計画:
NPSロールのインストール。RADIUSクライアントの追加。
接続ポリシーの作成。
ネットワークポリシーの作成。
MikroTikに承認サーバーを追加します。
SSHおよびWinBoxによる検証。
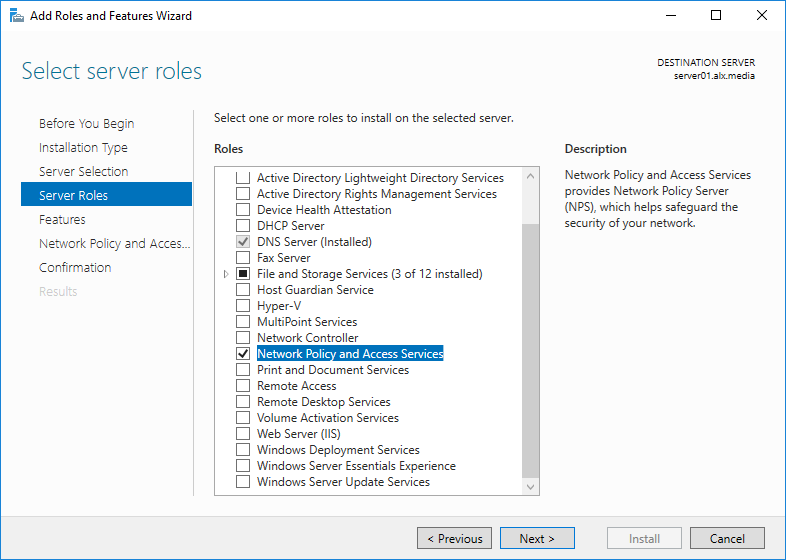
NPSロールのインストール
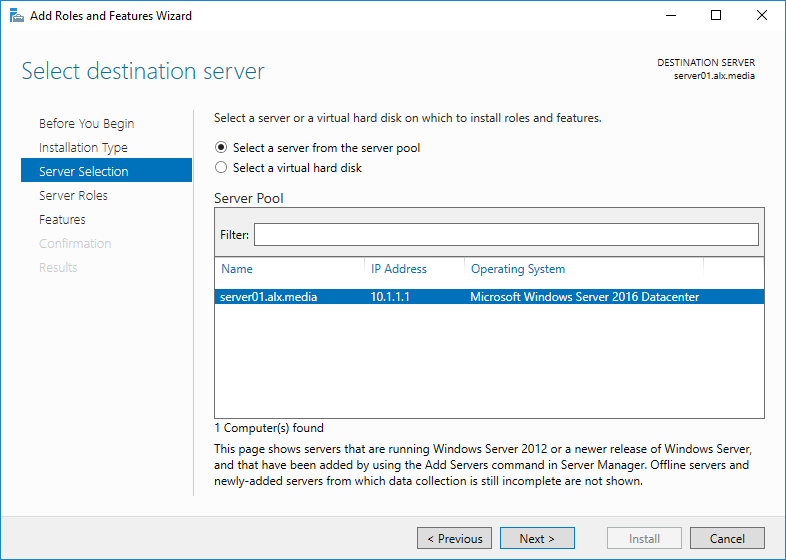
ドメインが既にインストールされているWindows Server 2016 Datacenterがあります。

ロールを展開するサーバーを選択します。 マイクロソフトは、ドメインコントローラーでこれを行うことを推奨していませんが、いくつかのベストプラクティスでは、遅延を減らすために、それを配置することをお勧めします。 構成用の管理ツールと共にネットワークポリシーとアクセスサーバーの役割を追加します。
Install-WindowsFeature NPAS -IncludeManagementTools

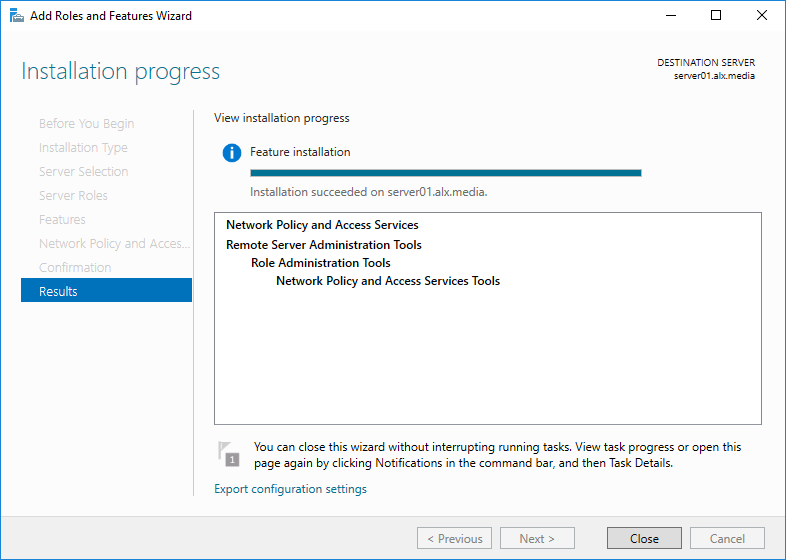
NPS管理パネルは、便利な方法で起動します。 たとえば、サーバーマネージャーを使用します。
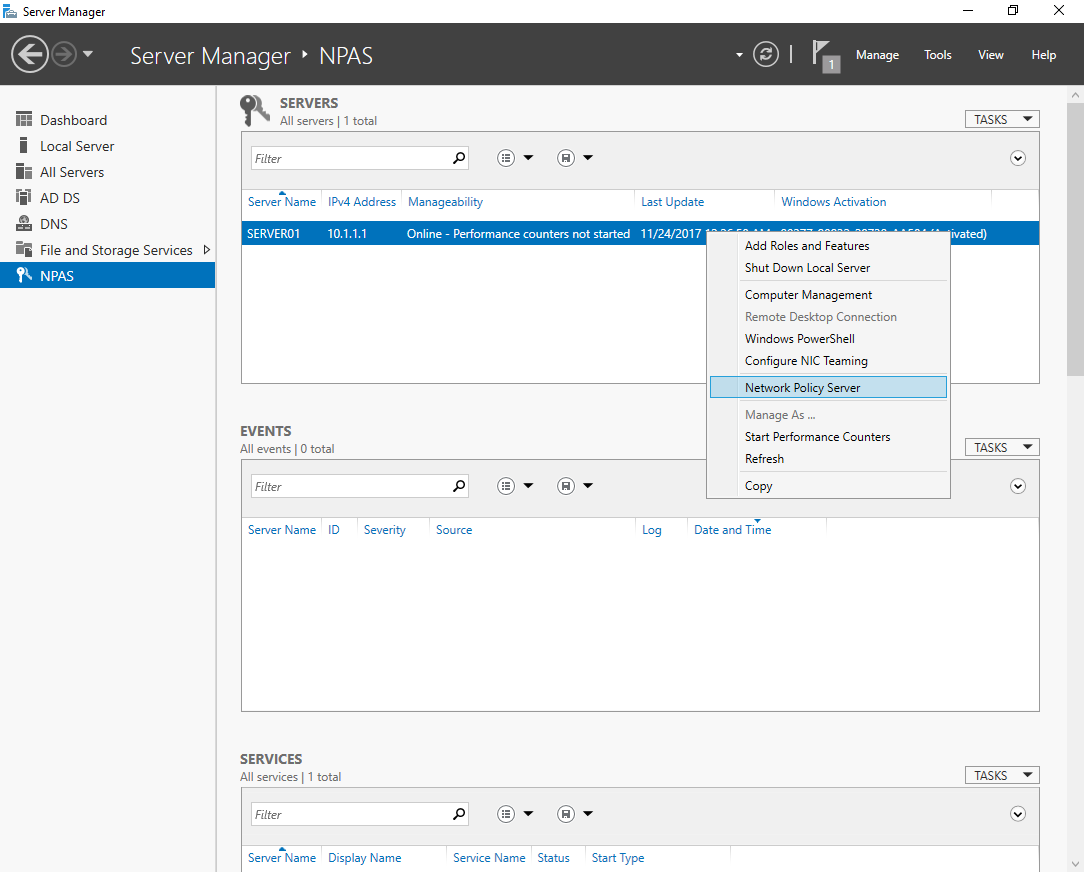
NPSサーバーをADに登録します。
netsh ras add registeredserver

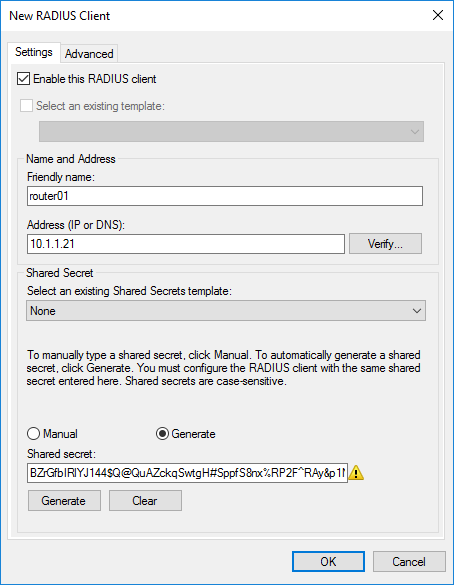
RADIUSクライアントの追加
サーバーがどのデバイスと通信を確立するかを知るには、それらのデバイスをRADIUSクライアントに追加する必要があります。
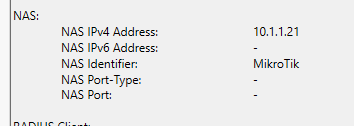
例として、MikroTik wAPを追加します。 デバイスにIDとして設定されたフレンドリ名、および唯一の有線インターフェイスに設定されたIP。 デバイスがサーバーにログインできるようにするには、キーを入力する必要があります。 サーバー上で手動で作成されるか、自動的に生成されます。 私は2番目のオプションを好みました。
New-NpsRadiusClient –Address "10.1.1.21" –Name "router01" –SharedSecret "egEcM4myJCptphGlZ1UymS#qLh^urp@fJ1hF8dE6dwb27NI^oIJtTWKKp^MEsU6p"
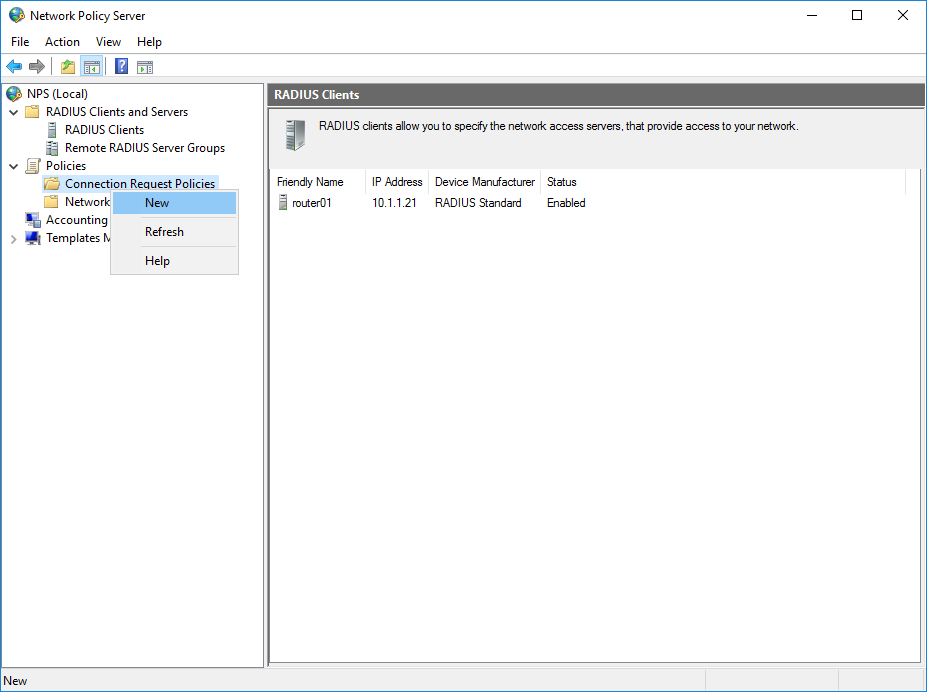
標準RADIUSで停止するベンダー名。

デバイスが追加されました。
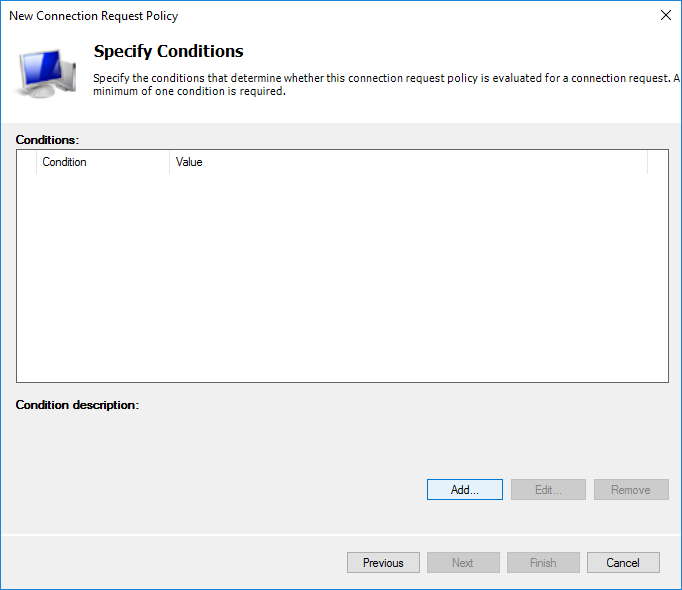
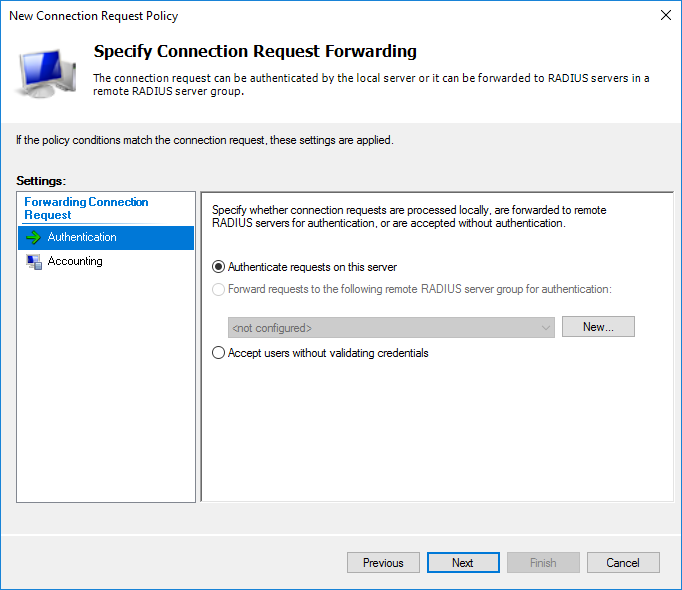
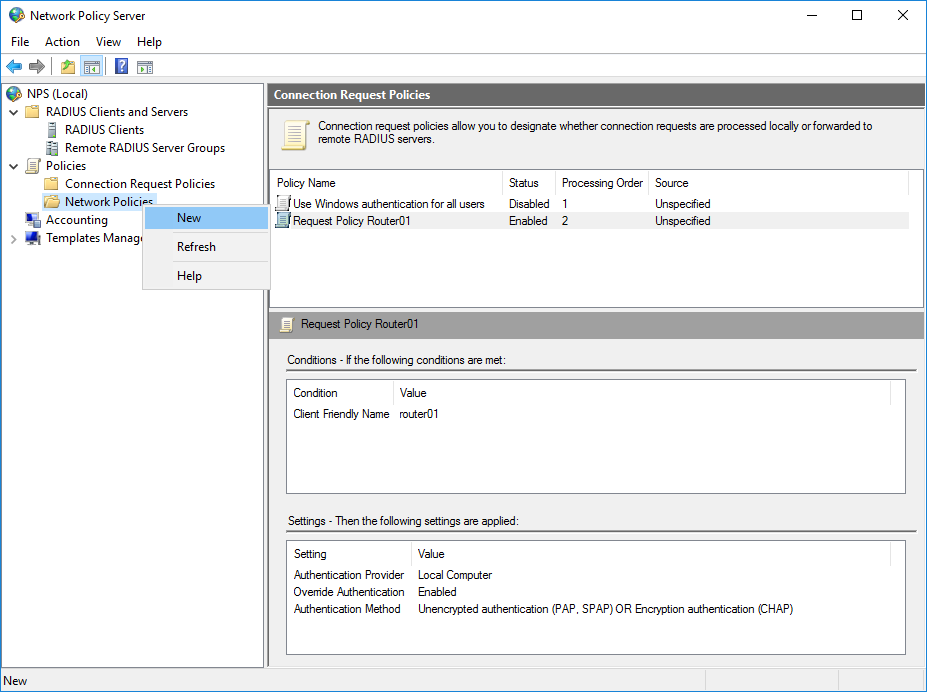
接続ポリシーを作成する
ポリシーに適切な名前を選択します。

サーバーが動作するデバイスを決定します。
Router01の値を持つクライアントフレンドリー名のみを選択しました。 これにより、作成されたクライアントを介してこのポリシーアイテムがデバイスに明確にバインドされます。 NAS Identifierを選択することにより、MikrotikデバイスをIDで識別できます。
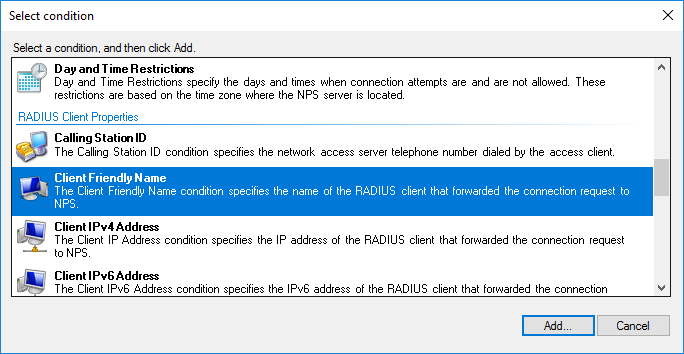
デバイスの予備設定なしIdentity = MikroTik。
追加のポリシー設定。
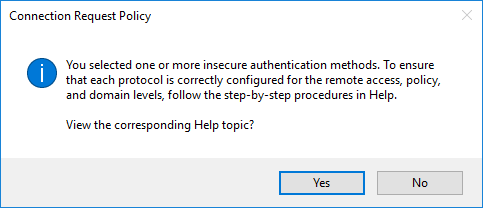
認証プロトコルを選択する段階で、SSH用の暗号化されていない(警告が表示される)PAPまたはWinBox用の暗号化されたCHAPを選択するだけで十分です。 私は両方を選びました。 Webバージョンを使用する必要がある場合は、MS-CHAPv2をオンにします。それ以外はすべて同じです。

実際、安全でない方法の選択に関する警告。 彼らは、段階的な参考資料を読むことを申し出ます。
この段階では、何も触れませんでした。

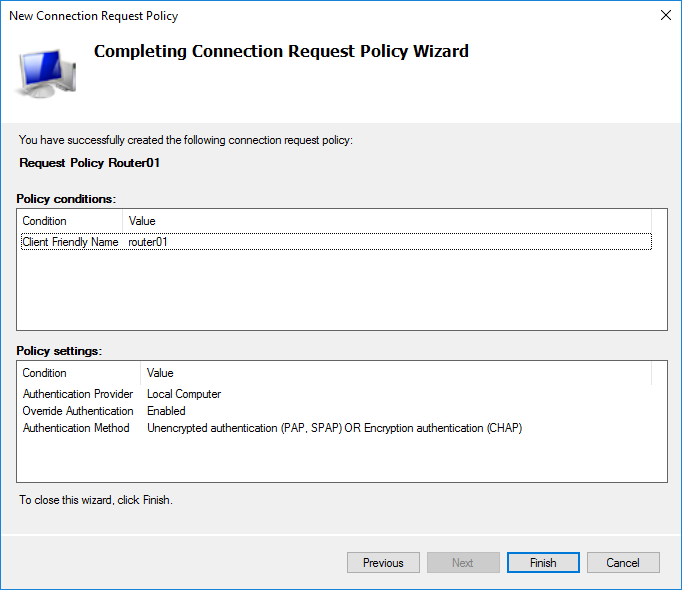
最終ポリシー設定。
technetでの標準的な例でさえ、PowerShellでそれを再現することはできませんでした 。 理由を教えていただければ幸いです。
netsh nps add crp name = "Request Policy Router01" state = "ENABLE" processingorder = "1" policysource = "0" conditionid ="0x1020" conditiondata = "router01" profileid = "0x1025" profiledata = "0x1" profileid = "0x1009" profiledata = "0x1" "0x2" profileid = "0x1fb0" profiledata = "TRUE"
ポリシー項目を上下に移動して、希望の優先度を選択します。
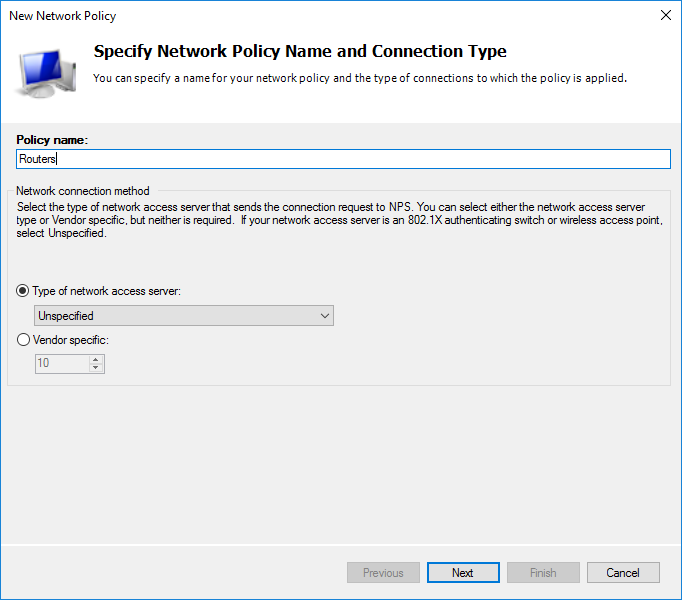
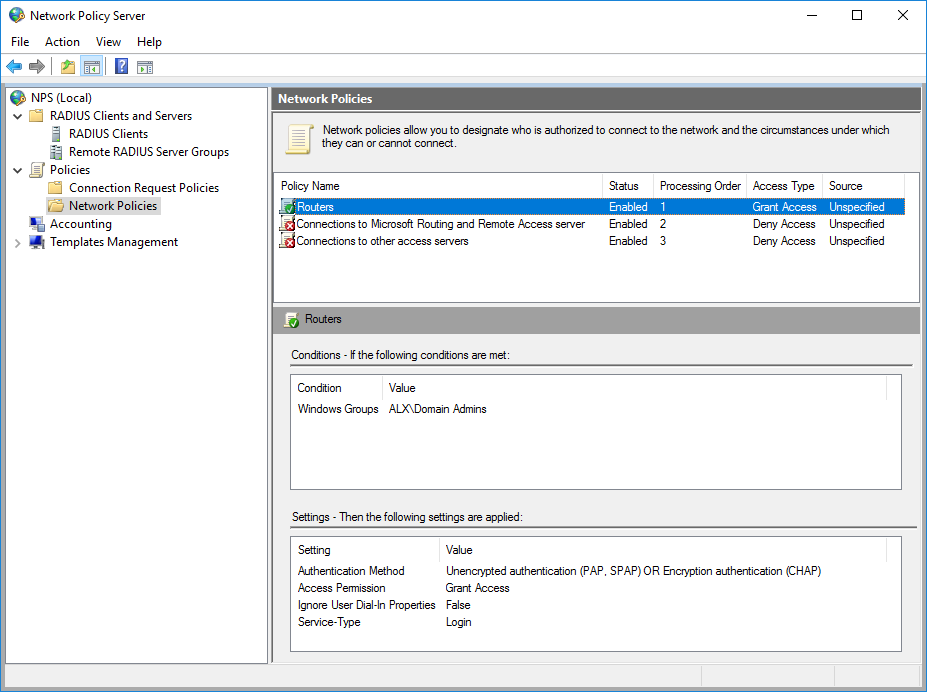
ネットワークポリシーを作成する
彼女のルーターを呼び出しましょう。
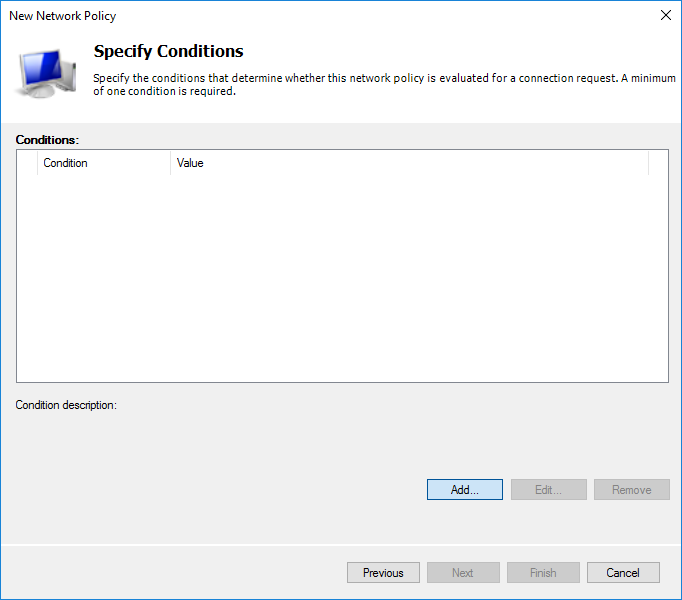
前と同様に、条件を定義する必要があります。
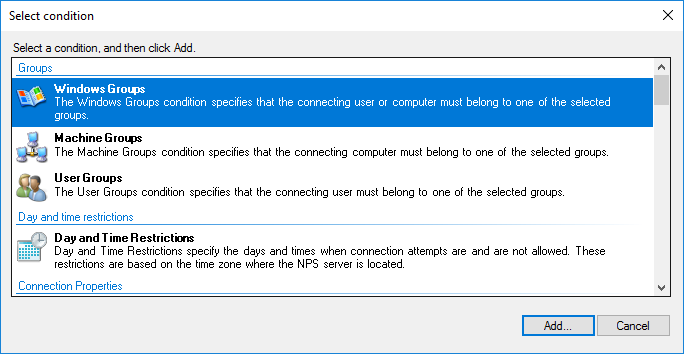
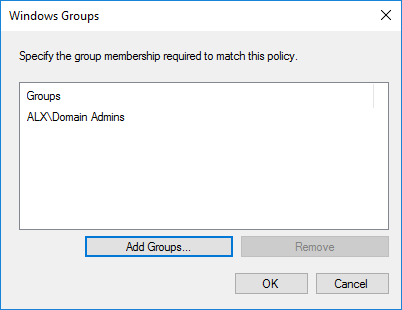
ADでは、Domain Adminsグループに追加のユーザーを作成しました。 すべてのドメイン管理者がMikroTikにアクセスできるという事実に基づいて、Windowsグループ条件を選択します。
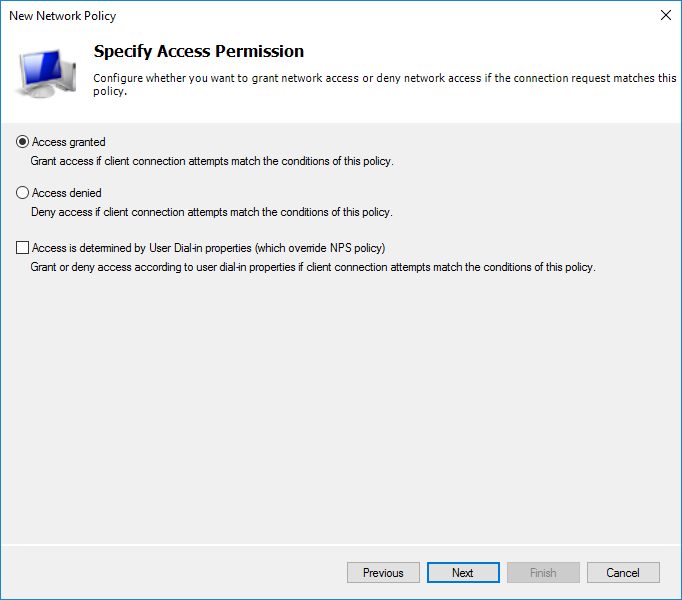
許容または禁止のルール。 条件の対象となるすべての人を許可します。
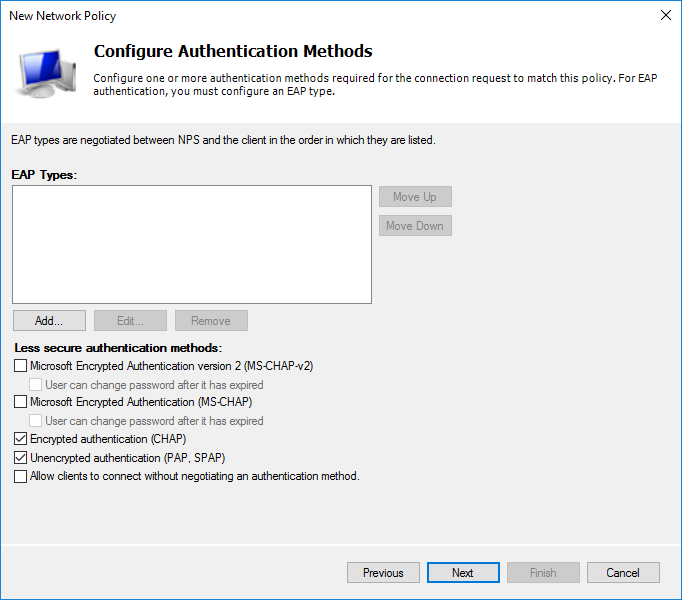
認証方法は、以前のポリシーに似ています。
必要に応じて、追加の設定を構成できます。 そのままにした。

次に、サーバーに送信するものを選択する必要があります。

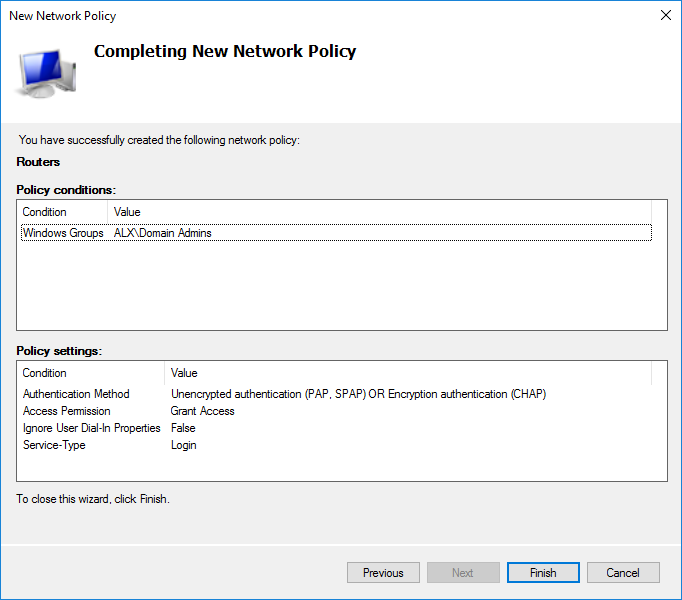
結果のネットワークポリシー設定。
必要に応じて、他のポリシーから必要な優先度を選択します。
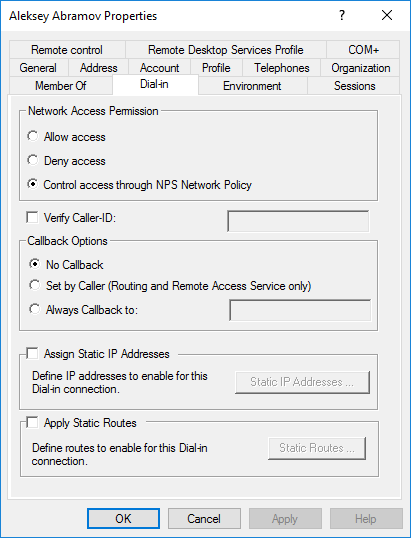
このユーザーのADのNPSでアカウントを確認するには、[ネットワークアクセス許可]セクションの[ダイヤルイン]タブで[NPSネットワークポリシーによるアクセスの制御]項目をオンにする必要があります。
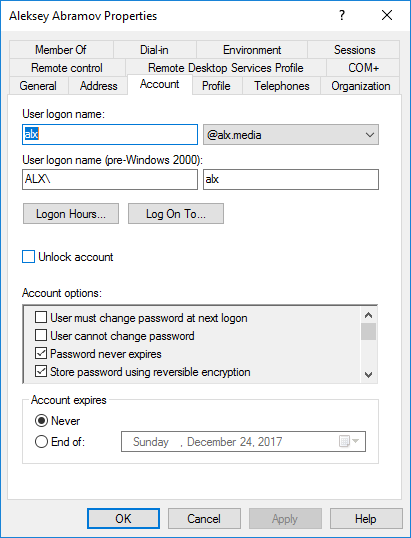
WinBoxを介してログインできるようにするには、ユーザープロファイルで可逆暗号化を有効にする必要があります。
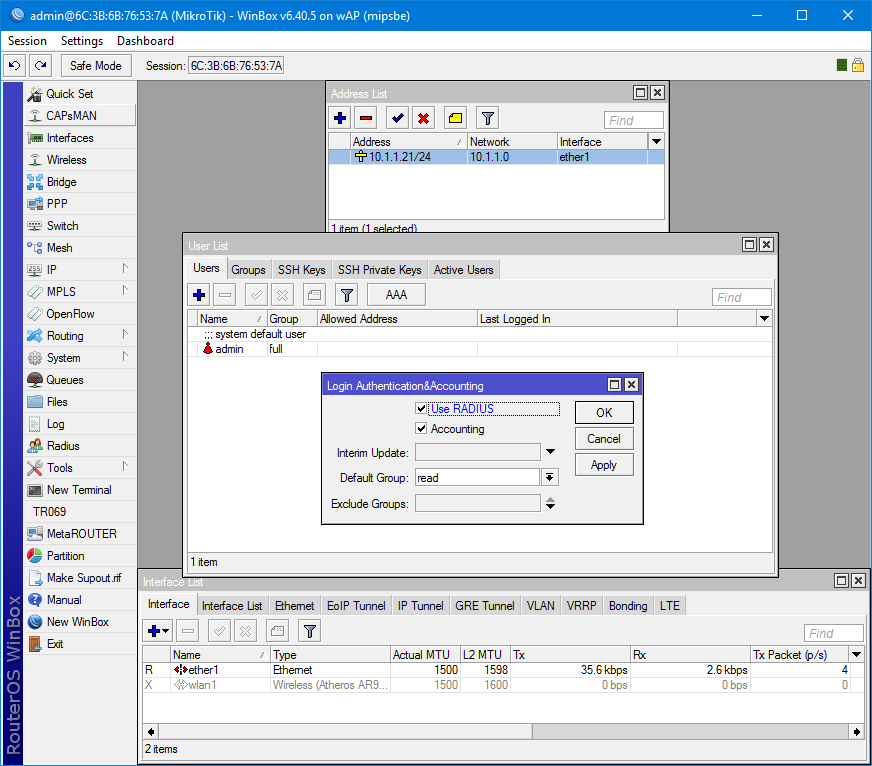
MikroTikに承認サーバーを追加する
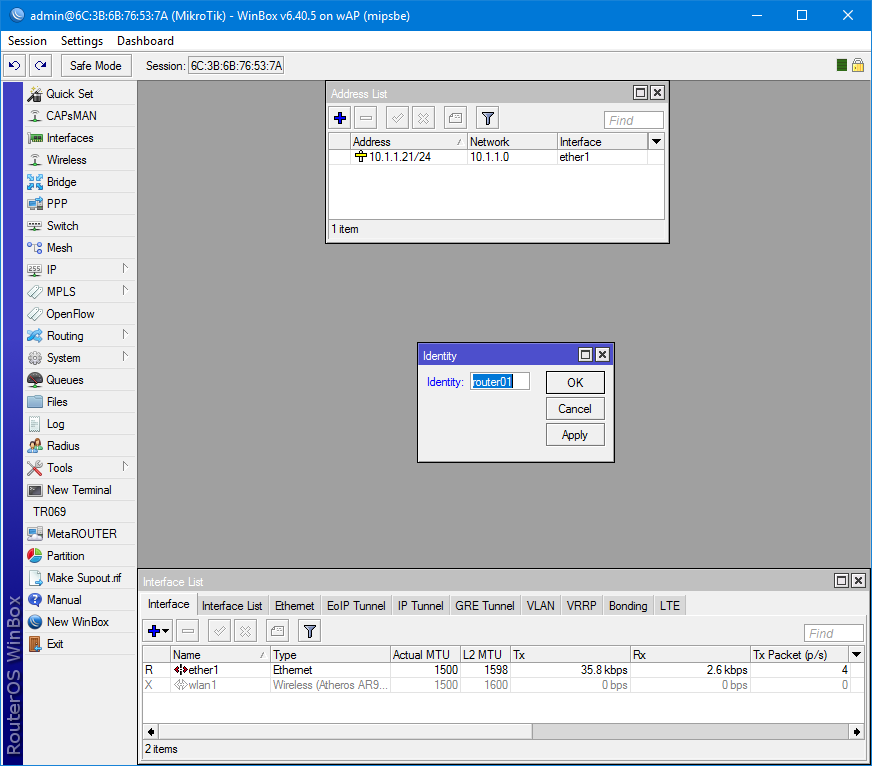
最初に、システムのIDをrouter01に割り当て、インターフェイスのマスクを使用してIPを割り当てます。 /system identity set name=router01 /ip address add address=10.1.1.21/24 interface=ether1 network=10.1.1.0
[システム/ユーザー]および[ユーザー]タブで、[RADIUSを使用する]を有効にします。 デフォルトでは、読み取り専用アクセスが選択されています。
/user aaa set use-radius=yes
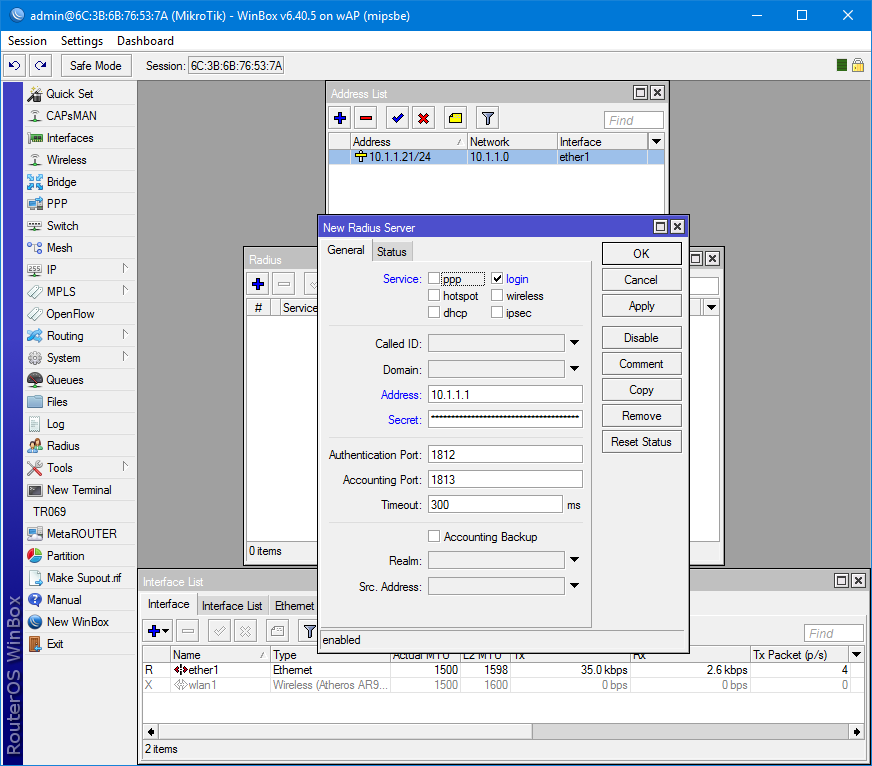
Radius設定を開き、新しいサーバーを追加します。 サービスは、宛先に基づいて選択されます。 もちろん、それらの間でアクセスを共有する方が良いです。 アドレス-NSPがインストールされているサーバーのアドレス。
シークレット-クライアントをサーバーに追加する段階で生成されたキー。
/radius add address=10.1.1.1 secret=egEcM4myJCptphGlZ1UymS#qLh^urp@fJ1hF8dE6dwb27NI^oIJtTWKKp^MEsU6p service=login
SSHおよびWinBoxによる検証
SSHを介した接続を確認し、構成をエクスポートします。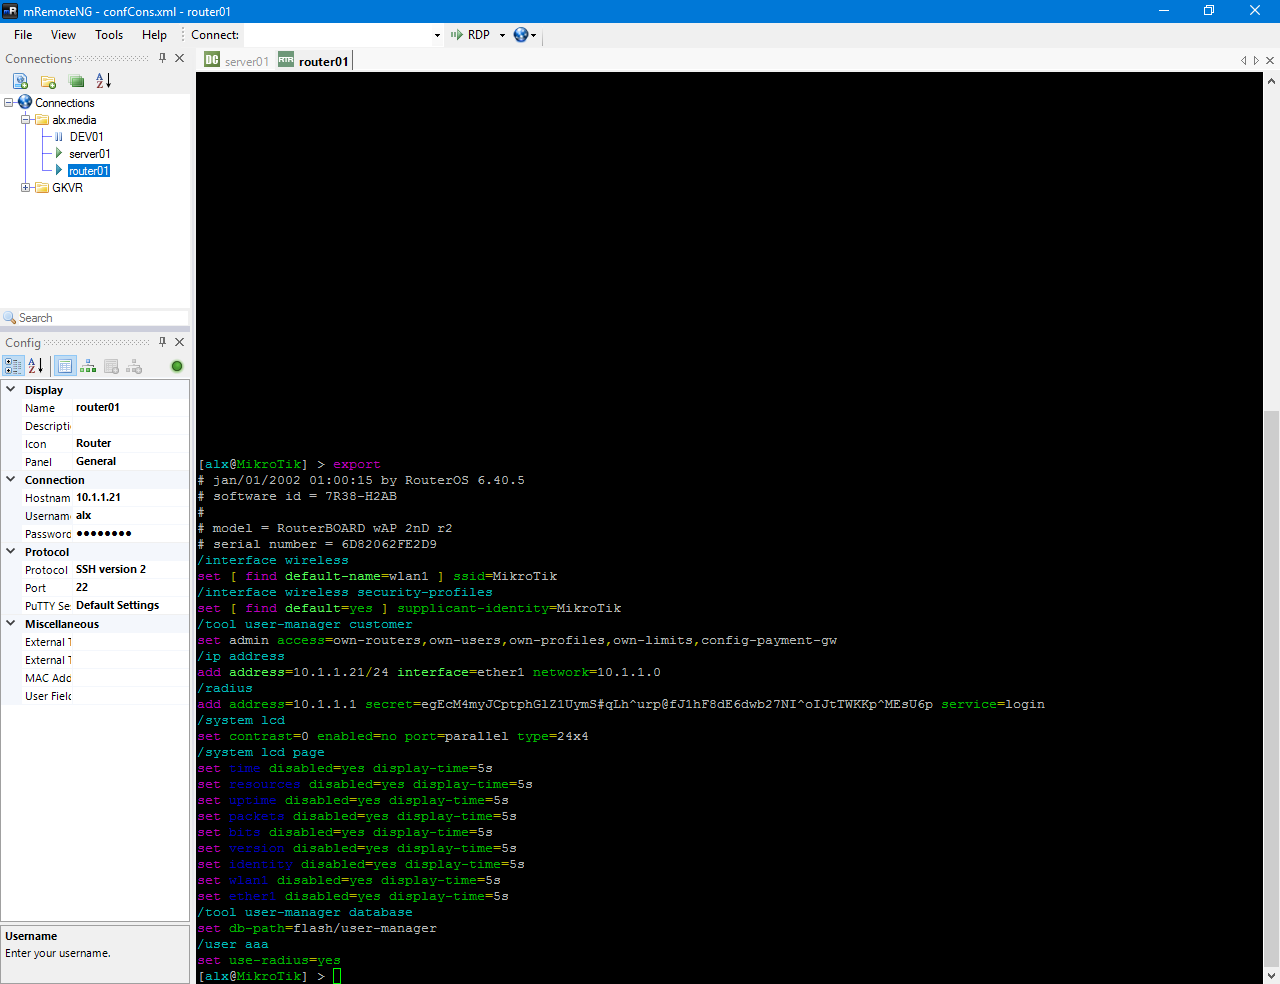
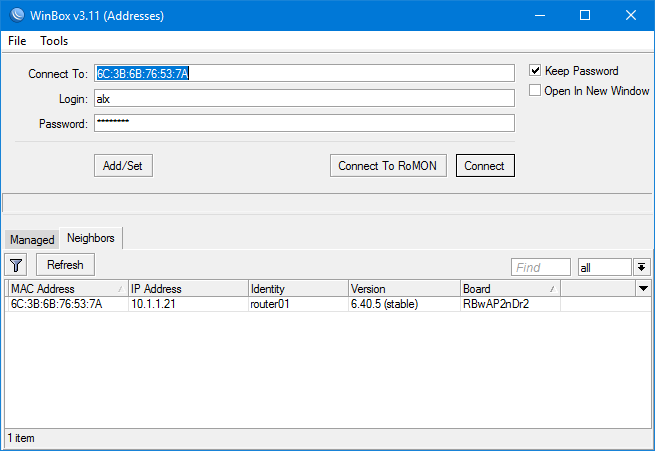
そして、Winboxで認証を確認します。
ご覧のとおり、アクティブユーザーでは、システム管理者と、SSHおよびWinboxを介した読み取りアクセス権を持つドメインユーザーの両方の接続がハングします。

すべてが機能します。
ご清聴ありがとうございました。