For my post-apocalyptic game Frameshift, I needed to fill a very large open world with diverse cities. Our team has only 3 people, so I, of course, used the procedural power of Houdini!
Earlier, when I did not know about Houdini, I wrote in C # my own tools for procedural mesh generation for Unity. Adding new features was a very long process, and when I once heard that Houdini is designed for such tasks, I immediately switched to it. I experimented with different ways of generating cities and streets, and in this article I will briefly talk about the technique that I ultimately used for the game.
First I created a tool for generating a network of streets that could be used in the city. My decision is based on the concepts presented here , as well as on the article used by reference. It says a lot about tensor fields and eigenvectors, and everything is written very technically, but this can be briefly explained as follows: for my case (generating a road network on a relief) I needed to generate contour relief lines, as well as lines perpendicular to them.
I started with the relief, and thanks to a little help from the Houdini Gubbins example, I generated vectors at each point of the relief directed towards the path, and gradient lines using VEX:
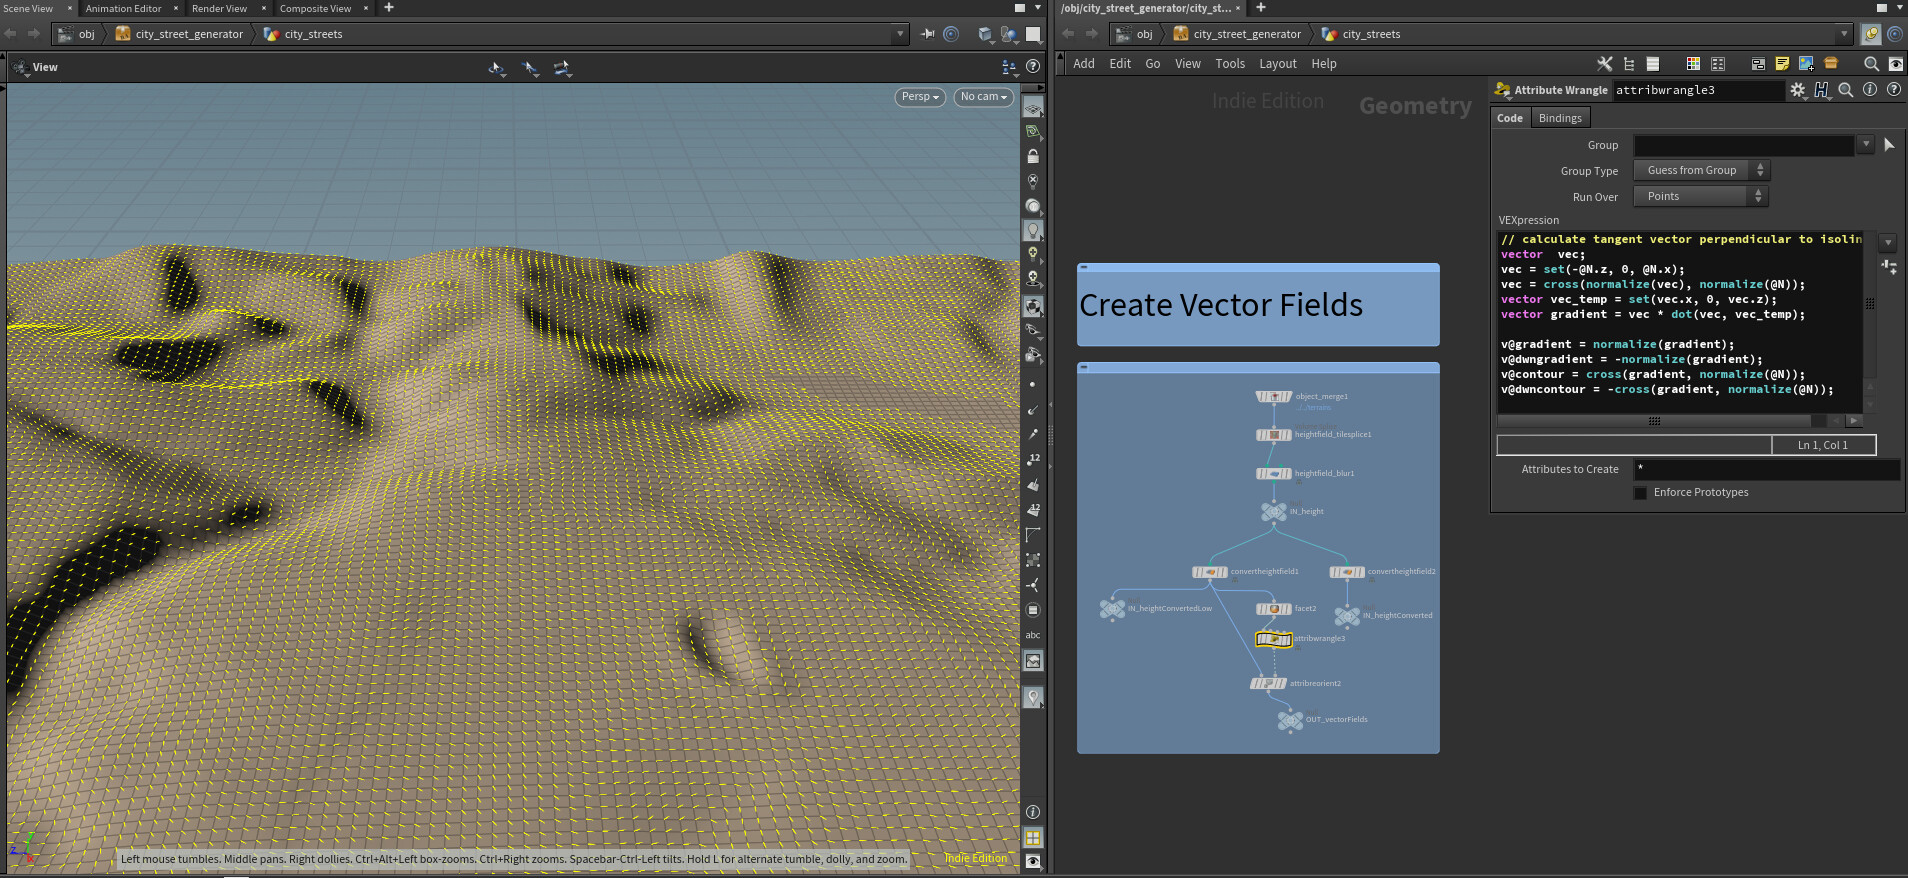
Yellow vectors show contour lines.
Then we need to create a grid of city streets and mix its vectors with vectors repeating the natural curves of the relief. So we will create an area that resembles a grid of city streets, combining well with the relief. Here we put the grid on the relief, then polyframing so that the normals line up along the grid lines, add a falloff for smooth blending and finally set a new path vector that is a mixture of two vectors:

In the image above, you can see that inside the borders of the rectangle, the contour lines are more like a grid. I also perform a similar process to add the influence of manually created roads to the game. I introduced a slider in Unity HDA so that the influence can be changed by creating more naturally located or more “square” streets within the city limits.
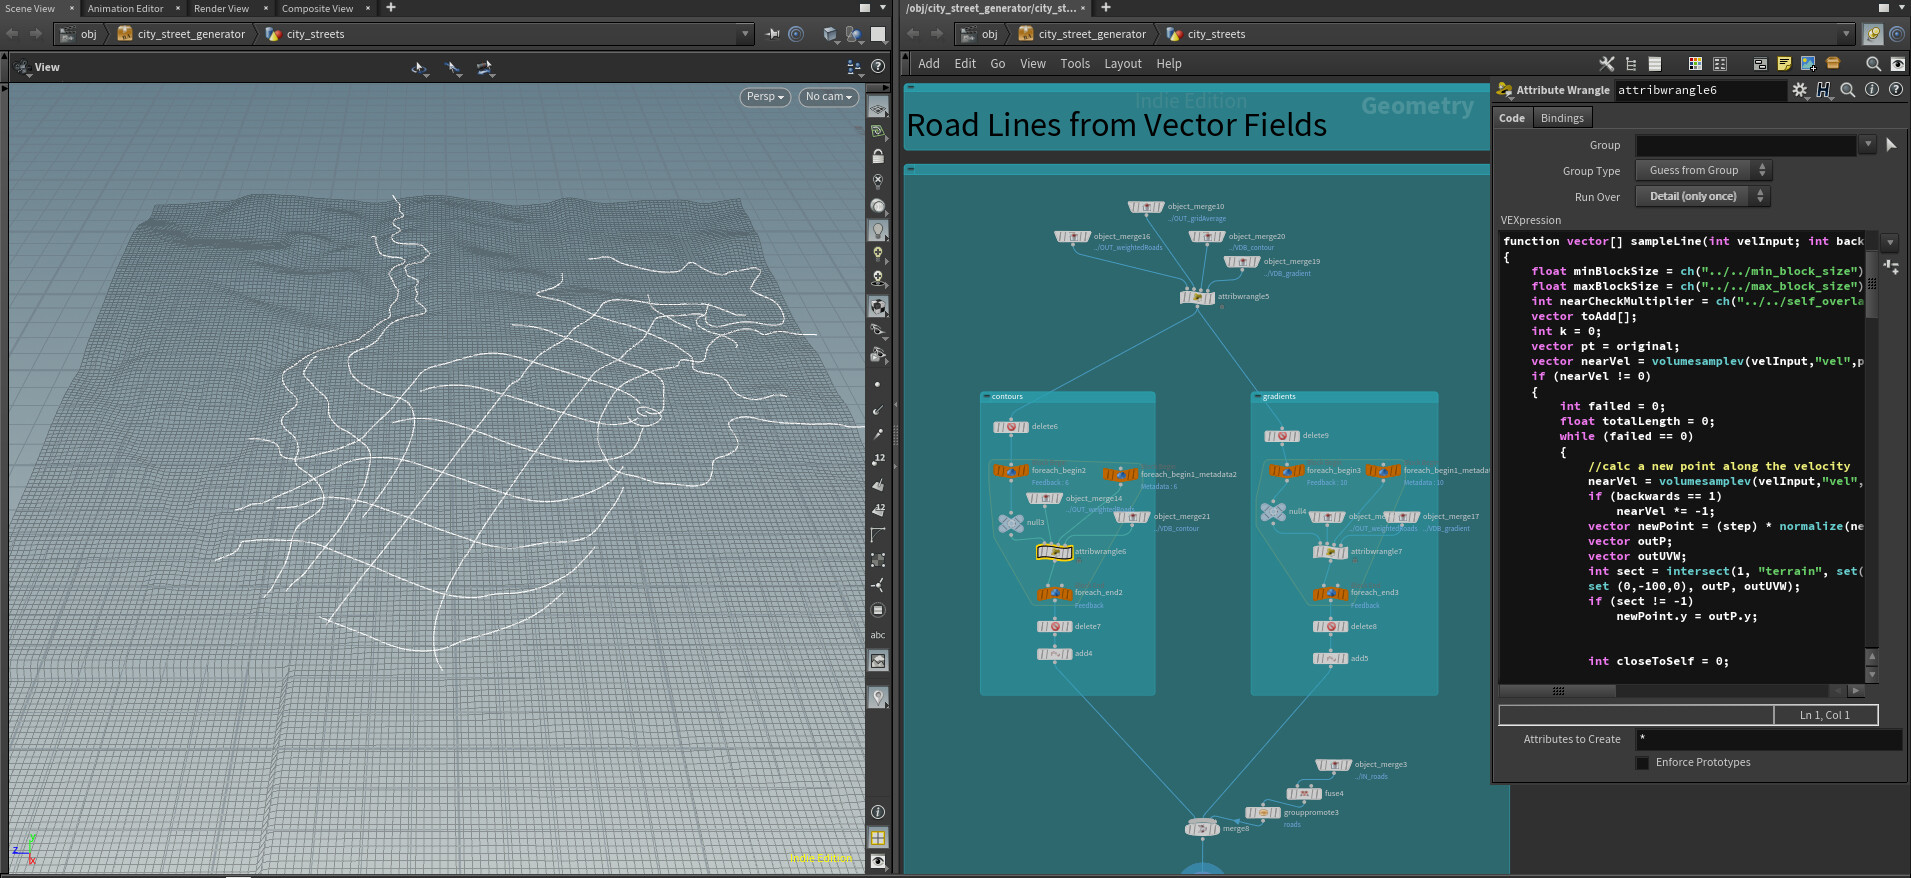
Next, I will convert the vector fields to VDB so that you can sample from them to create ready-made roads. With SOP volume tracking you can get a beautiful visualization:

It is already starting to look like a grid of streets! They are too close to each other, but in general there are already forms. Then we perform many sampling operations from VDB speeds and many vex to create ready-made road lines. The vex code essentially arranges the roads to the right distance and ends them if they are too close to other roads or too long:
Then we perform post-processing to smooth everything out, remove small parts, lengthen the dead ends to create realistic intersections, and lay roads on the terrain. The final result looks like this:
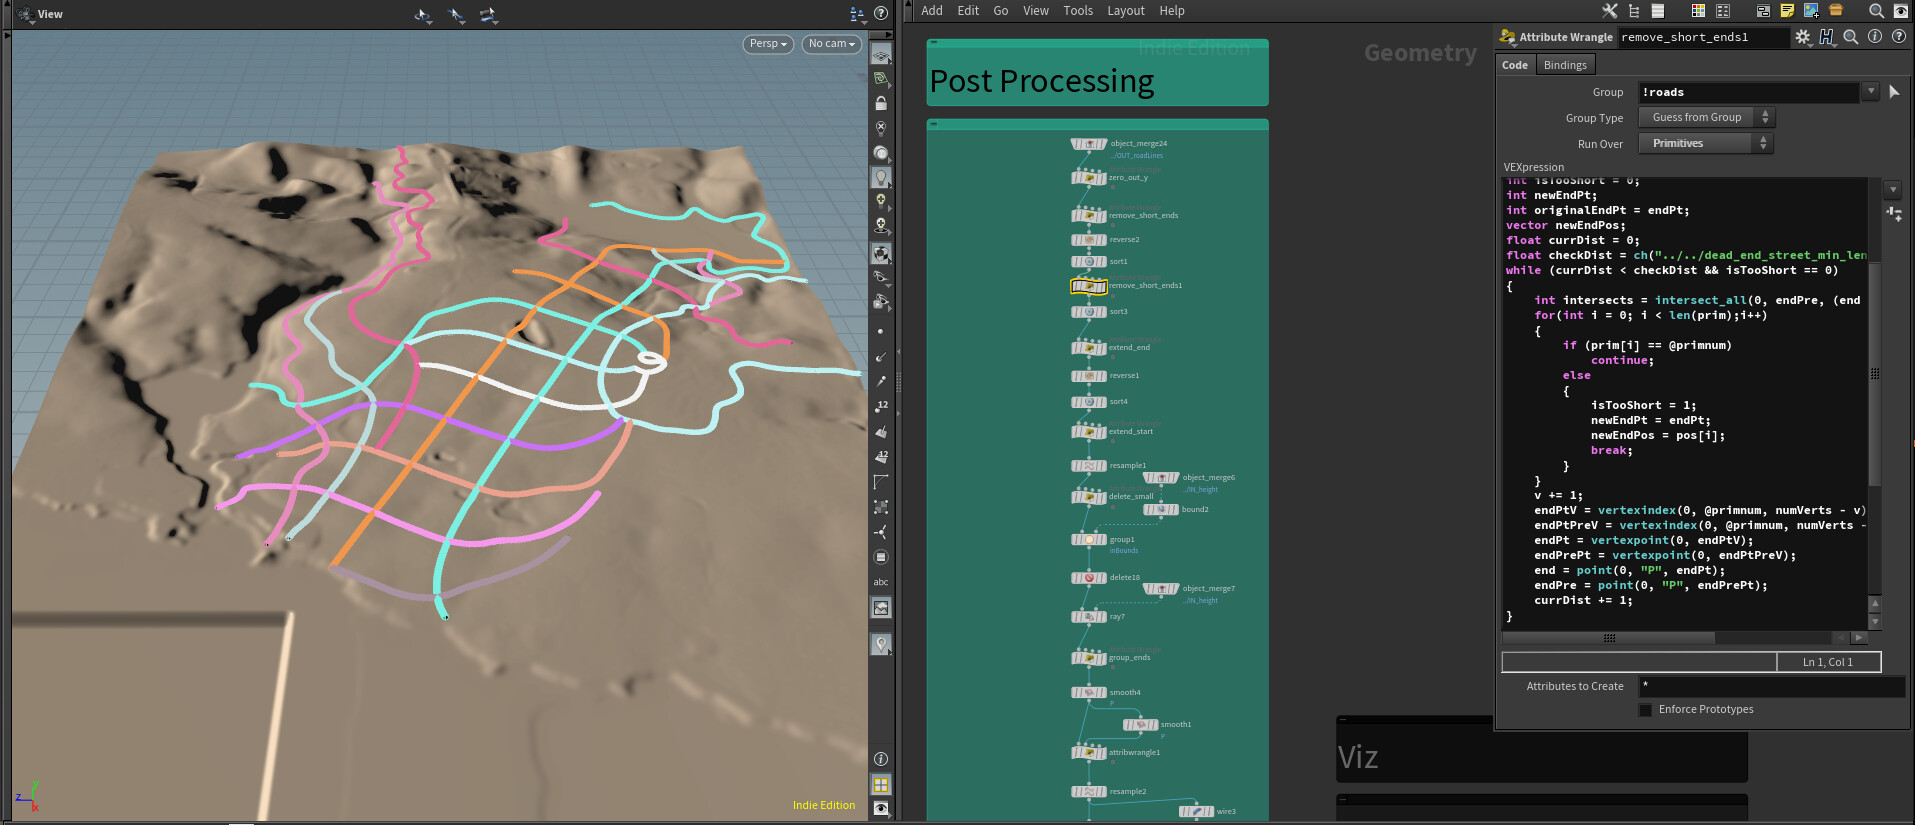
There are still a few unrealistic parts, but a little manual cleanup in Unity is acceptable, given how much time we saved on this.
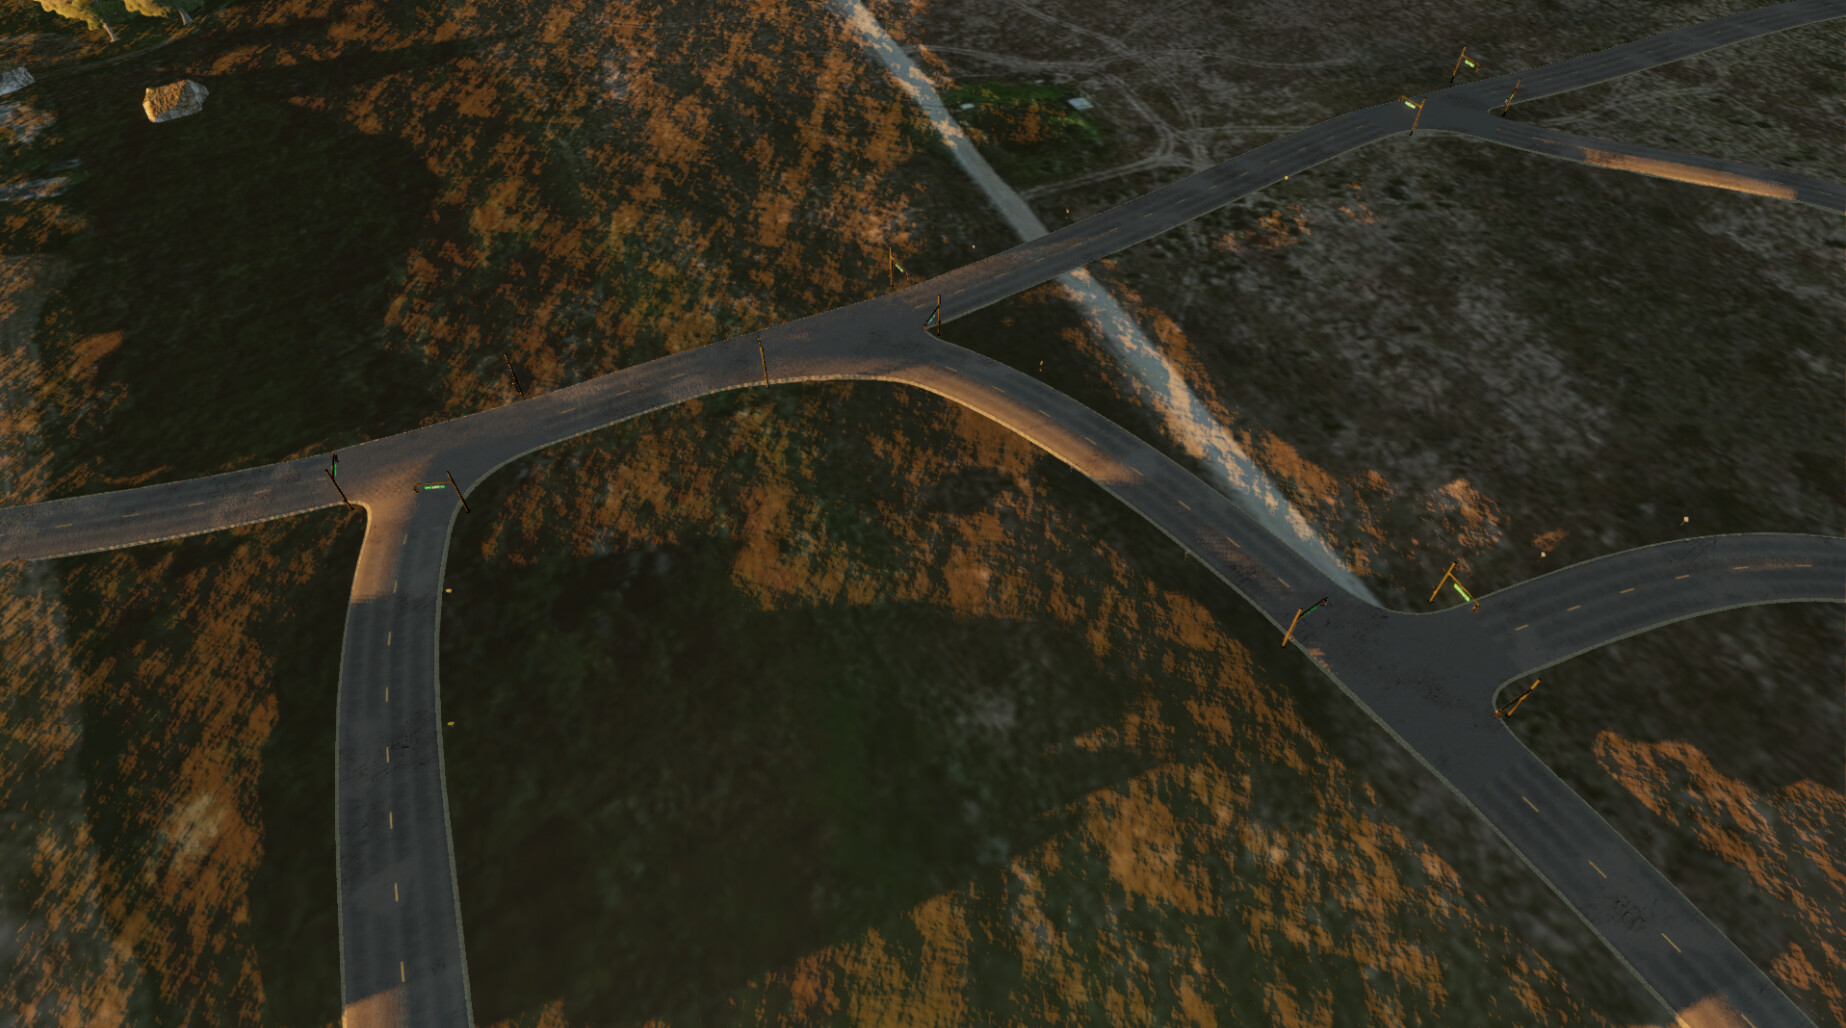
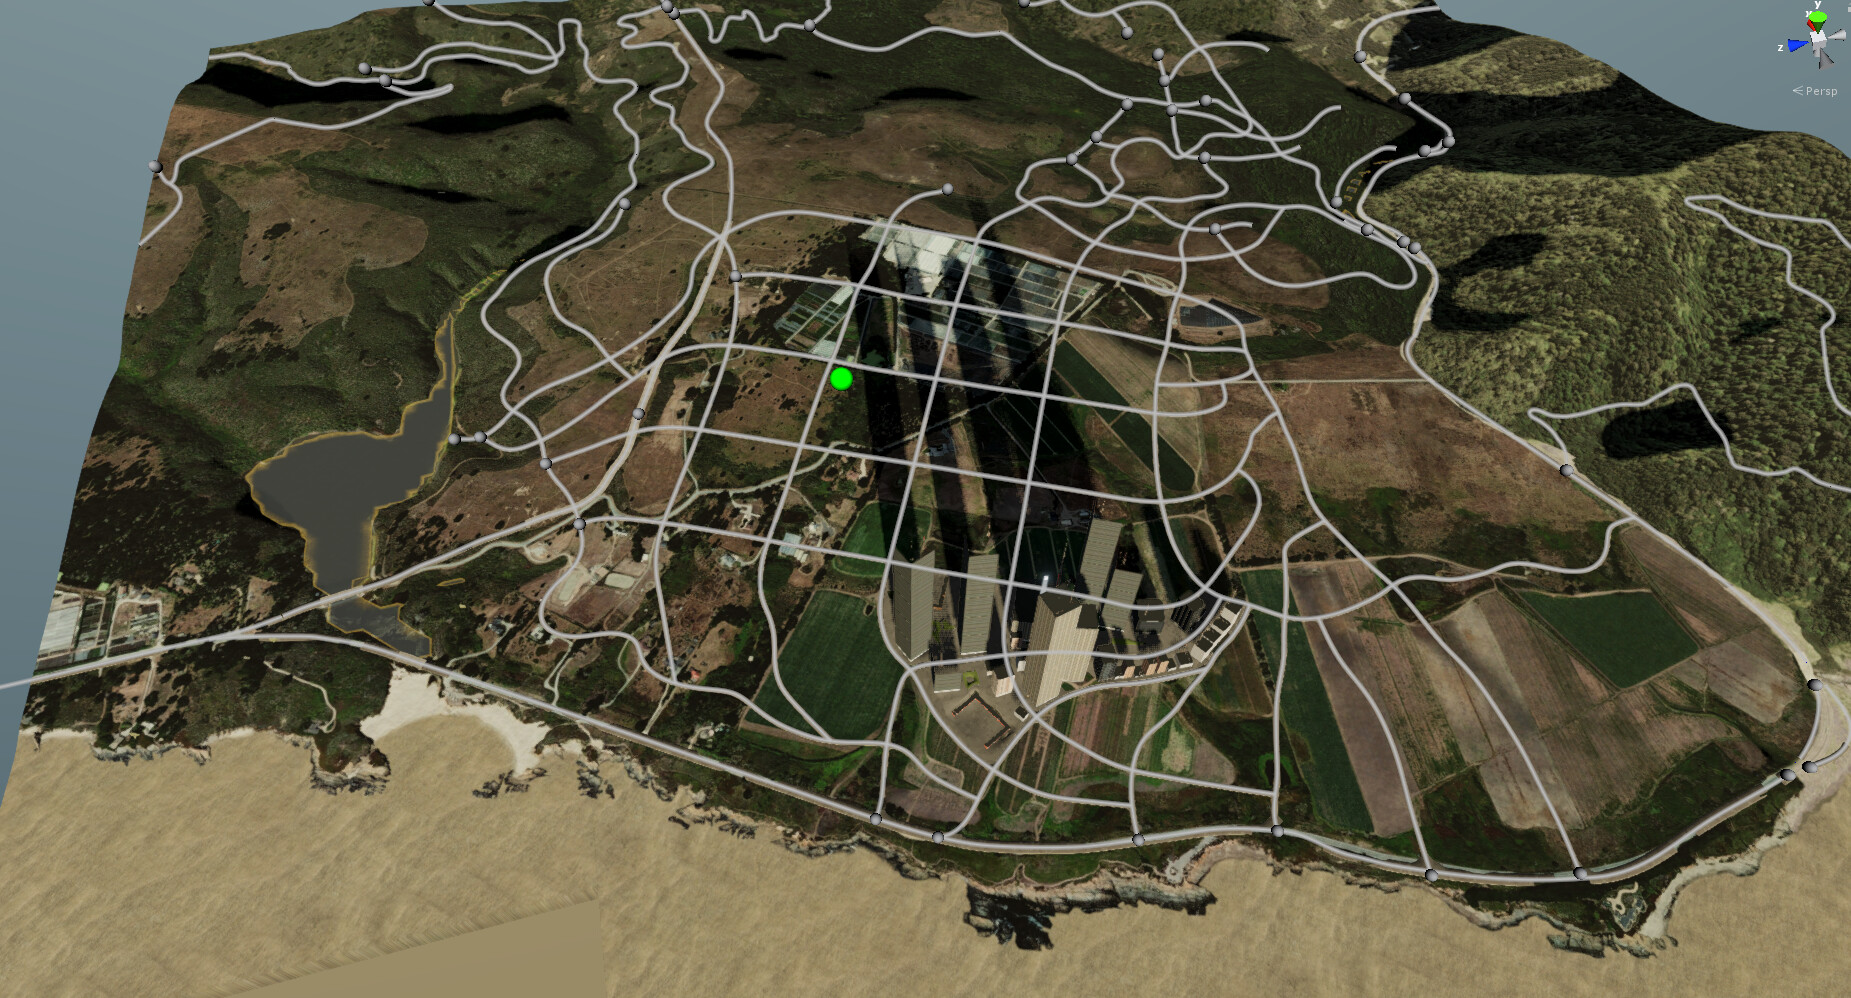
So, we procedurally generated a city street network, but the result was only a bunch of curves in Houdini. Now I’ll show you how to generate road geometry for each of these curves to create meshes that you can use in Unity. Here are our previous results ported to Unity:
First you need to tell how the data transfer between Houdini and Unity is performed. In the case of roads, I write a sequence of points, the width of the road, and the road surface preset in the JSON file. In Unity, I created editor tools for manually editing roads using Bezier curves:
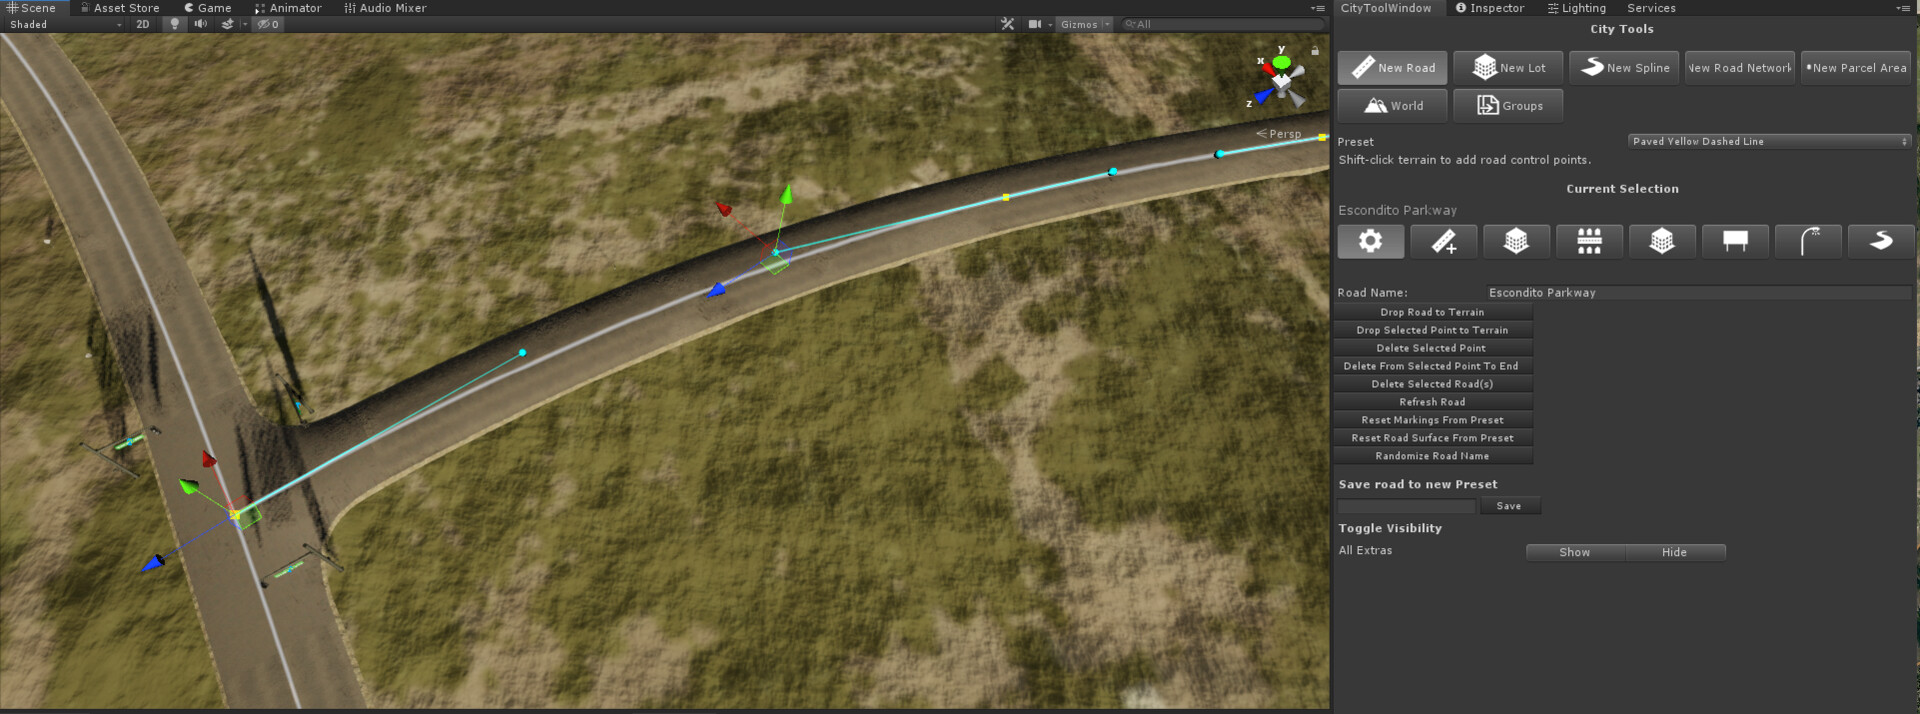
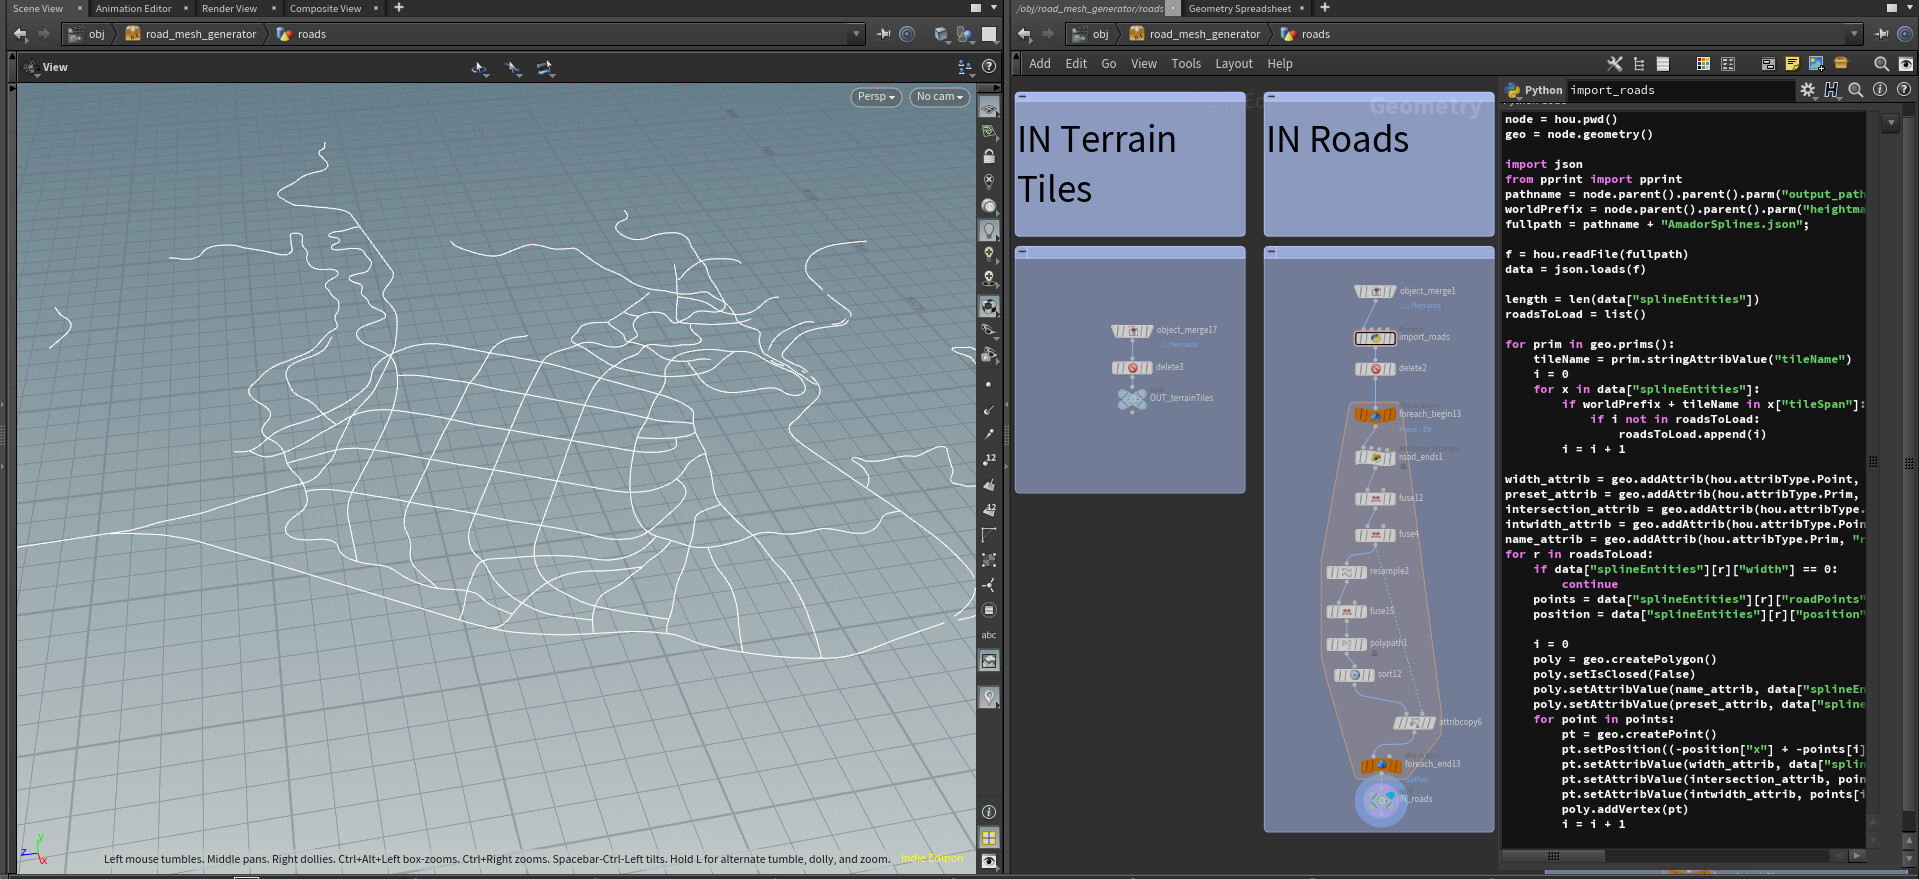
You can find many tutorials on search engines about creating a Bezier curve editor in Unity. To transfer data back to Houdini, I use the Python node to read the JSON file:
Here you see the result of creating an urban street network, obtained above, but this time it is read from the JSON file, because now it is obtained from Unity with manual changes.
I also import a relief from Unity, reading its raw data. Probably today it can be done natively using HDA, because the Houdini Engine has improved support for Unity terrain, but when I did this work, it was still not so good.
Then we create the intersections. The main work here is done by the Intersection Stitch SOP, but I also used VEX to slightly lengthen the roads in case they didn’t intersect completely, and removed the short ends so that the T-intersections were created correctly.
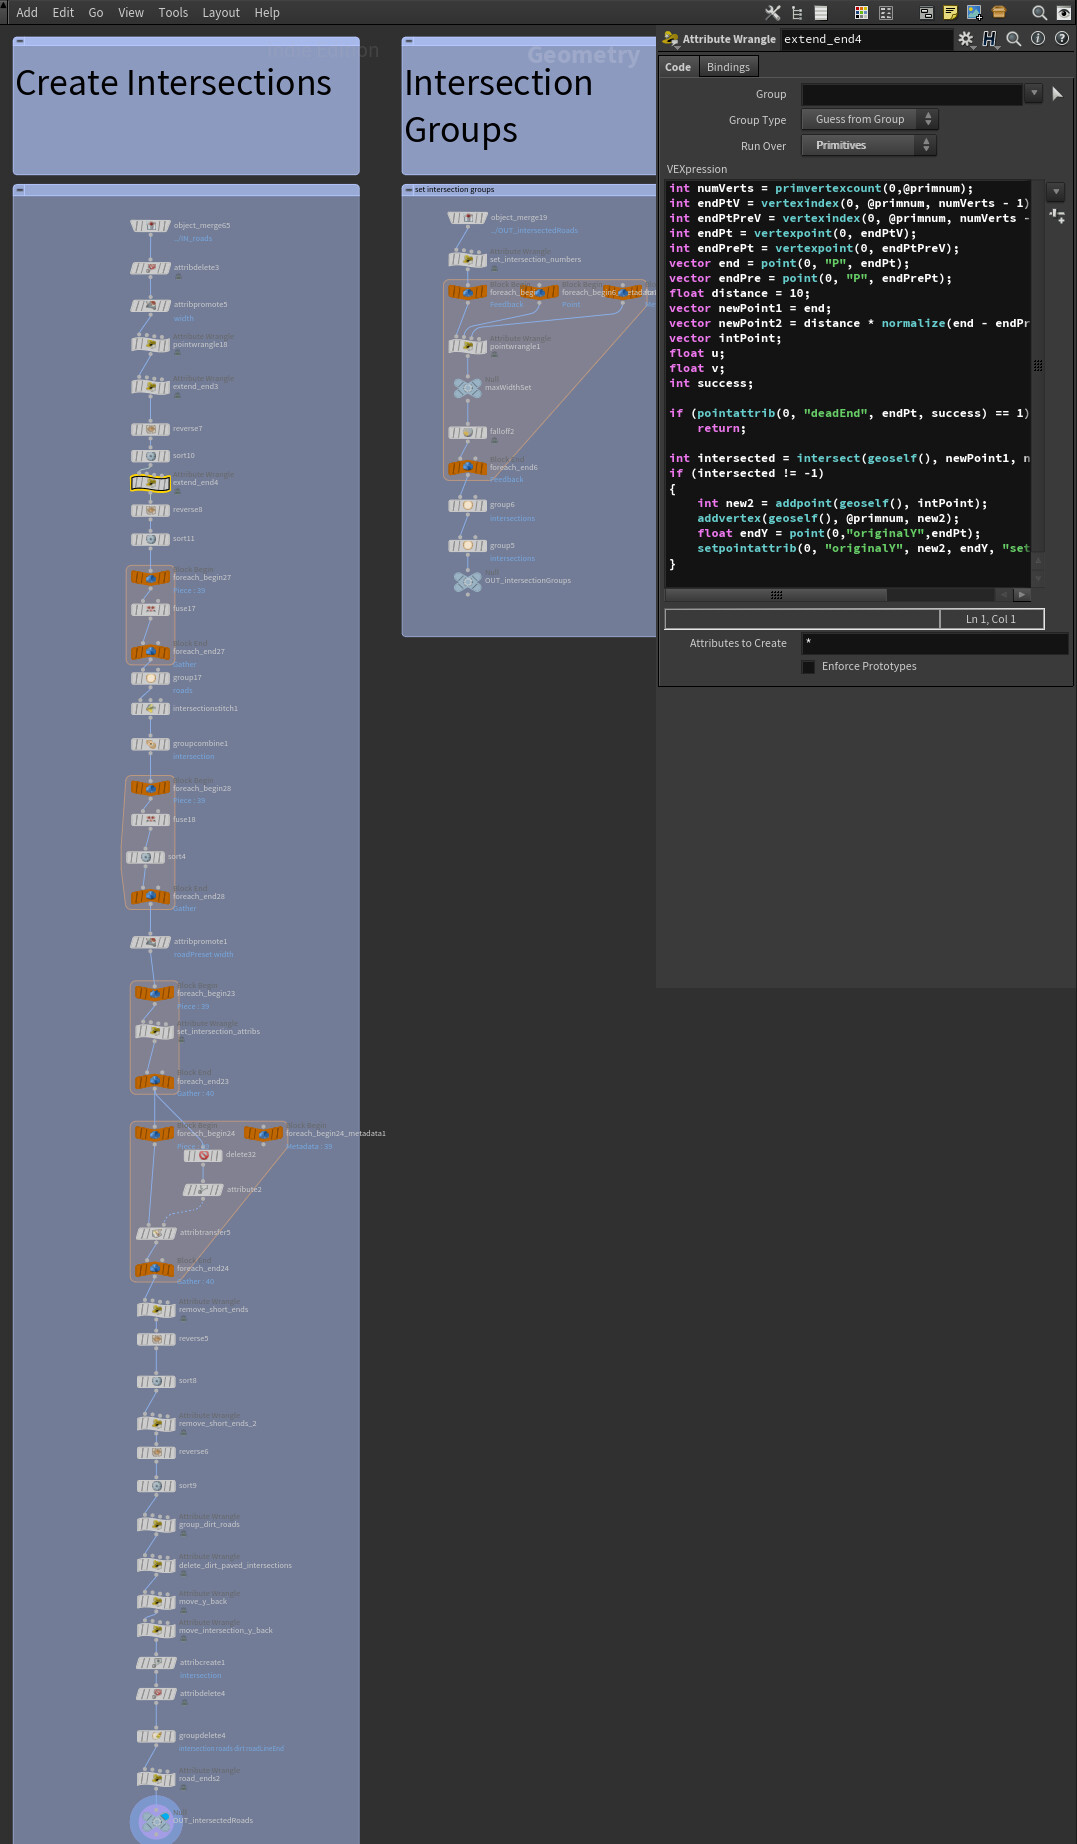
Next, I create a group of intersections with the help of falloff from the intersection point, where the distance of weakening is equal to the widest at the intersection of the road. Then I expand this group of edges in cases where the angle between two roads is less than 45 degrees so that there is enough space between the two ends of the intersection to create a mesh of the desired width:

The calculations in the VEX node find the hypotenuse of a right triangle (we can assume that each individual part of the intersection consists of two right triangles):

Since we know what the width of the roads of the intersection group should be (indicated in the figure above as A) and know the angle a, we can calculate C to find the distance by which we need to expand the intersection group to divide them by the desired width.
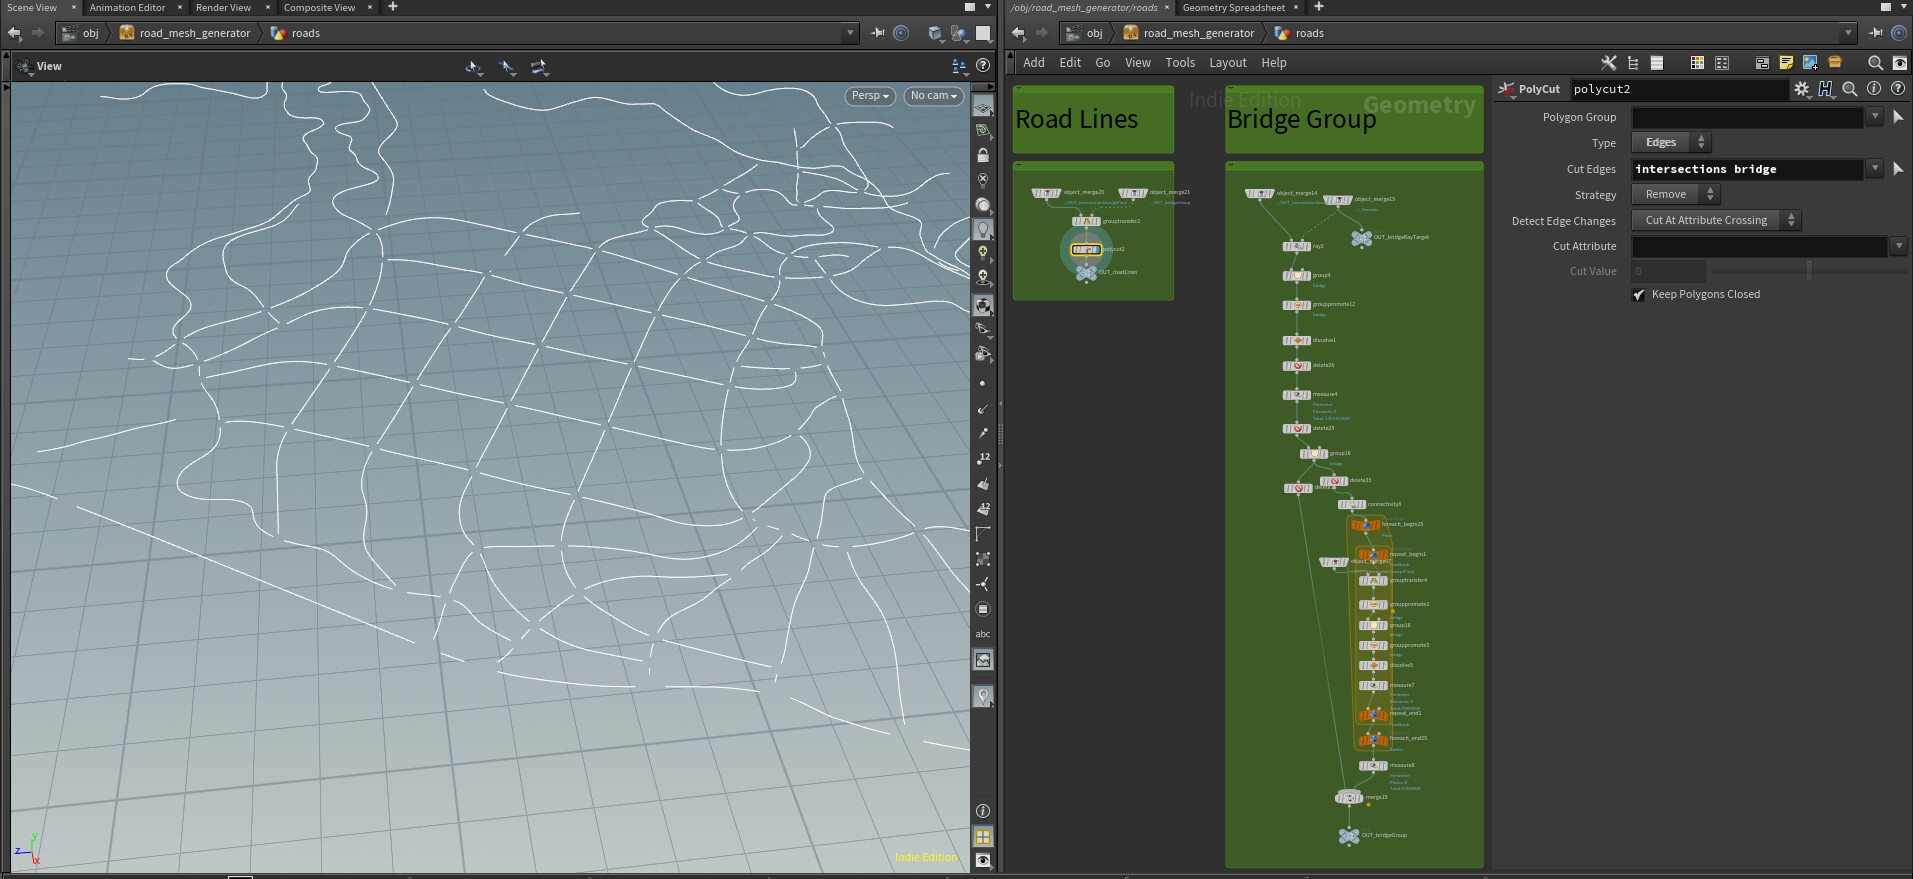
Then we create groups of bridges, highlighting sections of roads that are above a certain distance above the ground. This is done using Ray SOP with “point intersection distance” turned on and “transform points” turned off. Next, to create ready-made curves for the closing geometry, we use Polycut to cut the intersection and bridge groups so that only normal roads remain.
And now we are finally starting to create real meshes. The intersection mesh subnet is a modified version of the Solving Intersections tutorial. The subnet that creates the geometry of the road also closes the line and creates UV. There’s another great tutorial created by HoudiniSimon. It tells you how to generate UV to bend a closed curve, but the first part of the tutorial can also be applied to open curves.
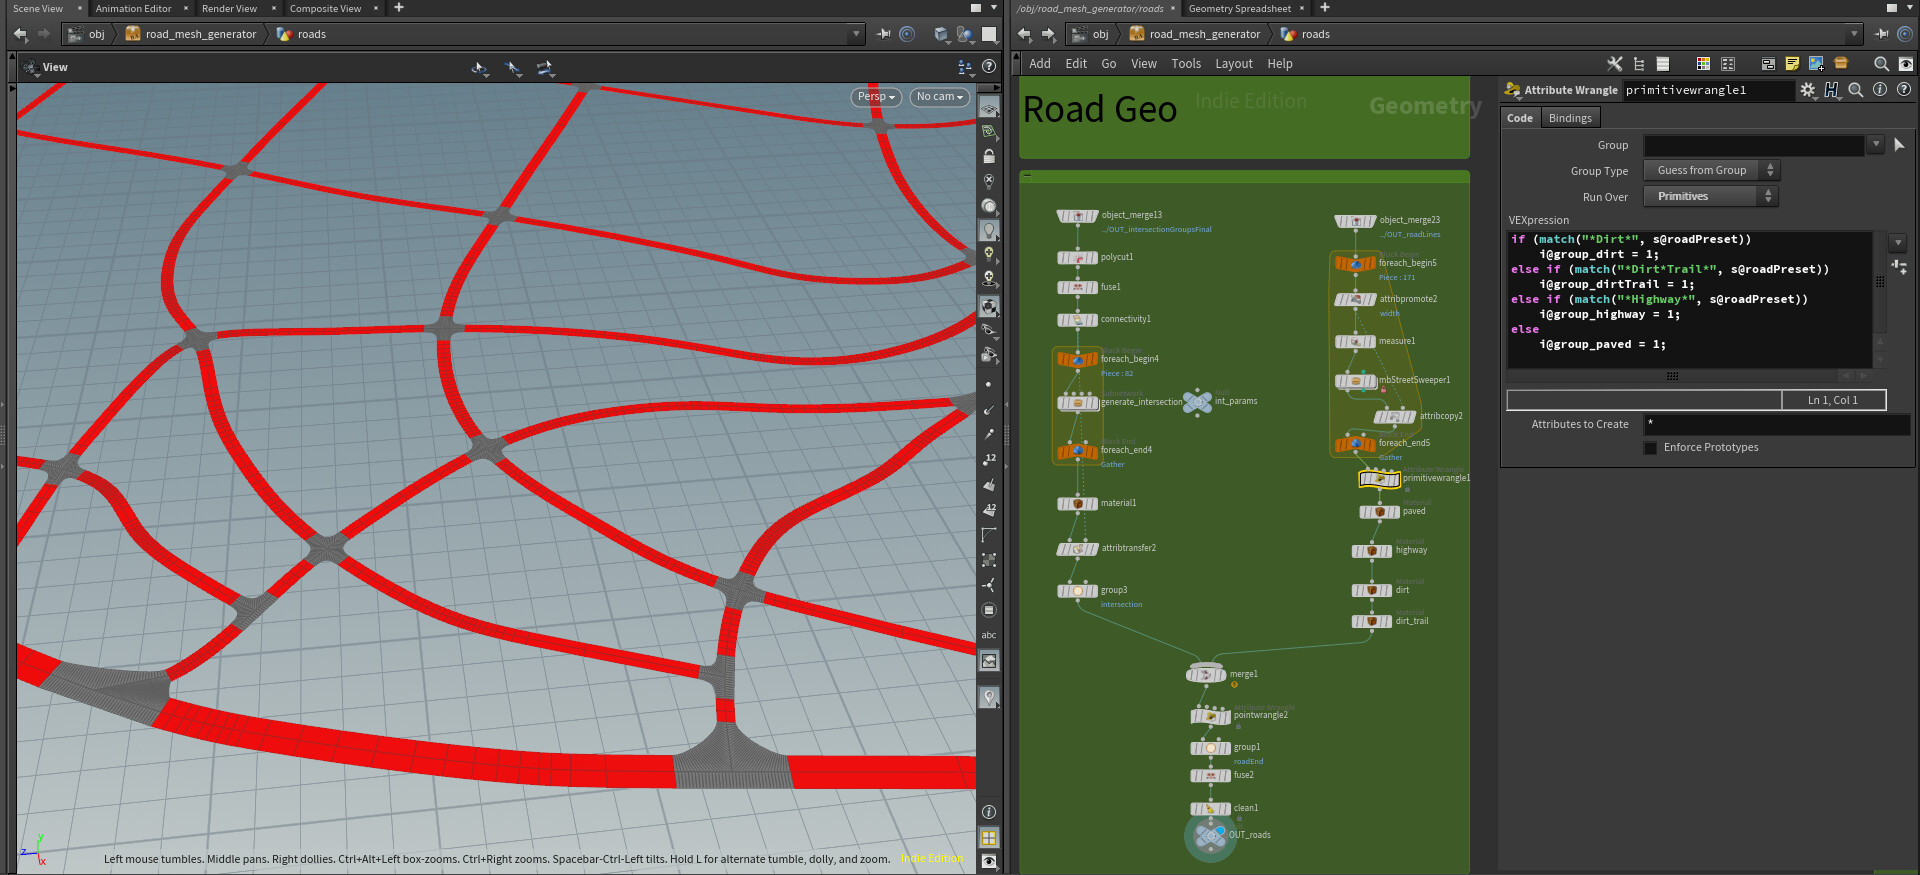
Then I just created some groups to apply the materials to use the roadPreset attribute taken from my curves in Unity.
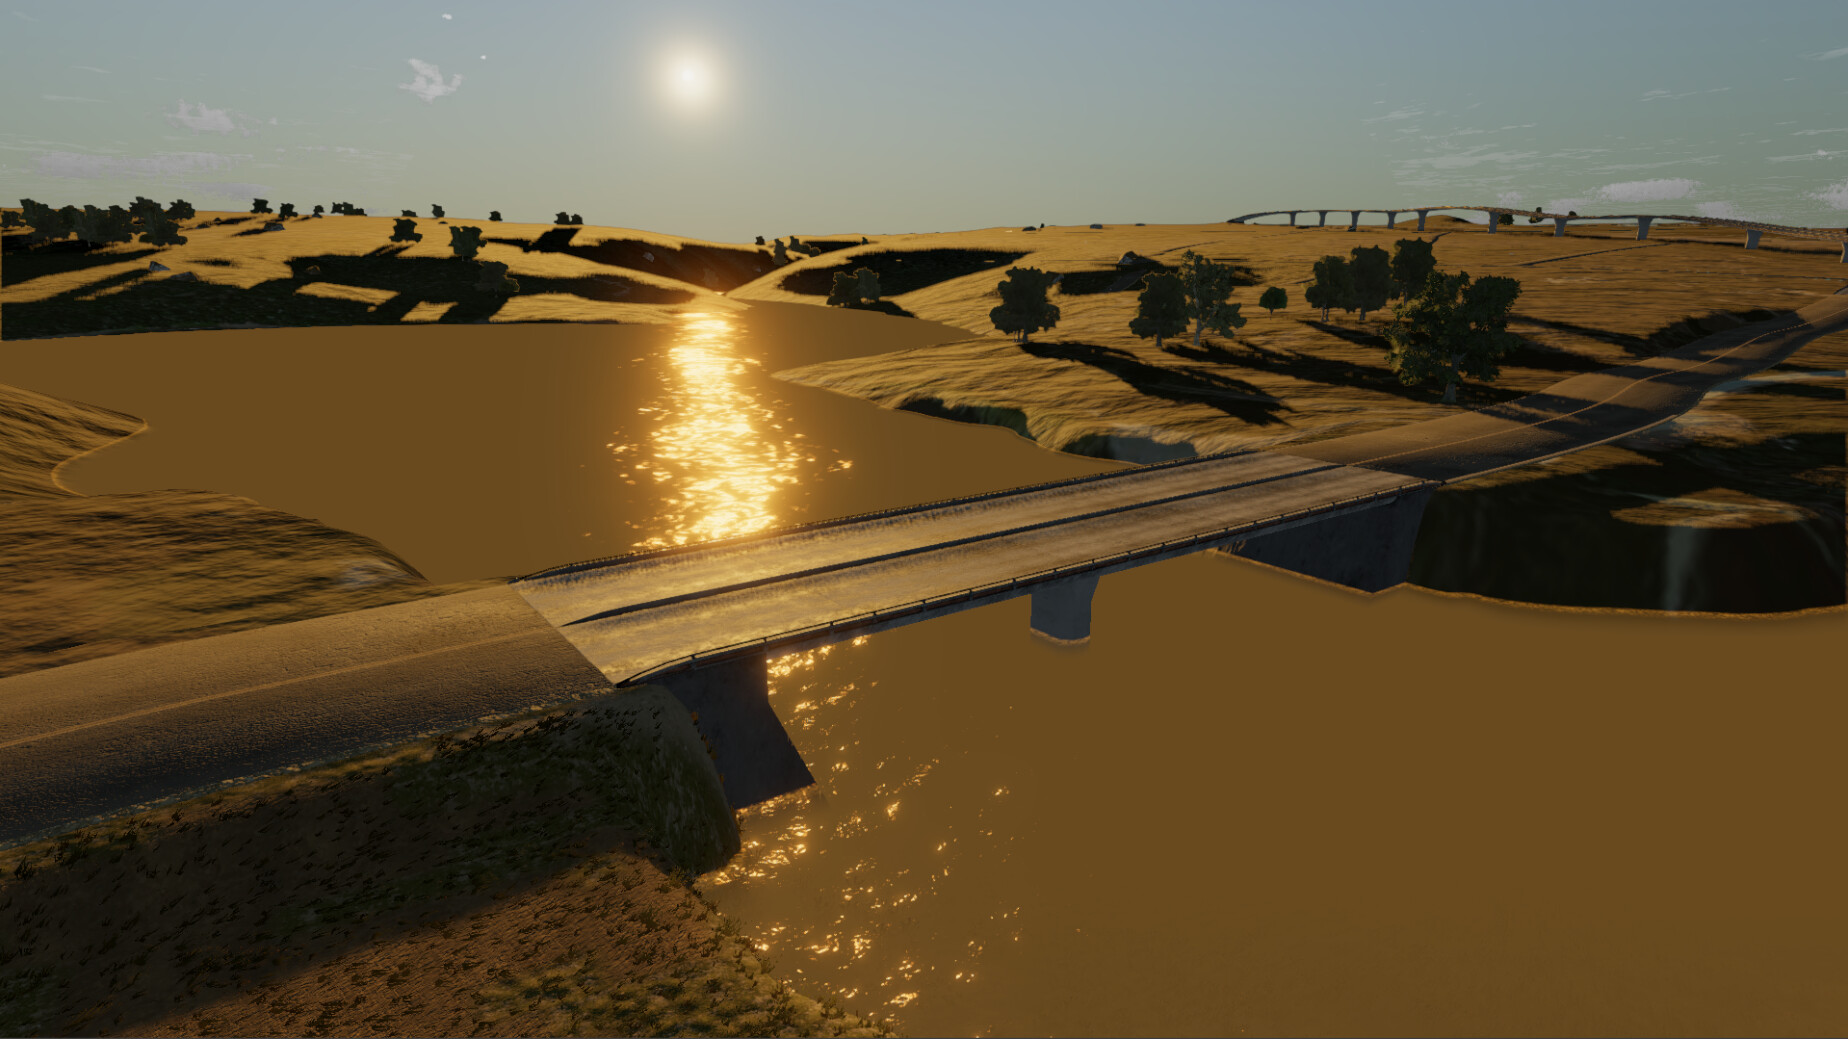
Next we create the geometry of the bridges. The network shown below iteratively passes through all previously created groups of bridges and, depending on the height above the ground, length and tortuosity, inserts either a bulk or arched bridge. I will consider creating an arch bridge in a separate tutorial, and the bulk bridge uses the excellent Gamedev Sweep Geometry SOP with included start and end groups to close the previously created bridge geometry along the bridge curve.

Result:

These bridge meshes consist of manually modeled start / end / middle sections, deformable and duplicate along a curve using Gamedev Sweep Geometry SOP. Here's what the manually-created geometry and groups look like:

The central group is selected, and the ends are in the bridgeStart and bridgeEnd groups, which are used by the geometry closure node.
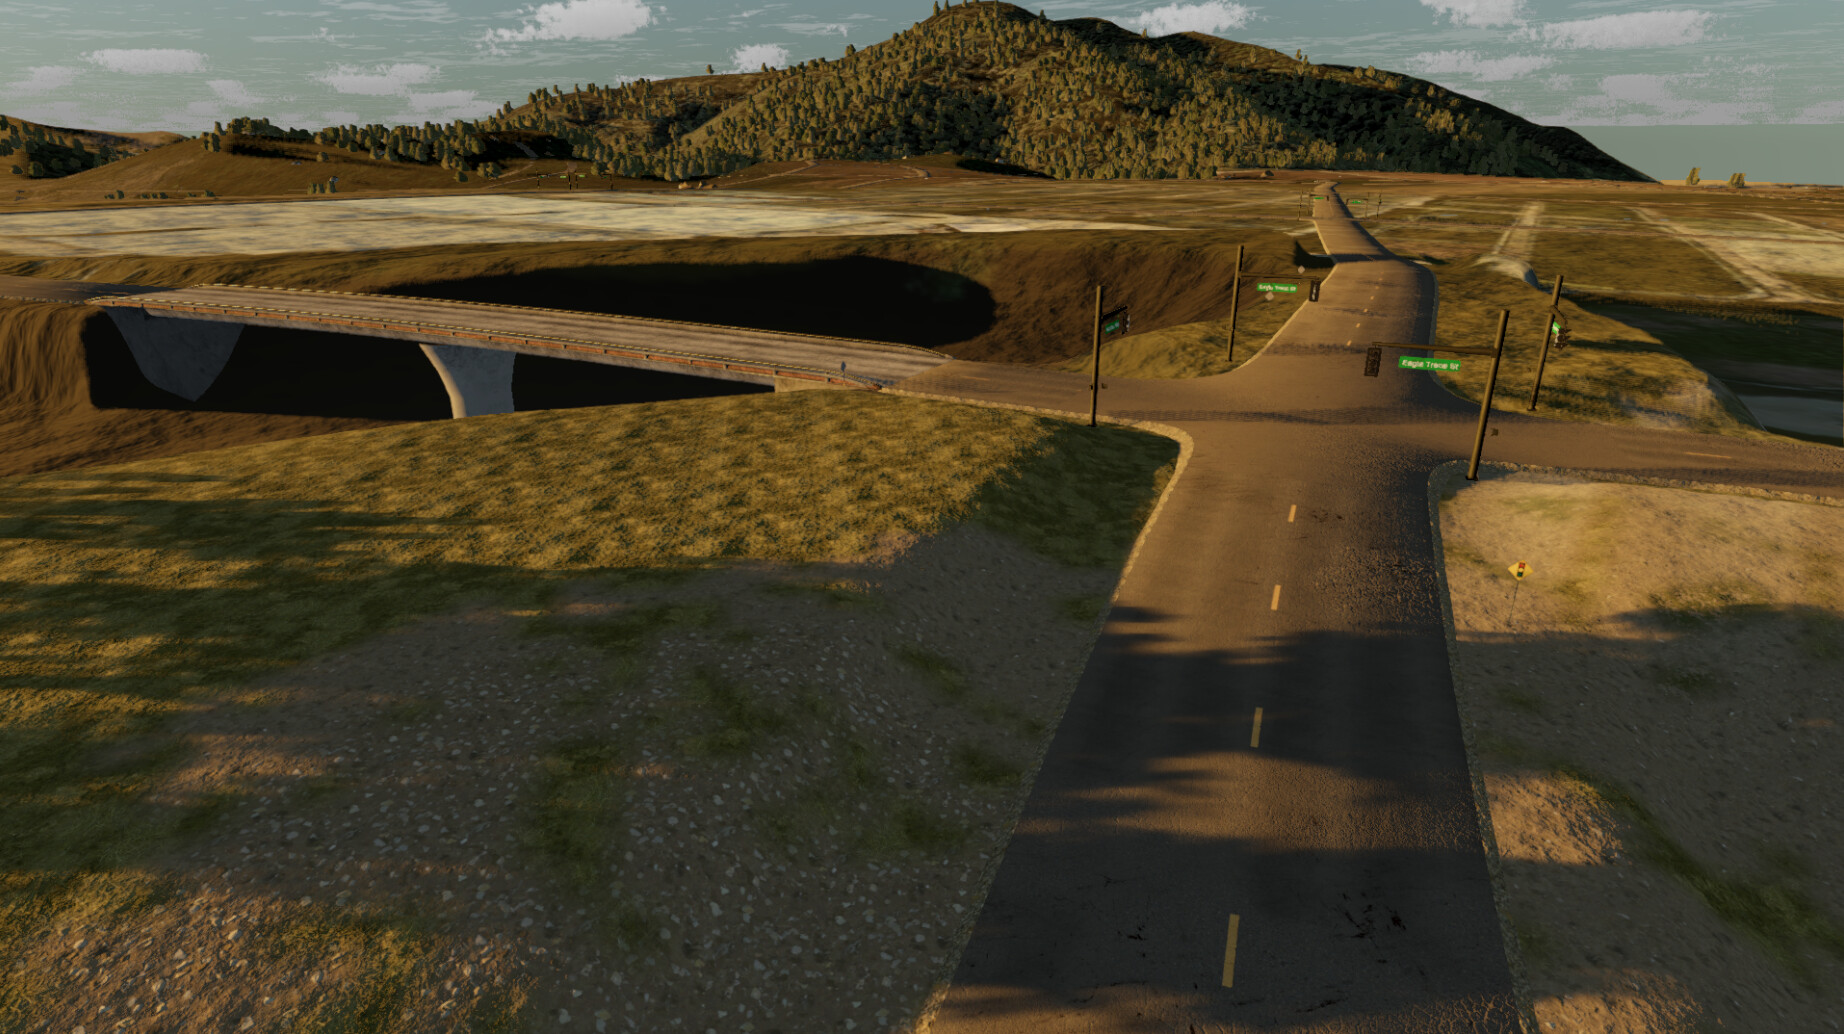
We complete the bridge by extruding it a little to create a road embankment on which gravel texture will be applied; several Boolean variables are also set for intersections of certain types of roads. For example, if a dirt road intersects with a highway, then it is truncated.

In the end, we save all the geometry for use in Unity and in additional Houdini tools. We split the road meshes into smaller fragments and export them as FBX, and also save the data in .bgeo files so that you can use them later.

In Unity:
I hope you enjoyed this short description of our Houdini road geometry creation process. In the next post, I will talk about creating road markings and leveling the terrain so that it more closely matches the roads.