Centralized installation of the 3CX extension for Chrome via GSuite
3CX V16 Update 4 Alpha introduces a new extension for Chrome that allows you to make calls without opening the web client. You can work with any desktop application, but when an incoming call arrives, a browser dialer with subscriber information will appear in the lower right corner of the screen.
In this article we will tell you how to centrally install this extension for all company employees without going to individual PCs. This can be done directly from the GSuite Admin Console.
Log in to GSuite with an administrator account and open Chrome App Management . You can deploy the application for the entire organization by selecting a domain, or for a specific organizational unit (OU).

After selecting the range (1) (organization or OU), press the yellow plus and select “Add the Chrome app by extension or ID” (2).
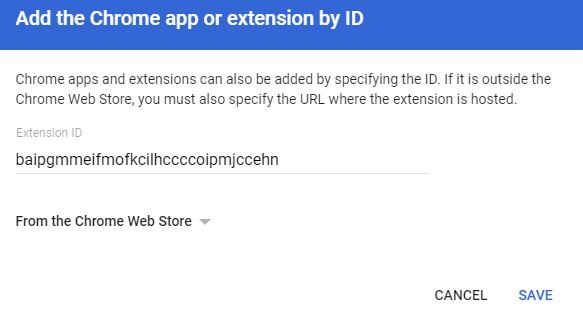
Specify 3CX extension ID for Chrome: baipgmmeifmofkcilhccccoipmjccehn
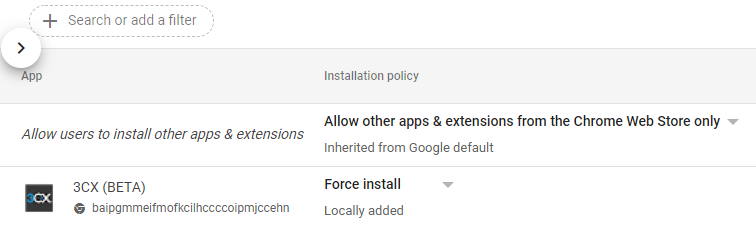
After adding the application, install the “Installation policy” in “Force install” so that the diler is installed for all users (the installation may take some time).
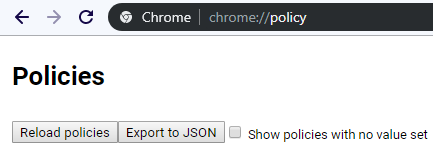
Of course, you can check the users PC to make sure that the policy is applied. To force a policy update, open the URL chrome: // policy and click "Reload policies".
Transfer conversation records from Google Drive
The 3CX V16 Update 4 Alpha is no longer supported by Google Drive as a repository for conversation records and backup files. This is due to recent changes to the Google API regarding access to user data . In addition to the API, some users had problems with getting a list of files, expiration of the authentication period and limitation on the volume of GDrive. Therefore, we added the “Archive Transfer” tool so that you can quickly transfer all 3CX archives to a folder on the local drive. Then they can be moved to another suitable place.
- In the 3CX interface, go to the “Recording Conversations” section and click the “Transfer Archive” button.
- Make sure you have enough free space on your local drive. If, after starting the transfer, you receive an e-mail notification about insufficient space, free the disk and repeat the process.
- The transfer is completed after receiving the e-mail "Transfer is completed." The duration of the transfer depends on the size and number of archived records.

Please note that the “Archive Transfer” tool will be removed in the next updates, and the “Frequency of moving to archive” option will be automatically disabled for Google Drive.
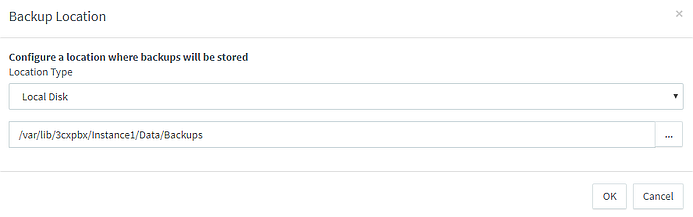
To transfer 3CX configuration backups, simply go to the Backup section and set a different location for automatic backup.