はじめに
マップを使用してAngular 2のプロジェクトで作業する過程で、次のタスクが発生しました。Angularコンポーネントを標準のポップアップリーフレットにレンダリングする必要があります。 この記事では、コンポーネントの動的レンダリングをこの特定のタスクのコンテキストで検討しますが、同じ方法で、この情報を自分のケースで使用できます。
問題の声明
最初のプロジェクトはこちらです。 これは、leaflet.jsマップライブラリが接続されている角度2以上のアプリケーションです。 MapServiceには、マップの作成、マーカーの追加、およびマーカーの中心化のためのメソッドがあります。 MapComponent-マップを表示するためのコンポーネント。 プロジェクトをビルドするには、webpack 2を使用しますアプリケーションを実行すると、マーカー付きのマップが表示され、次のタイプのポップアップが添付されます。
marker.bindPopup(` <h3>Leaflet PopUp</h1> <p>Some text</p> <p *ngIf="false">Should be deleted from DOM if it was angular component because of ngIf = false<p> `);
それをクリックして、次の図を参照してください。
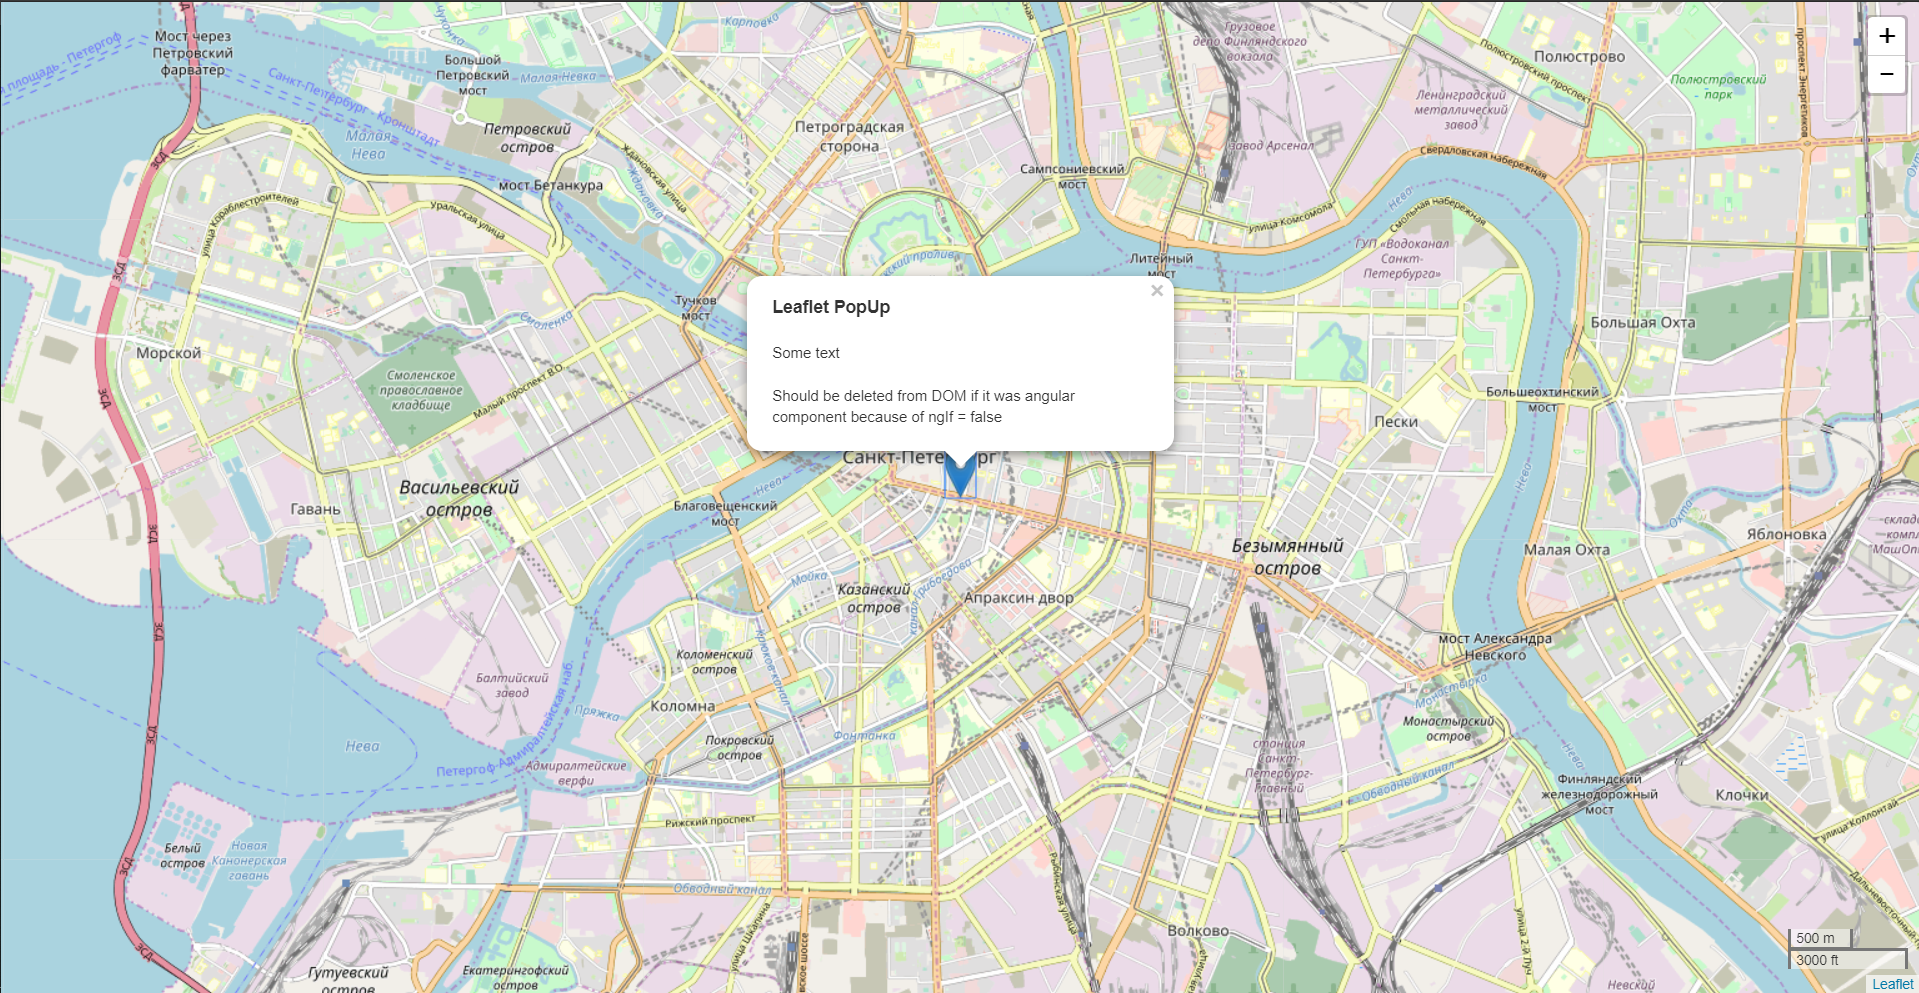
DOMには、「DOMから削除する必要があります...」というテキストの要素があります。これを* ngIfを使用して削除しますが、ポップアップでは、すぐに機能するように角度コードを記述できません。 角度成分の動的なレンダリングがシーンに入ります。
問題解決
最初に、動的にレンダリングするコンポーネントを作成します。
@Component({ selector: 'custom-popup', template: require('./custom-popup.component.html') }) export class CustomPopUpComponent { public inputData: any; private title: string = 'Angular component'; private array: Array<string> = ['this', 'array', 'was viewed', 'by', 'ngFor!']; }
そのテンプレート:
<div> <h1>{{title}}</h1> <p>{{inputData}}</p> <p *ngFor="let text of array">{{text}}</p> <p *ngIf="false">Should be deleted from DOM if it was angular component because of ngIf = false</p> </div>
次に、新しいdynamic-render.service.tsサービスを作成します。
@Injectable() export class RenderService { private componentRef: ComponentRef<any>; constructor(private ngZone: NgZone, private injector: Injector, private appRef: ApplicationRef, private componentFactoryResolver: ComponentFactoryResolver) { } public attachCustomPopUpsToMap(map: Map) { this.ngZone.run(() => { map.on("popupopen", (e: any) => { const popup = e.popup; const compFactory = this.componentFactoryResolver.resolveComponentFactory(popup.options.popupComponentType); this.componentRef = compFactory.create(this.injector); this.componentRef.instance.geoObject = popup.options.object; this.appRef.attachView(this.componentRef.hostView); let div = document.createElement('div'); div.appendChild(this.componentRef.location.nativeElement); popup.setContent(div); }); }); } }
addListenerはアンギュラゾーンの外側で実行されるため、手動で追加する必要があります。 したがって、ポップアップが開かれるたびに、componentFactoryが呼び出され、optionsフィールドでロールしたコンポーネントが作成されます。 さらに、このコンポーネントのインスタンスを使用してフィールドにデータを書き込むことができ、オプションのポップアップに転送することもできます。 この例では、options.dataのデータをコンポーネントのinputDataフィールドに割り当てます。 次に、新しく作成したコンポーネントをアタッチするdiv要素を作成し、それをコンテンツとしてポップアップに割り当てます。
注:このコードは、角度2.3.0以降向けに書かれています。 以前のバージョンの場合、このソリューションは次のようになります。 代わりに
this.appRef.attachView(this.componentRef.hostView);
書く必要があります
if (this.appRef['attachView']) { this.appRef['attachView'](this.componentRef.hostView); this.componentRef.onDestroy(() => { this.appRef['detachView'](this.componentRef.hostView); }); } else { this.appRef['registerChangeDetector'](this.componentRef.changeDetectorRef); this.componentRef.onDestroy(() => { this.appRef['unregisterChangeDetector'](this.componentRef.changeDetectorRef); }); }
MapModuleのRenderServiceを確認してください。 また、CustomPopUpComponentをMapModuleの宣言とentryComponentsに追加する必要があります。 renderServiceを呼び出し、マップ要素にポップアップでAngularコンポーネントをレンダリングする機能を追加します。その後、カスタムコンポーネントをマーカーにアタッチします。
this.renderService.attachCustomPopUpsToMap(this.mapService.getMap()); let options = { data: 'you can provide here anything you want', popupComponentType: CustomPopUpComponent }; let myPopUp = L.popup(options); marker.bindPopup(myPopUp);
データフィールドでは、コンポーネントのデータをpopupComponentType-コンポーネント自体に渡します。 この設計は、使いやすさのためにインターフェイスにラップすることができますが、この例のフレームワークではこれを行いません。記事はそれについてではありません。 正しく表示するために、スタイルを少し調整した後、アプリケーションを起動できます。 マーカーをクリックすると、コンポーネントがリーフレットポップアップの中心にあることがわかります。

おわりに
アンギュラ2+と組み合わせて、標準のリーフレットポップアップの機能を大幅に拡張することができました。 ボーナスとして、コンポーネントはアニメーションを開いたり閉じたり、ズームやその他の標準的なリーフレットを取得します。
この記事で説明されているすべてを実装するプロジェクトのソースはこちらです。