
過去数年間、同僚と私はオフィスで紙を少なくしようとしています。 従業員はデジタルドキュメントをより速く、より適切に操作します-ほこりはずっと少なくなります。
デジタルドキュメントに完全に切り替えるには、最初に紙をスキャンする必要があります。 スキャナーのデスクトップアプリケーションを開発するには、 .NET Frameworkを使用します 。 箱から出してすぐに、彼はスキャナーを操作するためのツールを提供しません。 .NETはCOMと友だちなので、 WIA(Windows Imaging Architecture)コンポーネントを使用できます。
WIAとの便利な作業のために、多くのスキャンアプリケーションの基礎を形成するクラスを作成しました。 例としてScannerクラスを使用して、 スキャナーでの経験を共有したいと思います。
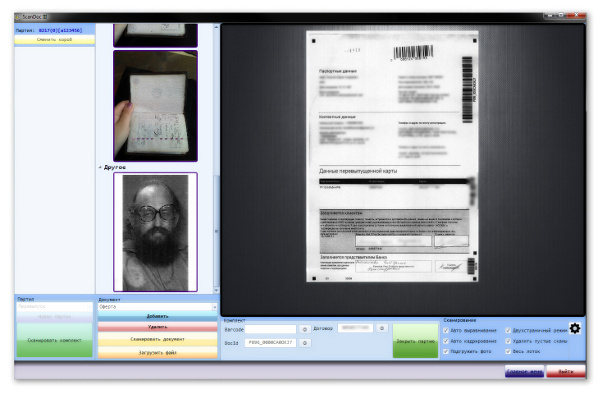
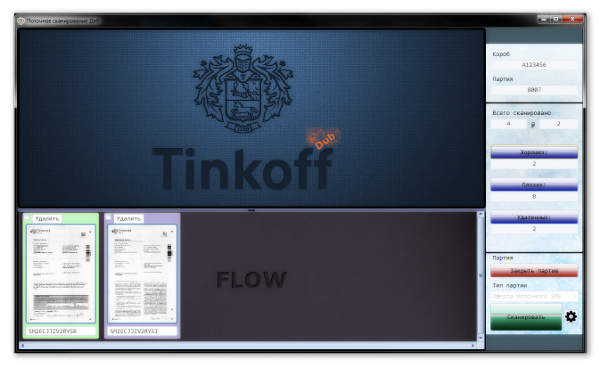
私たちの銀行のいくつかの非常に有用なアプリケーションで使用されています。 たとえば、銀行の顧客のすべてのアプリケーションと契約は、 スキャナークラスを使用するアプリケーションによってデジタル化されます。
次のようになります。
など:
すべてがシンプルであるというわけではありません
開発したアプリケーションからスキャナーの操作を開始するには、最初にスキャナーを選択してから構成し、スキャンする必要があります。 したがって、クラスのパブリックインターフェイスは、 ConfigurationとScanの 2つのメソッドによって制限できます。
設定により、標準のスキャナー設定ダイアログが表示されます。 スキャンはドキュメントをスキャンし、 MemoryStreamに画像を返します。
今、詳細に...
WIAを介してスキャナーを操作します。 これを行うには、 Microsoft Windows Image Acquisition Library v2.0コンポーネントをCOMプロジェクトに接続します 。COMプロジェクトの実装はファイルC:\ Windows \ System32 \ wiaaut.dllにあります。
スキャナーを一度セットアップし、次のアプリケーションのロード時に、スキャナーが既に構成されていることが一般的です。 スキャナーを構成し、構成を保存および復元する機能が必要です。 Scannerクラスを作成し、 WIAを使用してファイルの先頭に追加します。 Scannerクラスのオブジェクトを作成するとき、設定から設定をロードしようとします。 うまくいかない場合は、スキャナーを手動でセットアップすることをお勧めします。
通常、1つのプログラムが1つのスキャナーで動作するため、シングルトンを作成できます。 私の場合、複数のスキャナーが同時に存在する場合があります。
コンストラクタは次のようになります。
public Scanner() { try { LoadConfig(); } catch (Exception) { MessageBox.Show(" , "); Configuration(); } }
ここでMessageBoxは何をしていますか? ほとんどの場合、スキャンアプリケーションはGUIを意味します。 情報を表示するには、 MessageBoxを使用してメッセージを表示することもできます。さらに、標準のWIAダイアログを使用してスキャナーを構成します。
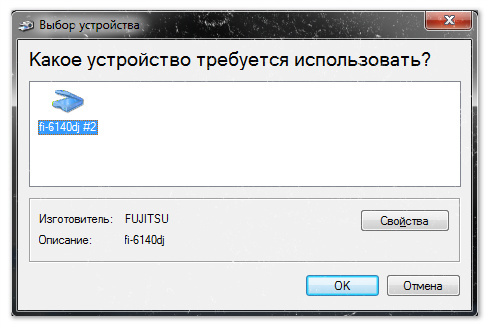
スキャナーをセットアップすることから始めましょう。 スキャナーは、 設定()機能を使用して設定されます。この機能は、プログラムの「スキャナー設定」ボタンを押すなど、いつでも呼び出すことができます。
public void Configuration() { try { var commonDialog = new CommonDialogClass(); _scanDevice = commonDialog.ShowSelectDevice(WiaDeviceType.ScannerDeviceType, true); if (_scanDevice == null) return; var items = commonDialog.ShowSelectItems(_scanDevice); if (items.Count < 1) return; _scannerItem = items[1]; SaveProp(_scanDevice.Properties, ref _defaultDeviceProp); SaveConfig(); } catch (Exception e) { MessageBox.Show(e.Message, " "); } }
スキャナーには多くのパラメーターがあり、そのうちのいくつかは他から計算する必要があるため、問題を複雑にしないために、標準のWIAダイアログCommonDialogClassを使用して構成します。 まず、プログラムのユーザーがShowSelectDeviceスキャナー(WiaDeviceType。ScannerDeviceType、true)を選択することをお勧めします。 ダイアログは、 Deviceオブジェクトを返します 。デバイスが選択されていない場合はnullを返します 。
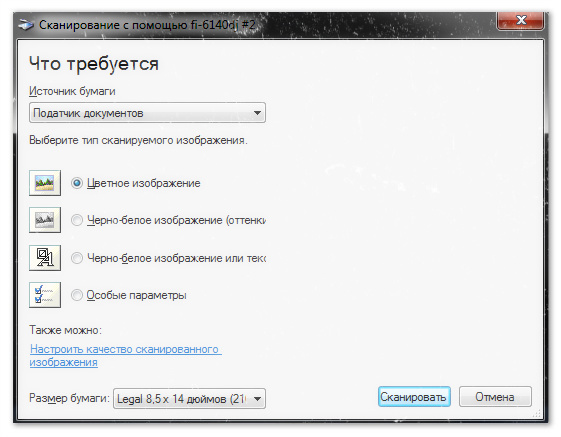
次に、受信したデバイスShowSelectItems(_scanDevice)を構成します。 設定では、 DPI 、用紙サイズ、カラーモード、その他のパラメーターを設定できます。
このセットアップウィンドウの主な欠点は、論理的なOKではなく、[スキャン]ボタンをクリックして確認する必要があることですが、この場合、スキャンは開始されません。
構成が正常に完了したら、SaveConfig()を呼び出して構成をファイルに保存します。
WIAは設定の保存/復元を提供しません。 私はこの部分を自分でしなければなりませんでした。 複雑なことは何もありませんでした。設定はIPropertyリストの形式で表示され、 DeviceとItemにあります。
保存するために、パラメータ名、識別子、値がセミコロンで区切られ、 DeviceとItemの設定が[device]と[item]ヘッダーで区切られた読みやすいテキスト形式を選択しました。
構成例
[device]
DeviceID;{6BDD1FC6-810F-11D0-BEC7-08002BE2092F}\0003
Item Name;4098;Root
Full Item Name;4099;0003\Root
Item Flags;4101;76
Unique Device ID;2;{6BDD1FC6-810F-11D0-BEC7-08002BE2092F}\0003
Manufacturer;3;FUJITSU
Description;4;fi-6140dj
Type;5;65537
Port;6;\\.\Usbscan0
Name;7;fi-6140dj #2
Server;8;local
Remote Device ID;9;
UI Class ID;10;{C2A237CB-9CEF-4fd6-B989-E82E1DB0F0C9}
Hardware Configuration;11;0
BaudRate;12;
STI Generic Capabilities;13;51
WIA Version;14;2.0
Driver Version;15;2.1.4.3
PnP ID String;16;\\?\usb#vid_04c5&pid_114d#8&184ab430&0&2#{6bdd1fc6-810f-11d0-bec7-08002be2092f}
STI Driver Version;17;2
Horizontal Bed Size;3074;8500
Vertical Bed Size;3075;11692
Access Rights;4102;3
Horizontal Optical Resolution;3090;600
Vertical Optical Resolution;3091;600
Firmware Version;1026;0500
Max Scan Time;3095;180000
Preview;3100;0
Show preview control;3103;1
Horizontal Sheet Feed Size;3076;8500
Vertical Sheet Feed Size;3077;14000
Document Handling Capabilities;3086;21
Document Handling Status;3087;5
Document Handling Select;3088;1
Pages;3096;1
Sheet Feeder Registration;3078;1
Horizontal Bed Registration;3079;0
Vertical Bed Registration;3080;0
Document Handling Option;38914;0
[item]
ItemID;0003\Root\Top
Item Name;4098;Top
Full Item Name;4099;0003\Root\Top
Item Flags;4101;67
Color Profile Name;4120;sRGB Color Space Profile.icm
Horizontal Resolution;6147;200
Vertical Resolution;6148;200
Horizontal Extent;6151;1653
Vertical Extent;6152;2338
Horizontal Start Position;6149;23
Vertical Start Position;6150;0
Data Type;4103;2
Bits Per Pixel;4104;8
Brightness;6154;0
Contrast;6155;0
Current Intent;6146;0
Pixels Per Line;4112;1653
Number of Lines;4114;2338
Preferred Format;4105;{B96B3CAA-0728-11D3-9D7B-0000F81EF32E}
Item Size;4116;3872792
Threshold;6159;128
Format;4106;{B96B3CAA-0728-11D3-9D7B-0000F81EF32E}
Media Type;4108;128
Channels Per Pixel;4109;1
Bits Per Channel;4110;8
Planar;4111;0
Bytes Per Line;4113;1656
Buffer Size;4118;65535
Access Rights;4102;3
Compression;4107;0
Photometric Interpretation;6153;0
Lamp Warm up Time;6161;180000
3100;3100;0
private void SaveConfig() { var settings = new List<string>(); settings.Add("[device]"); settings.Add(String.Format("DeviceID;{0}", _scanDevice.DeviceID)); foreach (IProperty property in _scanDevice.Properties) { var propstring = string.Format("{1}{0}{2}{0}{3}", ";", property.Name, property.PropertyID, property.get_Value()); settings.Add(propstring); } settings.Add("[item]"); settings.Add(String.Format("ItemID;{0}", _scannerItem.ItemID)); foreach (IProperty property in _scannerItem.Properties) { var propstring = string.Format("{1}{0}{2}{0}{3}", ";", property.Name, property.PropertyID, property.get_Value()); settings.Add(propstring); } File.WriteAllLines(Config, settings.ToArray()); } private enum loadMode {undef, device, item}; private void LoadConfig() { var settings = File.ReadAllLines(Config); var mode = loadMode.undef; foreach (var setting in settings) { if (setting.StartsWith("[device]")) { mode = loadMode.device; continue; } if (setting.StartsWith("[item]")) { mode = loadMode.item; continue; } if (setting.StartsWith("DeviceID")) { var deviceid = setting.Split(';')[1]; var devMngr = new DeviceManagerClass(); foreach (IDeviceInfo deviceInfo in devMngr.DeviceInfos) { if (deviceInfo.DeviceID == deviceid) { _scanDevice = deviceInfo.Connect(); break; } } if (_scanDevice == null) { MessageBox.Show(" "); return; } _scannerItem = _scanDevice.Items[1]; continue; } if (setting.StartsWith("ItemID")) { var itemid = setting.Split(';')[1]; continue; } var sett = setting.Split(';'); switch (mode) { case loadMode.device: SetProp(_scanDevice.Properties, sett[1], sett[2]); break; case loadMode.item: SetProp(_scannerItem.Properties, sett[1], sett[2]); break; } } SaveProp(_scanDevice.Properties, ref _defaultDeviceProp); } private static void SetProp(IProperties prop, object property, object value) { try { prop[property].set_Value(value); } catch (Exception) { // return; } }
スキャン手順は簡単です。 ピクチャとともにMemoryStreamを返すか、スキャンが失敗した場合はnullを返します。
public MemoryStream MemScan() { try { var result = _scannerItem.Transfer(FormatID.wiaFormatJPEG); var wiaImage = (ImageFile)result; var imageBytes = (byte[])wiaImage.FileData.get_BinaryData(); using (var ms = new MemoryStream(imageBytes)) { using (var bitmap = Bitmap.FromStream(ms)) { bitmap.Save(stream, ImageFormat.Jpeg); } } } catch (Exception) { return null; } return stream; }
私の意見では、スキャンするときは進行状況バーを描画する方が便利なので、標準の進行状況を非表示にします。 進行状況を表示せずにスキャンするには、 Transferメソッドが使用されます。
両面/シンプレックス
多くの長距離スキャナーは、設定ダイアログから選択できる2ページスキャンモードをサポートしています。

ただし、標準ダイアログでは、 二重モードの設定を忘れることがあります。したがって、 二重モードを強制的に有効にして元の設定に戻すことができると便利です。
public void SetDuplexMode(bool isDuplex) { // WIA property ID constants const string wiaDpsDocumentHandlingSelect = "3088"; const string wiaDpsPages = "3096"; // WIA_DPS_DOCUMENT_HANDLING_SELECT flags const int feeder = 0x001; const int duplex = 0x004; if (_scanDevice == null) return; if (isDuplex) { SetProp(_scanDevice.Properties, wiaDpsDocumentHandlingSelect, (duplex | feeder)); SetProp(_scanDevice.Properties, wiaDpsPages, 1); } else { try { SetProp(_scanDevice.Properties, wiaDpsDocumentHandlingSelect, _defaultDeviceProp[wiaDpsDocumentHandlingSelect]); SetProp(_scanDevice.Properties, wiaDpsPages, _defaultDeviceProp[wiaDpsPages]); } catch (Exception e) { MessageBox.Show(String.Format(" :{0}{1}", Environment.NewLine, e.Message)); } } }
2ページモードでスキャンするには、1ページ目と2ページ目でMemScan()を呼び出す必要があります。 最初の呼び出しはシートをスキャンして最初のページの画像を返し、2番目の呼び出しは2ページ目のスキャンを返します。 フィーダースキャナーを使用する場合、 MemScan()が戻るまでループでスキャンすると便利です!= Null-これは、スキャナーが紙切れになったことを意味します。 スキャナーがどのモードで動作するかを考える必要はありません。文書はとにかくスキャンされます。 カチンコスキャナーのループでスキャンを開始する場合、スキャナーが接続されている間、スキャンプロセスは停止しません。ソフトウェアを開発するとき、このニュアンスを考慮する必要があります。
スキャナーを操作するためのフルクラスのソースコード
using System; using System.Collections.Generic; using System.Drawing; using System.Drawing.Imaging; using System.IO; using System.Windows.Forms; using WIA; namespace Scanning { public class Scanner { public const string Config = "scanner.cfg"; private Device _scanDevice; private Item _scannerItem; private Random _rnd = new Random(); private Dictionary<string, object> _defaultDeviceProp; public bool IsVirtual; public Scanner() { try { LoadConfig(); } catch (Exception) { MessageBox.Show(" , "); Configuration(); } } public void Configuration() { try { var commonDialog = new CommonDialogClass(); _scanDevice = commonDialog.ShowSelectDevice(WiaDeviceType.ScannerDeviceType, true); if (_scanDevice == null) return; var items = commonDialog.ShowSelectItems(_scanDevice); if (items.Count < 1) return; _scannerItem = items[1]; SaveProp(_scanDevice.Properties, ref _defaultDeviceProp); SaveConfig(); } catch (Exception e) { MessageBox.Show(e.Message, " "); } } private void SaveProp(WIA.Properties props, ref Dictionary<string, object> dic) { if (dic == null) dic = new Dictionary<string, object>(); foreach (Property property in props) { var propId = property.PropertyID.ToString(); var propValue = property.get_Value(); dic[propId] = propValue; } } public void SetDuplexMode(bool isDuplex) { // WIA property ID constants const string wiaDpsDocumentHandlingSelect = "3088"; const string wiaDpsPages = "3096"; // WIA_DPS_DOCUMENT_HANDLING_SELECT flags const int feeder = 0x001; const int duplex = 0x004; if (_scanDevice == null) return; if (isDuplex) { SetProp(_scanDevice.Properties, wiaDpsDocumentHandlingSelect, (duplex | feeder)); SetProp(_scanDevice.Properties, wiaDpsPages, 1); } else { try { SetProp(_scanDevice.Properties, wiaDpsDocumentHandlingSelect, _defaultDeviceProp[wiaDpsDocumentHandlingSelect]); SetProp(_scanDevice.Properties, wiaDpsPages, _defaultDeviceProp[wiaDpsPages]); } catch (Exception e) { MessageBox.Show(String.Format(" :{0}{1}", Environment.NewLine, e.Message)); } } } public MemoryStream MemScan() { if ((_scannerItem == null) && (!IsVirtual)) { MessageBox.Show(" , !", "Info"); //return null; IsVirtual = true; } var stream = new MemoryStream(); if (IsVirtual) { if (_rnd.Next(3) == 0) { return null; } var btm = GetVirtualScan(); btm.Save(stream, ImageFormat.Jpeg); return stream; } try { var result = _scannerItem.Transfer(FormatID.wiaFormatJPEG); var wiaImage = (ImageFile)result; var imageBytes = (byte[])wiaImage.FileData.get_BinaryData(); using (var ms = new MemoryStream(imageBytes)) { using (var bitmap = Bitmap.FromStream(ms)) { bitmap.Save(stream, ImageFormat.Jpeg); } } } catch (Exception) { return null; } return stream; } private Bitmap GetVirtualScan() { const int imgSize = 777; var defBtm = new Bitmap(imgSize, imgSize); var g = Graphics.FromImage(defBtm); var r = new Random(); g.FillRectangle(new SolidBrush(Color.FromArgb(r.Next(0, 50), r.Next(0, 50), r.Next(0, 50))), 0, 0, imgSize, imgSize); // bg for (int i = 0; i < r.Next(1000, 3000); i++) { var den = r.Next(200, 255); var br = new SolidBrush(Color.FromArgb(den, den, den)); den -= 100; var pr = new Pen(Color.FromArgb(den, den, den), 1); var size = r.Next(1, 8); var x = r.Next(0, imgSize - size); var y = r.Next(0, imgSize - size); g.FillEllipse(br, x, y, size, size); g.DrawEllipse(pr, x, y, size, size); } g.DrawString(" ", new Font(FontFamily.GenericSerif, 25), Brushes.Aqua, new RectangleF(0, 0, imgSize, imgSize)); g.Flush(); return defBtm; } private void SaveConfig() { var settings = new List<string>(); settings.Add("[device]"); settings.Add(String.Format("DeviceID;{0}", _scanDevice.DeviceID)); foreach (IProperty property in _scanDevice.Properties) { var propstring = string.Format("{1}{0}{2}{0}{3}", ";", property.Name, property.PropertyID, property.get_Value()); settings.Add(propstring); } settings.Add("[item]"); settings.Add(String.Format("ItemID;{0}", _scannerItem.ItemID)); foreach (IProperty property in _scannerItem.Properties) { var propstring = string.Format("{1}{0}{2}{0}{3}", ";", property.Name, property.PropertyID, property.get_Value()); settings.Add(propstring); } File.WriteAllLines(Config, settings.ToArray()); } private enum loadMode {undef, device, item}; private void LoadConfig() { var settings = File.ReadAllLines(Config); var mode = loadMode.undef; foreach (var setting in settings) { if (setting.StartsWith("[device]")) { mode = loadMode.device; continue; } if (setting.StartsWith("[item]")) { mode = loadMode.item; continue; } if (setting.StartsWith("DeviceID")) { var deviceid = setting.Split(';')[1]; var devMngr = new DeviceManagerClass(); foreach (IDeviceInfo deviceInfo in devMngr.DeviceInfos) { if (deviceInfo.DeviceID == deviceid) { _scanDevice = deviceInfo.Connect(); break; } } if (_scanDevice == null) { MessageBox.Show(" "); return; } _scannerItem = _scanDevice.Items[1]; continue; } if (setting.StartsWith("ItemID")) { var itemid = setting.Split(';')[1]; continue; } var sett = setting.Split(';'); switch (mode) { case loadMode.device: SetProp(_scanDevice.Properties, sett[1], sett[2]); break; case loadMode.item: SetProp(_scannerItem.Properties, sett[1], sett[2]); break; } } SaveProp(_scanDevice.Properties, ref _defaultDeviceProp); } private static void SetProp(IProperties prop, object property, object value) { try { prop[property].set_Value(value); } catch (Exception) { return; } } } }
もちろん、 スキャナーはスキャナーを操作するための本格的なツールとは言えませんが、さまざまなタイプのスキャナーを操作するためのターンキーソリューションです。 この例は、下からWIAを操作する方法を示しています。 NETであり、スキャンプログラムを構築するための基礎となります。
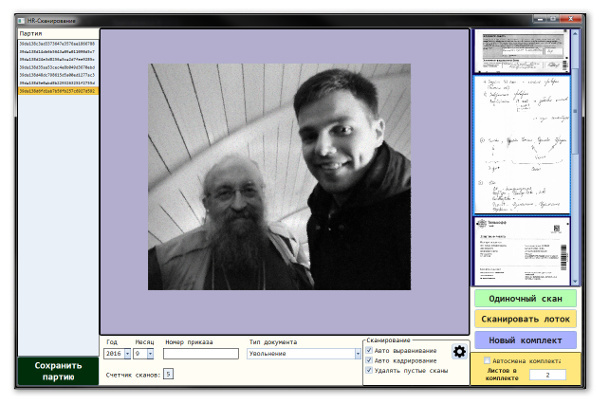
そして、人事部の注文をスキャンします;)
ご清聴ありがとうございました、ハブレでお会いしましょう!