Cable management and patch panel removal in the server
In this article, I share my experience in organizing the server for 14 patch panels.
Under the cut - a lot of photos.
General information about the object and the server
Our company DATANETVORKS won the tender for the construction of SCS in a new three-story office building. The network includes 321 ports, 14 patch panels. The minimum requirements for copper cable and accessories are cat 6a, FTP, since according to the new ISO 11801 standards, a minimum of 6 cable categories should be used to build a corporate network.
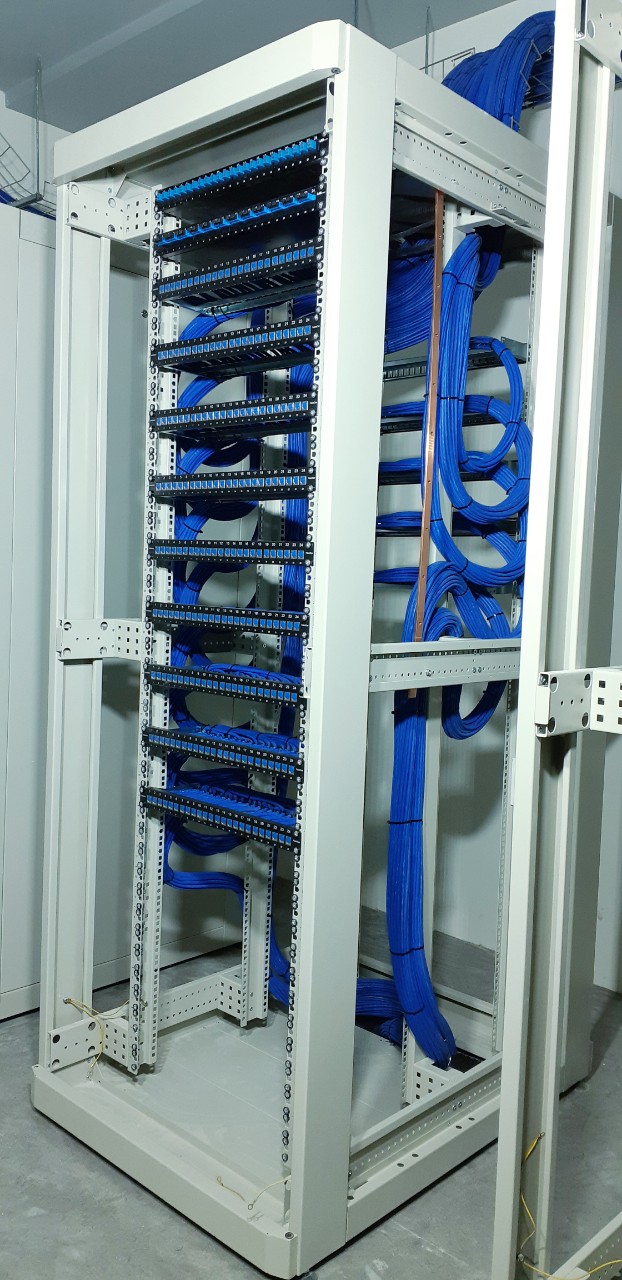
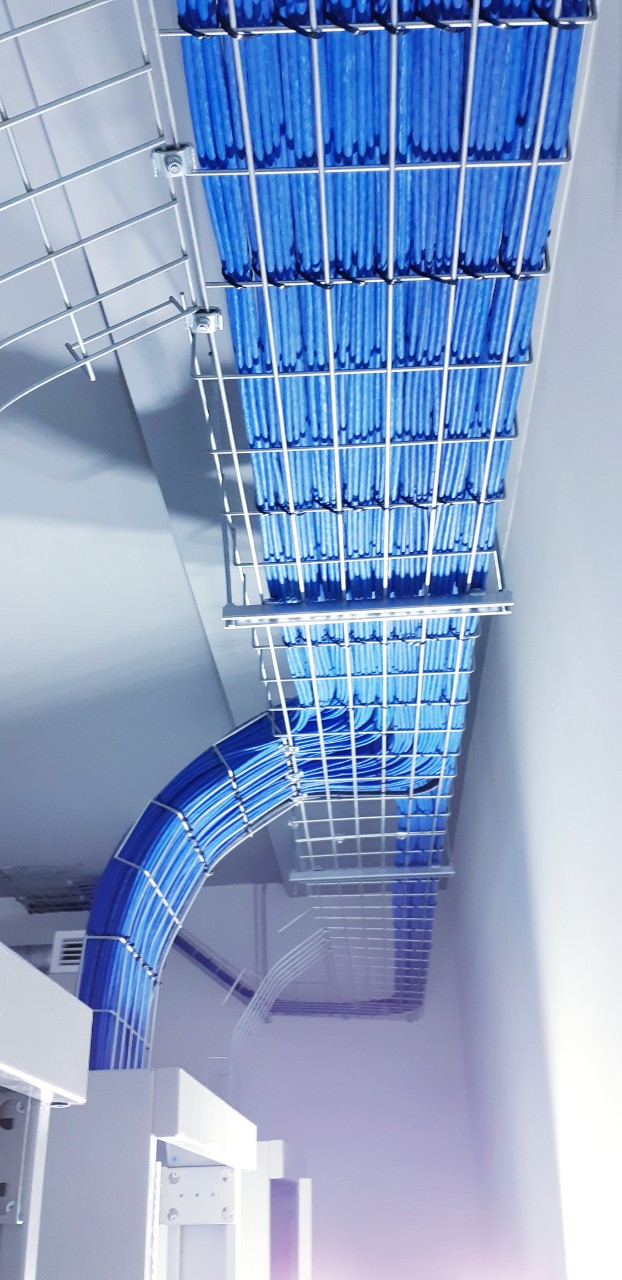
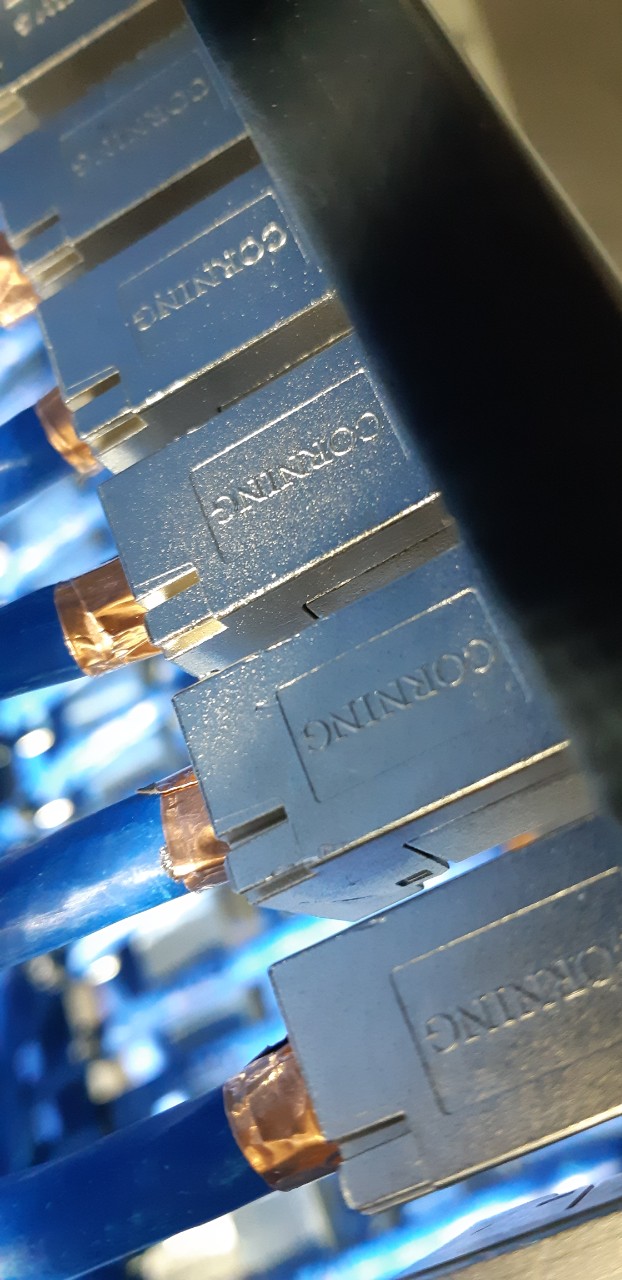
The choice fell on Corning products. Patch panels were selected type-setting, because they are easier to maintain and if one port fails, you can easily replace it without losing the useful space of the panel. The modules used Corning XS500, shielded, cat 6a, Keystone installation type. They decided to buy the cabinet at CMS 42U with perforated doors for better ventilation and increased lateral space to optimize cable management and installation of network equipment. In the future, a cabinet width of 800 millimeters will be very useful to us. The cable route in the server room is built from a mesh tray 300 * 50 mm with a suspension on studs and collets.
The construction of the network lasted throughout the year, due to the varying degree of readiness of the facility. My partner and I came several times to help with the installation of the cable route and cable extensions, but other installers did the main work. The last stage of our work at the facility was laying and disconnecting the cable in the wiring closet. The whole process took five days, three of which we laid the cable in trays and spread it over the patch panels.
Cable preparation for rack entry and cable management
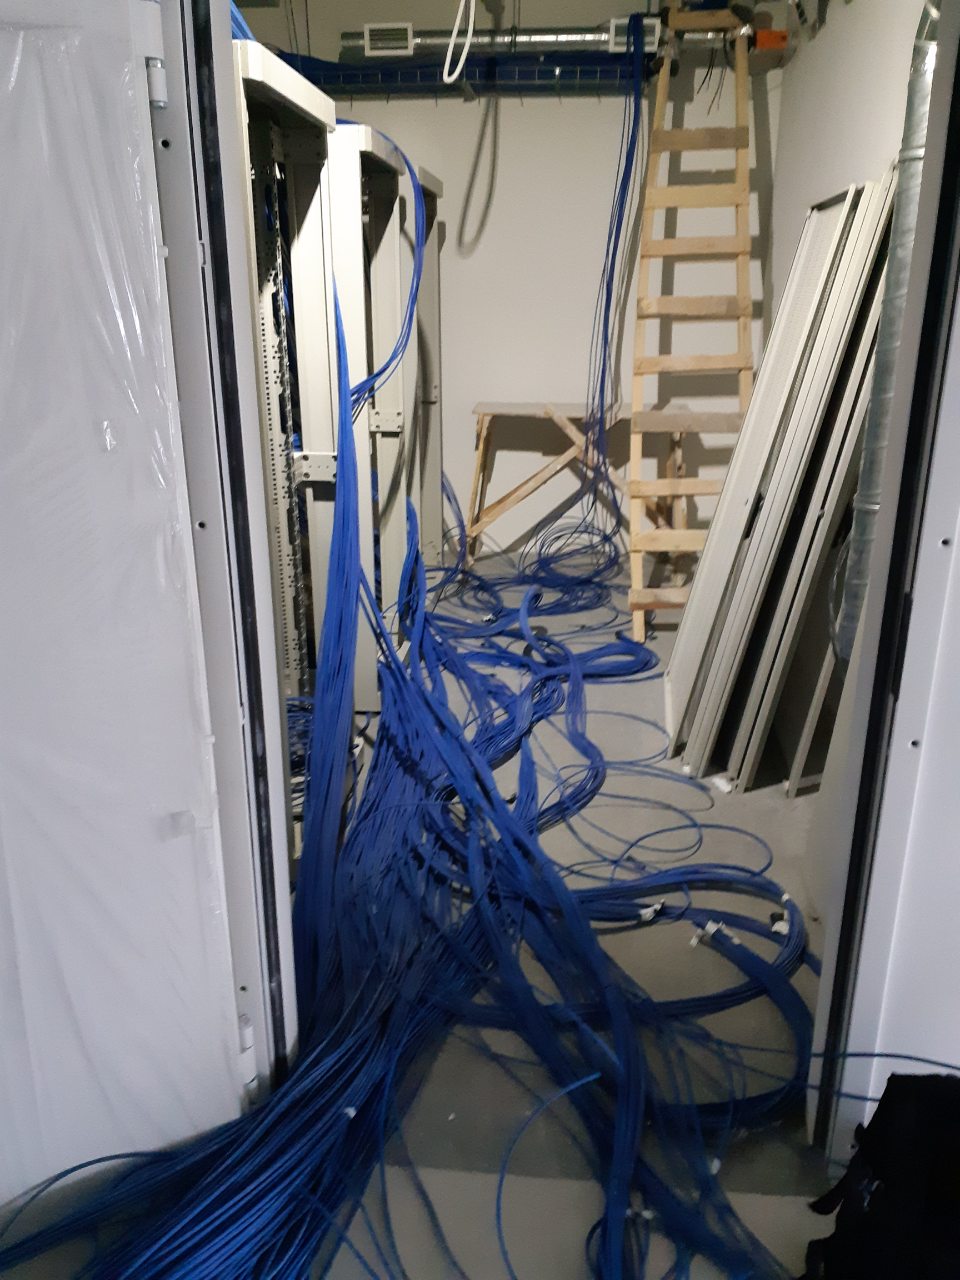
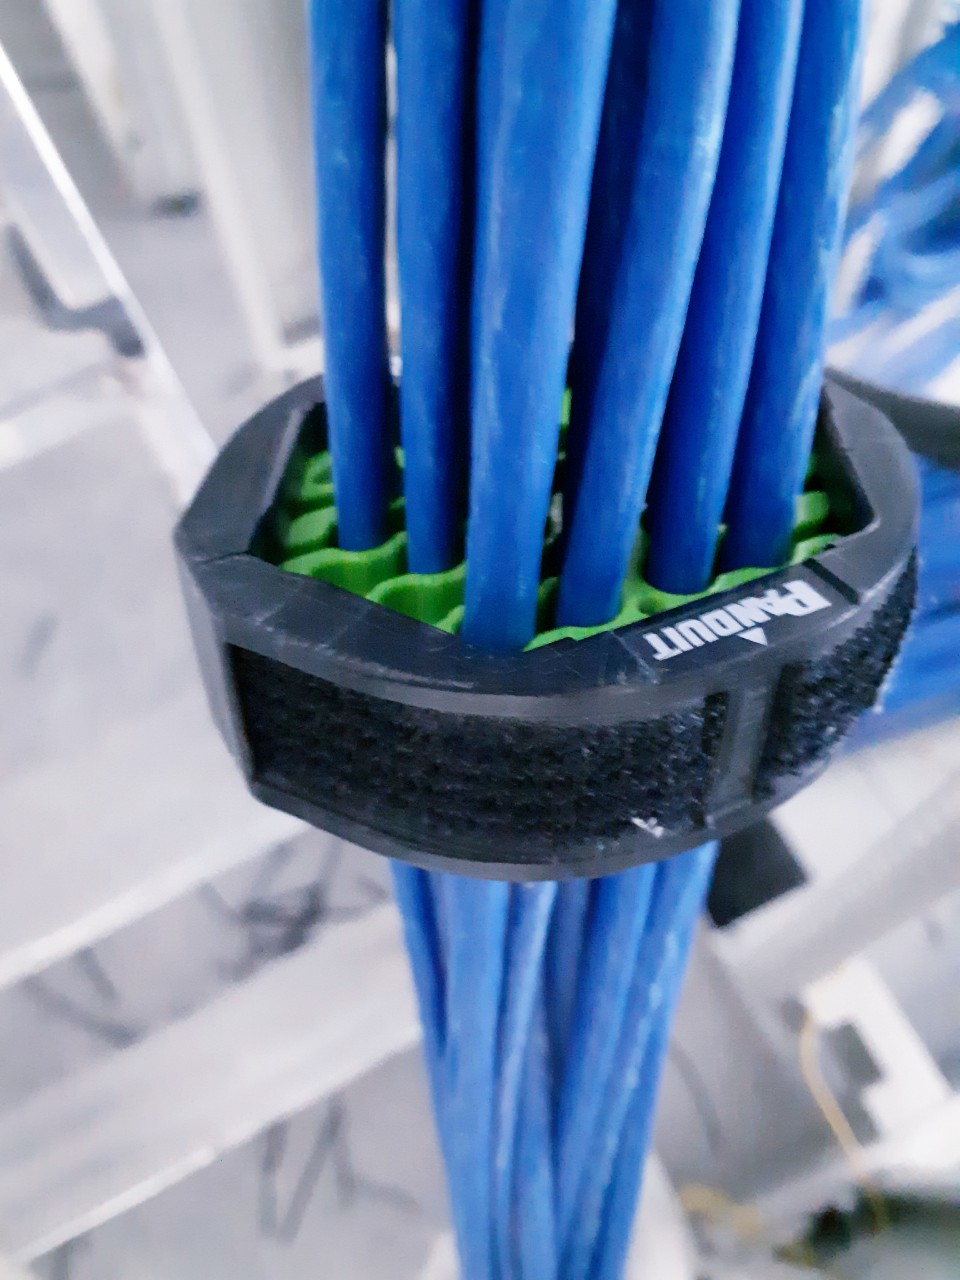
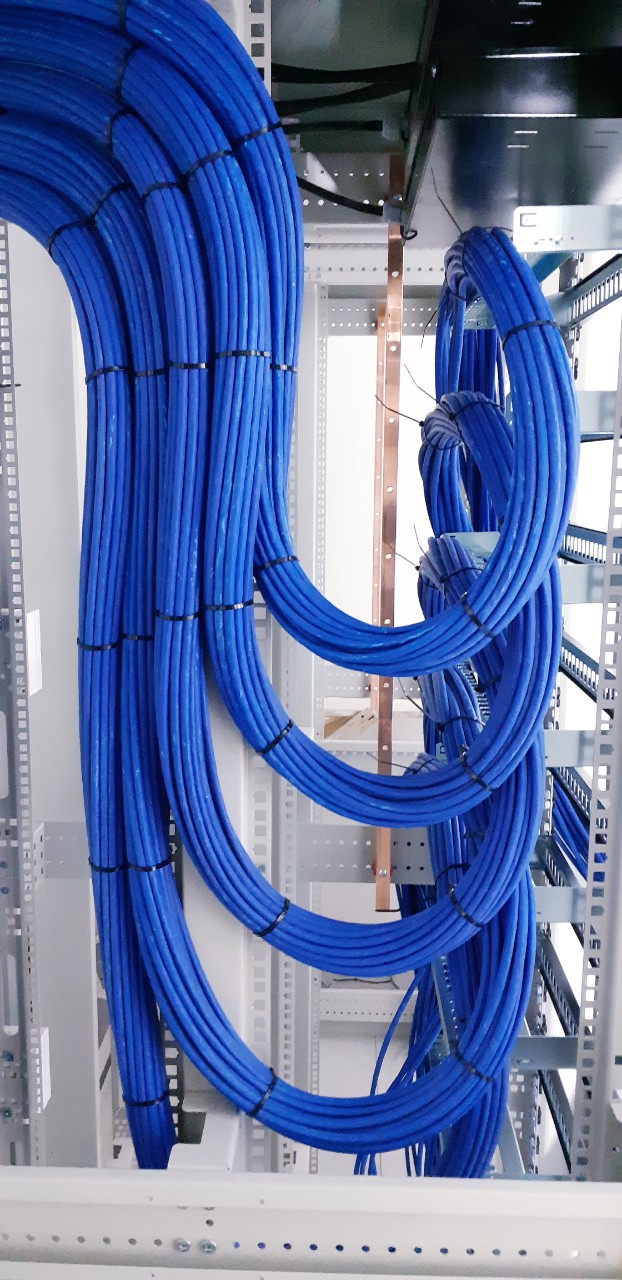
Arriving at the server room, we saw three cable entries, two entered the tray under the ceiling and one came out of the floor under the counter. Initially, they decided to shorten the links to approximately the desired length, with the calculation of a margin meter for deletion and mark. The length of some cables was clearly greater than necessary, which would complicate further work on combing and laying in the tray. Having cut off the extra length, we sorted the cable into patch panels, 24 links into one panel, and each bundle was “combed” using the PANDUIT cable-laying device. Having thought over the order of entering the cable bundles into the cabinet, they secured them in the elbow with cable ties with a sequence of every 25-30 centimeters. It is advisable to understand the location of the panels in advance and lay the cable alternately to avoid weaving. This process took us two days, the work is monotonous, but as a result gives a visual and technical order of cable routes. When entering the rack, it was decided to make a supply of cable in the form of a loop for further convenience in the service case.
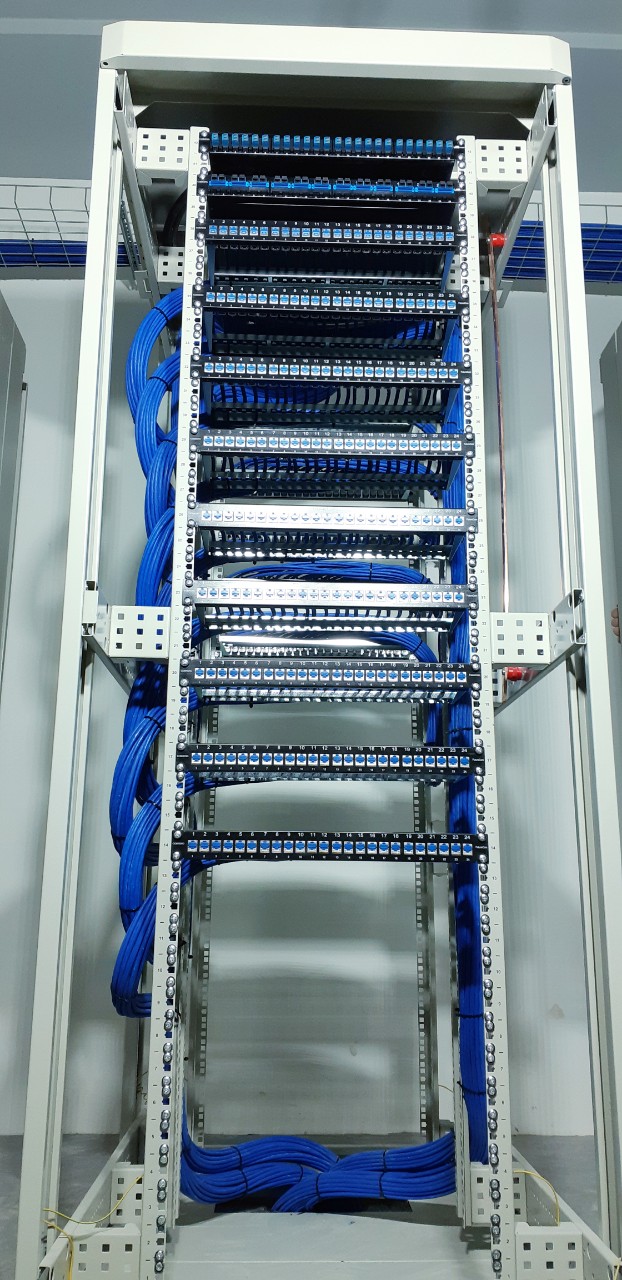
Module exclusion, rack mounting and mounting of patch panels
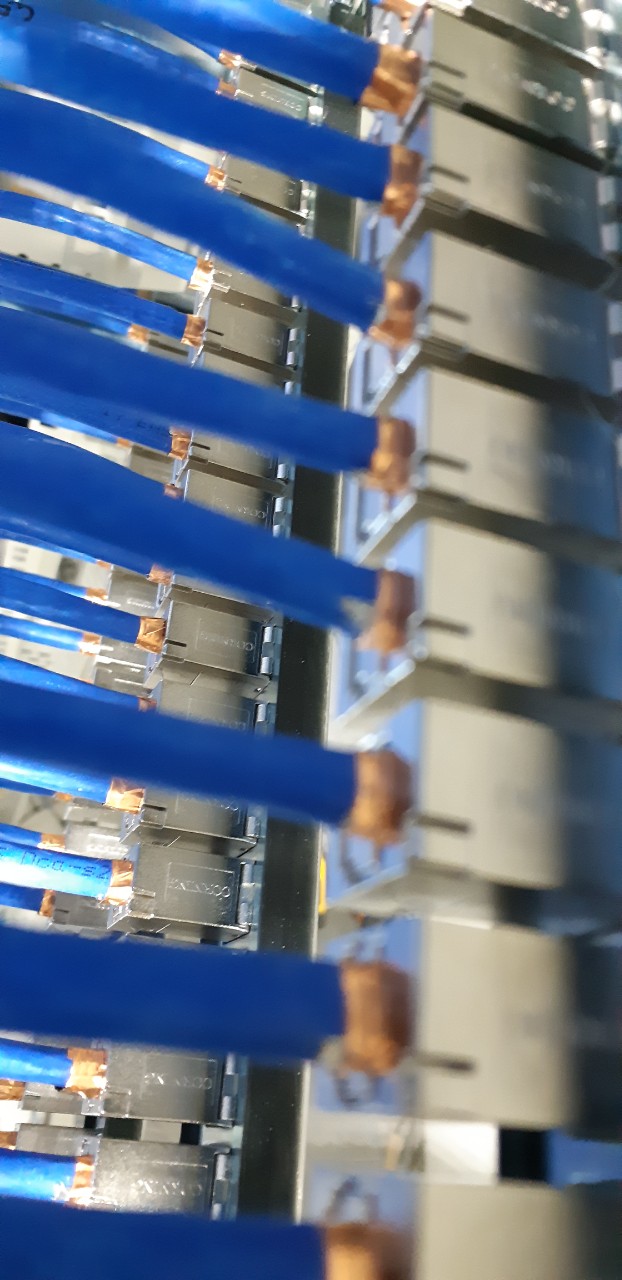
Bringing the cable to the place of installation of the patch panel, we fixed the cable ties to the panel organizer, according to the port number. Then they cut off once again the excess cable length, leaving a margin of a few centimeters for cutting.
During his practice, he tried many different modules of various brands. I will say that the most convenient self-clamping module is Legrand. When they turn the plastic handle, the mating part is clamped and it remains only to cut the ends of the cores, but these components are of category 5e UTP, which in this case does not suit us. The Corning module consists of two components and a self-adhesive copper tape for connecting the screen. The color scheme of twisted pairs is successfully arranged and reduces the risk of confusing pairs when disconnected. During testing, there were less than 10% of errors, which is normal for 642 modules taking into account the screen. They turned it off for about 15 hours, I was on one side of the rack, and my partner was on the other. All this time I had to work standing up, there was no possibility to build a convenient workplace due to the proximity of the rear side of the rack to the switching wall. Partner worked sitting, lucky). In our profession, we often have to work in uncomfortable conditions and postures. It is hot, it is cold, cramped, too high or very low. It came to laying the cable crawling or hanging from a height on a safety belt. For this, I love my work, always new locations, tasks and solutions that often have to be invented on my own. Sitting in the office is definitely not mine, after 8 years of such adventures. So, having filled 14 patch panels, it's time to put everything together and see what five days have been spent on. Having screwed the panels and cable organizers onto their units (having skipped the switch installation site in advance) and seeing the result, you get great pleasure, I can call it euphoria. I think the customer gets less pleasure than me when the work is done in good faith. Sometimes you don’t finish it perfectly and then it’s hard to fall asleep, think about it, so I concluded that it’s better to do well right away. I hope this and your rule in work!
Network Testing with the Fluke Networks DTX-1500
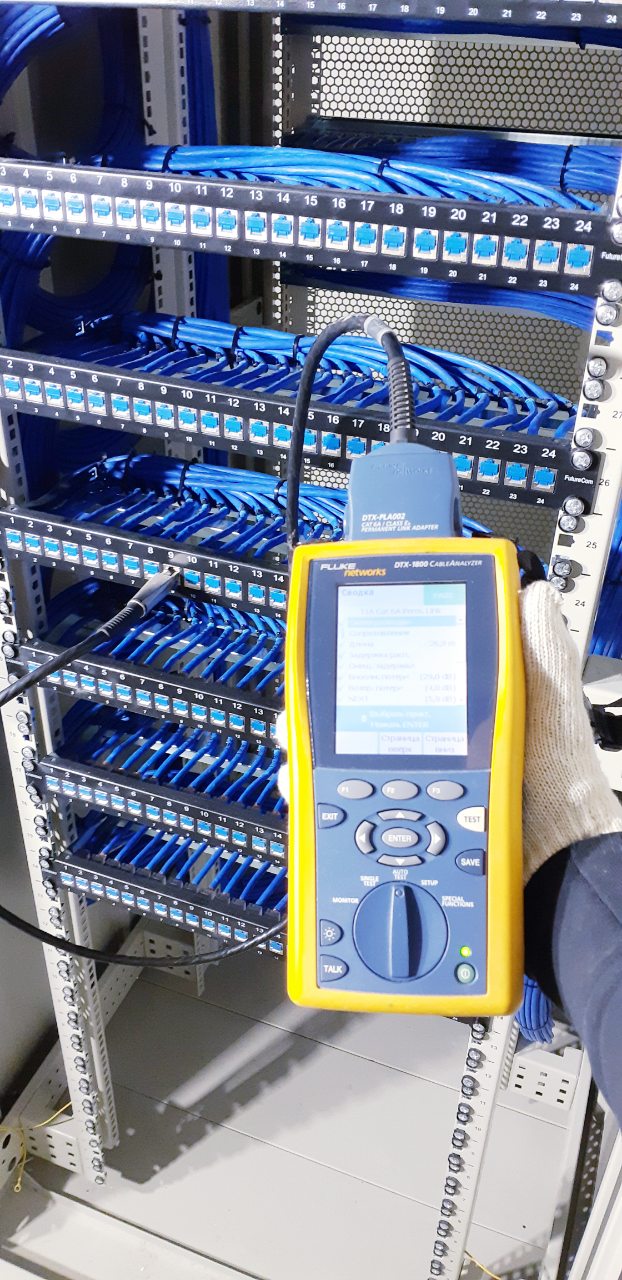
Testing the network for integrity and color pinout can be performed with several devices. There are simple testers with the function of core and color matching, but in order to get network certification and a guarantee for components from the manufacturer (in our case, 20 years from Corning), you need to test the network with a DTX-1500 device in accordance with international ISO or TIA standards. The device must be checked once a year, which we successfully perform, otherwise the results are not valid. Unlike a conventional tester, Fluke shows which pairs are mixed up, what is the link length, signal attenuation and other information. If an error occurs, Fluke indicates at which end of the cable a problem has occurred, which greatly simplifies component service. The device is not cheap, but it is necessary to build a large SCS. After testing, the results are sent for consideration to the manufacturer and, if all is well, he gives a guarantee on his products.
After completing testing, correcting all errors and cleaning, the object for the installer can be considered closed. The five-day trip is over, and we are pleased to go home. Further work of managers and designers to provide documentation.
From the author:
I wish you to enjoy the work, from quality completed projects. I personally am ashamed when the work is done poorly, you constantly think about it, there is no peace. For myself, I realized that it’s easier to do well right away. I hope this is your rule of work.