Hello! My name is Alexander, I have been working with Unreal Engine for more than 5 years, and almost all this time - with network projects.
Since network projects differ in their development and performance requirements, it is often necessary to work with simpler objects, such as UObject classes, but their functionality is initially truncated, which can create a strong framework. In this article, I will talk about how to activate various functions in the UObject base class in Unreal Engine 4.

In fact, I wrote the article more as a reference. Most of the information is extremely difficult to find in the documentation or the community, and here you can quickly open the link and copy the desired code. I decided at the same time to share with you! The article is aimed at those who are already a little familiar with UE4. C ++ code will be considered, although it is not necessary to know it. You can simply follow the instructions if you need something to talk about. Moreover, it is not necessary to copy everything, you can paste the code from the section with the necessary properties and it should work.
A bit about UObject
UObject is the base class for almost everything that is in Unreal Engine 4. The vast majority of objects that are created in your world or just in memory are inherited from it: objects on the stage (AActor), components (UActorComponent), different types for working with data and others.
The class itself, although easier than derivatives, is at the same time quite functional. For example, it contains many useful events, such as changing the values of variables in the editor and basic functions for the network, which are not active by default.
Objects created by this class cannot be on stage and exist exclusively in memory. They cannot be added as components to Actors, although it can be a kind of component if you implement the necessary functionality yourself.
Why do I need UObject if AActor already supports everything I need? In general, there are many examples of use. The easiest is inventory items. On stage, somewhere in the sky, it is not practical to store them, so you can store them in memory without loading the render and without creating unnecessary properties. For those who like technical comparisons, AActor takes a kilobyte (1016 bytes), and an empty UObject is only 56 bytes.
What is the problem of UObject?
There are no problems in general, well, or I just did not come across them. All that annoys UObject is the lack of various features that are available by default in AActor or in components. Here are the problems that I have identified for my practice:
- UObjects are not replicated over the network;
- because of the first point, we cannot trigger RPC events;
- You can not use an extensive set of functions that require a link to the world in Blueprints;
- they do not have standard events like BeginPlay and Tick;
- you cannot add components from UObjects to AActor in Blueprints.
Most of the things can be easily solved. But some will have to tinker.
Creating UObject
Before expanding our class with features, we need to create it. Let's use the editor so that the generator automatically writes everything that is needed to work to the header (.h).
We can create a new class in the Content Browser editor by clicking the New button and selecting New C ++ Class .

Next, we need to choose the class itself. It may not be in the general list, therefore, open it and select UObject.

Name your class and select in which folder it will be stored. When we created the class, you can go into the studio, find it there and start embedding all the necessary functions.
Beginners, note that two files are created: .h and .ccp. In .h you will declare variables and functions, and in .cpp you will define their logic. Find both files in your project. If you did not change the path, then they should be in Project / Source / Project /.
Until we continue, let's write the Blueprintable parameter in the UCLASS () macro above the class declaration. You should get something like this:
.h
UCLASS(Blueprintable) class MYPROPJECT_API UMyObject : public UObject { GENERATED_BODY() }
Thanks to this, you can create Blueprints that will inherit everything that we do with this object.
UObject Replication
By default, UObjects are not replicated over the network. As I described above, a number of restrictions are created when you need to synchronize data or logic between the parties, but do not store garbage in the world.
In Unreal Engine 4, replication takes place precisely due to world objects. It means simply creating an object in memory and replicating it does not work. In any case, you will need an owner who will manage the transfer of object data between the server and clients. For example, if your object is a character’s skill, then the character should become the owner. He will also be a conductor for transmitting information over the network.
Prepare our object for replication. So far in the header we need to set only one function:
.h
UCLASS(Blueprintable) class MYPROPJECT_API UMyObject : public UObject { GENERATED_BODY() public: virtual bool IsSupportedForNetworking () const override { return true; }; }
IsSupportedForNetworking () will determine that the object supports the network and can be replicated.
However, not all so simple. As I wrote above, you need an owner who controls the transfer of the object. For the purity of the experiment, create an AActor that will replicate it. This can be done in exactly the same way as UObject, only the parent class, naturally, AActor.
Beginners, if you need to replicate an object in a character, controller, or elsewhere, create the appropriate base class through the editor, add the necessary logic to it, and inherit from this class in the Blueprints.
Inside we need 3 functions: a constructor, a function to replicate subobjects, a function that determines what is replicated inside this AActor (variables, object references, etc.) and the place where we create our object.
Do not forget to create a variable by which our object will be stored:
.h
class MYPROPJECT_API AMyActor : public AActor { GENERATED_BODY() public: AMyActor(); virtual bool ReplicateSubobjects (class UActorChannel *Channel, class FOutBunch *Bunch, FReplicationFlags *RepFlags) override; void GetLifetimeReplicatedProps (TArray<FLifetimeProperty>& OutLifetimeProps) const override; virtual void BeginPlay (); UPROPERTY(Replicated, BlueprintReadOnly, Category="Object") class UMyObject* MyObject; }
Inside the source file we have to write everything:
.cpp
// #include "MyActor.h" #include "Net/UnrealNetwork.h" #include "Engine/World.h" #include "Engine/ActorChannel.h" #include " UObject/MyObject.h" AMyActor::AMyActor() { // Actor . bReplicates = true // . NetCullDistanceSquared = 99999; // ( ). NetUpdateFrequency = 1.f; } void AMyActor::GetLifetimeReplicatedProps (TArray<FLifetimeProperty>& OutLifetimeProps) { Super::GetLifetimeReplicatedProps(OutLifetimeProps); // . . DOREPLIFETIME(AMyActor, MyObject); } bool AMyActor::ReplicateSubobjects(UActorChannel * Channel, FOutBunch * Bunch, FReplicationFlags * RepFlags) { bool WroteSomething = Super::ReplicateSubobjects(Channel, Bunch, RepFlags); // . if (MyObject ) WroteSomething |= Channel->ReplicateSubobject(MyObject , *Bunch, *RepFlags); return WroteSomething; } AMyActor::BeginPlay() { /* ( ) . this. . , , . */ if(HasAuthority()) { MyObject = NewObject<UMyObject>(this); // if(MyObject) UE_LOG(LogTemp, Log, TEXT("%s created"), *MyObject->GetName()); } }
Now your object will be replicated with this Actor. You can display his name on the tick, but already on the client. Please note that on Begin Play an object is unlikely to arrive before the client, so there is no point in writing a log on it.
Variable Replication in UObject
In most cases, it makes no sense to replicate an object if it does not contain information that will also be synchronized between the server and clients. Since our object is already replicated, passing variables is not difficult. This is done in the same way as inside our Actor:
.h
UCLASS(Blueprintable) class MYPROPJECT_API UMyObject : public UObject { GENERATED_BODY() public: virtual bool IsSupportedForNetworking () const override { return true; }; void GetLifetimeReplicatedProps (TArray<FLifetimeProperty>& OutLifetimeProps) const override; UPROPERTY(Replicated, BlueprintReadWrite, Category="Object") int MyInteger; // }
.cpp
// #include "MyObject.h" #include "Net/UnrealNetwork.h" UMyObject ::UMyObject () { // Object . . bReplicates = true // , . } void UMyObject ::GetLifetimeReplicatedProps (TArray<FLifetimeProperty>& OutLifetimeProps) { Super::GetLifetimeReplicatedProps(OutLifetimeProps); // Integer . DOREPLIFETIME(UMyObject, MyInteger); } }
By adding a variable and flagging it for replication, we can replicate it. Everything is simple and the same as in AActor.
However, there is a small pitfall that is not immediately visible, but can be misleading. This will be especially noticeable if you do not create your UObject for work in C ++, but prepare it for inheritance and work in Blueprints.
The bottom line is that variables created in the heir to the Blueprints will not be replicated. The engine does not automatically mark them and changing a parameter on the server in the BP does not change anything in the value on the client. But there is a cure for this. For the correct replication of BP variables, you need to mark them in advance. Add a couple of lines to GetLifetimeReplicatedProps ():
.cpp
void UMyObject ::GetLifetimeReplicatedProps (TArray<FLifetimeProperty>& OutLifetimeProps) { Super::GetLifetimeReplicatedProps(OutLifetimeProps); // Integer . DOREPLIFETIME(UMyObject, MyInteger); // UBlueprintGeneratedClass* BPClass = Cast<UBlueprintGeneratedClass>(GetClass()); if (BPClass) BPClass->GetLifetimeBlueprintReplicationList(OutLifetimeProps); }
Variables in child Blueprint classes will now replicate as expected.
RPC events in UObject
RPC (Remote Procedure Call) events are special functions that are called on the other side of a project’s network interaction. Using them, you can call the function from the server on other clients and from the client on the server. Very useful and often used when writing network projects.
If you are not familiar with them, I recommend reading one article. It describes usage in C ++ and in Blueprints .
While there are no problems in Actor or in components with their call, in UObject events fire on the same side where they were called, which makes it impossible to make a remote call when it is needed.
Looking at the component code (UActorComponent), we can find several functions that allow you to transfer calls over the network. Since UActorComponent is inherited from UObject, we can simply copy the necessary sections of code and paste into our object so that it works as it should:
.h
// #include "Engine/EngineTypes.h" UCLASS(Blueprintable) class MYPROPJECT_API UMyObject : public UObject { GENERATED_BODY() public: virtual bool CallRemoteFunction (UFunction * Function, void * Parms, struct FOutParmRec * OutParms, FFrame * Stack) override; virtual int32 GetFunctionCallspace (UFunction* Function, void* Parameters, FFrame* Stack) override; // }
.cpp
// #include "Engine/NetDriver.h" // . bool UMyObject::CallRemoteFunction(UFunction * Function, void * Parms, FOutParmRec * OutParms, FFrame * Stack) { if (!GetOuter()) return false; UNetDriver* NetDriver = GetOuter()->GetNetDriver(); if (!NetDriver) return false; NetDriver->ProcessRemoteFunction(GetOuter(), Function, Parms, OutParms, Stack, this); return true; } int32 UMyObject::GetFunctionCallspace(UFunction * Function, void * Parameters, FFrame * Stack) { return (GetOuter() ? GetOuter()->GetFunctionCallspace(Function, Parameters, Stack) : FunctionCallspace::Local); }
With these functions, we will be able to trigger RPC events not only in code, but also in blueprints.
Please note that in order to trigger Client or Server events, you need an owner whose Owner is our player. For example, an object is owned by the user's character or an object in which Owner is the Player Controller of the player.
Global Features in Blueprints
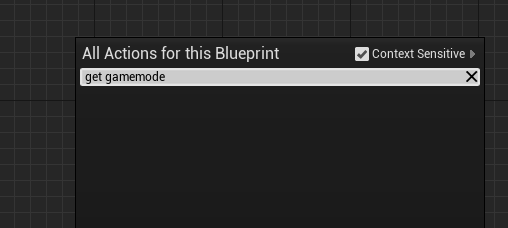
If you have ever created an Object Blooprint, you may have noticed that you cannot call global functions (static, but for the sake of clarity we call it) that are available in other classes, for example, GetGamemode (). It seems that you simply cannot do classes in Object classes, because of which you either have to pass all the links when creating, or somehow pervert, and sometimes the choice completely falls on the Actor class that is created on the stage and supports everything in the world.
But in C ++, of course, there are no such problems. However, the game designer, who plays with the settings and adds different little things, cannot say that you need to open Visual Studio, find the appropriate class and get the game mode in the doSomething () function by changing the points in it. Therefore, it is imperative that the designer can log into Blooprint and with two clicks do what his job is. Save both his time and yours. However, the Blueprints were invented for this.
The bottom line is that when you look up or call functions in the context menu in Bluprint, those same global functions that require a reference to the world try to call a function inside your object that refers to it. And if the editor sees that there is no function, he understands that he cannot use it and does not show it in the list.
However, there is a cure for this. Even two.
Let's first consider an option for more convenient use in the editor. We will need to redefine a function that returns a link to the world and then the editor will understand that in the game itself it can work:
.h
UCLASS(Blueprintable) class MYPROPJECT_API UMyObject : public UObject { GENERATED_BODY() // GetWorld() . virtual UWorld* GetWorld() const override; // }
.cpp
UWorld* UMyObject::GetWorld() const { // , . if (GIsEditor && !GIsPlayInEditorWorld) return nullptr; else if (GetOuter()) return GetOuter()->GetWorld(); else return nullptr; }
Now it is defined and the editor will understand that in general the object is able to get the desired pointer (although it is not valid) and use global functions in the BP.
Please note that the owner (GetOuter ()) must also have access to the world. It could be another UObject with a specific GetWorld (), component, or Actor object in the scene.
There is another way. It is enough to add a label to the UCLASS () macro when declaring the class that the WorldContextObject parameter will be added to the static functions in the BP, into which any object that serves as a conductor to the "world" and the global functions of the engine is fed. This option is suitable for those who in the project can have several worlds at the same time (for example, the game world and the world for the spectator):
.h
// WorldContext UCLASS(Blueprintable, meta=(ShowWorldContextPin)) class MYPROPJECT_API UMyObject : public UObject { GENERATED_BODY() // }
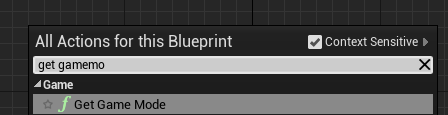
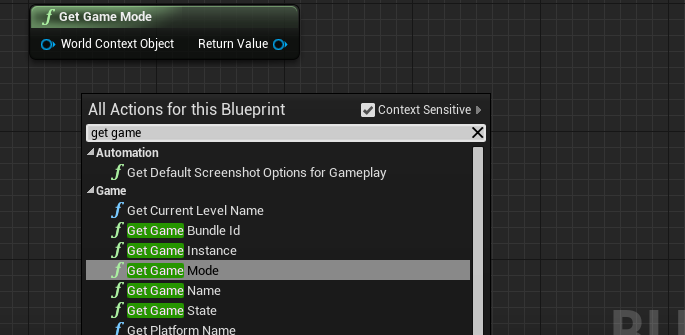
If you enter GetGamemode into the search in the BP, it will appear in the list, like other similar functions, and the parameter will be WorldContextObject, into which you need to pass a link to Actor.
By the way, you can just file the owner of our property there. I recommend creating a function on Actor, this will always be useful for the object:
.h
UCLASS(Blueprintable, meta=(ShowWorldContextPin)) class MYPROPJECT_API UMyObject : public UObject { GENERATED_BODY() // , . public: UFUNCTION(BlueprintPure) AActor* GetOwner() const {return Cast<AActor>(GetOuter());}; // }
Now you can simply use global functions in combination with our Pure function to obtain an owner.
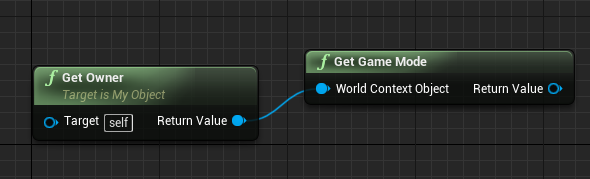
If in the second embodiment you also declare GetWorld () as in the first variant, you can submit a reference to yourself (Self or This) in the WorldContextObject parameter.

BeginPlay and Tick events
Another problem that Blueprint developers may encounter is that there are no BeginPlay and Tick events in the Object class. Of course, you can create them yourself and call from another class. But agree that it is much more convenient when it all works out of the box.
Let’s get started with how to make Begin Play. We can create a function available for rewriting in the BP and call it in the constructor of the class, but there are a number of problems, since at the time of the constructor your object has not yet been fully initialized.
In all classes, there is the PostInitProperties () function, which is called after the initialization of most parameters and registration of the object in various internal systems, for example, for the garbage collector. In it, you can just call our event, which will be used in the Blueprints:
.h
UCLASS(Blueprintable) class MYPROPJECT_API UMyObject : public UObject { GENERATED_BODY() // . virtual void PostInitProperties() override; // , . UFUNCTION(BlueprintImplementableEvent) void BeginPlay(); // }
.cpp
void UMyObject::PostInitProperties() { Super::PostInitProperties(); // , . BeginPlay if(GetOuter() && GetOuter()->GetWorld()) BeginPlay(); }
Instead of if (GetOuter () && GetOuter () -> GetWorld ()) you can simply put if (GetWorld ()) if you have already redefined it.
Be careful! By default, PostInitProperties () is also called in the editor.
Now we can go into our BP object and call the BeginPlay event. It will be called when the object is created.
Let's move on to Event Tick. There is no simple function for us. Tick objects in the engine calls a special manager, to which you need to somehow pick up. However, there is a very convenient trick here - additional inheritance from FTickableGameObject. This will allow you to automatically do everything you need, and then it will be enough just to pick up the necessary functions:
.h
// #include "Tickable.h" // c FTickableGameObject UCLASS(Blueprintable) class MYPROPJECT_API UMyObject : public UObject, public FTickableGameObject { GENERATED_BODY() public: // virtual void Tick(float DeltaTime) override; virtual bool IsTickable() const override; virtual TStatId GetStatId() const override; protected: // UFUNCTION(BlueprintImplementableEvent) void EventTick(float DeltaTime); // }
.cpp
void UMyObject::Tick(float DeltaTime) { // . EventTick(DeltaTime); // . } // bool UMyObject::IsTickable() const { return true; } TStatId UMyObject::GetStatId() const { return TStatId(); }
If you inherit from your object and create a BP class, then an EventTick event will be available that will cause logic for each frame.
Adding Components from UObjects
In UObject Blueprints, you cannot spawn components for Actors. The same problem is inherent to ActorComponent's Blueprints. The logic of Epic Games is not very clear, since in C ++ this can be done. Moreover, you can add a component from Actor to another Actor object by simply specifying a link. But this cannot be done.
Unfortunately, I could not figure out this item. If anyone has instructions on how to do this, I will be glad to post it here.
The only option I can offer at the moment is to make a wrapper in the UObject class, providing access to a simple addition of components. Thus, it will be possible to add components to the Actor, but you will not have dynamically created input parameters of the spawn. Often, this can be neglected.
Setting up an instance through the editor
In UE4, there is another convenient “feature” for working with objects - this is the ability to create an instance during initialization and change its parameters through the editor, thereby setting its properties, without creating a child class just for the sake of settings. Especially useful for game designers.
Suppose you have a modifier manager for a character and the modifiers themselves are represented by classes that describe the superimposed effects. The game designer created a pair of modifiers and indicates in the manager which ones are used.
In a normal situation, it would look like this:
.h
class MYPROPJECT_API AMyActor : public AActor { GENERATED_BODY() public: UPROPERTY(EditAnywhere) TSubclassOf<class UMyObject> MyObjectClass; }
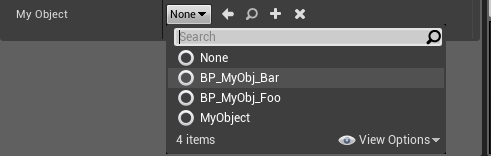
However, there is a problem in that it cannot configure modifiers and you have to create an additional class for other values. Agree, it’s not very convenient to have dozens of classes in Content Browser that differ only in values. Fixing this is easy. You can add a couple of fields inside USTRUCT (), and also indicate in the container object that our objects will be instances, and not just references to non-existent objects or classes:
.h
UCLASS(Blueprintable, DefaultToInstanced, EditInlineNew) // - class MYPROPJECT_API UMyObject : public UObject { GENERATED_BODY() UPROPERTY(EditAnywhere) // uint8 MyValue; // , // }
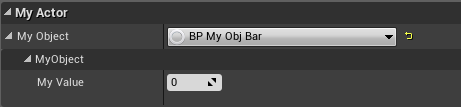
This alone is not enough, now it is necessary to indicate that the same variable with the class will be an instance. This is already done where you store the object, for example, in the character modifier manager:
.h
class MYPROPJECT_API AMyActor : public AActor { GENERATED_BODY() public: UPROPERTY(EditAnywhere, Instanced) // Instanced class UMyObject* MyObject; // }
Please note that we use the reference to the object, and not to the class, since the instance will be created immediately upon initialization. Now we can go into the editor window to select a class and adjust the values inside the instance. It is much more convenient and more flexible.
Info
There is another interesting class in Unreal Engine. This is AInfo. A class inherited from AActor that does not have a visual representation in the world. Info uses such classes as: game mode, GameState, PlayerState and others. That is, classes that support different chips from AActor, for example, replication, but are not placed on the scene.
If you need to create an additional, global manager that should support the network and all the resulting Actor classes, then you can use it. You do not have to manipulate the UObject class as described above to force it, for example, to replicate data.
However, keep in mind that although the object has no coordinates, no visual components and it does not render on the screen, it is still a descendant of the Actor class, which means it is as heavy as the parent. It is reasonable to use in small quantities and for convenience.
Conclusion
UObject is needed very often, and I advise you to use it whenever the Actor is not really needed. It is a pity that it is a little limited, but it is also a plus. Sometimes you have to tinker with when you need to use a custom template, but most importantly, all the main restrictions can be removed.
, , UObject, , , .
, , Unreal Engine 4. - , . , - , UObject.