In the last part, we examined the issue of integrating the three-dimensional part using the standard ordering system included in the Verge3D plugin for WordPress. However, this option is not suitable for everyone, since the capabilities of this plugin are significantly limited. With its help it is impossible to access popular payment systems, such as PayPal or 2Checkout, it is impossible to operate with discounts, coupons, stocks and other things that everyone is used to seeing in popular e-commerce systems.

In this article, we will show you how to get around these limitations and integrate 3D visualization directly into the WooCommerce online store. By the way, today it is the most popular e-commerce system - according to statistics, it is used in 28% of all online stores.
Result
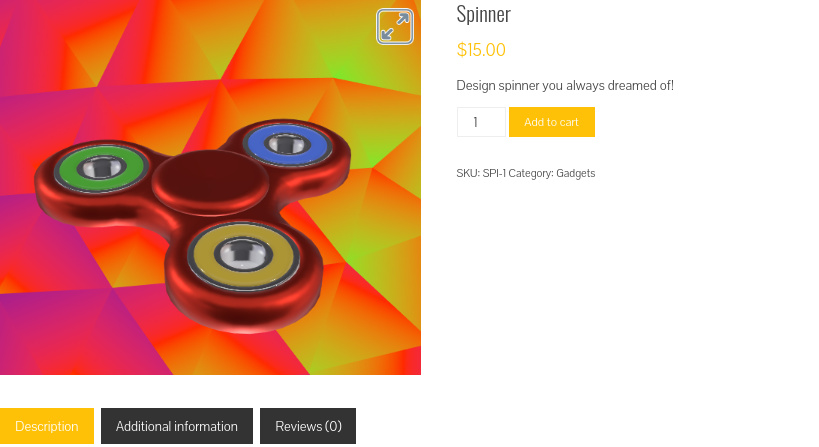
Here is how our store will look like - click on the picture to try it live.
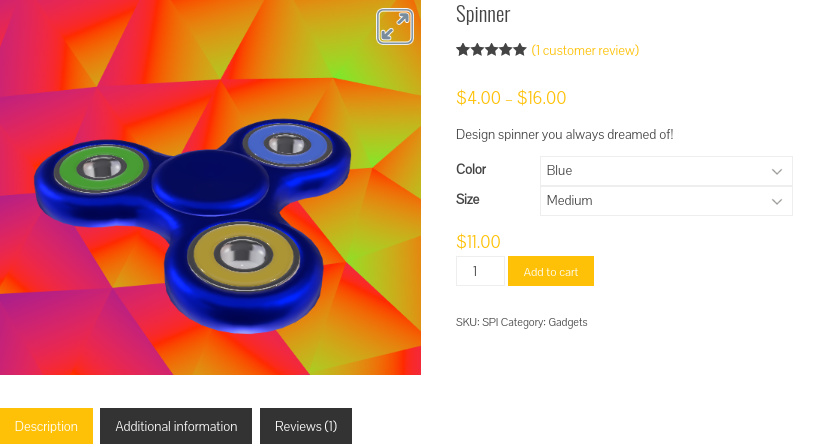
In this prototype, we will sell the once-popular spinner toys. It is assumed that the potential buyer will be able to choose the color and size from the proposed options. As a bonus, a visitor to our store will be able to unwind a three-dimensional model in real time, and moreover, hear the characteristic sound of the bearing. Of course, the model can be viewed from all sides and zoom in / out.
Plan
The workflow is not particularly difficult, but just in case, we outline a short plan of what we are going to do:
- Install WooCommerce and the Verge3D plugin.
- Creating an interactive application and uploading it to the site.
- Create multiple product options in WooCommerce.
- Determining the logic of the application in the visual editor.
Now consider these steps in more detail.
Installation
WooCommerce and Verge3D plugins are available in the regular WordPress directory. Just find them, install and activate.

When installing the WooCommerce system, the wizard will offer to enter a number of parameters for your future store, while Verge3D does not require additional settings.
3D Graphics
For the purposes of this article, we use a ready-made spinner model included in Verge3D examples. By the way, such a model can be easily created by a person who has the basic skills of working in 3D modeling programs 3ds Max or Blender, or downloaded from a free catalog or model store.
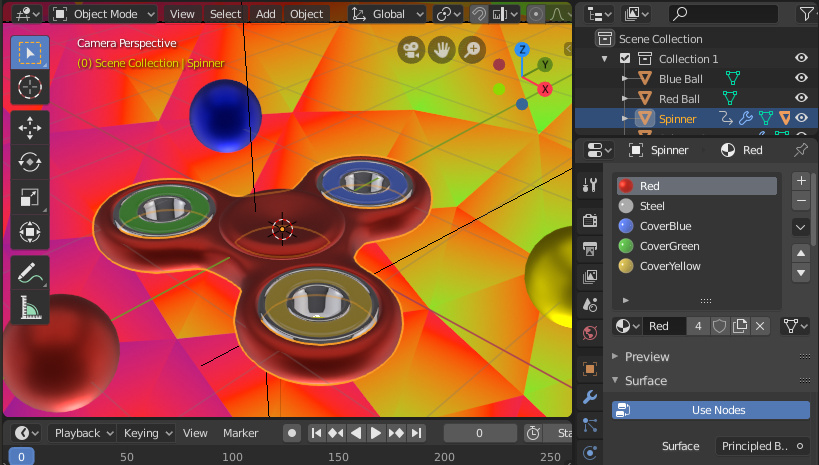
In addition to the model, we will need to determine the logic of the application in the visual Puzzles editor. In particular, we will need to change color and size, as well as turn on / off animation by click. We will talk more about this below.

Upload a 3D application to the site
To upload the application to your website, use the Verge3D-Applications tool located on the WordPress toolbar. Click the Add New button:

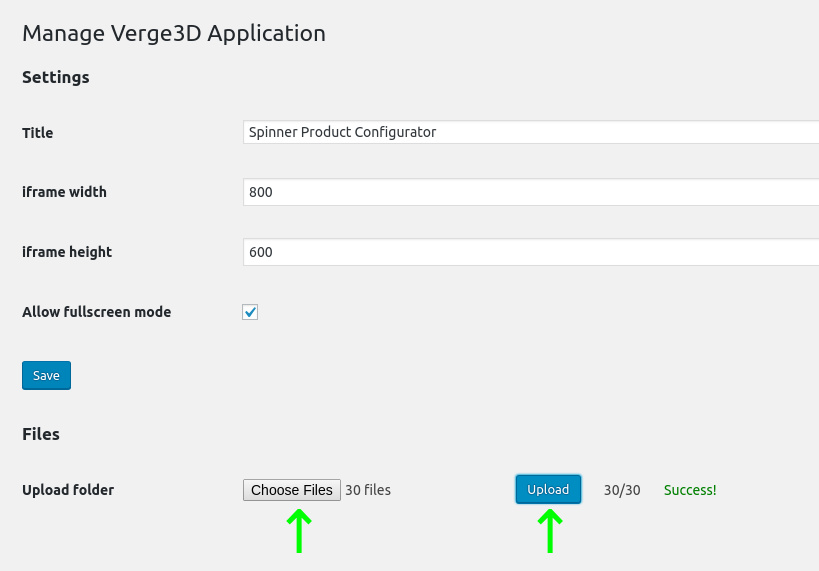
Enter a name for your 3D application and click Next. On the settings page, select the folder with the application files and click "Upload":
After the download is complete, go back to the application window and check how everything works by clicking on the spinner.html link.
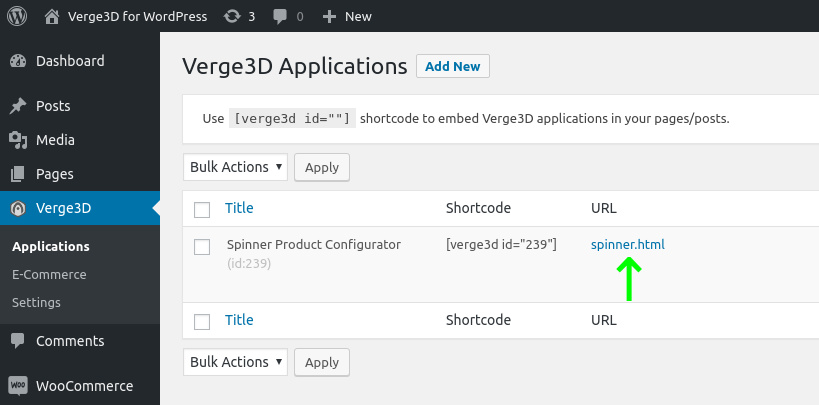
Our 3D spinner configurator will open in a new window and will occupy the entire page. This is normal, since we have not yet dealt with the main part, namely integration with WooCommerce.
Adding 3D to the product page
Our next step is to replace boring static images of goods in the WooCommerce store with a full-fledged three-dimensional model. By the way, if you have not created the product itself, it's time to do it.
3D connection is made in edit mode:

In the “Product data” section, go to the Verge3D tab and select the application we created earlier:

Save the settings and go to the product page. Now it should show an interactive application instead of a picture:
Adding Product Options
Showing customers 3D product types is already a big achievement. But since we undertook to do not just 3D visualization, but a full-fledged configurator, we will need to make our three-dimensional model customizable.
The ability to create 3D product configurators is provided by the standard WooCommerce function called variable product. In our store, the buyer will be able to choose the product of one of three different sizes and colors.
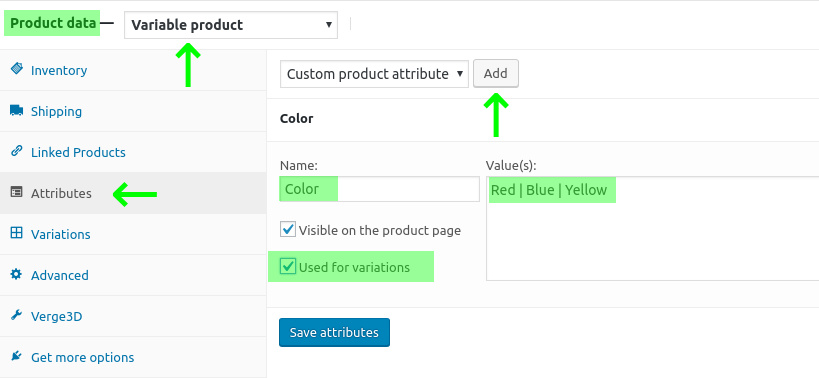
So, let's start with the flowers! In the “Product data” section, select “Variable product” and then go to the “Attributes” tab and add a new attribute named “Color”. Specify 3 values — red, blue, and yellow — and check “Used for variations”.
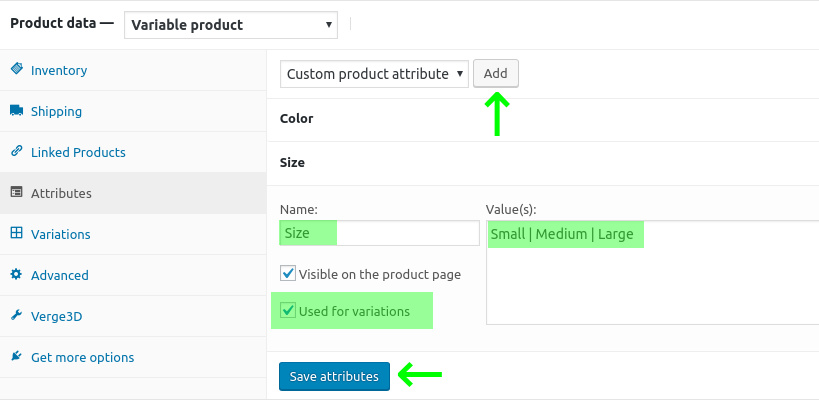
Add another “Size” attribute for the size and save the settings:
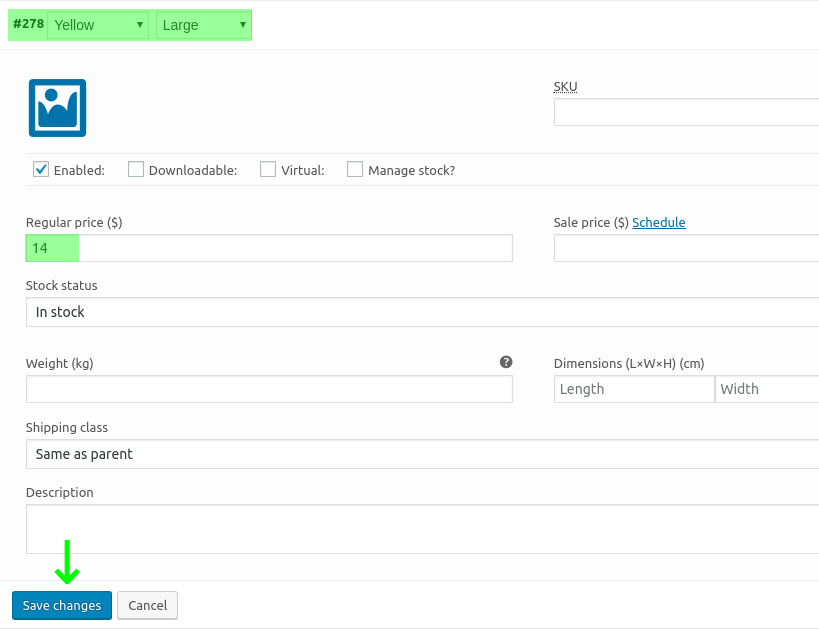
Now create all possible product options in WooCommerce:

In total, 9 different products will be created: blue small, red small, yellow large and so on. All you have to do is put down the prices for each of the options:
Save the settings and check the product in the store!
Creating 3D Configurator
At this point, you have the WooCommerce variable product. However, the three-dimensional part remains always the same, regardless of which options customers choose. Let's fix it!
At the previous stage, you may have noticed that the application has 3 colored balls that serve to change the colors of the spinner. When you press one of these “buttons”, the material of the model changes. This is done using simple Puzzles blocks, a visual logic editor included with Verge3D:
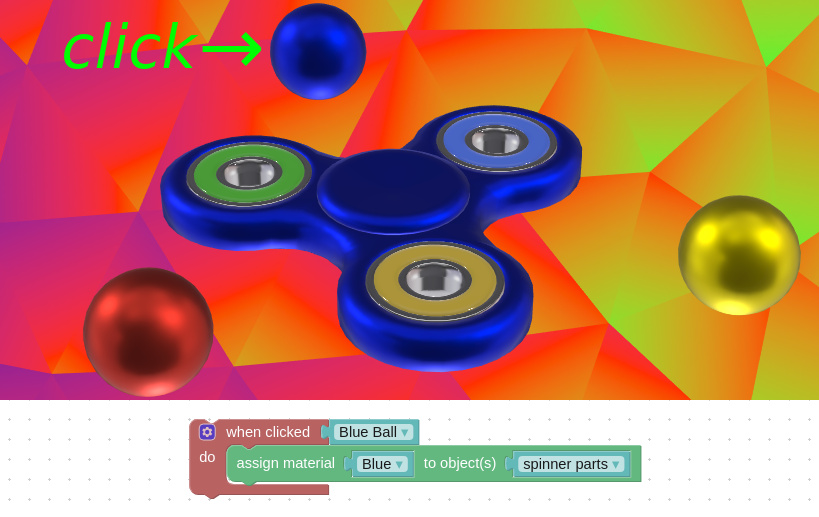
Now, instead of these three areas, we will use the selection menu, which automatically added WooCommerce to the product page. In this case, the logical blocks will look a little different:

The picture shows that when the client selects a color, the material with the same name will be assigned to the model - red, blue or yellow.
And here is the logic for resizing the model:

That's all! Having created the logic, you simply upload the application to the site, as we did above, and reload the product page. Now we have a full-fledged configurator with animation, a choice of sizes and colors.
The trilogy of lessons on creating a three-dimensional configurator without programming and layout is completed. If something remains unclear, or there will be other questions, let's discuss in the comments. Also write what you would like to see in subsequent tutorials on using 3D on the web.