
1. A little background
2. Specifications Phicomm K3C
3. OpenWRT firmware
4. Russify the interface
5. Add dark themes
The Chinese company Phicomm in the lineup of Wi-Fi routers has a device called the K3C AC1900 Smart WLAN Router.
The device used a bunch of Intel AnyWAN SoC GRX350 and Intel Home Wi-Fi Chipset WAV500 (by the way, the same hardware was used in ASUS Blue Cave: the same Intel PXB4583EL processor and Wi-Fi Intel chips PSB83514M / PSB83524M instead of PSB83513M / PSB83523M ).
There are several versions of this router:
- B1 , B1G , B2 - for China;
- A1 , C1 , S1 ( VIE1 ) - for other countries ( I got - C1 with firmware v.34.1.7.30 ).
What interests me about this IEEE 802.11ac standard router?
So that there are: 4 gigabit ports ( 1 WAN and 3 LAN ), 5 GHz band, support for MU-MIMO 3x3: 3 and USB 3.0. Well and not only.
1. A little background
Optional part
My previous router was TP-Link TL-WR941ND with hardware version 3.6 ( 4MB Flash and 32MB RAM ). The standard firmware periodically hung for no reason regardless of version ( updated a couple of times, the last update for my hardware was released at the end of 2012 ).
Disappointed with the native firmware, I requested Gargoyle ( emnip, version 1.8; the firmware is based on OpenWRT, if anyone is not aware ) and finally the router began to work as it should.
WR941 at the time of purchase had good hardware for my needs ( and this was about 10 years ago ), but now I already lacked its performance. The ports are all 100 Mbit / s, the maximum Wi-Fi speed is 300 Mbit / s. Maybe for the Internet this is still normal, but transferring files on the local network between devices is somewhat slow. Also, the built-in Flash memory is not enough even for the Russification of the firmware ( even changing files through WinSCP, I tried somehow ), not to install more capacious plug-ins (of course you can expand the memory, install the firmware for an increased memory size, but I’m not direct enough hands for soldering memory chips ).
But, probably, even all of the above would not soon force me to change the router. Just I bought myself at the very beginning of September this year Xiaomi Redmi Note 5 to replace the prematurely lost Redmi Note 4 ( after 2 years of exemplary service ) and it turned out that RN5 and WR941 are mutually incompatible - RN5 did not want to reconnect after disconnecting from the wireless network created using WR941 (and this is not an isolated problem, as I discovered a little later reading the topic on w3bsit3-dns.com ).
In general, there is a need to change the router. Why exactly a subject? I was interested in its filling ( I read about it on SmallNetBuilder just a year ago ) and its capabilities ( although it is unlikely that even half of them will be used in the near future ). But not even that turned out to be decisive in choosing exactly the Phicomm K3C ( I also looked closely at Xiaomi Mi WiFi Router 3G ), and the affordable price ( bought for $ 32 at the rate ) with good filling and the ability to change the stock firmware to full OpenWRT. The router comes with a manufacturer-cut version of OpenWRT ( I read somewhere that a spy was added in it, but did not find any details ).
Modification of OpenWRT to work on Phicomm K3C ( officially OpenWRT does not support the Intel WAV500 chipset ) was made by a Chinese with the nickname Paldier ( his GitHub and page with firmware files for this router, the theme of the router on the OpenWRT forum ). He also made the Asus Merlin firmware port for K3C ( since installing it requires replacing RAM from 256MB to 512MB, we won’t consider it ).
↑ Top
2. Specifications Phicomm K3C
I hope there is no need to translate them into the great and mighty?
| Hardware | |
|---|---|
| WiFi Standards | IEEE802.11 ac / n / a 5 GHz and IEEE 802.11b / g / n 2.4 GHz |
| CPU | GRX350 Dual Core main processor + 2 wireless co-processors |
| Ports | 1x 10/100/1000 Mbps WAN, 3x 10/100/1000 Mbps LAN, 1x USB 3.0, Flash 128 MB, RAM 256 MB |
| Buttons | Power reset |
| External power supply | 12V DC / 3A |
| Antennas | 6 high gain antennas inside |
| Dimensions | 212 mm x 74 mm x 230.5 mm |
| Radio parameter | |
| Transfer rate | max 1.900 Mbps |
| Frequency | 2.4 GHz = max. 600 Mbps und 5 GHz = max. 1.300 Mbps |
| Basic functions | Enable / disable wireless, Hide SSID, AP Isolation |
| Advanced functions | MU-MIMO, Smart ConnectWiFi Security: WPA / WPA2, WPA-PSK / WPA2-PSK |
| Software | |
| WAN type | Dynamic IP / Static IP / PPPoE / PPTP / L2TP |
| Port forwarding | Virtual Server, DMZ, UPnPDHCP: DHCP Server, Client List |
| Security | Firewall, Remote Management |
| Utility functions | Guest Network, DDNS, Client Settings, VPN Pass-Through, Bandwidth Control |
| USB functions | Storage Sharing, Media Server, FTP Server |
| Other features | |
| Package content | K3C router, power supply unit, ethernet cable, QIG including DoC and GPL licenses |
| Operating temperature | 0 - 40 ° C |
| Storage temperature | -40 - 70 ° C |
| Operating humidity | 10 - 90% non-condensing |
| Storage humidity | 5 - 90% non condensing |
Taken from the official German site ( other options are a Chinese site with translations into several languages and brakes ).
You can also read a little more about it on WikiDevi (the site, for reasons unknown to me, did not renew the expired certificate on October 20 and the page can be viewed in the Google cache ).
If you are interested in a detailed review, tests and photos of the giblets of this device, then all this can be found on the SmallNetBuilder website and the KoolShare forum ( there are a lot of photos and everything is in Chinese ).
↑ Top
3. OpenWRT firmware
- We connect the router to the computer / laptop, via the LAN port ( any of the three ) and the Internet through the WAN ( because you will need to download the firmware, a little more than 30MB ).
- We learn the address of the router on the local network ( we will need it later, usually it is 192.168.2.1 ).
- We launch the previously downloaded RoutAckPro utility ( 600kB of weight and a bunch of Chinese text inside; I don’t know where to upload it, but it can be downloaded from the w3bsit3-dns.com forum after registering with it ). If the address differs from the above, then enter it in the IP form. Click the Telnet button in the window. If everything is done correctly, the text 打开 Telnet 完成 appears in the window. Now the utility can be closed, i.e. we prepared the router to change the firmware via Telnet.
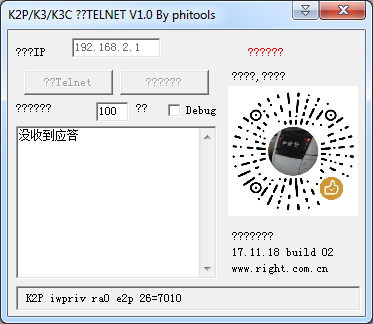
RoutAckPro Window
- Via the PuTTY program ( Smartty or another similar one ), we connect via Telnet to the router ( IP is the same as for RoutAckPro, port is 23 ).
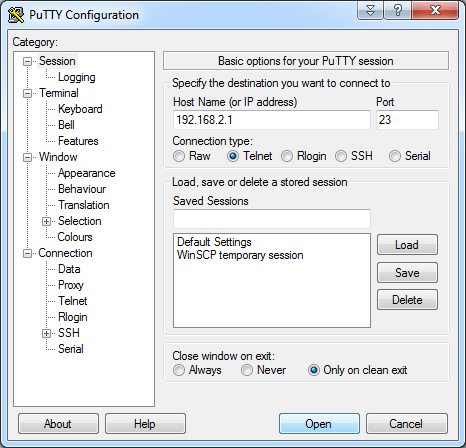
PuTTY window with connection settings.
- In the PuTTY console, enter to go to the tmp directory:
cd /tmp
- We determine what kind of firmware we need to download (the iron version is printed on a sticker glued to the bottom of the router, in my case it is “ H / W C1 ”, that is, I need firmware for C1 ).
- On the Paldier website , we select the version of the fullimage.img file we need . For me it
http://k3c.paldier.com/openwrt/C1/fullimage.img
Therefore, we write the following in the PuTTY console:
wget http://k3c.paldier.com/openwrt/C1/fullimage.img
- Then enter the command
/usr/sbin/upgrade /tmp/fullimage.img fullimage 0 1
and wait for messages about successful firmware.
- After that we introduce
rm -rf /overlay/* sync && sleep 10 && reboot
and wait until the router restarts (a couple of minutes ). After that, you can connect to its web interface ( address 192.168.2.1 , password admin ).
- After the first boot, it is advised to do a reset (with a hidden button on the router, a little to the right of the power jack, or via the web interface ).
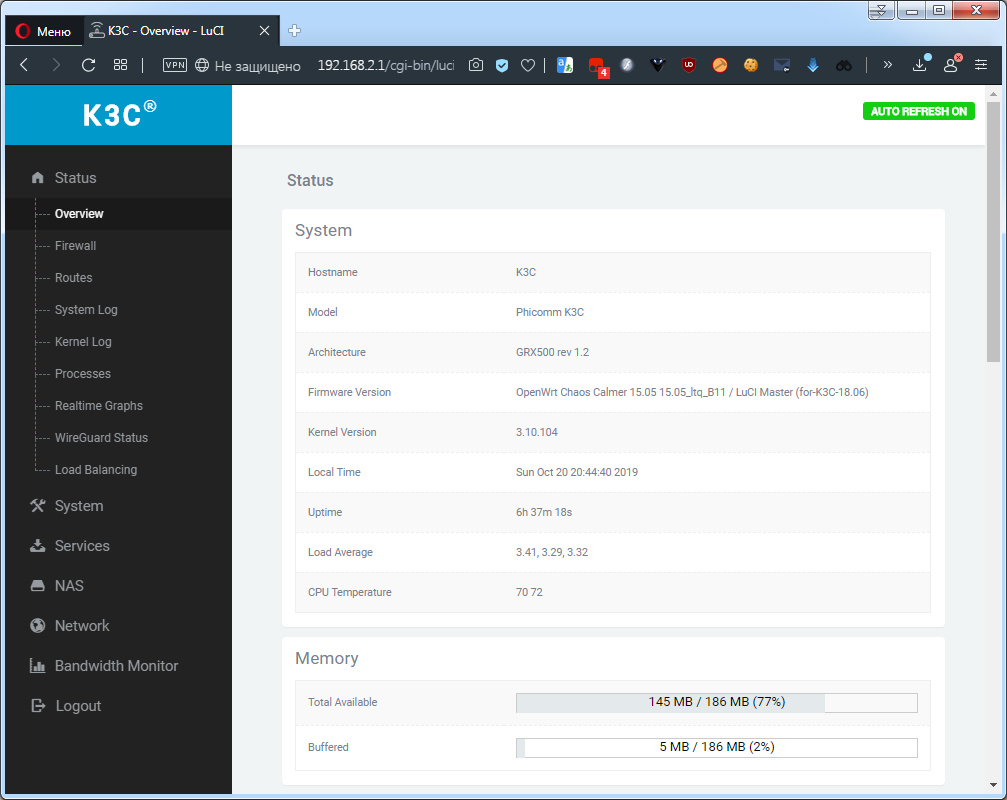
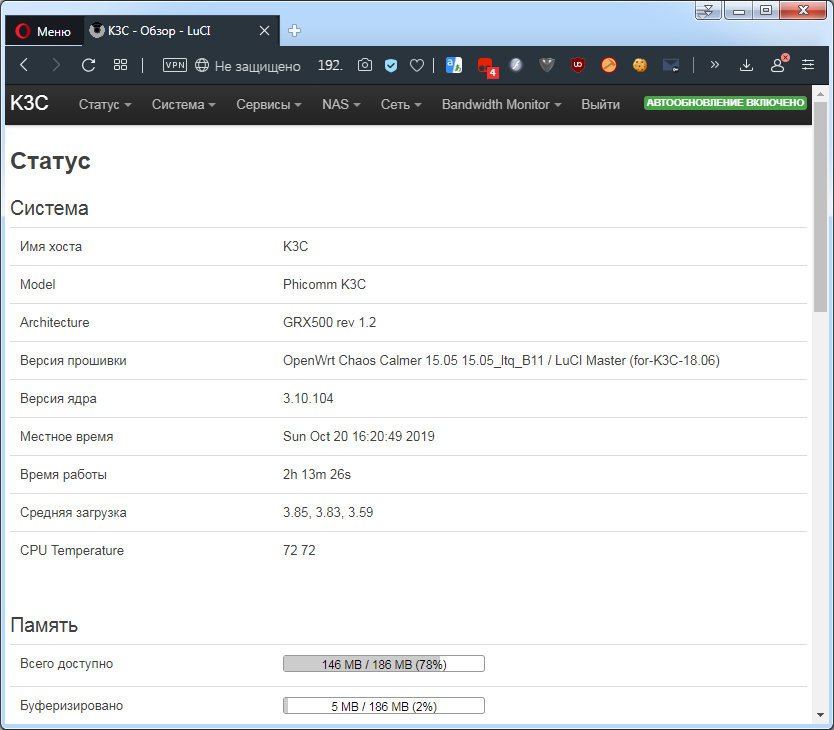
Now the router will have this interface
The flashing instruction was made by the user of the w3bsit3-dns.com forum WayOutt , for which many thanks to him.
If you do not want to immediately connect the K3C to the Internet and you have a USB flash drive or a USB card reader with a flash card.
We skip step 5, and in step 7, instead of downloading the firmware file to the router with the wget command, download it to the PC ( if you still need it later ) and copy the file to the USB flash drive and connect it to the router’s USB port.
In paragraph 8, we enter the following command:
The remaining items remain unchanged.
* After the OpenWRT firmware, the path to mount the flash drive will change. It has become like this for me:
In paragraph 8, we enter the following command:
/usr/sbin/upgrade /mnt/usb/.run/mountd/sda1/fullimage.img fullimage 0 1
The remaining items remain unchanged.
* After the OpenWRT firmware, the path to mount the flash drive will change. It has become like this for me:
/usr/sbin/upgrade /tmp/usb/.run/mountd/sda1/fullimage.img fullimage 0 1
↑ Top
4. Russify the interface
But the firmware from Paldier, unfortunately, does not contain a Russian translation, but it does have a list of sites that should be blocked in China ( therefore, with default settings we can’t access the same github, but this is solved by removing one checkmark in the V2Ray settings ).
Therefore, we will establish Russian localization for LuCI.
This is done quite simply:
- Go to System ==> Software ==> Actions tab .
- In the Download and install package field, enter
and click the Ok button on the right.http://downloads.openwrt.org/releases/18.06.0/packages/mips_24kc/luci/luci-i18n-base-ru_git-19.297.26179-fbefeed-1_all.ipk
List of links to packages for interface Russification and a quick way to install themhttp://downloads.openwrt.org/releases/18.06.0/packages/mips_24kc/luci/luci-i18n-advanced-reboot-ru_git-19.297.26179-fbefeed-42_all.ipk http://downloads.openwrt.org/releases/18.06.0/packages/mips_24kc/luci/luci-i18n-aria2-ru_1.0.1-2_all.ipk http://downloads.openwrt.org/releases/18.06.0/packages/mips_24kc/luci/luci-i18n-base-ru_git-19.297.26179-fbefeed-1_all.ipk http://downloads.openwrt.org/releases/18.06.0/packages/mips_24kc/luci/luci-i18n-ddns-ru_2.4.9-3_all.ipk http://downloads.openwrt.org/releases/18.06.0/packages/mips_24kc/luci/luci-i18n-firewall-ru_git-19.297.26179-fbefeed-1_all.ipk http://downloads.openwrt.org/releases/18.06.0/packages/mips_24kc/luci/luci-i18n-hd-idle-ru_git-19.297.26179-fbefeed-1_all.ipk http://downloads.openwrt.org/releases/18.06.0/packages/mips_24kc/luci/luci-i18n-minidlna-ru_git-19.297.26179-fbefeed-1_all.ipk http://downloads.openwrt.org/releases/18.06.0/packages/mips_24kc/luci/luci-i18n-mwan3-ru_git-19.297.26179-fbefeed-1_all.ipk http://downloads.openwrt.org/releases/18.06.0/packages/mips_24kc/luci/luci-i18n-nlbwmon-ru_git-19.297.26179-fbefeed-1_all.ipk http://downloads.openwrt.org/releases/18.06.0/packages/mips_24kc/luci/luci-i18n-samba-ru_git-19.297.26179-fbefeed-1_all.ipk http://downloads.openwrt.org/releases/18.06.0/packages/mips_24kc/luci/luci-i18n-transmission-ru_git-19.297.26179-fbefeed-1_all.ipk http://downloads.openwrt.org/releases/18.06.0/packages/mips_24kc/luci/luci-i18n-upnp-ru_git-19.297.26179-fbefeed-1_all.ipk http://downloads.openwrt.org/releases/18.06.0/packages/mips_24kc/luci/luci-i18n-wireguard-ru_git-19.297.26179-fbefeed-1_all.ipk
* If you notice, we have OpenWRT firmware on May 15, and OpenWRT firmware packages on June 18, 08.0. But this is normal, because LuCI in firmware used from OpenWRT 18.06
Well, or download these packages, save them to a USB flash drive, and then plug it into the router’s USB port and install them via PuTTY with the command
opkg install /tmp/usb/.run/mountd/sda1/luci-i18n-*.ipk
* All ipk packages that are located on the path /tmp/usb/.run/mountd/sda1/ and have a name starting with luci-i18n- will be installed . This is the fastest way of Russification (it will take several seconds to install): through the web interface you will have to install each package separately ( besides, I’m not sure that it will succeed in updating from the local media ) and it will take several minutes to install, through the Internet and PuTTY you need to register the path to each package, which is also not so fast.
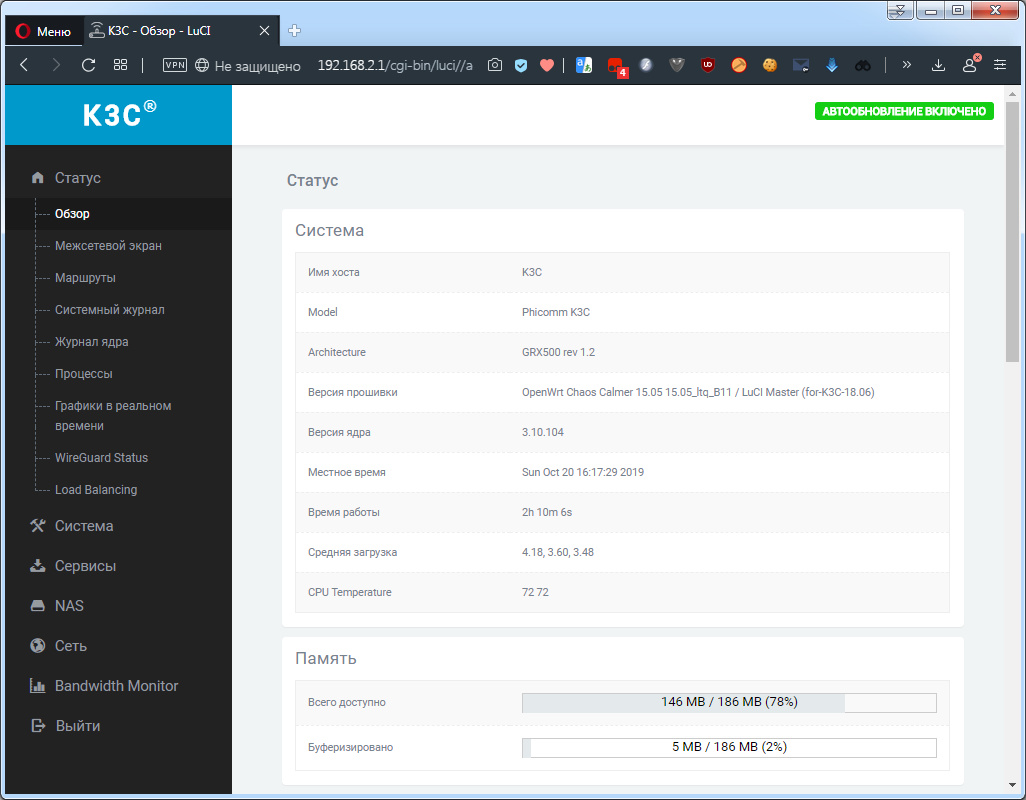
- We go to any section or just refresh the page and you can enjoy almost entirely the Russian-language interface ( some modules do not have Russian localization ).
AdvancedTomatoMaterial Theme
Bootstrap Theme
- We also have the item Russian (Russian) in the list of available languages.
↑ Top
5. Add dark themes
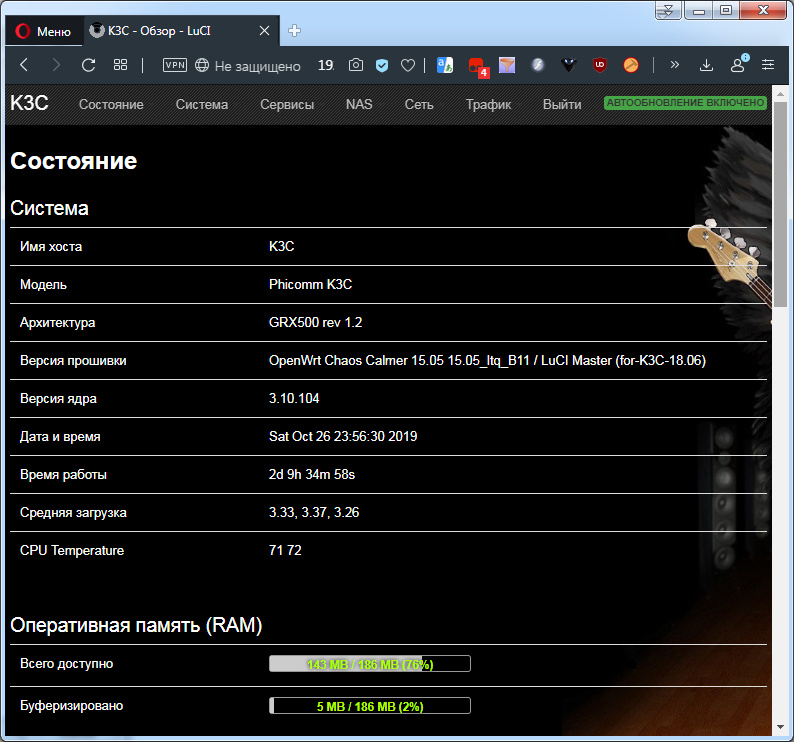
I’ll also tell you how to install a dark theme so that default topics do not burn out your eyes.
We look at the previous algorithm for adding a language and replace it with a link to
http://apollo.open-resource.org/downloads/luci-theme-darkmatter_0.2-beta-2_all.ipk
As a result, we get a nice Darkmatter theme in the list of topics.

You can also install a dark modification of the Bootstrap theme ( I like it the most because it works faster than the material ones ). You can take it here ( in the * .ipk.zip archive attached to that message, the package with the theme is double-packed ).

Sunny Dark Theme by Bootstrap
I now have her version a little redone by me.
↑ Top
PS Constructive advice on design / content is welcome.