
Today, streaming platforms are at the peak of popularity, since millions of talented people regularly share their knowledge - read, they use streaming to the fullest. As this market is growing, there are many applications that can stream live video using a smartphone or laptop camera. Perhaps you also want to introduce such functionality into your application; if so, then we hasten to please - now Voximplant allows you to forward video calls via RTMP to any CDN that supports this protocol.
This functionality is made possible by the new Voxengine module - StreamingAgent . Under the cut you are waiting for 5 steps to configure this integration, welcome!
Scheme
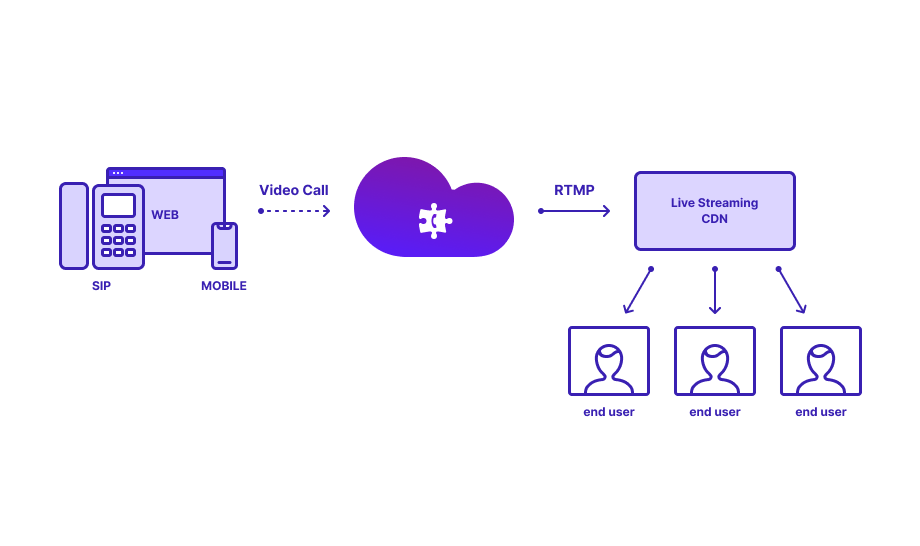
A video call from a mobile / web application or SIP arrives in our cloud, which directs it to a streaming CDN. In turn, the CDN sends audio and video streams to end users - as it usually does. Please note that RTMP only supports H.264, so it is very important to explicitly specify this codec when streaming.
You will need
- an account on a streaming service, for example, Twitch or Youtube ;
- Voximplant account. If you do not have it, then registration lives here ;
- Voximplant application, as well as a script, rule and one user. We will create all this in this tutorial;
- web client for capturing video and audio - use our videochat demo
1. Streaming settings
First of all, you will need to get the values of two parameters, which we use in the cloud script - stream name / key and server URL . The following shows how to get these values using Twitch and YouTube as examples.
Twitch
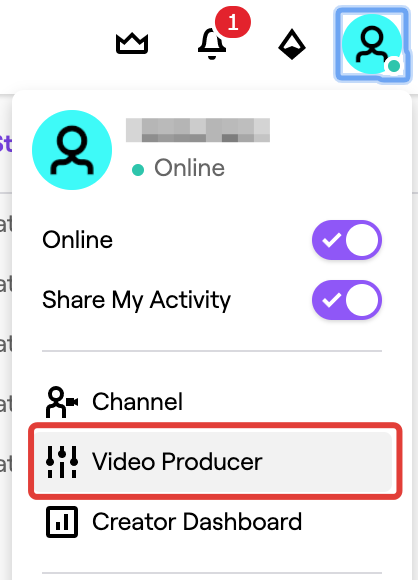
Log into your account, click on the profile picture in the upper right corner and select Video Producer.
In the Settings section, select Channel, and then click Copy at the top of the page to get your Primary Stream Key. Please note that the key is only available with two-factor authentication activated. Paste this value into your text editor or just leave this page open to copy the value later.
To find the server url, go to the page stream.twitch.tv/ingests , select one of the recommended servers and copy it without the last slash, for example: rtmp: //live-sfo.twitch.tv/app
YouTube
Log in to your account, click on the avatar in the upper right corner and select YouTube Studio (beta).

If you don’t have a YouTube channel, a dialog will appear about creating a channel. Click Create channel and you will see a dashboard of the created channel with a notification that streaming will be possible within 24 hours.

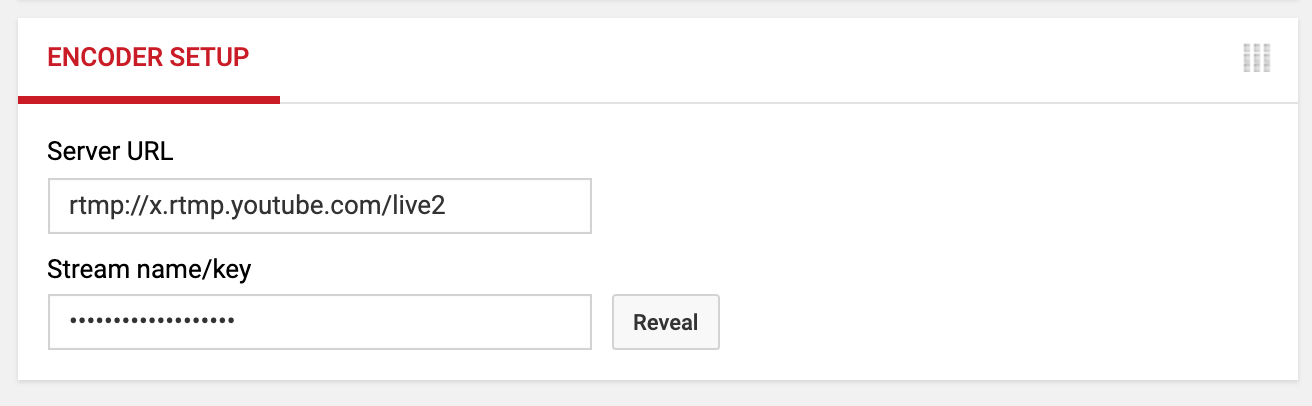
While in YouTube Studio, go to Other features -> Live stream now through the menu on the left. A new page opens, at the bottom of which is the Encoder setup block. From here, you need to take the Server URL and Stream name / key values (or leave the page open).
2. VOXIMPLANT settings
Now you need to make the settings from the side of Voximplant. First log in to your account: https://manage.voximplant.com/auth . In the menu on the left, click “Applications”, then “New Application” and create an application called streaming. Go into the new application, switch to the “Scripts” tab to create a startStream script with this code (do not forget to substitute the values from the previous step in lines 8 and 9):
require(Modules.StreamingAgent); VoxEngine.setVideoCodec("H264"); VoxEngine.addEventListener(AppEvents.CallAlerting, function (e) { const streaming = VoxImplant.createStreamingAgent({ protocol: "RTMP", url: "rtmp://live-sfo.twitch.tv/app", streamName: "live_********************", keyframeInterval: 4 }); e.call.sendMediaTo(streaming); streaming.addEventListener(StreamingAgentEvents.Connected, function (e) { Logger.write("LOG: StreamingAgentEvents.Connected: " + e.reason); }); streaming.addEventListener(StreamingAgentEvents.Disconnected, function (e) { Logger.write("LOG: StreamingAgentEvents.Disconnected: " + e.reason); }); streaming.addEventListener(StreamingAgentEvents.ConnectionFailed, function (e) { Logger.write("LOG: StreamingAgentEvents.ConnectionFailed: " + e.reason); }); streaming.addEventListener(StreamingAgentEvents.Error, function (e) { Logger.write("LOG: StreamingAgentEvents.Error: " + e.reason); }); streaming.addEventListener(StreamingAgentEvents.StreamStarted, function (e) { Logger.write("LOG: StreamingAgentEvents.StreamStarted: " + e.reason); }); streaming.addEventListener(StreamingAgentEvents.StreamError, function (e) { Logger.write("LOG: StreamingAgentEvents.StreamError: " + e.reason); }); streaming.addEventListener(StreamingAgentEvents.StreamStopped, function (e) { Logger.write("LOG: StreamingAgentEvents.StreamStopped: " + e.reason); }); e.call.answer(); e.call.addEventListener(CallEvents.Disconnected, function (e) { Logger.write("LOG: terminating in 6 secs"); setTimeout(VoxEngine.terminate, 6000); }); });
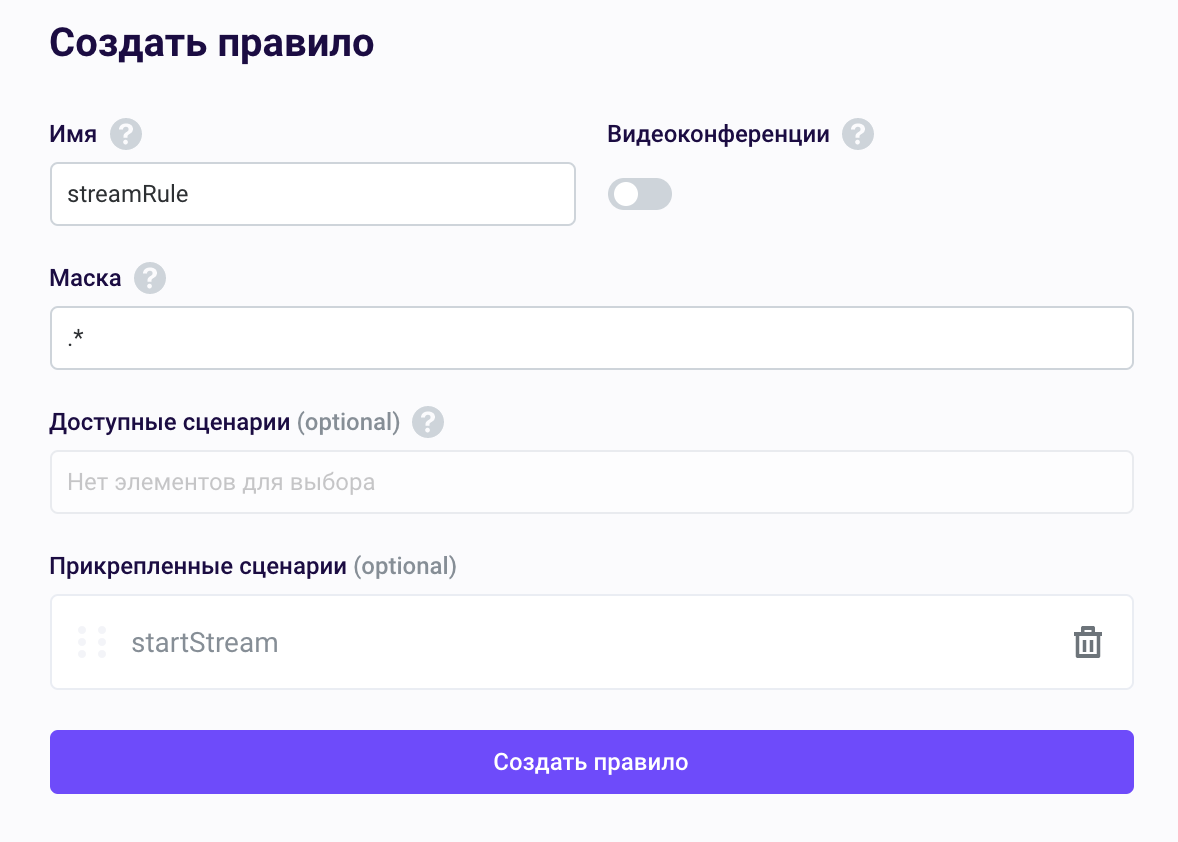
This is a simple script that initiates a stream and also monitors all its possible states, such as: Connected, Connection failed, StreamStarted, etc. - Details of the script will be slightly lower. Now you need to go to the “Routing” tab of your application and click “New Rule”. Name it streamRule, specify the startStream script and leave the default mask (. *).
The last thing to do at this stage is to create a user. Go to the “Users” tab, click “Create User”, specify a name (for example, user1) and password, then click “Create”. We will need this username / password pair for authentication in the web client.

The configuration of Voximplant is completed, but before we move on to the web client, I propose to understand how the StreamingAgent module works in our scenario.
3. The scenario
The StreamingAgent module allows developers to launch RTMP streams to popular stimulation platforms. To use the functionality of the module, we must connect it at the very beginning of the script:
require(Modules.StreamingAgent);
Next, you must explicitly specify the codec that will be used when streaming. Since many platforms (including Twitch and YouTube) use RTMP, which, in turn, supports H.264, this is what we will indicate:
VoxEngine.setVideoCodec("H264");
If the codec is not specified, then the StreamingAgentEvents.StreamError event may be raised , containing the error text:
"Video codec mismatch. " + codecName + " granted, but should be H.264"
Then we add a handler for the CallAlerting event to handle the video call from the web client (yes, we will get to it soon). First of all, we will add a call to the createStreamingAgent method to the handler . The method has the following parameters, most of them are required, optional are marked separately:
- protocol - so far only RTMP is supported;
- url - server URL, see step 1;
- streamName - stream name / key, see step 1;
- applicationName (optional) - part of streamName, e.g. live2. Use this option if the selected platform requires it;
- keyframeInterval (optional, seconds) - how often a key frame will be generated in the stream. If not specified, the default value is 2.
In the script listing above, the call to the createStreamingAgent method looks like this:
VoxEngine.addEventListener(AppEvents.CallAlerting, function (e) { const streaming = VoxImplant.createStreamingAgent({ protocol: "RTMP", url: "rtmp://live-sfo.twitch.tv/app", streamName: "live_********************", keyframeInterval: 4 });
But we can omit keyframeInterval and use applicationName, like this:
VoxEngine.addEventListener(AppEvents.CallAlerting, function (e) { const streaming = VoxImplant.createStreamingAgent({ protocol: "RTMP", url: "rtmp://a.rtmp.youtube.com/", applicationName: "live2", streamName: "somename" });
After the streaming object is created, the script continues to process the call inside the handler. The next step is to direct the incoming video stream from the web client to the created streaming object:
e.call.sendMediaTo(streaming);
Then we use all possible streaming events for debugging: the handlers do nothing but send information to the Voximplant session log. You can not use this piece of code if you want.
After processing the events, the script answers the incoming call:
e.call.answer();
Finally, we must correctly handle the end of the streaming when the web client stops sending the video. Formally, we can not use this handler too, but the session will end only after 60 seconds after the video has stopped sending. There is no sense in this expectation, therefore it is better to end the session, starting from Disconnected events:
e.call.addEventListener(CallEvents.Disconnected, function (e) { Logger.write("LOG: terminating in 6 secs"); setTimeout(VoxEngine.terminate, 6000); });
Understanding the logic of the script, we are ready to start the last - but not least - part of our configuration.
4. Web client
Clone or download our videochat demo. Then go to the repository folder and open the WebApp / JS / app.js file in a text editor / IDE. Change the name of the application on line 5 and save the file:

Actually, that's all.
5. Start streaming
You need to run the WebApp folder locally or on your web server. To run locally, you can use the live-server utility or the Web Server for Chrome application. When starting the web client, you must give it the name of your Voximplant account, for example:
http://127.0.0.1:8080/index.html#accname=johngalt
After launching the client, enter the login-password pair from step 2:
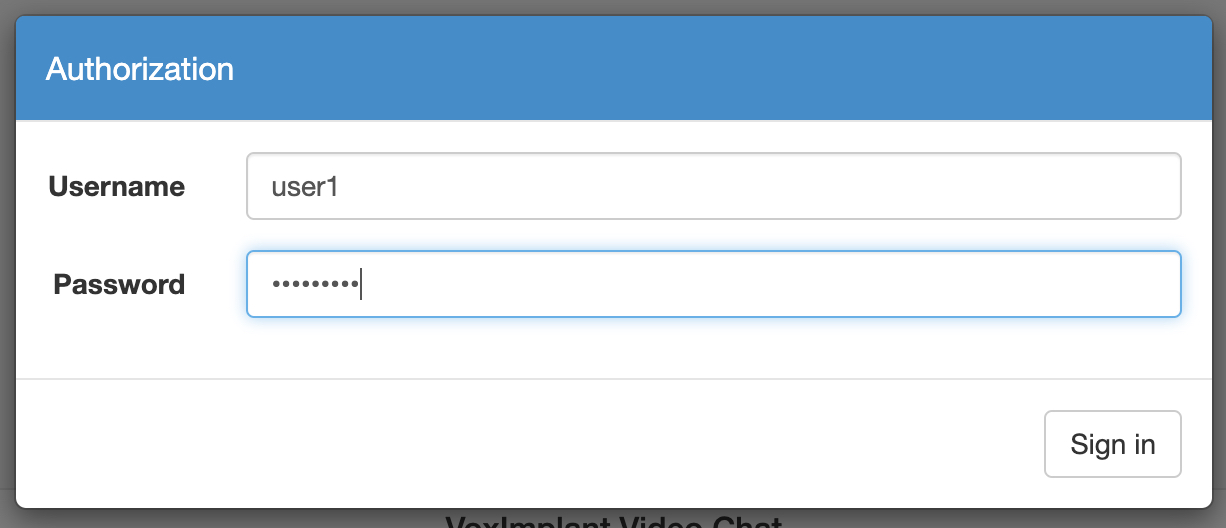
Enter any character set next to the @ sign and press Call. If everything was done correctly, your stream will begin soon :) Successful streams and productive development for you!