Level diagrams
Actually, the levels themselves are created in a 3D editor, namely, their geometry, texture mapping, baking shadows, etc. I described all this in the first part. Why are there any other schemes? The fact is that Three.js does not offer any kind of physical engine, and I use level schemes to identify obstacles.

Three.js for solving the collision problem offers only raytracing - the simplest way to determine the intersection of the geometry of objects. In principle, it can be used, and I even did it already in one of my other projects. It was a virtual city right on the site, in the browser. You can move around the city and not pass through the walls.

In the case when the intersection of the geometry of the player and the building occurs during movement, I implemented the repulsion of the player by a certain distance in the direction opposite to the wall. But for this, objects must be parallelepipeds. Around some complex objects, I created colliders (we will call the invisible objects that play the role of obstacles and prevent the player from passing through themselves), through which intersections were worked out. And the lower parts of some buildings, which are simply “boxes”, were sometimes used as colliders themselves.

On geometrically complex objects, ray tracing may not work or behave inappropriately. And, just as a solution, you can embed in the object not one, but several small invisible colliders in the form of parallelepipeds with 100% transparency, drawn next to each other and on top of each other, roughly repeating the shape of the object.
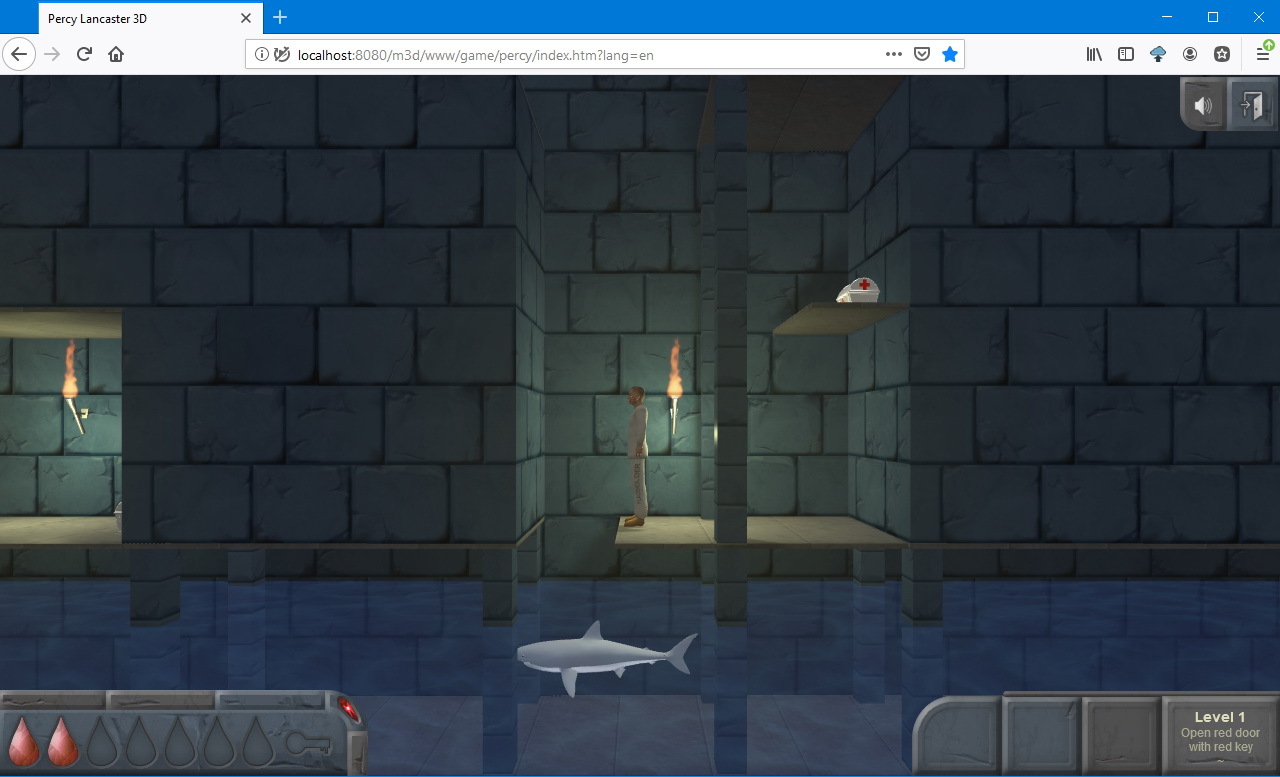
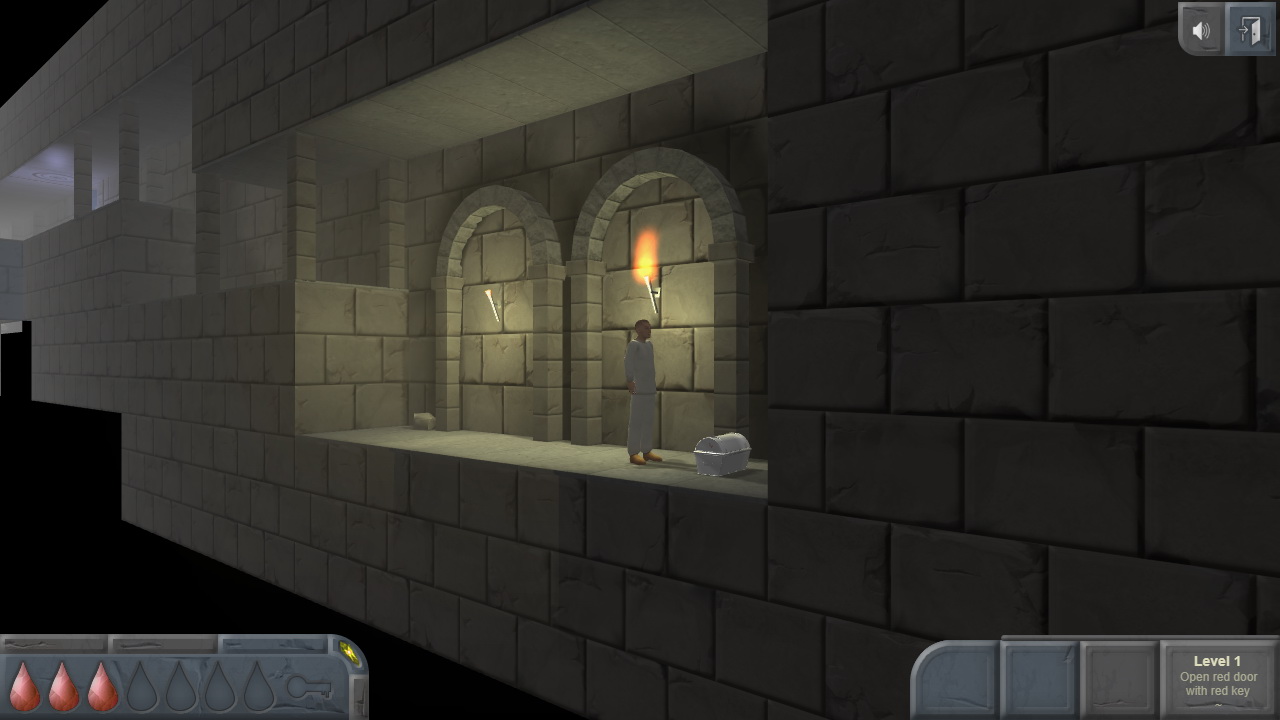
In the game about dungeons, the level is a single long object with cut moves to move the player. Actually, to solve the collision problem, one could stick invisible colliders where necessary and use raytracing. However, I decided to go the other way.
- Firstly, I wanted to automate the process of creating an array of colliders.
- Secondly, you can use only information about the colliders, that is, their coordinates in space, and not load the 3D scene itself with some extra empty objects.
- Thirdly, since the game uses only a side view and one of the coordinates never changes when moving, you can use the calculation of intersections in only two coordinates.
- And fourthly, after all, in fact, there will remain a level scheme. Moreover, coming up with new levels is just convenient starting with such a scheme. You can simply drag blocks around the screen in any graphics editor, constructing new corridors and obstacles, and then run the script and get information about the colliders. That is, the problem of the level editor is partially solved.
I wrote a script that takes input parameters such as the name of the level diagram file (png) and the color, the filling of which is interpreted as an obstacle. The default free space color is black. For processing by the script, the scheme of each level must be saved in a separate png file. For example, for the lowest level, it looks like this:

I agreed that one block should be 80 pixels wide and 48 pixels high. This corresponds to 4 x 2.4 meters in the 3D world. It would be possible to make 40 x 24 pixels, that is, ten times, but in the picture it looks small.
The result of the script on the first level (the image is cropped to the right):
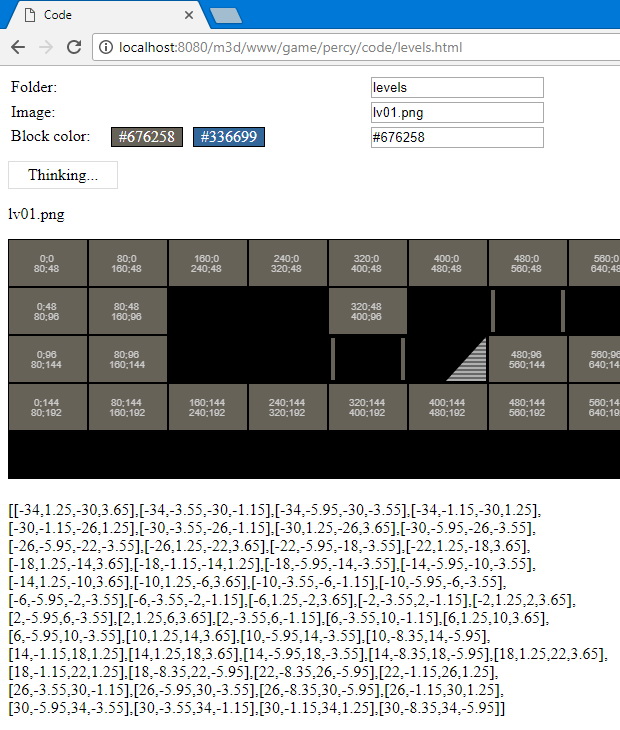
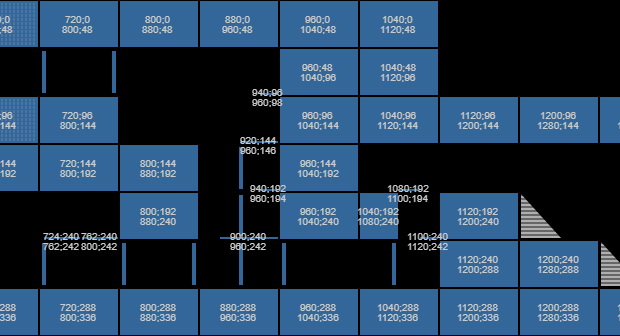
The script is executed in the browser. I think there’s no point in html markup, it’s elementary: data entry fields and a start button. Next, the read image is displayed on the canvas. And as a result of the script, an array is displayed under the picture in the 3D world scale, which contains the lower left and upper right coordinates of each block, and with the offset specified in the script for each level. This array can be copied and pasted into the list of colliders to use in the game (more about this below), it will be stored in some kind of constant. Coordinates also appear on the picture itself, but in the frame of reference of the 2D image. These numbers are displayed in the center of each block and allow you to check whether all the blocks are included in the calculation. By themselves, these numbers are not needed for anything except for visual inspection. Some blocks, such as columns between which the player passes, should not be counted. About which objects are excluded from the calculation - below.
In addition, for example, at the second level there are thin horizontal plates on which the player walks. They must be considered. Accordingly, you need to make sure that numbers also appear on them. In the diagram, make them 2 pixels high.
Now, about how the script takes blocks into account:
- The scheme is processed by 80x48 blocks, in each of which an area is taken from the 2nd to 79th pixels horizontally and from the 2nd to 47th pixels vertically. The first and last pixels are not used, so that around the blocks you can create a black frame with a width of 1 pixel, this improves the visual perception of the circuit and facilitates its creation.
- All pixels of the top row of the block are viewed. If there are colored ones among them, then the coordinates of the block go from the first to the last colored pixel horizontally and to the full height of the block vertically in the final array. This will be a blank block at full or partial width.
- All pixels of the bottom line of the block are viewed. If there are colored ones among them, but there is not one colored in the top row, then the coordinates of the block go from the first to the last colored pixel horizontally and 3 pixels vertically from the bottom to the final array. This will be a platform on which to walk. Inside one block there can be several horizontal platforms. Platforms are recognized only at the bottom of the block. The coordinates of the platform are “sunk” into a block that is lower, so that the surface of the platform is on the same level with neighboring blocks - not platforms.
- Columns and other decorations inside an empty block are not processed, since only the upper and lower row of pixels is considered. Therefore, inside the block, you can place decor, explanations for the diagram, pointers, columns, etc., without fear that this will somehow affect the result of the script.
Then all received coordinates from the array are translated into the scale of the 3D world, multiplied by the coefficient of its scale (which was selected in the 3D editor when it was created). The array is ready for use in the game. The script code was written in haste, so it does not pretend to be elegant, but it performs its task.
The code
ap = { // ( ), 3D lvd: { 'lv01.png': { invw: false, invh: true, level_dw: -8.5, level_dh: -1.5 }, 'lv02.png': { invw: true, invh: true, level_dw: -19.5, level_dh: -5.5 } }, blockw: 80, // 2D blockh: 48, // 2D sc3d: 0.05, //, 3D ex: 100, // 3D (- ) v: { data: [] }, i: 0, par: {}, datai: [], resi: [], ars: [], fStopEncode: false, blockColor: function(cl) { document.getElementById('input_cl').value = cl; }, startEncode: function() { // for (var key in ap.lvd) { ap.lvd[key].dw = ap.lvd[key].level_dw * ap.blockw; ap.lvd[key].dh = ap.lvd[key].level_dh * ap.blockh; }; document.getElementById('startbtn').style.display = 'none'; document.getElementById('startmsg').style.display = 'block'; var cl = document.getElementById('input_cl').value; var fld = document.getElementById('input_fld').value; var nm = document.getElementById('input_nm').value; ap.nm = nm; ap.par = { path: [fld + '/', nm], key: [nm], cl: aplib.hexToRgb(cl.substring(1, 7)) }; setTimeout(function() { ap.datai[ap.par.key] = new Image(); ap.datai[ap.par.key].onload = function() { ap.parseData(); }; ap.datai[ap.par.key].src = ap.par.path[0] + ap.par.path[1]; }, 500); }, stopEnode: function(e) { if (typeof ap !== "undefined") { if (e.keyCode == 27) { console.log('stop'); ap.fStopEncode = true; }; }; }, parseData: function() { ap.w = ap.datai[ap.par.key[0]].width, ap.h = ap.datai[ap.par.key[0]].height; aplib.initCanv(ap.w, ap.h); ctx.drawImage(ap.datai[ap.par.key[0]], 0, 0, ap.w, ap.h, 0, 0, ap.w, ap.h); ap.ars = []; ap.i = 0; setTimeout(function() { ap.parseData1(); }, 1000); }, parseData1: function() { if (ap.i < ap.par.key.length) { document.getElementById('info').innerHTML = '' + ap.nm; ap.blocksw = Math.floor(ap.w / ap.blockw); ap.blocksh = Math.floor(ap.h / ap.blockh); ap.ar = []; ap.arv = {}; ap.hi = 0; ctx.fillStyle = '#CCCCCC'; ap.parseData2(); } else { document.getElementById('startbtn').style.display = 'block'; document.getElementById('startmsg').style.display = 'none'; }; }, parseData2: function() { if (ap.hi < ap.blocksh) { ap.ar.push([]); ap.wi = 0; ap.parseData3(); } else { ap.parseData4(); }; }, parseData3: function() { var k = ''; if (ap.wi < ap.blocksw) { var fground = true, fvari = false, fempty = true; var upx1 = 0, upx2 = 0, dnx1 = 0, dnx2 = 0; var upxf = false, dnxf = false; for (var wii = 1; wii < ap.blockw - 2 + 2; wii++) { pixelDatai = ctx.getImageData(ap.wi * ap.blockw + wii, ap.hi * ap.blockh + 1, 1, 1).data; // pixelDatai2 = ctx.getImageData(ap.wi * ap.blockw + wii, (ap.hi + 1) * ap.blockh - 3, 1, 1).data; // if ((pixelDatai[0] == ap.par.cl.r) & (pixelDatai[1] == ap.par.cl.g) & (pixelDatai[2] == ap.par.cl.b)) { // ground if (upxf == false) { upxf = true; upx1 = wii; }; } else { // if (upxf == true) { upx2 = wii + 1; upx1--; // dy = -1; // 3D 1 ap.v.data.push([ap.wi * ap.blockw + upx1, ap.hi * ap.blockh + dy, ap.wi * ap.blockw + upx2, ap.hi * (ap.blockh) + ap.blockh - 1]); upxf = false; upx1 = 0; upx2 = 0; }; }; if ((pixelDatai2[0] == ap.par.cl.r) & (pixelDatai2[1] == ap.par.cl.g) & (pixelDatai2[2] == ap.par.cl.b)) { // ground if (upxf == false) { if (dnxf == false) { dnxf = true dnx1 = wii; }; }; } else { if (upxf == false) { if (dnxf == true) { dnx2 = wii + 1; dnx1--; // dy = 2; // 3D 2 ap.v.data.push([ap.wi * ap.blockw + dnx1, (ap.hi + 1) * ap.blockh - 3 + dy, ap.wi * ap.blockw + dnx2, (ap.hi + 1) * ap.blockh - 3 + 2 + dy]); dnxf = false; dnx1 = 0; dnx2 = 0; }; }; }; }; if (ap.fStopEncode == true) { ap.hi = ap.h, ap.wi = ap.w, i = ap.par.key.length; }; setTimeout(function() { ap.wi++; ap.parseData3(); }, 10); } else { ap.hi++; ap.parseData2(); }; }, parseData4: function() { setTimeout(function() { var t, tw, tx, ty, ar = []; // for (var i = 0; i < ap.v.data.length; i++) { ar = ap.v.data[i]; t = ar[0] + ';' + (ar[1]+1) + '<br/>' + ar[2] + ';' + (ar[3]+1); tw = ar[2] - ar[0]; tx = ar[0]; ty = ar[1] + Math.floor((ar[3] - ar[1]) / 2) - 0; aplib.Tex2Canvas(ctx, t, 'normal 10px Arial', 10, '#CCCCCC', tx, ty, tw, 0, 'center', 'top'); }; ap.parseData5(); }, 10); }, parseData5: function() { var t, tw, tx, ty, ar = [], n; // 3D var lv = ap.lvd[ap.nm]; for (var i = 0; i < ap.v.data.length; i++) { ar = ap.v.data[i]; ar[0] += lv.dw; ar[1] += lv.dh; ar[2] += lv.dw; ar[3] += lv.dh; if (lv.invh == true) { n = -ar[1]; ar[1] = -ar[3]; ar[3] = n; }; if (lv.invw == true) { n = -ar[0] ar[0] = -ar[2]; ar[2] = n; }; ar[0] = Math.round(ap.sc3d * ar[0] * ap.ex) / ap.ex; ar[1] = Math.round(ap.sc3d * ar[1] * ap.ex) / ap.ex; ar[2] = Math.round(ap.sc3d * ar[2] * ap.ex) / ap.ex; ar[3] = Math.round(ap.sc3d * ar[3] * ap.ex) / ap.ex; }; // ap.v.data.sort(aplib.sortBy0); console.log(ap.v.data); document.getElementById('divresult').innerHTML = JSON.stringify(ap.v.data); } }; aplib = { hexToRgb: function(hex) { var arrBuff = new ArrayBuffer(4); var vw = new DataView(arrBuff); vw.setUint32(0, parseInt(hex, 16), false); var arrByte = new Uint8Array(arrBuff); return { r: arrByte[1], g: arrByte[2], b: arrByte[3], s: arrByte[1] + "," + arrByte[2] + "," + arrByte[3] }; }, // canvas Tex2Canvas: function(ctx, t, font, lin, fcolor, x, y, w, h, haln, valn) { //left, right, center, center-lim- ctx.font = font; ctx.fillStyle = fcolor; var l = 0; var tx = x; var ftw = false; var tw = 1; var arr = t.split('<br/>'); for (var i = 0; i < arr.length; i++) { arr[i] = arr[i].split(' '); }; for (var i = 0; i < arr.length; i++) { var s = '', slen = 0, s1 = '', j = 0; while (j < arr[i].length) { var wordcount = 0; while ((slen < w) & (j < arr[i].length)) { s = s1; s1 = s + arr[i][j] + ' '; slen = ctx.measureText(s1).width; if (slen < w) { j++; wordcount++; } else { if (wordcount > 0) { s1 = s; } else { j++; }; }; }; ftw = false; tw = ctx.measureText(s1).width; if (haln == 'center') { tx = x + Math.round((w - tw) / 2); }; if (haln == 'right') { tx = x + Math.round((w - tw)); }; if (haln == 'center-lim') { if (tw > w) { tw = w; }; if (tw < 1) { tw = 1; }; tx = x + Math.round((w - tw) / 2); ftw = true; }; if (ftw == false) { ctx.fillText(s1, tx, l * lin + y); } else { ctx.fillText(s1, tx, l * lin + y, tw); }; if (s1 == '') { j = arr[i].length + 1; }; l++; s1 = ''; slen = 0; }; }; return Math.round(tw); }, // canvas initCanv: function(w, h) { function canvErr() { document.getElementById('divcanv').innerHTML = '<div style="height:130px"></div><div style="width:440px; border:#FFFFFF 1px solid; margin:10px; padding:4px; background-color:#000000"><p class="txterr">---> Error<br/>HTML5 Canvas is not supported!<br/>Please, update your browser!</p></div>'; }; if (w == 0) { w = 740; h = 680; }; elcanv = document.getElementById('divcanv'); elcanv.innerHTML = '<canvas id="canv" style="width:' + w + 'px; height:' + h + 'px; display:block;" width="' + w + '" height="' + h + '"></canvas>'; canvas1 = document.getElementById('canv'); if (!canvas1) { canvErr(); return 0; } else { if (canvas1.getContext) { ctx = canvas1.getContext('2d'); ctx.clearRect(0, 0, w, h); return 1; } else { canvErr(); }; }; }, sortBy0: function(i, ii) { if (i[0] > ii[0]) return 1; else if (i[0] < ii[0]) return -1; else return 0; } };
Now - about how the game works with an array of blocks. The game uses intersecting corridors (levels). When a player turns into a corridor, a new array of blocks is connected: and for each corridor, accordingly, its own array is obtained, obtained from its level scheme. During the movement of the player, his coordinates are checked for being inside each block. And if he is inside any block, then we get a collision. But with every movement of the player we do not need to look for intersections with all blocks of the level, because there can be a lot of them. Create an array of only the blocks closest to the player.
collisionsUpdate: function(x, y, dw, dh) { var coll = []; var o; for (var i = 0; i < ap.v.lv.d.length; i++) { o = ap.v.lv.d[i]; if ((o[0] >= x - ap.v.dw) & (o[2] <= x + ap.v.dw)) { if ((o[1] >= y - ap.v.dh) & (o[3] <= y + ap.v.dh)) { coll.push(o); }; }; }; ap.v.coll = coll; },
Here, at the input x, y are the current coordinates of the player, dw, dh is the distance at which you want to search for blocks horizontally and vertically, for example 12 and 8 meters. In other words, take all the blocks around the player in a square 24x16 meters. They will participate in the search for clashes. ap.v.lv.d [i] is an element of an array of blocks of the current level, in fact, he himself is also an array of 4 numbers defining the boundaries of one block - [x1, y1, x2, y2], therefore, to check the square horizontally we take elements with indices 0 and 2, and vertically - 1 and 3. If there is a match, then add this block to the list for collisions ap.v.coll.
When the player moves, we will update this list of collisions, but in order to save performance, we will do this not at every step (or rather, rendering the frame), but when the player leaves a certain square, a little smaller, specified in ap.v.collwStep and ap.v.collhStep, e.g. 8 and 4 meters. That is, we will reassemble the collision array again when the player passes a certain path horizontally or vertically from his original position. At the same time, we will remember its position at which we reassembled the array in order to use it for the next iteration. pers [ax] - here by ax we mean the coordinate axis (ax), it can be x or z, depending on the direction of the corridor along which the player is walking.
// if ((Math.abs(pers[ax] - ap.v.collw) > ap.v.collwStep) || (Math.abs(pers.y - ap.v.collh) > ap.v.collhStep)) { ap.v.collw = pers[ax]; ap.v.collh = pers.y; ap.collisionsUpdate(pers[ax], pers.y, 12, 8); };
Why such difficulties? Why not use the entire array of collisions at the level and not steam. The fact is that the collision detection is carried out according to a much more complex algorithm, and it is unprofitable to check the collision with absolutely all level blocks, and not the nearest ones, at every render of the frame. (Although, this is not accurate.)
The definition of collisions at each rendering of a frame using the collision array prepared above:
The code
collisionsDetect: function(x, y, xOld, yOld, up) { //up=-1 - var res = false, o; var collw = false, collh = false, collwi = false, collhi = false, collhsup = false, support = [], supportf = false, fw = false, upb = -1; var bub = -1, bubw = 0; var pw2 = ap.v.player.pw2, ph2 = ap.v.player.ph2, supportd = ap.v.supportd; for (var i = 0; i < ap.v.coll.length; i++) { o = ap.v.coll[i]; collwi = false; collhi = false; collhsup = false; fw = false; if ((x + pw2 >= o[0]) & (x - pw2 <= o[2])) { if ((y + ph2 > o[1]) & (y - ph2 < o[3])) { collwi = true; }; }; // if ((xOld + pw2 >= o[0]) & (xOld - pw2 <= o[2])) { if ((yOld + ph2 > o[1]) & (yOld - ph2 < o[3])) { bub = i; if (Math.abs(xOld - o[0]) < Math.abs(xOld - o[2])) { bubw = -1; } else { bubw = 1; }; }; }; if ((x >= o[0]) & (x <= o[2])) { fw = true; // i }; if ((y + ph2 >= o[1]) & (y - ph2 <= o[3])) { if ((x > o[0]) & (x < o[2])) { collhi = true; // if (y + ph2 > o[3]) { collhsup = true; supportf = true; support = o; upb = 1; }; // if (y - ph2 < o[1]) { upb = -1; }; }; }; if ((y - ph2 >= o[3] + supportd - 0.11) & (y - ph2 <= o[3] + supportd + 0.001)) { if (fw == true) { collhi = true; collh = true; res = true; collhsup = true; supportf = true; support = o; }; }; if (collwi & collhi) { res = true; }; if (collwi) { collw = true; }; if (collhi) { collh = true; }; }; return { f: res, w: collw, h: collh, support: support, supportf: supportf, upb: upb, bub: bub, bubw: bubw }; },
Here x, y, xOld, yOld are the new and current coordinates of the player. New ones are calculated when a button is pressed, based on a given speed of movement, that is, these are possible coordinates. They are checked for whether they fall inside any block from the list of collisions. If they fall, they roll back to the old ones, and the player does not pass through the obstacle. And if they don’t fall, then they become current. pw2 and ph2 are half the width and height of the player’s imaginary collider (player width / 2, player height / 2). The output is issued if there is a horizontal and vertical collision (collw, collh), whether there is a support block (supportf) under the player - this makes it clear whether to start further the fall animation or if the player simply switched to a neighboring block, and so on. Just don’t ask why I added 0.001 there and subtracted 0.11. This is a terrible crutch that prevents falling through the blocks and the effect of jitter when colliding with a horizontal obstacle ... This function works, but it needs to be rewritten in the normal way. Optimization of this function is also missing yet.
I think with collisions it’s worthwhile to end here.
It’s hard to say how much faster my method is or maybe slower than raytracing, but in the case of the latter, Three.js also stores an array of objects that participate in the collision system. It’s just that the collisions there are determined by the method of emitting the beam and its intersection with the planes of the sides of the objects, and with me, by determining whether the coordinates of one object are inside the other along each of the two axes.
The game also has moving objects (shark) and marker objects that trigger some kind of animation (for example, contact with water triggers the movement of a shark). All these objects also participate in collisions, and some with time-varying coordinates. There, oddly enough, everything is simpler: during the movement of the object its coordinates are compared with the coordinates of the player.
Gamepad
In general, supporting a javascript gamepad in a browser is not a trivial task. There are no button press and release events. There are only events connecting and disconnecting the device and the state that can be obtained by periodic polling, and then compare it with the previous one.
A video demonstrating the operation of the gamepad in a browser on a tablet on Windows 8.1 and a PC on Windows 10. The tablet, however, is an old one, released in 2014, so dynamic lighting is turned off in the game on it.
To poll the gamepad, a function is called once every 100 milliseconds. It is set using the function of my library m3d.lib.globalTimer.addEvent.
m3d.lib.globalTimer.addEvent({ name: 'gamepad', ti: 100, f: function() { var st = m3d.gamepad.state(); if (st == false) { if (contr.gpDownFlag == true) { m3d.gamepad.resetH(); }; }; } });
Here globalTimer is the javascript setInterval timer event management system that I wrote. There, simply a series of events are added to a certain array that need to be called at different intervals. Then, one setInterval timer is set with the frequency corresponding to the event with the highest frequency of all. The timer polls the function m3d.lib.globalTimer.update (), which runs through the list of all events and runs the functions of those that have come to execute. When adding or deleting events, the interval frequency can also change (for example, if you delete the fastest event).
The game also defines handlers for each gamepad key: 'a' is for the axis (ax), 'b' for the button (button), and 11 is the left deviation along the horizontal axis of the cross (as if its button 1), 12 - the right deviation along the horizontal axis of the cross (as if its button 2), 21 and 22 - for the vertical axis. For example:
['a', 11],
['b', 3]
means that the next function will be set at the same time for deviation along the horizontal axis to the left and for button 3 (left). Well, then a function is set that will be executed when the button is pressed, and then when released.
m3d.gamepad.setHandler( [ ['a', 11], ['b', 3] ], function(v) { if (contr.btState.lt == false) { contr.keyDownFlag = true; contr.btState.lt = true; contr.gpDownFlag = true; apcontrolsRenderStart(); }; }, function(v) { contr.btState.lt = false; m3d.contr.controlsCheckBt(); apcontrolsRenderStart(); } );
Here apcontrolsRenderStart () is a function that launches a render if it is not already running. In general, support for the gamepad is tightly tied to my m3d library, so if I go on to describe all its features, it will stretch for a very long time ...
I’ll give only a part of it - gamepad, in which I implemented the initialization of the gamepad, installing handlers and polling the state in the simplest way.
The code
gamepad: { connected: false, gamepad: {}, gamepadKey: '', axesCount: 0, buttonsCount: 0, f: [], // fup: [], // fval: [], // fupCall: [], // buttons: [], //link to f [0.. ] axes: [], //link to f [0.. ] initCb: function() {}, resetH: function() {}, init: function(gp) { var f = false; for (var key in gp) { if (f == false) { if (gp[key] != null) { if (typeof gp[key].id !== "undefined") { f = true; this.connected = true; this.gamepad = gp[key]; this.gamepadKey = key; }; }; }; }; if (typeof this.gamepad.axes !== "undefined") { this.axesCount = this.gamepad.axes.length; }; if (typeof this.gamepad.buttons !== "undefined") { this.buttonsCount = this.gamepad.buttons.length; }; this.f = []; this.fup = []; this.fval = []; this.fupCall = []; this.axes = []; for (var i = 0; i < this.axesCount * 2; i++) { this.axes.push(-1); }; this.buttons = []; for (var i = 0; i < this.buttonsCount; i++) { this.buttons.push(-1); }; this.initCb(); }, setHandlerReset: function(f) { this.resetH = f; }, setHandler: function(ar, f, fup) { //ar['b',3] ['a',11] var fi, bt, ax, finext, finexta; finexta = false; for (var i = 0; i < ar.length; i++) { if (ar[i][0] == 'a') { ax = Math.floor(ar[i][1] / 10); bt = ar[i][1] - (ax * 10); bt = ax * 2 + bt - 3; fi = this.axes[bt]; if (fi == -1) { // fi = this.f.length; if (finexta == false) { finexta = true; this.f.push(f); this.fup.push(fup); this.fval.push(0); this.fupCall.push(true); this.axes[bt] = fi; } else { fi--; this.f[fi] = f; this.fup[fi] = fup; this.axes[bt] = fi; }; } else { this.f[fi] = f; this.fup[fi] = fup; }; } else if (ar[i][0] == 'b') { bt = ar[i][1] - 1; fi = this.buttons[bt]; if (fi == -1) { // fi = this.f.length; if (finexta == false) { finexta = true; this.f.push(f); this.fup.push(fup); this.fval.push(0); this.fupCall.push(true); this.buttons[bt] = fi; } else { fi--; this.f[fi] = f; this.fup[fi] = fup; this.buttons[bt] = fi; }; } else { this.f[fi] = f; this.fup[fi] = fup; }; }; }; }, state: function() { var pressed = false; var fi, fval, axesval; for (var i = 0; i < this.fval.length; i++) { this.fval[i] = 0; }; // var gp = navigator.getGamepads()[this.gamepadKey]; for (var i = 0; i < this.axesCount; i++) { axesval = Math.round(gp.axes[i]); if (axesval < 0) { pressed = true; fi = this.axes[i * 2]; if (fi != -1) { this.fval[fi] = gp.axes[i]; this.fupCall[fi] = true; }; } else if (axesval > 0) { pressed = true; fi = this.axes[i * 2 + 1]; if (fi != -1) { this.fval[fi] = gp.axes[i]; this.fupCall[fi] = true; }; }; }; for (var i = 0; i < this.buttonsCount; i++) { if (gp.buttons[i].pressed == true) { pressed = true; fi = this.buttons[i]; if (fi != -1) { this.fval[fi] = 1; this.fupCall[fi] = true; }; }; }; for (var i = 0; i < this.fval.length; i++) { fval = this.fval[i]; if (fval != 0) { this.f[i](this.fval[i]); } else { if (this.fupCall[i] == true) { this.fupCall[i] = false; this.fup[i](this.fval[i]); }; }; }; return pressed; } }, //gamepad
In general, the gamepad support in the game is still incomplete: only support for the simplest gamepad is implemented, but not the one that, for example, is used in the XBox, because I do not have it. If I get it, I’ll program it and work with it. There, it will be possible to adjust the speed of the character, that is, it will be possible to move at any speed in the range from step to run. This is achieved by taking fractional parameters from the axes. My gamepad returns only the integers -1 and 1. Moreover, my gamepad has a disgusting cross, and when pressed left or right, simultaneous presses down or up. Therefore, I did not use the top and bottom on the cross and duplicated it with the buttons on the right of the gamepad ... By the release of the game I plan to create several profiles of gamepads. In addition, in the case of connecting several gamepads, only the latter will be used so far.
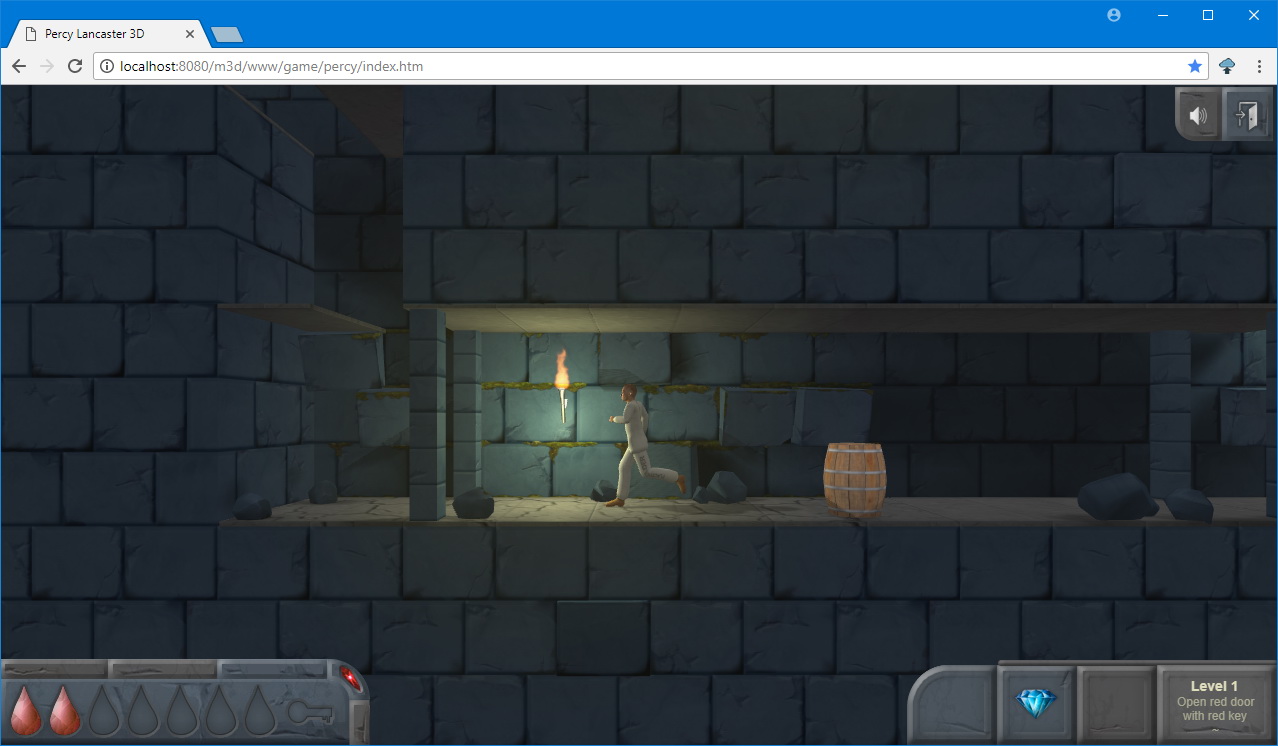
Responsive screen
The game is designed for an aspect ratio of 16: 9. But I added automatic horizontal adjustment of ± 10% so that in the expanded browser window there weren’t such black bars on the sides:
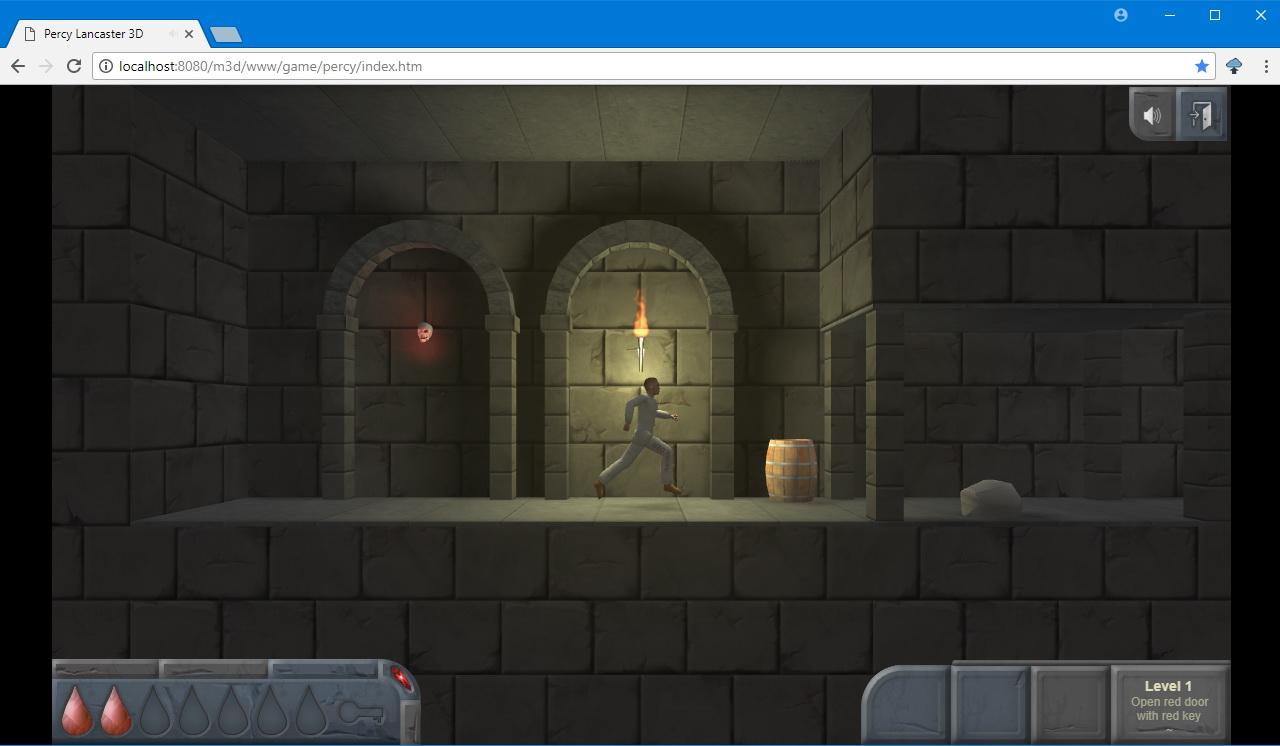
And it would be like this:
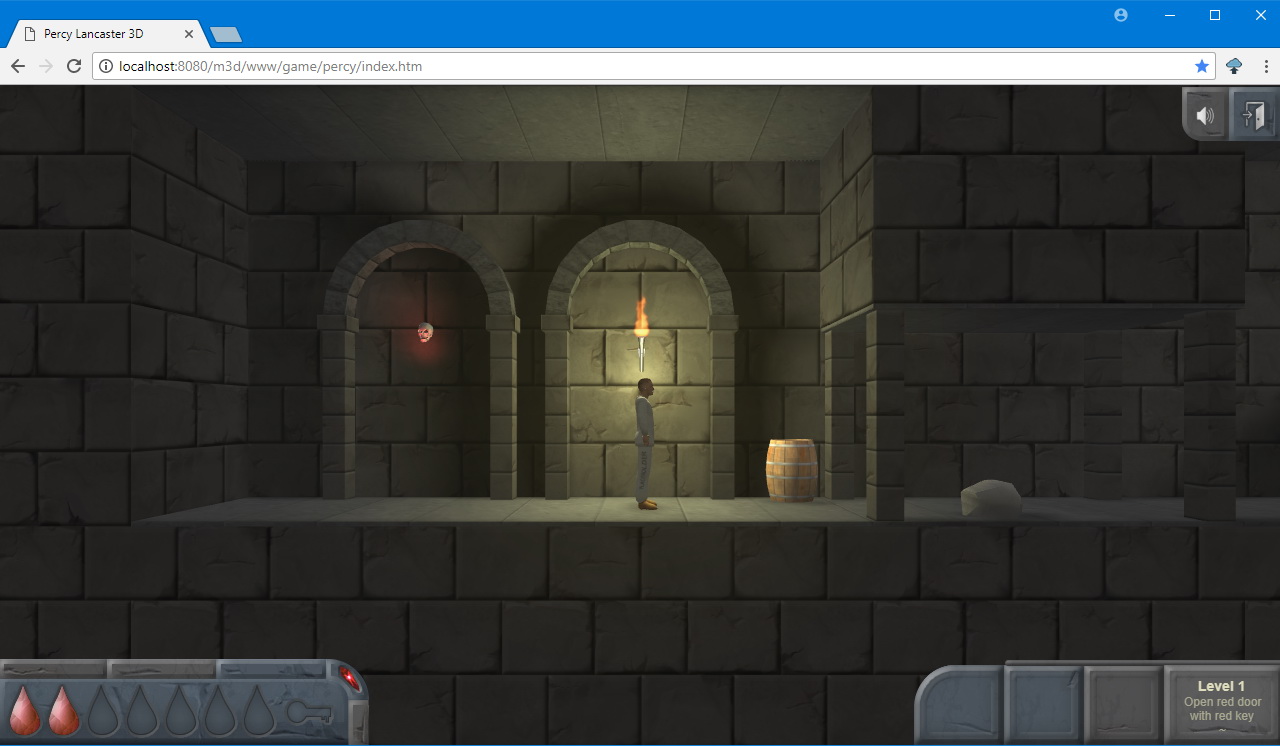
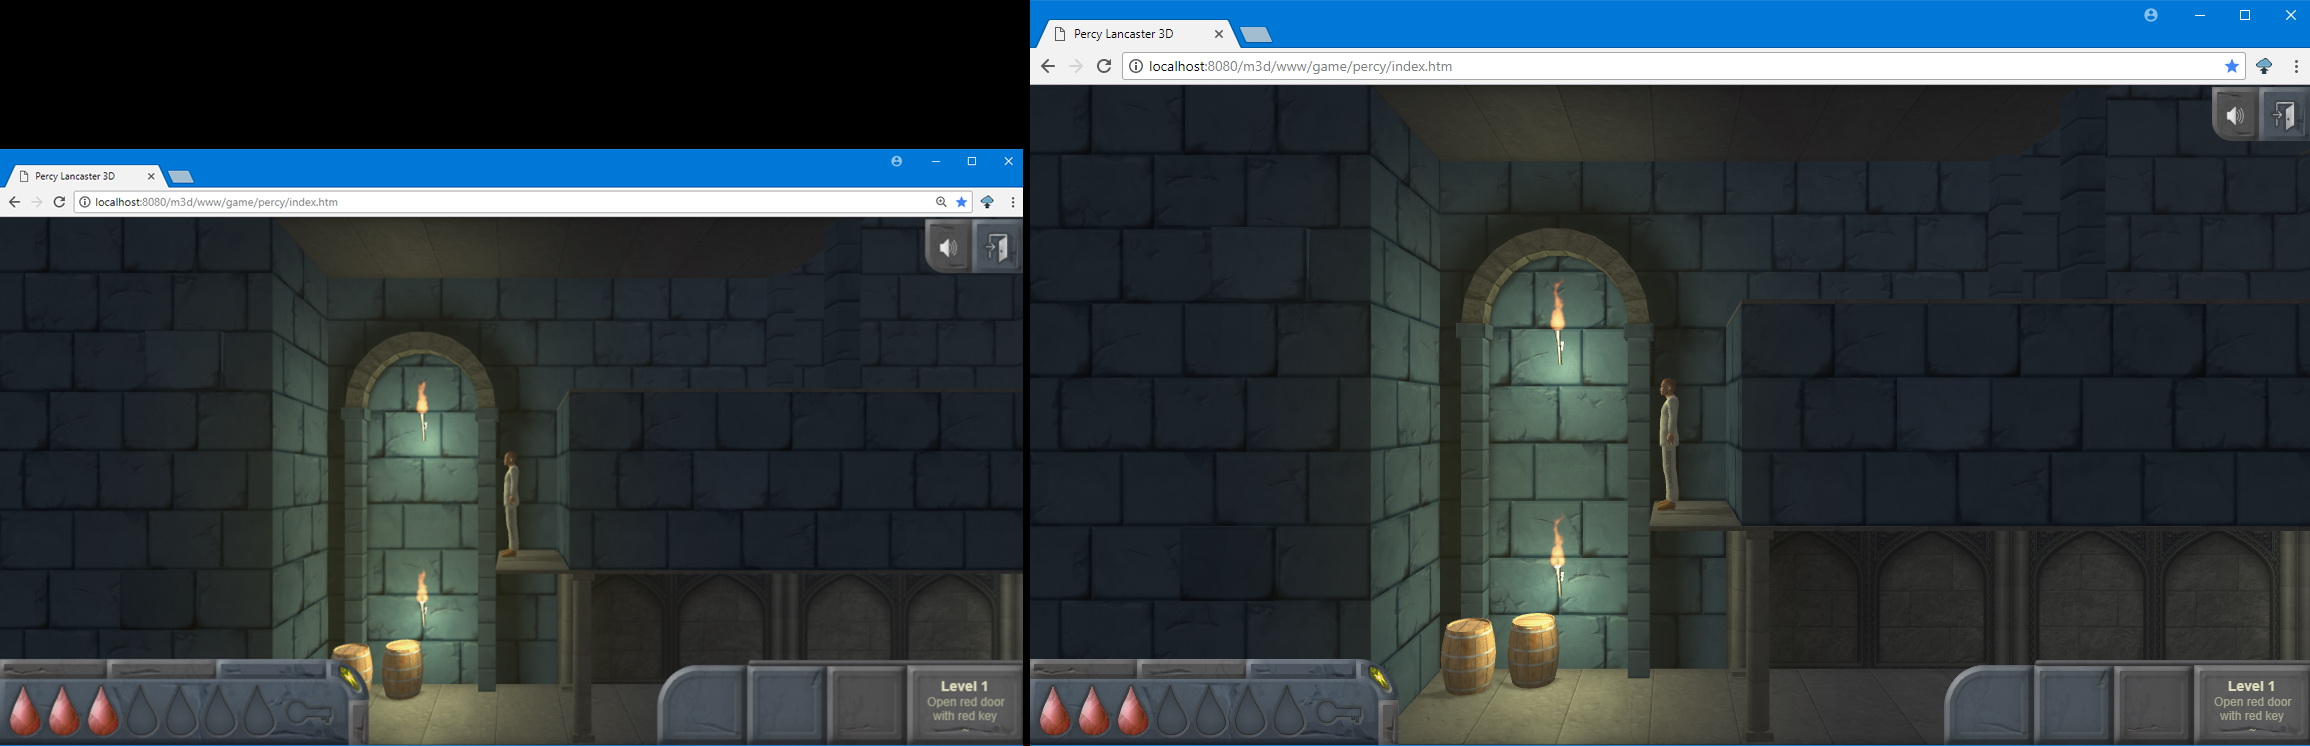
In full-screen mode, there will be real 16: 9. It would be possible to adapt the image in general to any proportions of the browser window, but I did not do it, since a low wide window would lead to a too large viewing angle, which is not good from the point of view of gameplay: distant dead ends, objects, enemies will be immediately visible and everything else that the player does not need to see yet. Therefore, I limited myself to adjusting within ± 10% of 16: 9. However, for narrow monitors (4: 3), I nevertheless realized the ability to switch from 16: 9 to adaptation mode from 4: 3 to 16: 9 by pressing the Y key. But not wider - so, again, not to break the gameplay. That is, you can play in the classic 16: 9 ratio, or you can enlarge the image to the height of the window by cropping it horizontally. Although, this is also not very good, for example, in arcade situations, when something flies towards the player from the side. Little time is left for the reaction. But you can always quickly return to classic mode.

Screen adaptation, as well as all the hot keys used in the game are shown in the following video:
Actually, the aspect ratio is set in the game settings.
aspect1:{w:1280, h:720, p:10}, //16x9 +- 10% aspect2:{w:960, h:720, p:34}, //4x3 +- 34%
And in the game, when you press Y, it switches:
contr.btCodesDn[89] = function() { //'y' if (m3dcache.setup.aspect.swch == 1) { m3dcache.setup.aspect = m3dcache.setup.aspect2; m3dcache.setup.aspect.swch = 2; } else { m3dcache.setup.aspect = m3dcache.setup.aspect1; m3dcache.setup.aspect.swch = 1; }; m3d.core.onWindowResize(0); m3d.contr.renderAll(); };
My library has an event that hangs on the resize window. Here is a fragment of it:
The code
m3dcache.v.vw = window.innerWidth; m3dcache.v.vh = window.innerHeight; m3dcache.v.vclipw = 0; m3dcache.v.vcliph = 0; if (typeof m3dcache.setup.aspect !== "undefined") { if ((m3dcache.setup.aspect.w == 0) || (m3dcache.setup.aspect.h == 0)) {} else { var o = m3d.lib.inBlock(0, 0, m3dcache.setup.aspect.w, m3dcache.setup.aspect.h, 0, 0, m3dcache.v.vw, m3dcache.v.vh, 'center', 'center', 'resize'); if (typeof m3dcache.setup.aspect.p !== "undefined") { if (o.clipx > 0) { ow = ow * (m3dcache.setup.aspect.p / 100 + 1); if (ow > m3dcache.v.vw) { ow = m3dcache.v.vw; }; o = m3d.lib.inBlock(0, 0, ow, oh, 0, 0, m3dcache.v.vw, m3dcache.v.vh, 'center', 'center', 'resize'); }; }; m3dcache.v.vclipw = o.clipx; m3dcache.v.vcliph = o.clipy; var margx = o.clipx + 'px', margy = o.clipy + 'px'; document.getElementById('m3dcontainer').style.marginLeft = margx; document.getElementById('m3dcontainer').style.marginTop = margy; if (document.getElementById('renderer') !== null) { document.getElementById('renderer').style.marginLeft = margx; document.getElementById('renderer').style.marginTop = margy; }; m3dcache.v.vw = ow; m3dcache.v.vh = oh; }; };
m3d.lib.inBlock is also a function of my library, which inscribes a rectangle into another rectangle with parameters such as centering, scaling or cropping, and displays the new dimensions of the inscribed rectangle, as well as the sizes of the fields that are formed in this process. Based on this information, the div container of the window is positioned. 'renderer' is a block context element of a 3D scene. Further, the canvas is scaled there in accordance with the obtained parameters.
The UI is displayed in the container on a separate canvas element. In general, the document tree consists of three transparent DIV blocks with absolute positioning (more or less is possible, depending on the needs of the game): on the bottom is the canvas of the 3D scene, above is the canvas for IU and the top is used to animate interface elements and other visual effects . That is, the UI is not rendered in 3D, but on its knavass, or layer. The task of combining layers into a single picture is left to the browser. To work with the UI, I have a special object in the library. Briefly - the essence is as follows. Sprite lists with UI elements in png format with transparency are loaded. From there, the necessary elements are taken - backgrounds, buttons. And they are drawn on the middle canvas using the js drawImage function (img, ix, iy, iw, ih, x, y, w, h). That is, the necessary fragments from the picture are displayed in the desired positions on the screen. Buttons are displayed on top of the backgrounds attached to them - all their positions and sizes are set in the UI configuration. When resizing a window, the positions of elements on the target canvas (on which they are displayed) are recalculated, depending on whether this or that element is centered horizontally and vertically or snapped to any corner or face of the screen. This creates an adaptive UI that does not depend on the aspect ratio of the screen. Only it is necessary to set the minimum possible resolution horizontally and vertically and not fall below it so that the elements do not overlap each other. I’ll talk about the UI another time, because the article turned out to be voluminous, and I’m still working on the UI, because there are still a lot of lacking functions that I need. For example, on high-resolution monitors, the interface will look small. You can multiply the size of the elements by a certain coefficient, depending on the screen resolution. On the other hand, maybe the huge buttons on the screen are not needed? If the screen resolution is huge, then the screen itself is quite large.
And you can give the programmer a choice - whether to scale the IU dynamically along with the size of the window or distribute the elements in the corners. In the case of dynamic size, there are also questions of their own - for example, the “soap” of an interface when it is displayed on a too large scale. If you make sprites of interface elements in a deliberately huge resolution, then they will take up a lot of space and, probably, it will not be useful for small devices - they still do not need large sprites, but they will consume memory.
I think that's enough for today. There is still something to think about, how to implement this or that. In the meantime, I digress for some time from programming and do promotion. I plan to participate in a pair of indie showcases and am actively involved in promoting the game in social networks, since in November I plan to go to the crowdfunding platform: I will need specialists in the field of 3D graphics and skeletal animation in order to complete the game.
In the following articles, I’ll talk about touch control in browsers for mobile devices - not everyone connects a gamepad or keyboard to the tablet, about optimizing 3D graphics for low-power devices, and much more.