Organization of online broadcasts in special conditions
Hello! In this article I would like to talk about how the IT team of the online hotel reservation service Ostrovok.ru set up online broadcasts of various corporate events.
In the Ostrovok.ru office there is a special meeting room - “Big”. Every day, it hosts working and informal events: team meetings, presentations, trainings, master classes, interviews with invited guests and other interesting events. The company employs more than 800 people - many of them work remotely in other cities and countries, and not everyone has the opportunity to physically attend every meeting. Therefore, the task of organizing online broadcasts of internal meetings was not long in coming and flew into the IT team. I’ll tell you more about how we did it.
So, we need to set up an online broadcast of events and record them with the ability to view them at a time convenient for the employee.
We also need to watch the broadcasts not only very easily, but also safely - we must not allow access to broadcasts to outsiders. And, of course, no third-party programs, plug-ins and other devilishness. Everything should be as simple as possible: open a link - watch a video.
Ok, the task is clear. It turns out that we need a video hosting site that provides users with services for storing, delivering and displaying video. With the possibility of limited access and opening access to all users of the domain.
Welcome to YouTube!

At first, everything looked as follows:
It turns out this way: the speaker comes with his laptop into the meeting room, connects via cable to the projector and shows a presentation, and those present ask questions. The camcorder captures the screen on which the slides are broadcast and records the overall sound. All this comes to the laptop, and from there XSplit broadcasts the recording to YouTube.
Thus, all interested employees who could not attend the meeting got the opportunity to watch the live broadcast of the presentation or return to its recording later at a convenient time. It would seem that the job is done - we disagree. But not so simple. As it turned out, this solution had one, but a very important minus - the sound on the recording was of very mediocre quality.
It was from this minus that our road began, full of pain and disappointment.
Obviously, the built-in microphone on the camcorder did not extend the entire meeting room and the speaker’s speech, for which everyone was watching online broadcasts.
But how to improve the sound quality in the broadcast, if not possible:
I’ll tell you more about all the methods we tried.
The first thing we did was test the external microphone for the camcorder. To do this, we have acquired the following models:
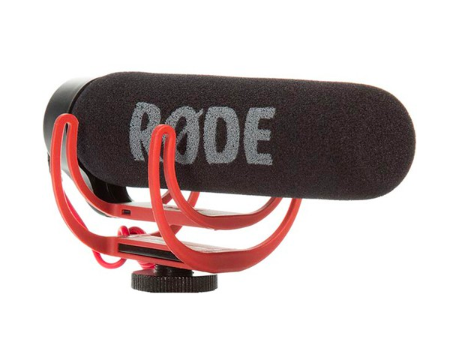
1. RODE VideoMic GO microphone - the average cost is 7,000 rubles.
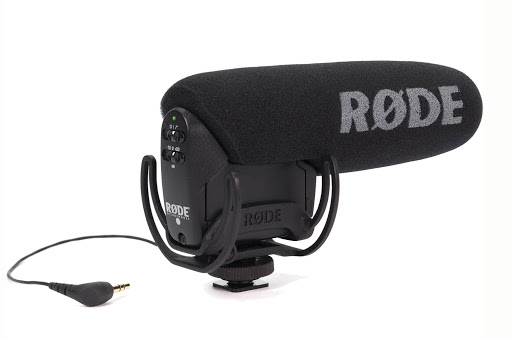
2. Microphone RODE VideoMic Pro - the average cost is 22 000 rubles.
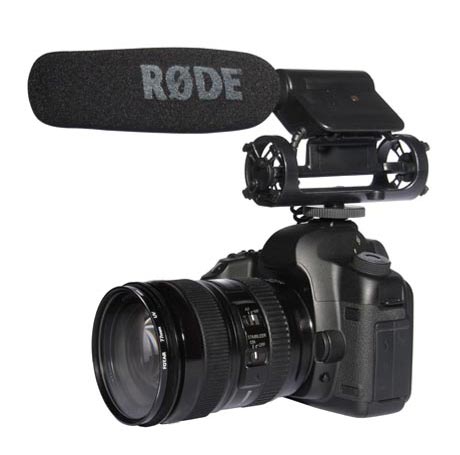
Microphones are connected to the camera, and it looks something like this:
Test results:
It’s good that we rented microphones.
After thinking, we decided that if a microphone worth 22,000 rubles only slightly improved the overall sound level, then we need to act big.
So we rented a microphone array Phoenix Audio Condor (MT600) worth 109 000 rubles.
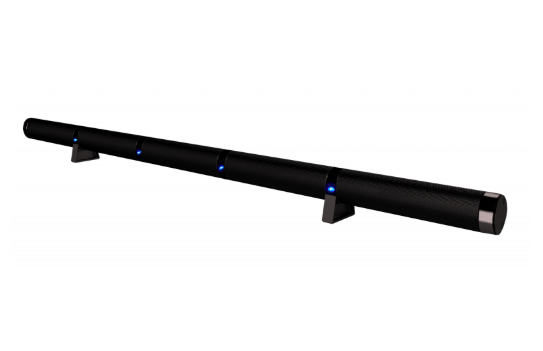
This panel is 122 cm long, which is an array of 15 microphones with a capture angle of 180 degrees, a built-in signal processor to combat echo and noise and other cool buns.
Such a monstrous thing will surely improve our position with sound, but ...

Test results:
In fact, the microphone is undeniably good, but it is only suitable for a separate small conference room. In our case, it was located under the projector screen, and people at the other end of the room were inaudible. In addition to the noise reduction mode of operation, questions arose - he periodically cut off the beginning and end of the speaker’s phrases.

Obviously, we need some kind of microphone network. Moreover, placed throughout the room and connected to a laptop.
Our choice fell on the microphone for web conferencing MXL AC-404-Z (average cost - 10,000 rubles).
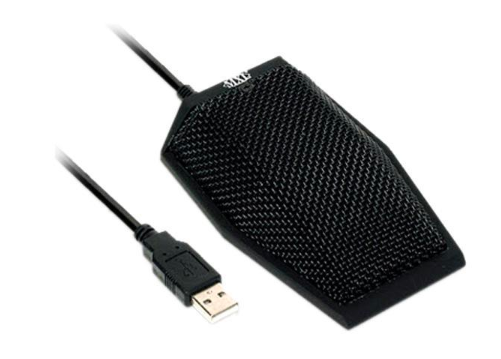
And we used these not two or three, but SEVEN at once.
Yes, the microphones are wired, which means that the whole room will be in wires, but this is another problem.
Most importantly, this option did not suit us either: the microphones did not work as one whole array providing high-quality sound. In the system, they were defined as seven separate microphones. And only one could be chosen.

Obviously, we need some kind of device designed for mixing audio signals, and summing several sources into one or more outputs.
Right! We need ... a mixing console! In which microphones would be connected. And which would connect to a laptop.
At the same time, due to the impossibility of wired connecting microphones to the table, we need a radio system that allows us to transmit an audio signal using a wireless connection, while maintaining sound quality.
Plus, we need several omnidirectional microphones that can be distributed around the table for the duration of the presentation and removed at the end of the presentation.
It was not difficult to decide on the mixing console - we chose the Yamaha MG10XUF (average cost - 20,000 rubles), which connects to the laptop via USB.

But with microphones it was more difficult.
As it turned out, a ready-made solution does not exist. So we had to turn an omnidirectional miniature condenser head microphone into ... a desktop microphone.
We rented a SHURE BLX188E M17 radio system (average cost - 50,000 rubles) and two SHURE MX153T / O-TQG microphones (average cost per unit - 14,000 rubles).
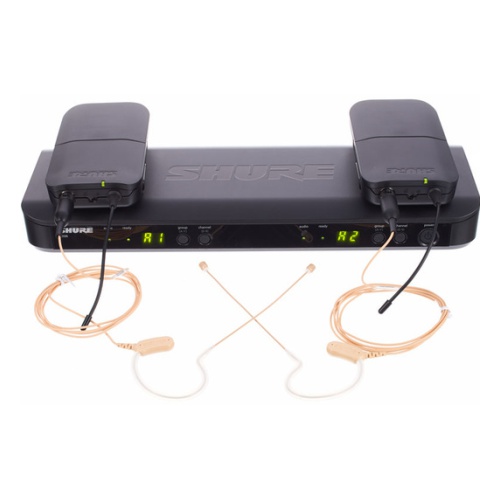
With the help of limitless imagination, we made of this:
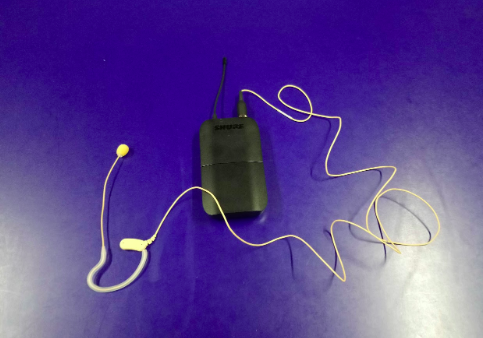
… this:

And we got a wireless omnidirectional miniature condenser desktop microphone!
Using the mixing console, we gave amplification to the microphones, and since the microphone is omnidirectional, it captures both the speaker and the one who asked the question.
We bought a third microphone and place them in a triangle, for greater coverage - so the recording quality becomes more voluminous. And the work of the squelch does not interfere.
In the end, this was the solution to all our problems with broadcasting on YouTube. Because it works. Not as elegant as we would like, but it works on the conditions that were in the beginning.
Is it a victory? Maybe.

The Battle ofHelm's Fall YouTube is over, the Battle of Middle-earth more interactive broadcasts are just beginning!
In the next article, we’ll show you how you integrated Youtube with Zoom’s remote conferencing system.
In the Ostrovok.ru office there is a special meeting room - “Big”. Every day, it hosts working and informal events: team meetings, presentations, trainings, master classes, interviews with invited guests and other interesting events. The company employs more than 800 people - many of them work remotely in other cities and countries, and not everyone has the opportunity to physically attend every meeting. Therefore, the task of organizing online broadcasts of internal meetings was not long in coming and flew into the IT team. I’ll tell you more about how we did it.
So, we need to set up an online broadcast of events and record them with the ability to view them at a time convenient for the employee.
We also need to watch the broadcasts not only very easily, but also safely - we must not allow access to broadcasts to outsiders. And, of course, no third-party programs, plug-ins and other devilishness. Everything should be as simple as possible: open a link - watch a video.
Ok, the task is clear. It turns out that we need a video hosting site that provides users with services for storing, delivering and displaying video. With the possibility of limited access and opening access to all users of the domain.
Welcome to YouTube!
How it all began
At first, everything looked as follows:
- Install the Panasonic HC-V770 camcorder on a tripod under the projector;
- Using a microHDMI-HDMI cable, we connect the camcorder to the AVerMedia Live Gamer Portable C875 video capture card;
- We connect the video capture card via miniUSB-USB cable to the laptop;
- On the laptop, install the XSplit program;
- Through XSplit, we create a broadcast on YouTube.
It turns out this way: the speaker comes with his laptop into the meeting room, connects via cable to the projector and shows a presentation, and those present ask questions. The camcorder captures the screen on which the slides are broadcast and records the overall sound. All this comes to the laptop, and from there XSplit broadcasts the recording to YouTube.
Thus, all interested employees who could not attend the meeting got the opportunity to watch the live broadcast of the presentation or return to its recording later at a convenient time. It would seem that the job is done - we disagree. But not so simple. As it turned out, this solution had one, but a very important minus - the sound on the recording was of very mediocre quality.
It was from this minus that our road began, full of pain and disappointment.
How to improve the sound?
Obviously, the built-in microphone on the camcorder did not extend the entire meeting room and the speaker’s speech, for which everyone was watching online broadcasts.
But how to improve the sound quality in the broadcast, if not possible:
- make the room a full conference room;
- put wired microphones on the table, because the table is sometimes cleaned, and the wires always interfere with everything;
- give a wireless microphone to the speaker, because, firstly, no one wants to speak into the microphone, secondly, there can be several speakers, thirdly, those who ask questions will not be heard.
I’ll tell you more about all the methods we tried.
Solution 1
The first thing we did was test the external microphone for the camcorder. To do this, we have acquired the following models:
1. RODE VideoMic GO microphone - the average cost is 7,000 rubles.
2. Microphone RODE VideoMic Pro - the average cost is 22 000 rubles.
Microphones are connected to the camera, and it looks something like this:
Test results:
- The RODE VideoMic GO microphone was no better than the built-in microphone in the camcorder itself.
- The RODE VideoMic Pro microphone turned out to be slightly better than the built-in microphone, but still did not satisfy our needs for sound quality.
It’s good that we rented microphones.
Decision 2
After thinking, we decided that if a microphone worth 22,000 rubles only slightly improved the overall sound level, then we need to act big.
So we rented a microphone array Phoenix Audio Condor (MT600) worth 109 000 rubles.
This panel is 122 cm long, which is an array of 15 microphones with a capture angle of 180 degrees, a built-in signal processor to combat echo and noise and other cool buns.
Such a monstrous thing will surely improve our position with sound, but ...
Test results:
In fact, the microphone is undeniably good, but it is only suitable for a separate small conference room. In our case, it was located under the projector screen, and people at the other end of the room were inaudible. In addition to the noise reduction mode of operation, questions arose - he periodically cut off the beginning and end of the speaker’s phrases.
Decision 3
Obviously, we need some kind of microphone network. Moreover, placed throughout the room and connected to a laptop.
Our choice fell on the microphone for web conferencing MXL AC-404-Z (average cost - 10,000 rubles).
And we used these not two or three, but SEVEN at once.
Yes, the microphones are wired, which means that the whole room will be in wires, but this is another problem.
Most importantly, this option did not suit us either: the microphones did not work as one whole array providing high-quality sound. In the system, they were defined as seven separate microphones. And only one could be chosen.
Decision 4
Obviously, we need some kind of device designed for mixing audio signals, and summing several sources into one or more outputs.
Right! We need ... a mixing console! In which microphones would be connected. And which would connect to a laptop.
At the same time, due to the impossibility of wired connecting microphones to the table, we need a radio system that allows us to transmit an audio signal using a wireless connection, while maintaining sound quality.
Plus, we need several omnidirectional microphones that can be distributed around the table for the duration of the presentation and removed at the end of the presentation.
It was not difficult to decide on the mixing console - we chose the Yamaha MG10XUF (average cost - 20,000 rubles), which connects to the laptop via USB.
But with microphones it was more difficult.
As it turned out, a ready-made solution does not exist. So we had to turn an omnidirectional miniature condenser head microphone into ... a desktop microphone.
We rented a SHURE BLX188E M17 radio system (average cost - 50,000 rubles) and two SHURE MX153T / O-TQG microphones (average cost per unit - 14,000 rubles).
With the help of limitless imagination, we made of this:
… this:
And we got a wireless omnidirectional miniature condenser desktop microphone!
Using the mixing console, we gave amplification to the microphones, and since the microphone is omnidirectional, it captures both the speaker and the one who asked the question.
We bought a third microphone and place them in a triangle, for greater coverage - so the recording quality becomes more voluminous. And the work of the squelch does not interfere.
In the end, this was the solution to all our problems with broadcasting on YouTube. Because it works. Not as elegant as we would like, but it works on the conditions that were in the beginning.
Is it a victory? Maybe.
The Battle of
In the next article, we’ll show you how you integrated Youtube with Zoom’s remote conferencing system.
All Articles