Boost JavaScript debugging skills using console tricks
Here is a translation of an article from the Better Programming Blog on Medium.com. The author, Indrek Lasn , talks about the code debugging tools that JavaScript provides.

The usual debugging of JavaScript code is to output the results using the
method. However, although this method works, it can hardly be called optimal. Why not make debugging more convenient?

The
object provides access to the browser debugging console. It can be used only if the JavaScript code is launched in the browser (i.e., this is the code of the client part, and not the server part). The
implementation may differ from browser to browser, but, as a rule, there is always some basic functionality. The best thing about debugging operators is their ability to work with all libraries and frameworks (due to the fact that they are sewn into the core of the language).
The simplest example of using
is code output. For example, take the following code:
It displays the name that is passed to the
function.

Output the name passed to the function
And if we want to know how many times the
function was called? Nothing complicated. We use
for this.
The
function displays the number of calls with the specified
parameter. If no
is specified, then the number of calls with the default parameter is displayed.
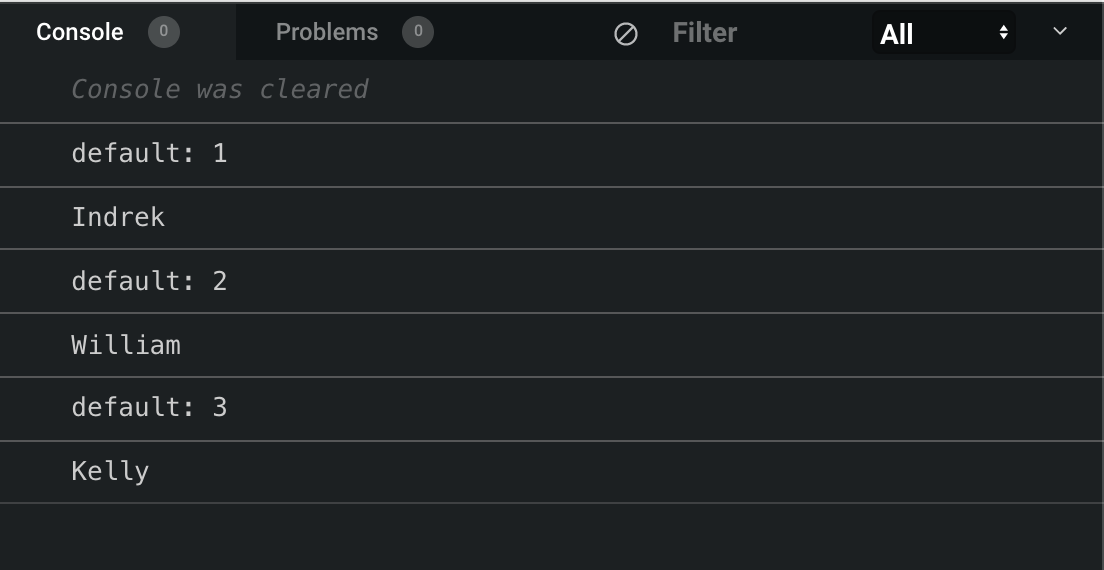
The code above displays the following:

Counting sayHello function calls
Thus we can find out the total number of function calls. And if you need to know the number of function calls with the same name? It's simple - just pass the
argument to the
method.
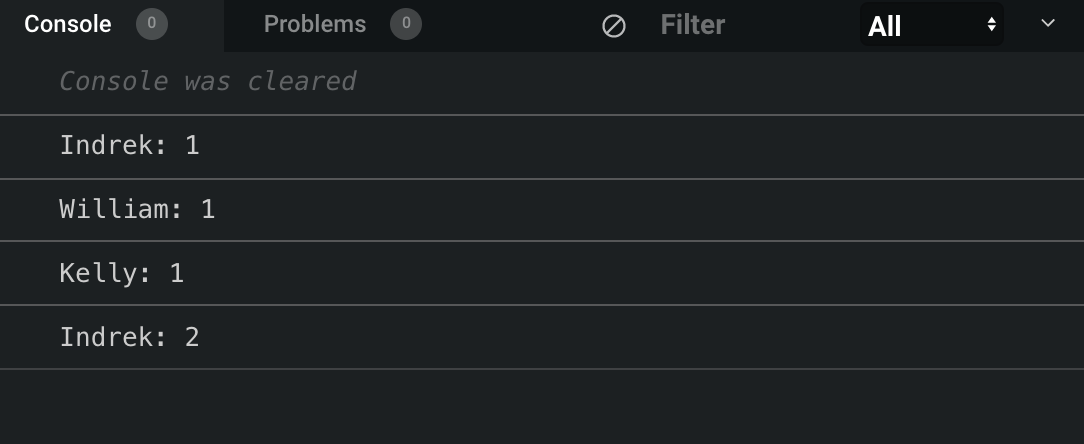
Voila! This function keeps track of how many times we called a function with one name or another.

Counting the number of mentions of each name
This method displays a warning in the console - useful when using the API or development tools.
can always show that something is going wrong: an argument is missing, an API version is outdated, etc.
This code checks to see if the
argument has been passed to the function. If this does not happen, a warning is displayed in the console.

A warning that the name is not transferred
When working with arrays and objects, when it comes to displaying data, the
method is very useful. Thanks to it, a separate row is allocated for each element in the table.
Let's look at the operation of this method with an example of an array of fruits. If we pass the array to
, we will see the following:
And if we look at the console, we will see a table describing our array.

Array presented in the form of a table
Imagine how useful this is if you have to work with arrays of hundreds or even thousands of values. Let's look at another example - now more values will be enclosed in our array.
By calling
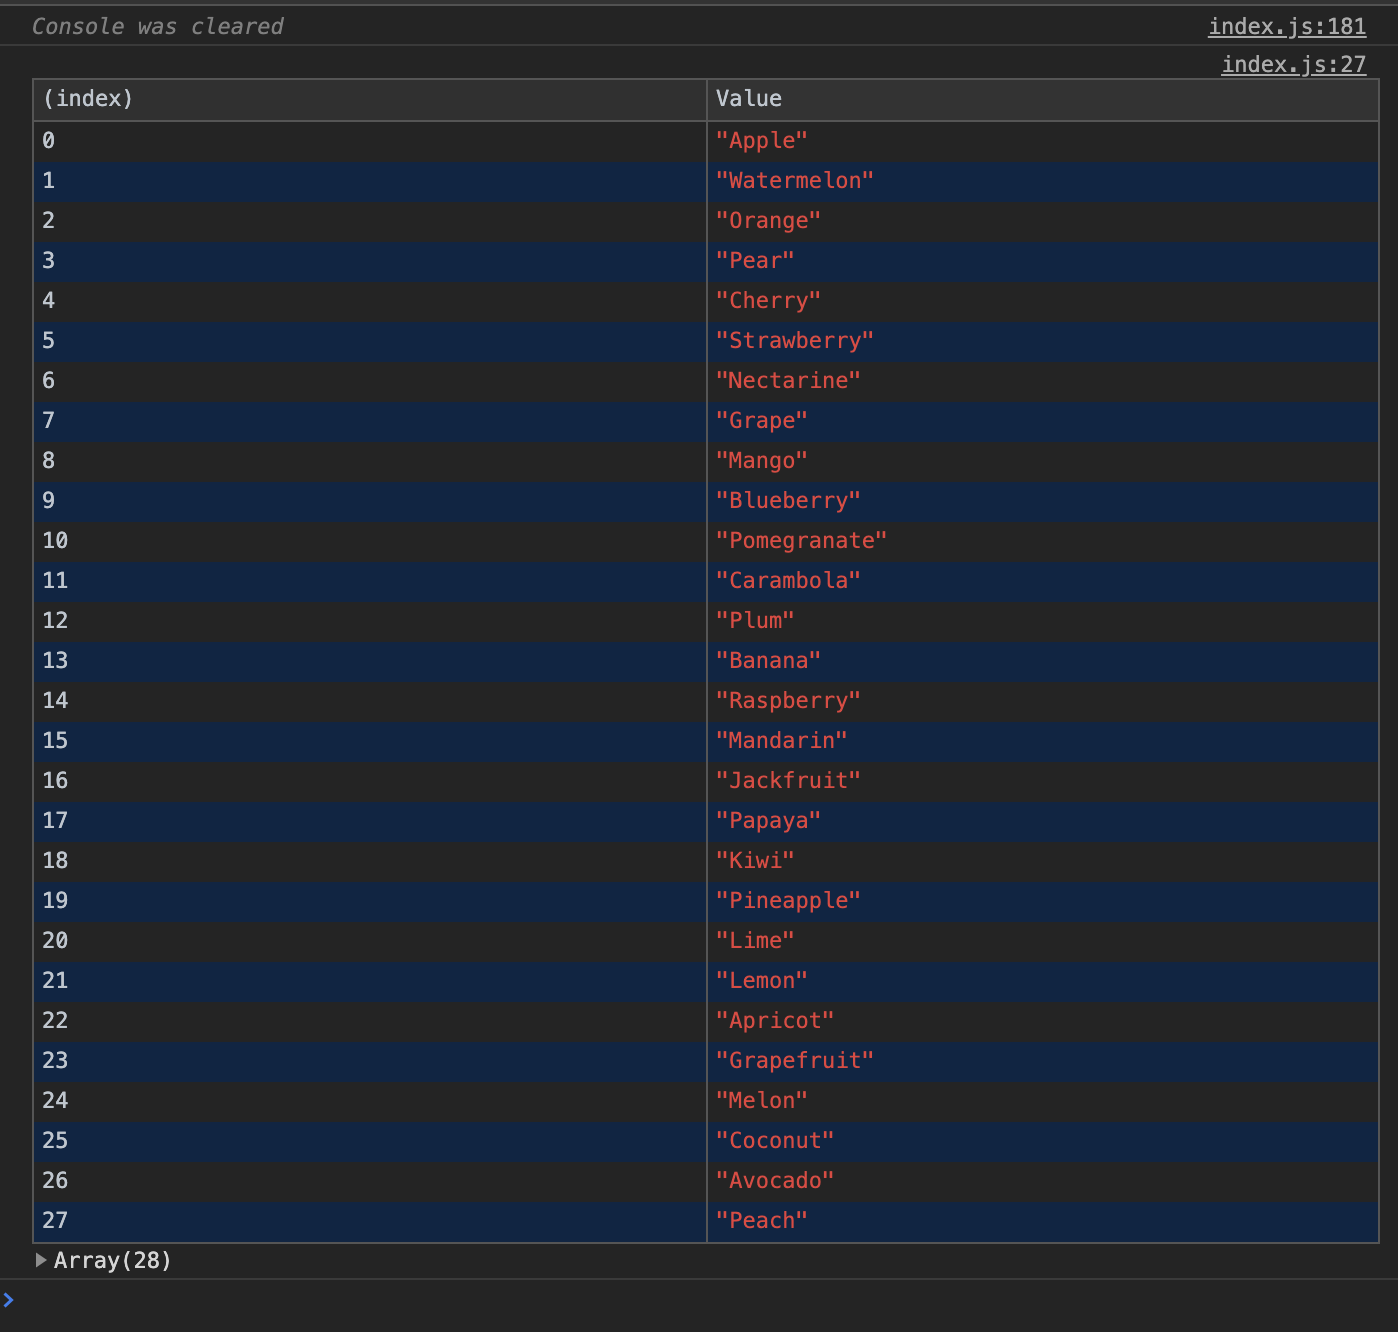
, we will see the following table:

All fruits are displayed in a table.
Working with arrays is easy. But what if, instead of arrays, objects?
So, instead of an array, we now have an object that contains two keys:
(name) and
(type) of the pet.

Previously, the table only displayed values, but now it contains values and keys. And if you take another object and try to add it to the table?
As expected, two separate objects appear in two different tables.

Two objects
Since we need to combine them in one table, we put both objects in an array.
Now group the objects inside the table.

Group objects by placing them in an array
When working with sets or related data, you can use nested groups. This is convenient because it allows you to display visually related messages to the console. To create a new nested group, you need to call
.
This code displays embedded blocks with information in the console. This can be useful when working with data presented in tabular form.

The
method works similarly, but the new block is collapsed by default. To read it, you need to click on the deploy button.
Use all the tools that this or that programming language provides. If that makes sense - just try it! And a little note: I dedicated a separate article to the internal JavaScript debugger, which can be read here .
If you are new to JavaScript and want to learn this language, I recommend starting with reading books and writing small programs in parallel. The “A Smarter Way to Learn JavaScript” tutorial will be very useful, but here is a list of ideas for writing fun apps.
Thanks for reading!

The usual debugging of JavaScript code is to output the results using the
console.log
method. However, although this method works, it can hardly be called optimal. Why not make debugging more convenient?

The
console
object provides access to the browser debugging console. It can be used only if the JavaScript code is launched in the browser (i.e., this is the code of the client part, and not the server part). The
console
implementation may differ from browser to browser, but, as a rule, there is always some basic functionality. The best thing about debugging operators is their ability to work with all libraries and frameworks (due to the fact that they are sewn into the core of the language).
The simplest example of using
console.log
is code output. For example, take the following code:
function sayHello(name) { console.log(name) } sayHello('Indrek')
It displays the name that is passed to the
sayHello
function.

Output the name passed to the function
And if we want to know how many times the
sayHello
function was called? Nothing complicated. We use
console.count()
for this.
console.count
The
count()
function displays the number of calls with the specified
label
parameter. If no
label
is specified, then the number of calls with the default parameter is displayed.
function sayHello(name) { console.count() console.log(name) } sayHello("Indrek") sayHello("William") sayHello("Kelly")
The code above displays the following:

Counting sayHello function calls
Thus we can find out the total number of function calls. And if you need to know the number of function calls with the same name? It's simple - just pass the
name
argument to the
count
method.
function sayHello(name) { console.count(name) } sayHello("Indrek") sayHello("William") sayHello("Kelly") sayHello("Indrek")
Voila! This function keeps track of how many times we called a function with one name or another.

Counting the number of mentions of each name
console.warn
This method displays a warning in the console - useful when using the API or development tools.
console.warn
can always show that something is going wrong: an argument is missing, an API version is outdated, etc.
function sayHello(name) { if(!name) { console.warn("No name given") } } sayHello()
This code checks to see if the
name
argument has been passed to the function. If this does not happen, a warning is displayed in the console.

A warning that the name is not transferred
console.table
When working with arrays and objects, when it comes to displaying data, the
console.table
method is very useful. Thanks to it, a separate row is allocated for each element in the table.
Let's look at the operation of this method with an example of an array of fruits. If we pass the array to
console.table
, we will see the following:
const fruits = ["kiwi", "banana", "strawberry"] console.table(fruits)
And if we look at the console, we will see a table describing our array.

Array presented in the form of a table
Imagine how useful this is if you have to work with arrays of hundreds or even thousands of values. Let's look at another example - now more values will be enclosed in our array.
const fruits = [ "Apple", "Watermelon", "Orange", "Pear", "Cherry", "Strawberry", "Nectarine", "Grape", "Mango", "Blueberry", "Pomegranate", "Carambola", "Plum", "Banana", "Raspberry", "Mandarin", "Jackfruit", "Papaya", "Kiwi", "Pineapple", "Lime", "Lemon", "Apricot", "Grapefruit", "Melon", "Coconut", "Avocado", "Peach" ]; console.table(fruits);
By calling
console.table
, we will see the following table:

All fruits are displayed in a table.
Working with arrays is easy. But what if, instead of arrays, objects?
const pets = { name: "Simon", type: "cat" }; console.table(pets);
So, instead of an array, we now have an object that contains two keys:
name
(name) and
type
(type) of the pet.

Previously, the table only displayed values, but now it contains values and keys. And if you take another object and try to add it to the table?
const pets = { name: "Simon", type: "cat" }; const person = { firstName: "Indrek", lastName: "Lasn" } console.table(pets, person);
As expected, two separate objects appear in two different tables.

Two objects
Since we need to combine them in one table, we put both objects in an array.
const pets = { name: "Simon", type: "cat" }; const person = { firstName: "Indrek", lastName: "Lasn" } console.table([pets, person]);
Now group the objects inside the table.

Group objects by placing them in an array
console.group
When working with sets or related data, you can use nested groups. This is convenient because it allows you to display visually related messages to the console. To create a new nested group, you need to call
console.group()
.
console.log("This is the first level"); console.group(); console.log("Level 2"); console.group(); console.log("Level 3"); console.warn("More of level 3"); console.groupEnd(); console.log("Back to level 2"); console.groupEnd(); console.log("Back to the first level");
This code displays embedded blocks with information in the console. This can be useful when working with data presented in tabular form.

The
console.groupCollapsed()
method works similarly, but the new block is collapsed by default. To read it, you need to click on the deploy button.
Conclusion
Use all the tools that this or that programming language provides. If that makes sense - just try it! And a little note: I dedicated a separate article to the internal JavaScript debugger, which can be read here .
If you are new to JavaScript and want to learn this language, I recommend starting with reading books and writing small programs in parallel. The “A Smarter Way to Learn JavaScript” tutorial will be very useful, but here is a list of ideas for writing fun apps.
Thanks for reading!
All Articles