Modeling application state using Store objects in SwiftUI
This week I want to talk about modeling a data layer in SwiftUI. I have already finished work on my very first application, which I create using only SwiftUI. Now I can share the way to create a model layer using the Store objects that I used when developing the NapBot application.
Store objects are responsible for maintaining state and providing action to change it. You can have as many Store objects as you need, preferably simple and responsible for a small part of the state of your application. For example, you might have SettingsStore to save the state of user settings and TodoStore to save custom tasks.
To create a Store object, you must create a class that conforms to the ObservableObject protocol. The ObservableObject protocol allows SwiftUI to observe and respond to data changes. To learn more about ObservableObject, take a look at the article " Managing Data Flow in SwiftUI ". Let's look at a simple example of a SettingsStore object.
In the above code example, we have the SettingsStore class, which provides access to user settings. We also use didChangeNotification to notify SwiftUI whenever the user changes the default settings.
Let's look at another use of the store object by creating a simple Todo app. We need to create a store object that stores a list of tasks and provides actions for changing them, for example, deleting them and filtering them.
There is a TodosStore class that conforms to the ObservableObject protocol. TodosStore provides several actions for changing its state, we can use these methods from our views. By default, SwiftUI updates the view each time the @Published field changes . This is why the array of Todo elements is designated as @Published . As soon as we add or remove elements from this array, SwiftUI will update the view subscribed to TodosStore .
Now you can create a view that displays a list of tasks and such actions as marking a task as completed, deleting and changing the display order of tasks. Let's start by creating a view that displays the title of the task and a radio button to mark the task as completed.
In the above example, Binding was used to provide a reference, such as access to a value type. In other words, grant write access to the todo element. TodoItemView does not own an instance of the Todo structure, but it does have write access to TodoStore through Binding .
Now we have TodosView , an element that uses the List component to display tasks. The List component also provides reordering and deletion. Another interesting thing is the indexed () function. This function returns a collection of elements with its indices. We use it to access items in the store through Binding. Here is the complete source of this extension.
Environment is an ideal candidate for storing store objects. Environment can split them between multiple views without explicit implementation through the init method. To learn more about the benefits of Environment in SwiftUI, take a look at the article “ Environment Features in SwiftUI “.
This article discussed a way to model the state of an application using multiple store objects. I really like the simplicity of this approach and how easy it is to scale your application by adding more store objects. I hope you enjoyed this article.
Store Object
Store objects are responsible for maintaining state and providing action to change it. You can have as many Store objects as you need, preferably simple and responsible for a small part of the state of your application. For example, you might have SettingsStore to save the state of user settings and TodoStore to save custom tasks.
To create a Store object, you must create a class that conforms to the ObservableObject protocol. The ObservableObject protocol allows SwiftUI to observe and respond to data changes. To learn more about ObservableObject, take a look at the article " Managing Data Flow in SwiftUI ". Let's look at a simple example of a SettingsStore object.
import Foundation import Combine final class SettingsStore: ObservableObject { let objectWillChange = PassthroughSubject<Void, Never>() @UserDefault(Constants.UserDefaults.sleepGoal, defaultValue: 8.0) var sleepGoal: Double @UserDefault(Constants.UserDefaults.notifications, defaultValue: true) var isNotificationsEnabled: Bool private var didChangeCancellable: AnyCancellable? override init() { super.init() didChangeCancellable = NotificationCenter.default .publisher(for: UserDefaults.didChangeNotification) .map { _ in () } .receive(on: DispatchQueue.main) .subscribe(objectWillChange) } }
In the above code example, we have the SettingsStore class, which provides access to user settings. We also use didChangeNotification to notify SwiftUI whenever the user changes the default settings.
Extended use
Let's look at another use of the store object by creating a simple Todo app. We need to create a store object that stores a list of tasks and provides actions for changing them, for example, deleting them and filtering them.
import Foundation import Combine struct Todo: Identifiable, Hashable { let id = UUID() var title: String var date: Date var isDone: Bool var priority: Int } final class TodosStore: ObservableObject { @Published var todos: [Todo] = [] func orderByDate() { todos.sort { $0.date < $1.date } } func orderByPriority() { todos.sort { $0.priority > $1.priority } } func removeCompleted() { todos.removeAll { $0.isDone } } }
There is a TodosStore class that conforms to the ObservableObject protocol. TodosStore provides several actions for changing its state, we can use these methods from our views. By default, SwiftUI updates the view each time the @Published field changes . This is why the array of Todo elements is designated as @Published . As soon as we add or remove elements from this array, SwiftUI will update the view subscribed to TodosStore .
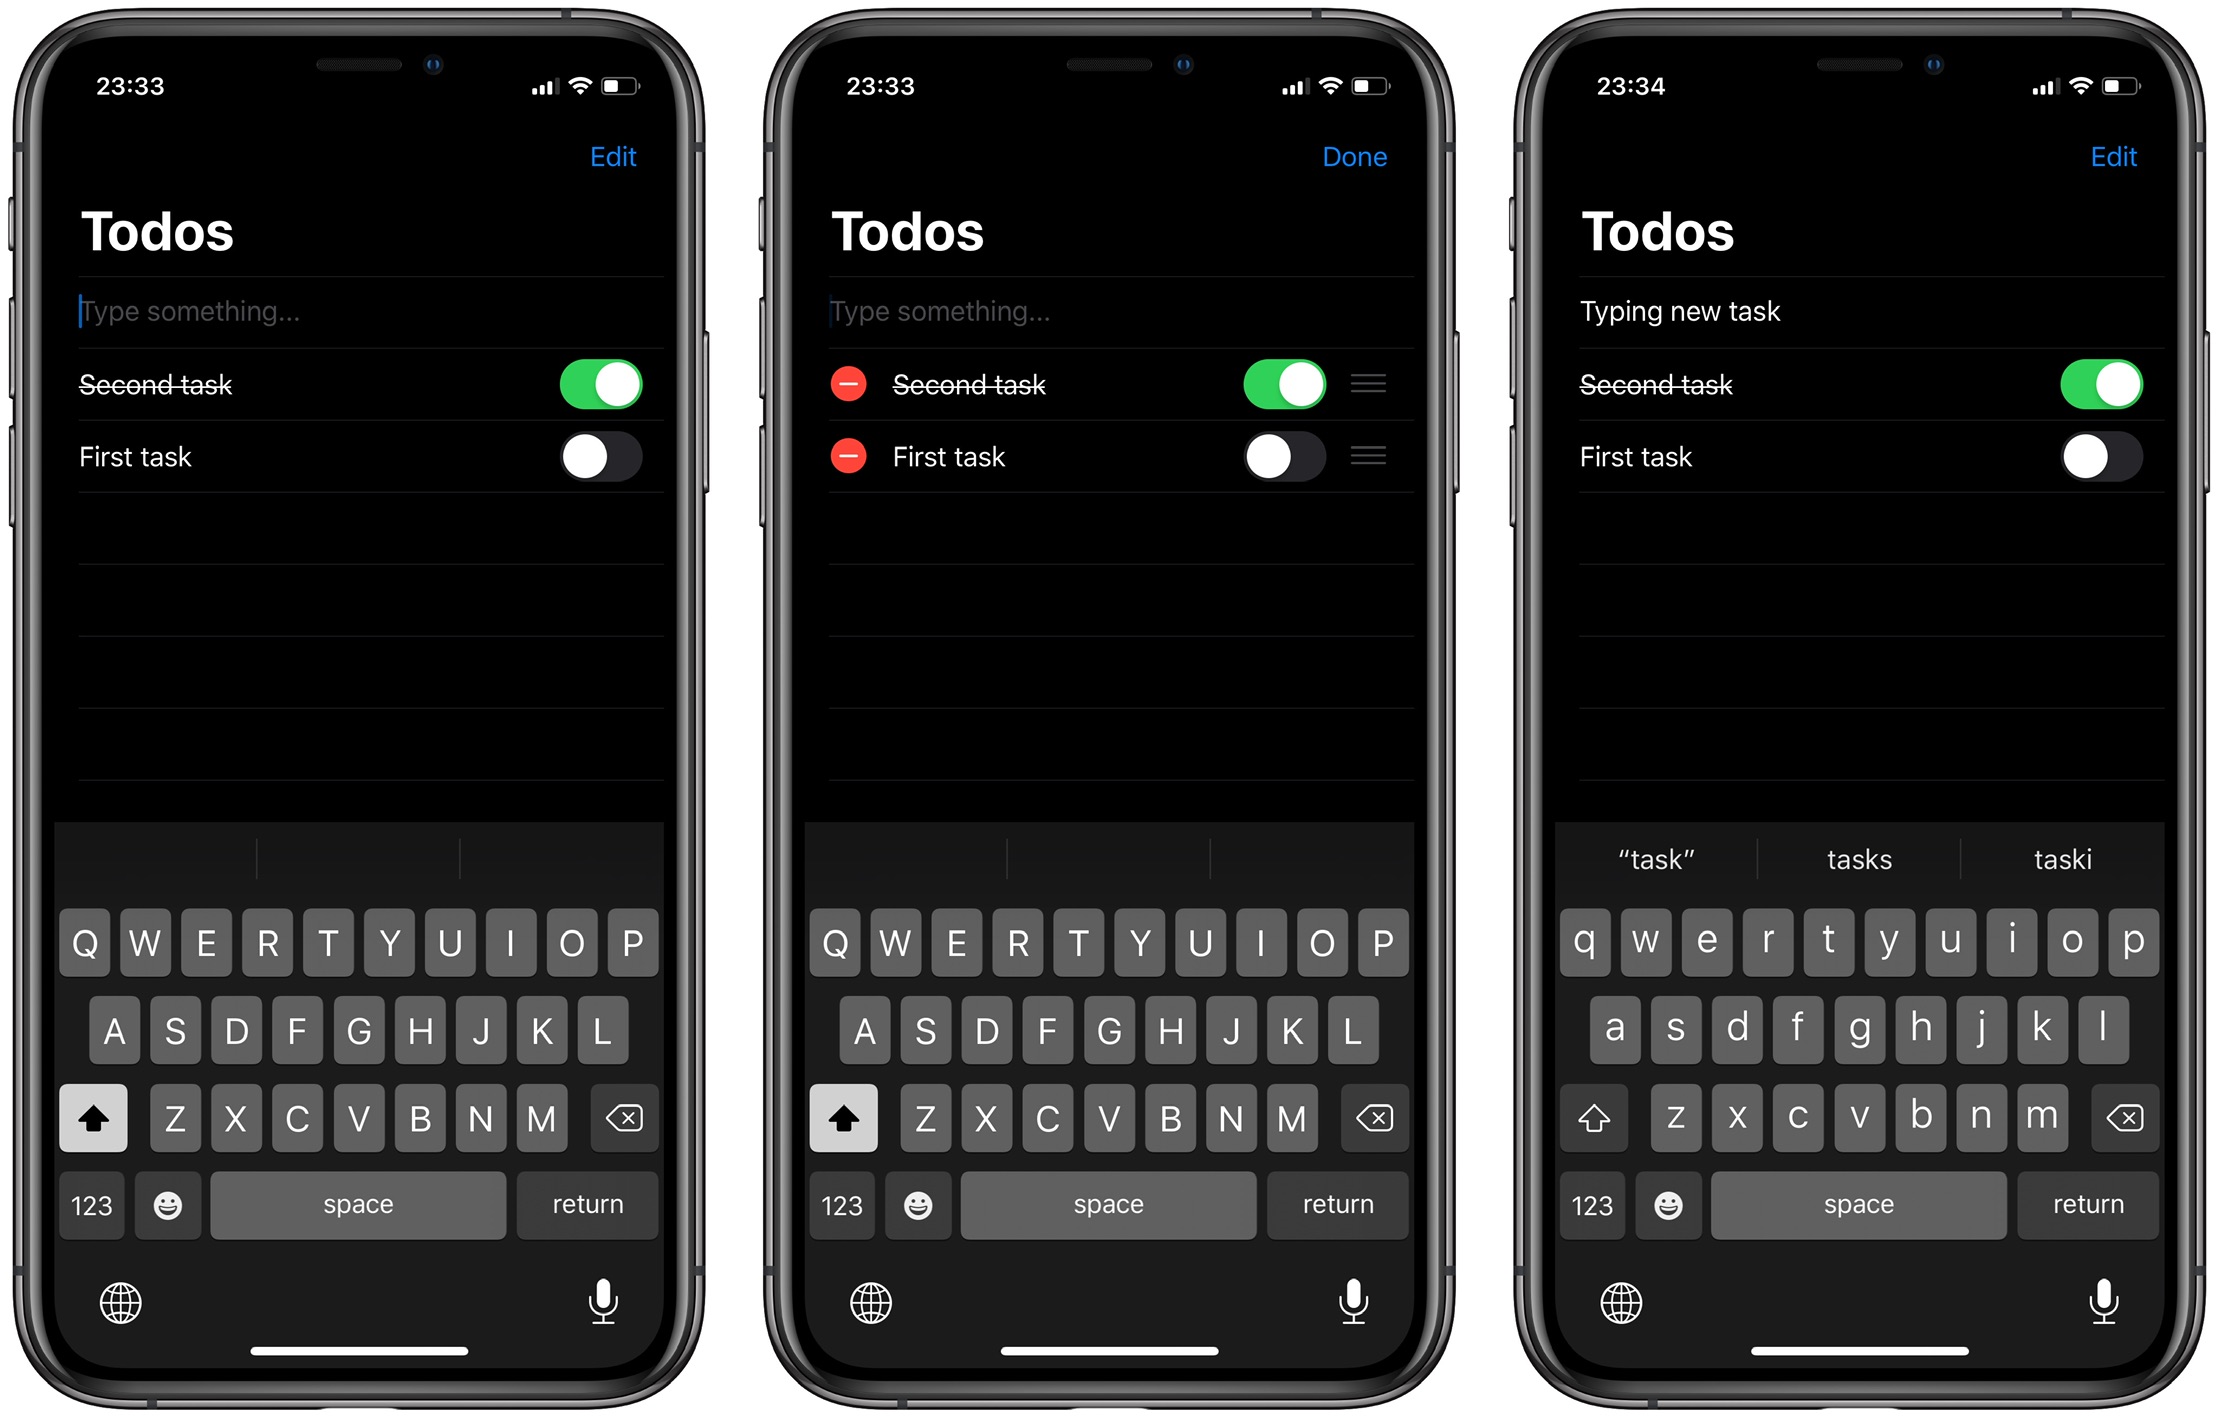
Now you can create a view that displays a list of tasks and such actions as marking a task as completed, deleting and changing the display order of tasks. Let's start by creating a view that displays the title of the task and a radio button to mark the task as completed.
import SwiftUI struct TodoItemView: View { let todo: Binding<Todo> var body: some View { HStack { Toggle(isOn: todo.isDone) { Text(todo.title.wrappedValue) .strikethrough(todo.isDone.wrappedValue) } } } }
In the above example, Binding was used to provide a reference, such as access to a value type. In other words, grant write access to the todo element. TodoItemView does not own an instance of the Todo structure, but it does have write access to TodoStore through Binding .
import SwiftUI struct TodosView: View { @EnvironmentObject var store: TodosStore @State private var draft: String = "" var body: some View { NavigationView { List { TextField("Type something...", text: $draft, onCommit: addTodo) ForEach(store.todos.indexed(), id: \.1.id) { index, _ in TodoItemView(todo: self.$store.todos[index]) } .onDelete(perform: delete) .onMove(perform: move) } .navigationBarItems(trailing: EditButton()) .navigationBarTitle("Todos") } } private func delete(_ indexes: IndexSet) { store.todos.remove(atOffsets: indexes) } private func move(_ indexes: IndexSet, to offset: Int) { store.todos.move(fromOffsets: indexes, toOffset: offset) } private func addTodo() { let newTodo = Todo(title: draft, date: Date(), isDone: false, priority: 0) store.todos.insert(newTodo, at: 0) draft = "" } }
Now we have TodosView , an element that uses the List component to display tasks. The List component also provides reordering and deletion. Another interesting thing is the indexed () function. This function returns a collection of elements with its indices. We use it to access items in the store through Binding. Here is the complete source of this extension.
import Foundation struct IndexedCollection<Base: RandomAccessCollection>: RandomAccessCollection { typealias Index = Base.Index typealias Element = (index: Index, element: Base.Element) let base: Base var startIndex: Index { base.startIndex } var endIndex: Index { base.endIndex } func index(after i: Index) -> Index { base.index(after: i) } func index(before i: Index) -> Index { base.index(before: i) } func index(_ i: Index, offsetBy distance: Int) -> Index { base.index(i, offsetBy: distance) } subscript(position: Index) -> Element { (index: position, element: base[position]) } } extension RandomAccessCollection { func indexed() -> IndexedCollection<Self> { IndexedCollection(base: self) } }
Environment is an ideal candidate for storing store objects. Environment can split them between multiple views without explicit implementation through the init method. To learn more about the benefits of Environment in SwiftUI, take a look at the article “ Environment Features in SwiftUI “.
Conclusion
This article discussed a way to model the state of an application using multiple store objects. I really like the simplicity of this approach and how easy it is to scale your application by adding more store objects. I hope you enjoyed this article.
All Articles