質問 :Vueの最も弱い点は何ですか?
回答 :現時点では、おそらくタイピングに対する敵意です。 APIは、型付き言語(TypeScriptなど)のサポートを計画することなく開発されましたが、2.5では大幅に改善されました。
質問 :Tony Hoareはnullを10億ドルのエラーと呼びました。 あなたのキャリアで最悪の技術的決定は何でしたか?
回答 :Vue 2.xのコードの書き直しを始めたときでも、最初にTypeScriptを使用するとよいでしょう。
インタビュー「Vue.jsクリエイターとHabrの出会い」より
Vue.jsのタイピングに対する不親切は、松葉杖がTypeScriptを利用することを余儀なくさせます。 Vue.jsの公式ドキュメントで提案されているオプションの1つは、「vue-class-component」ライブラリーとともにデコレーターを使用することです。
別のバージョンの「クランチ」を使用して、Vue.jsアプリケーションの強力なタイピングの問題を解決します(デコレーターとvue-class-componentなし)。 Vueコンポーネントのインスタンスコンストラクターで使用される「data」および「props」オプションのインターフェイスを明示的に定義する。 場合によっては、より簡単で便利です。
このチュートリアルでは、Vue.js + Asp.Net Core MVC + TypeScriptアプリケーションを備えたVisual Studio 2017を使用して、両方のタイプのアプローチ(デコレーターありとなし)を説明します。 ここに示した例は別の環境(Node.js + Webpack)に配置できますが。
途中で、JavaScriptコンポーネントを、強力な型指定を有効にして「本格的な」TypeScriptにすばやく変換する方法を示します。
内容
はじめに
使用メカニズム
-強力なタイピングオプションの有効化
-デコレータを介して入力
-入力および出力データインターフェイスを介した入力
TryVueMvcDecoratorプロジェクト
-テストアプリケーション
-構成調整
-修正Index.cshtml
-デコレータに切り替え
-プロジェクトの組み立てと立ち上げ
TryVueMvcGridプロジェクト
-テストアプリケーション
-AppGridプリセットを作成する
-プロジェクトの組み立てと立ち上げ
-厳密なタイピングへの適応
おわりに
はじめに
この記事は一連の記事の続きです:
- Vue.js + Asp.NETCore + WebpackなしのTypeScriptアプリケーション
- Vue.js + Asp.NETCore + TypeScriptアプリケーションのRequireJS
- Vue.js + Asp.Net Core MVC + TypeScriptおよびBootstrap4その他
これらの記事で引用されている例では、TypeScriptは半分しか使用されていません-厳密な型指定は意図的に無効にされています。 ここで、TypeScriptを完全に使用してみましょう。
インターネットの広い範囲で、Vue.jsを使用した高品質のサンプルや既製のアプリケーションを多数見つけることができます。 しかし、これらの例の大部分はJavaScriptで記述されています。 したがって、これらの例をTypeScriptの「プロクラステンベッド」にプッシュするには、ある程度の努力が必要です。
APIは、 公式のVue.jsドキュメントで提供されており、公式にサポートされているvue-class-componentデコレータを使用して、 クラスベースのVueコンポーネントを定義できます。 デコレータを使用するには、コンパイラオプション{"experimentalDecorators": true}
インストールする必要があり{"experimentalDecorators": true}
これはやや面倒です(TypeScriptの将来のバージョンでは大幅な変更が行われる可能性があります)。 さらに、追加のライブラリが必要です。
「余分な」ライブラリを削除したいという妄想的な欲求により、Vue.js + TypeScriptアプリケーションでの強い型付けの問題を解決する際に、Vueコンポーネントのプロパティとデータのインターフェイスの明示的な定義を使用することになりました。

このチュートリアルでは、最初に両方の松葉杖を使用するメカニズムについて説明し、次にTryVueMvcDecorator、TryVueMvcGridの2つのプロジェクトを作成します。
使用メカニズム
TypeScriptモジュールに駆動されるVueコンポーネントのソースコードがJavaScriptで記述されている場合、制御を行うすべてのコンパイラオプションを無効にするだけで、最初にコンパイルを試みることができます(デフォルトでは無効になっています)。 次に、実行中のアプリケーションコードで、必要なオプションをオンにし、TypeScriptコンパイラの不正使用の原因を排除することにより、「ネジを締めます」。
いくつかのコンパイラオプションを有効にすると、Vueコンポーネントコードのコンパイルが停止する場合があります。 なぜなら 「data」および「props」にリストされている変数の明示的な定義はありません。 以下に、デコレータの有無にかかわらずこの問題を解決する方法を説明します。
強力な入力オプションを有効にする
オプション{"strict": true}
すぐに多くのチェック(noImplicitAny、noImplicitThis、alwaysStrict、strictNullChecks、strictFunctionTypes、strictPropertyInitialization)を含むため、これらのチェックを連続して含めると便利です。 その後、たとえば、未使用の変数とパラメーターのチェックをオンにすることにより、制御をさらに強化できます。
{ "compilerOptions": { ... "experimentalDecorators": true, //"noImplicitAny": true, //"noImplicitThis": true, //"alwaysStrict": true, //"strictNullChecks": true, //"strictFunctionTypes": true, //"strictPropertyInitialization": true, "strict": true, "noUnusedLocals": true, "noUnusedParameters": true }, "include": [ "./ClientApp/**/*.ts" ] }
TypeScriptコンパイラーの制御を段階的に強化する(「ネジを締める」)ことで、特にVueコンポーネントのロジックを詳しく調べることなく、強力なタイピングをすばやく有効にすることができます。
デコレータを介して入力する
Vueコンポーネントの定義はクラスの定義に似ていますが、実際にはVue.extend()
関数の呼び出しであり、特定のプロパティとメソッドを持つVue
オブジェクトのインスタンスを作成および登録します。 プロパティとメソッドの定義はVue.extend()
関数の呼び出しパラメーターで指定されるため、TypeScriptコンパイラーはそれらに関するすべてを認識しません。
与えられた例では、Vueインスタンスにプロパティ:name、initialEnthusiasm、enthusiasm、およびメソッド:increment()、decrement()、exclamationMarks()があると想定されています。 当然、TypeScriptコンパイラは、適切な型制御オプションを有効にしようとすると、誓い始めることがあります。
vue-class-componentデコレータを使用すると、Vue-componentsの定義を本格的なクラスとして使用できます。 したがって、Vueコンポーネントのすべてのプロパティとメソッドを明示的な形式で定義することが可能になります。 そして、そのようなTypeScriptコンパイラは非常に普通にダイジェストします。
// Vue- export default Vue.extend({ template:'#hello-template', props: ['name', 'initialEnthusiasm'], data() { return { enthusiasm: this.initialEnthusiasm } }, methods: { increment() { this.enthusiasm++; }, decrement() { if (this.enthusiasm > 1) { this.enthusiasm--; } } }, computed: { exclamationMarks(): string { return Array(this.enthusiasm + 1).join('!'); } } });
// Vue- @Component({ template: '#hello-template', props: ['name', 'initialEnthusiasm'] }) export default class HelloComponent extends Vue { enthusiasm!: number; initialEnthusiasm!: number; data() { return { enthusiasm: this.initialEnthusiasm } }; // methods: increment() { this.enthusiasm++; }; decrement() { if (this.enthusiasm > 1) { this.enthusiasm--; } }; // computed: get exclamationMarks() { return Array(this.enthusiasm + 1).join('!'); } };
入力および出力インターフェイスを介して入力する
プロパティとデータのインターフェイスの定義による厳密な型指定の使用は、次の点に基づいていますVue
インスタンスには対応するプロキシがあります( this.$props, this.$data
)。
vm。$データ
Vueインスタンスが監視しているデータオブジェクト。 インスタンスは、ここでそのフィールドへの呼び出しをプロキシします。 (たとえば、vm.aはvm。$ Data.aを指します)
vm。$小道具
コンポーネントの現在の入力データへのアクセスを提供するオブジェクト。 Vueインスタンスは、その入力オブジェクトのプロパティへのアクセスをプロキシします。
詳細については、 公式ドキュメントを参照してください。
このため、上記のVueコンポーネントの例では、 this.initialEnthusiasm
相当しthis.$props.initialEnthusiasm
this.initialEnthusiasm
this.$props.initialEnthusiasm
に相当します。 プロパティとデータのインターフェイスを明示的に定義し、 this.$props, this.$data
を使用するときに明示的な型変換を提供することは残ります。
// interface HelloProps { name: string; initialEnthusiasm: number; } interface HelloData { enthusiasm: number; } // Vue ... enthusiasm = (this.$props as HelloProps).initialEnthusiasm; ... var thisData = this.$data as HelloData; if (thisData.enthusiasm > 1) { thisData.enthusiasm--; } ...
ここで使用されているアプローチをよりよく理解するために、厳密な型指定のためにインターフェースを使用するより複雑な例を示します。
// ClientApp/components/DemoGrid.ts interface DemoGridProps { rows: Array<any>; columns: Array<string>; filterKey: string; } interface DemoGridData { sortKey: string; sortOrders: { [index: string]: number }; } export default Vue.extend({ ... computed: { filteredData: function () { var thisData = (this.$data as DemoGridData); var thisProps = (this.$props as DemoGridProps); var sortKey = thisData.sortKey; var filterKey = thisProps.filterKey && thisProps.filterKey.toLowerCase(); var order = thisData.sortOrders[sortKey] || 1; var rows = thisProps.rows; if (filterKey) { rows = rows.filter(function (row) { return Object.keys(row).some(function (key) { return String(row[key]).toLowerCase().indexOf(filterKey) > -1 }) }) } if (sortKey) { rows = rows.slice().sort(function (a, b) { a = a[sortKey] b = b[sortKey] return (a === b ? 0 : a > b ? 1 : -1) * order }) } return rows; } }, ... methods: { sortBy: function (key: string) { var thisData = (this.$data as DemoGridData); thisData.sortKey = key thisData.sortOrders[key] = thisData.sortOrders[key] * -1 } } });
その結果、厳密な型指定に切り替える簡単な方法が得られます。プロパティとデータのインターフェイスを明示的に定義した後、愚かにもthis.someProperty
を探し、これらの場所で明示的な型変換を適用します。 たとえば、 this.columns
は(this.$props as DemoGridProps).columns
ます。
TryVueMvcDecoratorプロジェクト
このチュートリアルのセクションでは、「vue-class-component」デコレーターを使用して厳密な型指定の問題を解決するオプションを備えたVue.js TypeScriptアプリケーションを作成します。
テストアプリケーション
テストアプリケーションの開始点として、Visual Studio 2017のgithubのTryVueMvcプロジェクトを使用します。以前のチュートリアルVue.js + Asp.Net Core MVC + TypeScriptおよびBootstrap4を使用してこのプロジェクトをゼロから作成するか、 プロジェクトは、VS2017環境で、またはプロジェクトディレクトリのコマンドラインからビルドおよび起動できます。
npm install dotnet build dotnet bundle dotnet run
ブラウザーで、アドレスdotnetがコンソールで報告するページ( http:// localhost:52643など)を開きます。
Webpackを使用した単一ファイルのVueコンポーネントとアセンブリを好む人には、 TryVueWebpackプロジェクトをテストアプリケーションの開始点として使用できます。 アプリケーションをビルドして実行するには、プロジェクトディレクトリのコマンドラインから次の手順を実行します。
npm install npm run build
さらに、 dotnet run
使用するか、単にwwwroot \ index.htmlファイルを開くこともできます。
構成調整
tsconfig.jsonファイルで、コンパイラオプション{"experimentalDecorators": true}
追加します。
vue-class-component NPMパッケージのインストールをpackage.jsonファイルに追加します。
{ "version": "1.0.0", "name": "asp.net", "private": true, "dependencies": { "jquery": "^3.3.1", "popper.js": "^1.12.9", "bootstrap": "^4.0.0", "vue": "^2.5.13", "systemjs": "^0.21.0", "vue-class-component": "^6.2.0" } }
bundleconfig.jsonを修正して、vue.jsおよびvue-class-component.jsをnode_modulesディレクトリからwwwroot / vendorにコピーできるようにします。
[ { "outputFileName": "wwwroot/dist/vendor1.js", "inputFiles": [ "node_modules/jquery/dist/jquery.js", "node_modules/popper.js/dist/umd/popper.js", "node_modules/bootstrap/dist/js/bootstrap.js", "node_modules/systemjs/dist/system.src.js" ], "minify": { "enabled": true, "renameLocals": true }, "sourceMap": true }, { "outputFileName": "wwwroot/dist/vendor1.css", "inputFiles": [ "node_modules/bootstrap/dist/css/bootstrap.css" ], "minify": { "enabled": false } }, { "outputFileName": "wwwroot/dist/vendor1.min.css", "inputFiles": [ "node_modules/bootstrap/dist/css/bootstrap.min.css" ], "minify": { "enabled": false } }, { "outputFileName": "wwwroot/vendor/vue.js", "inputFiles": [ "node_modules/vue/dist/vue.js" ], "minify": { "enabled": true, "renameLocals": true }, "sourceMap": true }, { "outputFileName": "wwwroot/vendor/vue-class-component.js", "inputFiles": [ "node_modules/vue-class-component/dist/vue-class-component.js" ], "minify": { "enabled": true, "renameLocals": true }, "sourceMap": true }, { "outputFileName": "wwwroot/dist/main.css", "inputFiles": [ "ClientApp/**/*.css" ], "minify": { "enabled": true } }, { "outputFileName": "wwwroot/dist/app-bandle.min.js", "inputFiles": [ "wwwroot/dist/app-bandle.js" ], "minify": { "enabled": true, "renameLocals": true } }, { "outputFileName": "wwwroot/dist/app-templates.html", "inputFiles": [ "ClientApp/**/*.html" ], "minify": { "enabled": false, "renameLocals": false } } ]
修正Index.cshtml
vue-class-componentの使用を開始したため、SystemJSにこのライブラリのロード元を指示する必要があります。 これを行うには、Views / Home / Index.cshtmlでRazorレンダリングコードを変更します。
@* Views/Home/Index.cshtml *@ @using Microsoft.AspNetCore.Hosting @inject IHostingEnvironment hostingEnv @{ var suffix = hostingEnv.IsDevelopment() ? "" : ".min"; var vueUrl = $"vendor/vue{suffix}.js"; var vueClassComponentUrl = $"vendor/vue-class-component{suffix}.js"; var mainUrl = $"dist/app-bandle{suffix}.js"; ViewData["Title"] = "TryVueMvc Sample"; } <section id="app-templates"></section> <div id="app-root">loading..</div> @section Scripts{ <script> System.config({ map: { "vue": "@vueUrl", "vue-class-component": "@vueClassComponentUrl" } }); $.get("dist/app-templates.html").done(function (data) { $('#app-templates').append(data); SystemJS.import('@mainUrl').then(function (m) { SystemJS.import('index'); }); }); </script> }
デコレータに切り替える
アプリケーションでデコレータに切り替えるには、AppHello.tsおよびHello.tsモジュールのコードを変更するだけです。
// ClientApp/components/AppHello.ts import Vue from "vue"; import Component from "vue-class-component"; import HelloComponent from "./Hello"; @Component({ template: '#app-hello-template', components: { HelloComponent } }) export default class AppHelloComponent extends Vue { data() { return { name: "World" } } };
// ClientApp/components/Hello.ts import Vue from "vue"; import Component from "vue-class-component"; @Component({ template: '#hello-template', props: ['name', 'initialEnthusiasm'] }) export default class HelloComponent extends Vue { enthusiasm!: number; initialEnthusiasm!: number; data() { return { enthusiasm: this.initialEnthusiasm } }; // methods: increment() { this.enthusiasm++; }; decrement() { if (this.enthusiasm > 1) { this.enthusiasm--; } }; // computed: get exclamationMarks() { return Array(this.enthusiasm + 1).join('!'); } };
TryVueWebpackプロジェクトが出発点として使用された場合、AppHello.tsおよびHello.tsモジュールのコードはわずかに異なります。
// ClientApp/components/AppHello.ts import Vue from "vue"; import Component from "vue-class-component"; import HelloComponent from "./Hello.vue"; @Component({ components: { HelloComponent } }) export default class AppHelloComponent extends Vue { data() { return { name: "World" } } };
// ClientApp/components/Hello.ts import Vue from "vue"; import Component from "vue-class-component"; @Component({ props: ['name', 'initialEnthusiasm'] }) export default class HelloComponent extends Vue { enthusiasm!: number; initialEnthusiasm!: number; data() { return { enthusiasm: this.initialEnthusiasm } }; // methods: increment() { this.enthusiasm++; }; decrement() { if (this.enthusiasm > 1) { this.enthusiasm--; } }; // computed: get exclamationMarks() { return Array(this.enthusiasm + 1).join('!'); } };
プロジェクトの組み立てと立ち上げ
アプリケーションのビルドと実行は、VS2017環境では従来どおりです。 バンドルは、bundleconfig.jsonファイルのコンテキストメニューの[Bundler&Minifier \ Update Bundles]コマンドを使用して行います。 プロジェクトディレクトリでコマンドラインをビルドして実行することもできます。 スクリーンショットに示されているようなものを取得する必要があります。
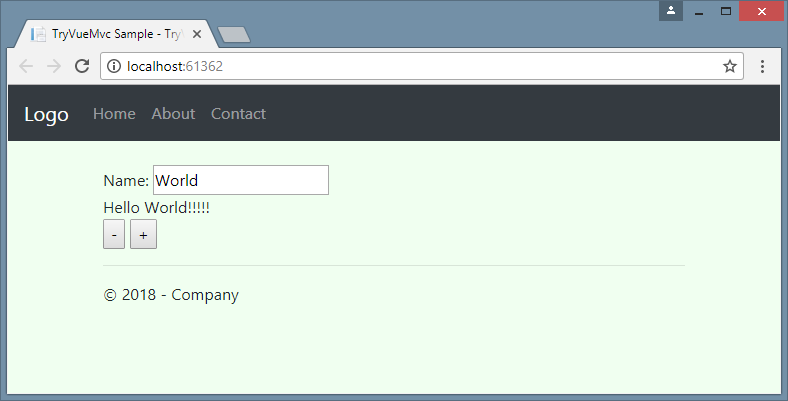
説明したアクションの結果を、githubのTryVueMvcDecoratorプロジェクトと比較できます。
TryVueMvcGridプロジェクト
次に、Vueコンポーネントの入力(this。$ Props)および出力(this。$ Data)データの型を明示的に定義することにより、厳密な型指定問題を解決するオプションを備えたTypeueでVue.jsアプリケーションを作成します。 今回は、デコレータと追加のライブラリを省きます。
公式のVue.js グリッドコンポーネントの例の Webサイトから例を埋め込むことで、アプリケーションを少し複雑にします。 jsfiddleで同じ例を見ることができます。
単純なものから複雑なものへと進みます。 理解を容易にするために、AppGridの作成を4つの段階に分けます。
- テストアプリケーションの準備(TryVueMvcの複製);
- AppGridアプリケーションのスケルトンを作成します。
- 公式サイトVue.jsからのサンプルのメインソースコードの転送。
- アプリケーションコードの適応を伴う強力な型指定オプションの包含。
テストアプリケーション
テストアプリケーションの出発点として、前のケースと同様に、githubのVisual Studio 2017のTryVueMvcプロジェクトを使用します。
AppGrid調達の作成
AppHelloアプリケーションをAppGridアプリケーションの空白(スケルトン)に置き換えます。 これを行うには、ClientApp / index.tsファイルの内容を変更し、ClientApp / componentsフォルダー内の古いファイルの代わりに、新しいコンポーネントブランクを作成します:AppGrid、DemoGrid。
// ClientApp/index.ts import Vue from "vue"; import AppGrid from "./components/AppGrid"; new Vue({ el: "#app-root", render: h => h(AppGrid), components: { AppGrid } });
// ClientApp/components/AppGrid.ts import Vue from "vue"; import DemoGrid from "./DemoGrid"; export default Vue.extend({ template: '#app-grid-template', components: { DemoGrid }, data: function () { return { foo: 42 } } });
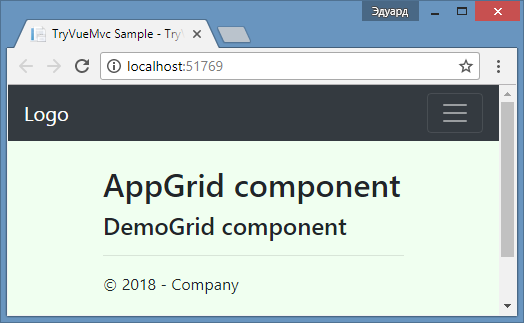
<!-- ClientApp/components/AppGrid.html --> <template id="app-grid-template"> <div> <h2>AppGrid component</h2> <demo-grid /> </div> </template>
// ClientApp/components/DemoGrid.ts import Vue from "vue"; export default Vue.extend({ template: '#demo-grid-template', props: ['foo'], data: function () { return { bar: 42 } } });
<!-- ClientApp/components/DemoGrid.html --> <template id="demo-grid-template"> <h4>DemoGrid component</h4> </template>
アプリケーションを再構築して起動すると、ブラウザはスクリーンショットに示されているものに似たものを取得するはずです。
DemoGridの埋め込みの例
AppGrid.tsコードとテンプレートコンテンツを転送します。 data()
と混同しないように、返されたプロパティ'gridData' -> 'gridRows'
を置き換えます。 tsコードのコンパイルは、型制御オプションが有効になった後でも正常に機能するはずです。 ここでは厳密な入力は必要ありません。
// ClientApp/components/AppGrid.ts import Vue from "vue"; import DemoGrid from "./DemoGrid"; export default Vue.extend({ template: '#app-grid-template', components: { DemoGrid }, data: function() { return { searchQuery: '', gridColumns: ['name', 'power'], gridRows: [ { name: 'Chuck Norris', power: Infinity }, { name: 'Bruce Lee', power: 9000 }, { name: 'Jackie Chan', power: 7000 }, { name: 'Jet Li', power: 8000 } ] } } });
<!-- ClientApp/components/AppGrid.html --> <template id="app-grid-template"> <div> <form id="search"> Search <input name="query" v-model="searchQuery"> </form> <demo-grid :rows="gridRows" :columns="gridColumns" :filter-key="searchQuery"> </demo-grid> </div> </template>
コードDemoGrid.tsとテンプレートのコンテンツを転送します。 入力プロパティ'data' -> 'rows'
を置き換えて、 data()
と混同しないようにしdata()
。 Vueコンポーネントのプロパティの定義を名前の配列に変更します( props: ['rows', 'columns', 'filterKey']
)。
// ClientApp/components/DemoGrid.ts import Vue from "vue"; export default Vue.extend({ template: '#demo-grid-template', props: ['rows', 'columns', 'filterKey'], data: function () { var sortOrders = {} this.columns.forEach(function (key) { sortOrders[key] = 1 }) return { sortKey: '', sortOrders: sortOrders } }, computed: { filteredData: function () { var sortKey = this.sortKey var filterKey = this.filterKey && this.filterKey.toLowerCase() var order = this.sortOrders[sortKey] || 1 var rows = this.rows if (filterKey) { rows = rows.filter(function (row) { return Object.keys(row).some(function (key) { return String(row[key]).toLowerCase().indexOf(filterKey) > -1 }) }) } if (sortKey) { rows = rows.slice().sort(function (a, b) { a = a[sortKey] b = b[sortKey] return (a === b ? 0 : a > b ? 1 : -1) * order }) } return rows } }, filters: { capitalize: function (str) { return str.charAt(0).toUpperCase() + str.slice(1) } }, methods: { sortBy: function (key) { this.sortKey = key this.sortOrders[key] = this.sortOrders[key] * -1 } } });
<!-- ClientApp/components/DemoGrid.html --> <template id="demo-grid-template"> <table> <thead> <tr> <th v-for="key in columns" @click="sortBy(key)" :class="{ active: sortKey == key }"> {{ key | capitalize }} <span class="arrow" :class="sortOrders[key] > 0 ? 'asc' : 'dsc'"> </span> </th> </tr> </thead> <tbody> <tr v-for="entry in filteredData"> <td v-for="key in columns"> {{entry[key]}} </td> </tr> </tbody> </table> </template>
DemoGridコンポーネントのスタイルに基づいて、ClientApp / css / demo-grid.cssファイルを作成します。
/* ClientApp/css/demo-grid.css */ body { font-family: Helvetica Neue, Arial, sans-serif; font-size: 14px; color: #444; } table { border: 2px solid #42b983; border-radius: 3px; background-color: #fff; margin-top: .5rem; } th { background-color: #42b983; color: rgba(255,255,255,0.66); cursor: pointer; -webkit-user-select: none; -moz-user-select: none; -ms-user-select: none; user-select: none; } td { background-color: #f9f9f9; } th, td { min-width: 120px; padding: 10px 20px; } th.active { color: #fff; } th.active .arrow { opacity: 1; } .arrow { display: inline-block; vertical-align: middle; width: 0; height: 0; margin-left: 5px; opacity: 0.66; } .arrow.asc { border-left: 4px solid transparent; border-right: 4px solid transparent; border-bottom: 4px solid #fff; } .arrow.dsc { border-left: 4px solid transparent; border-right: 4px solid transparent; border-top: 4px solid #fff; }
プロジェクトの組み立てと立ち上げ
アプリケーションは、前述のTryVueMvcDecoratorプロジェクトと同じ方法でビルドおよび起動されます。 アプリケーションを再構築して起動すると、ブラウザはスクリーンショットに示されているものに似たものを取得するはずです。

強力なタイピング適応
次に、ナットを締め始めます。 コンパイラオプション{"strict": true}
をすぐに配置しようとすると、コンパイル時に大量のTypeScriptエラーが発生します。
原則として、コントロールを段階的にオンにすることをお勧めします。1つのオプションをオンにし、発生したエラーを除去してから、次のオプションに対して同じことを行うなどです。
既存のVueコンポーネントコードを厳密な型指定に適合させるために、まず入力(props)コンポーネントと出力(data)コンポーネントのインターフェースを定義します。
interface DemoGridProps { rows: Array<any>; columns: Array<string>; filterKey: string; } interface DemoGridData { sortKey: string; sortOrders: { [index: string]: number }; }
次に、コンパイラオプション{"noImplicitThis": true}
を追加し、前述の「入力および出力データインターフェイスを介した標準化」セクションで説明した方法でエラーを{"noImplicitThis": true}
ます 。
コンパイラオプション{"noImplicitAny": true}
設定した後、他の未定義のタイプ{"noImplicitAny": true}
します。 その後、 {"strict": true}
を含めてもエラーは発生しません(この例では)。 DemoGrid.tsモジュールの適応の結果は、ネタバレの下に表示されます。
// ClientApp/components/DemoGrid.ts import Vue from "vue"; interface DemoGridProps { rows: Array<any>; columns: Array<string>; filterKey: string; } interface DemoGridData { sortKey: string; sortOrders: { [index: string]: number }; } export default Vue.extend({ template: '#demo-grid-template', props: ['rows', 'columns', 'filterKey'], //props: { rows: Array, columns: Array, filterKey: String }, data: function () { var sortOrders: any = {}; (this.$props as DemoGridProps).columns.forEach(function (key) { sortOrders[key] = 1 }) return { sortKey: '', sortOrders: sortOrders } as DemoGridData }, computed: { filteredData: function () { var thisData = (this.$data as DemoGridData); var thisProps = (this.$props as DemoGridProps); var sortKey = thisData.sortKey var filterKey = thisProps.filterKey && thisProps.filterKey.toLowerCase() var order = thisData.sortOrders[sortKey] || 1 var rows = thisProps.rows if (filterKey) { rows = rows.filter(function (row) { return Object.keys(row).some(function (key) { return String(row[key]).toLowerCase().indexOf(filterKey) > -1 }) }) } if (sortKey) { rows = rows.slice().sort(function (a, b) { a = a[sortKey] b = b[sortKey] return (a === b ? 0 : a > b ? 1 : -1) * order }) } return rows } }, filters: { capitalize: function (str: string) { return str.charAt(0).toUpperCase() + str.slice(1) } }, methods: { sortBy: function (key: string) { var thisData = (this.$data as DemoGridData); thisData.sortKey = key thisData.sortOrders[key] = thisData.sortOrders[key] * -1 } } });
説明したアクションの結果を、githubのTryVueMvcGridプロジェクトと比較できます。
おわりに
デコレータを介してVueコンポーネントを定義する方法には、長所と短所があります。 欠点の1つは、実用的な例をJavaScriptで記述するときにコードを再構築する必要があることです。 これにはより高い精度が必要です。
「data」および「props」オプションのインターフェースを明示的に定義することによる厳密な型指定のオプションにより、JavaScriptコードをVueコンポーネントに転送する段階で、より少ない頭脳を含めることができます。
さらに、インターフェイスにより、Vueコンポーネントの入力および出力データの型定義を再利用できます。 実際、1つのコンポーネントの入力のタイプは、多くの場合、別のコンポーネントの出力と一致します。
謝辞
- 見出しの引用は、Habrに関する記事から引用されています。 「 Vue.js の作成者がHabrに答えます」
- ここでは松葉杖をついた猫の写真を撮ります 。
- 例を使用するとき、部分的に使用される: "TypeScript Vue Starter"
- 使用される例を作成するとき: "Grid Component Example" 。
アップデート06/05/2019:
現時点では、 githubのサンプルのソースコードは記事のソースコードと若干異なります。 変更は、使用されているコンポーネントのバージョンの更新(Asp.NETCore 2.2への切り替えなど)によって引き起こされます。