みなさんこんにちは! この記事では、BitTorrentを使用していくつかの問題を解決する予定がある場合、 Btライブラリとは何か、どのように優れているのか、なぜそれを念頭に置く必要があるのかについて説明します。 次に、基本機能とメインAPIのデモとして、最も単純なコンソールトレントクライアントを実装します。
BTの特徴的な機能
Btは、Java 8のBitTorrentプロトコルの最新のフル機能実装です[1] 。 既存のオープンソースの対応物[2] [3]と比較して、Btには次の利点があります。
- 洗練と拡張を容易にするモジュール設計。 このアーキテクチャは、Guice IoCコンテナと標準のjava.util.ServiceLoaderメカニズムに基づいています。 Guiceは、新しいコンポーネントの透過的な追加と標準サービスの再定義を提供します。ServiceLoaderを使用すると、次のようないくつかのモジュールで構成されるクライアントを簡単に構築できます。 別のjarにあります。
- データストレージメカニズムへのバインドの欠如。 標準ストレージはファイルシステムの存在を前提としていますが、
java.nio.file.Path
インターフェースの使用のおかげで、 Jimfsなどのメモリ内ファイルシステム[4] 。 - 独自のメッセージタイプを使用した標準プロトコルの拡張の完全サポート[5] 。特定のニーズに対応する非標準クライアントを開発する場合に役立つ場合があります。
- 特にメッセージの送受信にNIOとシングルスレッドコアを使用しているため、処理されるトレントやネットワーク接続の数が多い場合でも、CPUとメモリのフットプリントが比較的低く、パフォーマンスが非常に高速です接続とブロッキング入出力)。
Btでサポートされている深刻なBitTorrentクライアントの必須オプションは次のとおりです。
- チューニングと構成の豊富な機会[6]
- メインラインDHTとの統合[7]
HTTPおよびUDPトラッカーのサポート。 マルチトラッカーおよびプライベートトラッカー - マルチキャストを介したローカルピアの検索[8]
- 配布に関する他の参加者とのf宴に関する情報の交換[9]
- セッションキーと非対称暗号化を使用したトラフィックの難読化[10]
- 複数のトレントの並列ダウンロード/配布
- 個々のファイルを選択してダウンロードする
- そして最後に、マグネットリンクを使用します。 トレントをダウンロードするには、その一意の識別子をリンクとして指定するだけです。
magnet:?xt=urn:btih:af0d9aa01a9ae123a73802cfa58ccaf355eb19f1
最も単純なコマンドラインクライアントの作成
体の動きを最小限に抑え、不必要な間違いを避けるために、記事のテキストでプロジェクトコードを再現しないで、すぐに完成したプロジェクトをgithub [11]からダウンロードすることをお勧めします。
プロジェクト構成
使いやすいように、クライアントの実行可能ファイルはファットjarになります。アプリケーションのクラスとリソース、およびその依存関係は単一のアーカイブに収集されます。 新しいMavenプロジェクトを作成します。pom.xmlで 、 main()
メソッド、実行可能ファイルの名前、外部依存関係、およびいくつかのプラグインを含むクラスを宣言します。
<?xml version="1.0" encoding="UTF-8"?> <project xmlns="http://maven.apache.org/POM/4.0.0" xmlns:xsi="http://www.w3.org/2001/XMLSchema-instance" xsi:schemaLocation="http://maven.apache.org/POM/4.0.0 http://maven.apache.org/xsd/maven-4.0.0.xsd"> <modelVersion>4.0.0</modelVersion> <groupId>com.github.atomashpolskiy</groupId> <artifactId>bt-cli-demo</artifactId> <version>1.0-SNAPSHOT</version> <name>Bt CLI Launcher</name> <description>Command line BitTorrent client</description> <properties> <project.build.sourceEncoding>UTF-8</project.build.sourceEncoding> <project.reporting.outputEncoding>UTF-8</project.reporting.outputEncoding> <compiler.source>1.8</compiler.source> <compiler.target>1.8</compiler.target> <main.class>bt.cli.CliClient</main.class> <bt-version>1.7</bt-version> <jopts-version>5.0.2</jopts-version> <slf4j-version>1.7.21</slf4j-version> <log4j-version>2.4.1</log4j-version> </properties> <build> <finalName>bt-launcher</finalName> ... </build> <dependencies> <dependency> <groupId>com.github.atomashpolskiy</groupId> <artifactId>bt-core</artifactId> <version>${bt-version}</version> </dependency> <dependency> <groupId>com.github.atomashpolskiy</groupId> <artifactId>bt-http-tracker-client</artifactId> <version>${bt-version}</version> </dependency> <dependency> <groupId>com.github.atomashpolskiy</groupId> <artifactId>bt-dht</artifactId> <version>${bt-version}</version> </dependency> <dependency> <groupId>net.sf.jopt-simple</groupId> <artifactId>jopt-simple</artifactId> <version>${jopts-version}</version> </dependency> <dependency> <groupId>org.apache.logging.log4j</groupId> <artifactId>log4j-core</artifactId> <version>${log4j-version}</version> </dependency> <dependency> <groupId>org.apache.logging.log4j</groupId> <artifactId>log4j-slf4j-impl</artifactId> <version>${log4j-version}</version> </dependency> </dependencies> </project>
依存関係として、3つの標準Btモジュールを指定しました。
- bt-core :ライブラリの「コア」。 外部依存関係を使用しない基本機能が含まれています
- bt-http-tracker-client :HTTPトラッカーとの統合モジュール
- bt-dht :Mainline DHTとの統合モジュール
Log4J(SLF4Jへのブリッジを含む)と多くの人に愛されているJOpt Simpleライブラリ[12]も必要です。これにより、コマンドライン引数を簡単かつ楽しく操作できます。
構成ロギング構成log4j2.xmlをすぐに追加しますが、ここではそのテキストを提供しません。 アプリケーションはbt.logとbt-dht.logの 2つのファイルにログインするだけです 。 2番目のファイルには、DHTの操作に関連するイベントとメッセージが含まれますが、ほとんどの場合、これらはユーザーにとってあまり重要ではありません。
ソースコード
さて、プロジェクトの設定は終わりました。コードの作成を始めましょう。 次のセクションでは、プログラムの引数を処理してJREを構成するために必要な「バインディング」の記述に時間を割きます。 せっかちな人はこのセクションを飛ばして、すぐにトレントクライアントコードを書くことができます。
オプション、モード、およびJREパラメーター
トレントクライアントなどの小さなアプリケーションでも、使用目的と現在の環境に応じて、多数の構成パラメーターを使用できます。 アプリケーションのユーザーに提供するオプションのリストを定義します。
- ヘルプ出力
-
.torrent
ファイルまたはmagnet
ダウンロードリンクの指定 - ファイルを保存するディレクトリを指定する
- 強制トラフィック難読化モードのアクティブ化(ユーザーのISPがBitTorrentトラフィックをカット/シェーピングし、難読化を使用している場合でもその性質を判断できる高度な統計トラフィック分析ツールを使用しない場合に便利になる場合があります)
- 順次ダウンロードモードのアクティブ化(たとえば、ダウンロードと並行してメディアファイルを再生するため)
- ダウンロードするファイルのインタラクティブな選択を無効にします(そのため、トレントに含まれるすべてのファイルがダウンロードされます。これは、ファイルのリストが大きい場合に必要になることがあります)
- ダウンロード完了後のシードモードのアクティブ化(デフォルトでは、クライアントはすべてのファイルがダウンロードされるとすぐにシャットダウンします)
- 使用されているIPアドレスとポートの表示(BitTorrentおよびDHT接続とは別に)
- 問題が発生した場合のデバッグのために、より詳細なログを要求します
オプションのリストを非表示にし、引数を別のクラスOptionsに解析します。ここでは、プログラムbt.cli.CliClient.main()
mainメソッドの初期バージョンのみを示します。
package bt.cli; import joptsimple.OptionException; public class CliClient { private static final Logger LOGGER = LoggerFactory.getLogger(CliClient.class); public static void main(String[] args) { Options options; try { options = Options.parse(args); } catch (OptionException e) { Options.printHelp(System.out); return; } } }
これで、アプリケーションに便利なヘルプを表示できます!
Option (* = required) Description --------------------- ----------- -?, -h, --help -S, --sequential Download sequentially -a, --all Download all files (file selection will be disabled) * -d, --dir <File> Target download location --dhtport <Integer> Listen on specific port for DHT messages -e, --encrypted Enforce encryption for all connections -f, --file <File> Torrent metainfo file -i, --inetaddr Use specific network address (possible values include IP address literal or hostname) -m, --magnet Magnet URI -p, --port <Integer> Listen on specific port for incoming connections -s, --seed Continue to seed when download is complete --trace Enable trace logging -v, --verbose Enable more verbose logging
ほとんどすべてのオプションの処理では、難読化の正しい操作のためにLog4Jを構成し、JREパラメーターを設定するだけです。 main()
にいくつかのユーティリティメソッドの呼び出しを追加します。
configureLogging(options.getLogLevel()); configureSecurity(); registerLog4jShutdownHook();
Log4Jのセットアップに関連するメソッドは、今のところ私たちにとって大きな関心はありません。 こちらとこちらでご覧いただけます 。 configureSecurity()
メソッドはもう少し詳細です。
実際、難読化プロトコルはセッションキーを使用した暗号化を使用しているため、最小推奨サイズは160ビットです。 ソフトウェアの配布を規制するアメリカの法律(つまり、Oracle JDKに必然的に関係することを意味します)によると、デフォルトの暗号化の最大許容キーサイズは128ビットを超えることはできません。 大きなキーの使用は禁止されていませんが、ユーザーは必要な設定を行い、この機会を「ロック解除」する必要があります。 Bt設定では、キーサイズを128〜4096ビットに設定できますが、この場合、デフォルトで設定された最適な値のままにして、同じJREを設定します。 Oracle JREバージョン8u152までは、このためにjarファイルをOracleサイトからダウンロードし[13] 、同じ名前のファイルをインストール済みのディストリビューションに置き換える必要がありました。 バージョン8u152以降、環境変数crypto.policy=unlimited
[14]を設定するだけで同じ効果を実現できます。 これはまさにconfigureSecurity()
メソッドが行うことです。
private static void configureSecurity() { // Starting with JDK 8u152 this is a way // to programmatically allow unlimited encryption // See http://www.oracle.com/technetwork/java/javase/8u152-relnotes-3850503.html String key = "crypto.policy"; String value = "unlimited"; try { Security.setProperty(key, value); } catch (Exception e) { LOGGER.error(String.format( "Failed to set security property '%s' to '%s'", key, value), e); } }
したがって、妥協オプションを選択します。
- ユーザーが「新鮮な」JREを持っている場合、すべてがすぐに動作します。
- ユーザーがすべてのトラフィックの強制難読化を要求していない場合、Btは難読化を使用してピアとの接続を確立する機能を自動的に無効にします。 同時に、平文接続は通常どおり機能します。
- JREが古く、設定されていない場合、ユーザーが難読化を要求すると、Btはエラーの処理を停止し、ユーザーにJREの設定を求めます。
ふう! Javaがその冗長さと複雑さで有名であるのも不思議ではありません。 最後の部分に到達する...
BTとの統合
トレントクライアントコードは、コンストラクター、いくつかのヘルパーメソッド、および実行するメソッドで構成されます。 まず、コンストラクターを検討します。
private final Options options; private final SessionStatePrinter printer; private final BtClient client; public CliClient(Options options) { this.options = options; this.printer = new SessionStatePrinter(); Config config = buildConfig(options); BtRuntime runtime = BtRuntime.builder(config) .module(buildDHTModule(options)) .autoLoadModules() .build(); Storage storage = new FileSystemStorage(options.getTargetDirectory().toPath()); PieceSelector selector = options.downloadSequentially() ? SequentialSelector.sequential() : RarestFirstSelector.randomizedRarest(); BtClientBuilder clientBuilder = Bt.client(runtime) .storage(storage) .selector(selector); if (!options.shouldDownloadAllFiles()) { CliFileSelector fileSelector = new CliFileSelector(); clientBuilder.fileSelector(fileSelector); runtime.service(IRuntimeLifecycleBinder.class) .onShutdown(fileSelector::shutdown); } clientBuilder.afterTorrentFetched(printer::onTorrentFetched); clientBuilder.afterFilesChosen(printer::onFilesChosen); if (options.getMetainfoFile() != null) { clientBuilder = clientBuilder.torrent(toUrl(options.getMetainfoFile())); } else if (options.getMagnetUri() != null) { clientBuilder = clientBuilder.magnet(options.getMagnetUri()); } else { throw new IllegalStateException("Torrent file or magnet URI is required"); } this.client = clientBuilder.build(); }
コードを見て、必要な説明を行いましょう。
Config config = buildConfig(options);
buildConfig()
メソッドは、Bt ランタイム構成を作成します。 Rantimeは、それぞれ独自のトレントを処理している顧客のコンテナです。 ランタイムの主な機能:
- すべての顧客に共通のサービスと拡張機能を含む単一のIoCコンテナーにモジュールを組み立てます。
- 接続プール、イベントセンター、トラッカーやピアファインダーと対話するコンポーネント、DHTサーバーなどの共有リソースを提供します。
- アプリケーションライフサイクル管理:サービスの開始と停止、カスタムコールバックの呼び出し。
個々のクライアントは、いくつかの特定のトレント固有のオブジェクト( コンテキスト )に対する小型で軽量のラッパーです。 そのタスクは、特定タイプのトレント( .torrent
ファイルまたはmagnet
リンク)の処理段階を順番に完了し、ユーザーに処理を開始および停止するAPIを提供することです。
したがって、Btチューニングは2つのレベルで実行されます。
- すべてのクライアントに共通のパラメーターを含むランタイムの構成 :IPアドレス、ポート、内部タスクの起動間隔、外部エージェント(トラッカー、ピア)との統合タイムアウト、さまざまな制限と制限(接続数、ネットワーク経由で送信されるデータブロックのサイズ、深さ) I / O操作などのキュー
- 特定のトレントに固有のパラメーターを含む個々のクライアントの構成 :ブロックの選択と読み込みモード(最もまれなブロックの順次読み込みまたはランダムな選択)、メタデータソース(
.torrent
ファイルまたはmagnet
リンク)、保存ディレクトリ、それに続くコールバック特定の読み込み段階の完了時に呼び出します。
ランタイム構成を作成するためのコードを検討してください。
private static Config buildConfig(Options options) { Optional<InetAddress> acceptorAddressOverride = getAcceptorAddressOverride(options); Optional<Integer> portOverride = tryGetPort(options.getPort()); return new Config() { @Override public InetAddress getAcceptorAddress() { return acceptorAddressOverride.orElseGet(super::getAcceptorAddress); } @Override public int getAcceptorPort() { return portOverride.orElseGet(super::getAcceptorPort); } @Override public int getNumOfHashingThreads() { return Runtime.getRuntime().availableProcessors(); } @Override public EncryptionPolicy getEncryptionPolicy() { return options.enforceEncryption()? EncryptionPolicy.REQUIRE_ENCRYPTED : EncryptionPolicy.PREFER_PLAINTEXT; } }; } private static Optional<Integer> tryGetPort(Integer port) { if (port == null) { return Optional.empty(); } else if (port < 1024 || port > 65535) { throw new IllegalArgumentException("Invalid port: " + port + "; expected 1024..65535"); } return Optional.of(port); } private static Optional<InetAddress> getAcceptorAddressOverride(Options options) { String inetAddress = options.getInetAddress(); if (inetAddress == null) { return Optional.empty(); } try { return Optional.of(InetAddress.getByName(inetAddress)); } catch (UnknownHostException e) { throw new IllegalArgumentException( "Failed to parse the acceptor's internet address", e); } }
ここで、ユーザーが指定したパラメーターに基づいて、bt.runtime.Configクラスの新しいインスタンスを作成します。このクラスでは、ユーザーが指定した値(存在する場合)またはデフォルト値を返すようにいくつかのメソッドを再定義します。
2つのパラメーターに注意する価値があります。
1つ目はnumOfHashingThreads 、または既にダウンロードされたデータの初期検証を実行するスレッドの数です(従来の専門用語では「ハッシュ」。クライアントの再起動時に必要です)。 デフォルトでは、Btは1つのスレッドのみを使用しますが、検証手順は並列化に適しているため、複数のスレッドを使用するのが理にかなっています。 スレッドの最適な数は、 [ ; * 2]
[ ; * 2]
、なぜなら 個々のスレッドは、次のI / O読み取り操作の完了を待機してアイドル状態になる場合があります。
2番目のパラメーターは、トラフィックの難読化を適用するポリシーです。 ポリシーは、ピアとの接続を確立するプロトコルで使用され、そのうち4つのみがあります[15] :
1)難読化を適用せず、難読化の使用を必要とする同業者と化合物を確立しないでください。
2)デフォルトでは、ごちそうにプレーンテキストを使用するように提供しますが、ごちそうが必要な場合は難読化することに同意します。
3)デフォルトでは、難読化を使用するようにごちそうを提供しますが、ごちそうが必要な場合は平文に同意します。
4)常に難読化を適用し、プレーンテキストを必要とするピアとの接続を確立しないでください。
このアプリケーションでは、2つの最も一般的なポリシーから選択します。強制難読化または宴会の要求に応じた難読化です。 最初のポリシーは偏執的なユーザー(および不正なISP)に適しており、2番目のポリシーは最大数のピアとの接続を許可します。
BtRuntime runtime = BtRuntime.builder(config) .module(buildDHTModule(options)) .autoLoadModules() .build();
ランタイムの構築は、通常次の2つになります。
- 必要なモジュールのリストを定義する(ピアに関する情報の交換やローカルピアの検索など、標準の拡張機能の無効化を含む)。
- アプリケーションのクラスパスにあるモジュールの検索と起動を有効にします(この場合、これらはpom.xmlで宣言されたモジュールです)。
メインモジュールに加えて、アプリケーションには2つの拡張モジュールがあります。HTTPトラッカーとの統合モジュールとMainline DHTとの統合モジュールです。 最初のモジュールはautoLoadModules()
呼び出すことで自動的に検出およびロードされます。2番目のモジュールでは非標準構成を指定するため、手動で再定義します。
private static Module buildDHTModule(Options options) { Optional<Integer> dhtPortOverride = tryGetPort(options.getDhtPort()); return new DHTModule(new DHTConfig() { @Override public int getListeningPort() { return dhtPortOverride.orElseGet(super::getListeningPort); } @Override public boolean shouldUseRouterBootstrap() { return true; } }); }
2つのパラメーターを再定義します。
- DHTサーバーが着信メッセージをリッスンするポート。
- 「パブリック」DHTインフラストラクチャ(
router.bittorrent.com
などのパブリックブートストラップノード)を使用する権限。 インターネットでファイルをダウンロードおよび配布する以外の目的でBitTorrentを使用する場合は、このパラメーターをfalse
設定したままにして、独自のDHTノードのリストを使用する必要があります(すべてのBtインスタンスがこの役割を果たすことができます)。
Storage storage = new FileSystemStorage(options.getTargetDirectory().toPath()); PieceSelector selector = options.downloadSequentially() ? SequentialSelector.sequential() : RarestFirstSelector.randomizedRarest(); BtClientBuilder clientBuilder = Bt.client(runtime) .storage(storage) .selector(selector);
次のステップでは、ダウンロードしたファイルを保存するディレクトリを指定します。 前述のように、 bt.data.file.FileSystemStorage
クラスのコンストラクターはjava.nio.file.Path
タイプのパラメーターを受け入れます。これにより、JimFSなどのメモリー内ファイルシステムと組み合わせて使用できます。 ライブラリ自体では、この機能は(ファイルI / Oの実行時間を節約するために)統合テストで使用されますが、仮説的には、よりエキゾチックなユースケースがあるかもしれません[16] 、例えば:
-
more
ユーティリティの精神で、コンソールにテキストファイルを直接ダウンロードします。 - オンザフライでファイルを再生し、ストレージデバイスを使用しないメディアプレーヤー。
if (!options.shouldDownloadAllFiles()) { CliFileSelector fileSelector = new CliFileSelector(); clientBuilder.fileSelector(fileSelector); runtime.service(IRuntimeLifecycleBinder.class) .onShutdown(fileSelector::shutdown); }
クライアントの収集を続けます。 ファイルが多すぎる場合、またはユーザーがディストリビューション全体をダウンロードする場合に、ファイル選択ステップをスキップする機会をユーザーに提供しました。 このオプションが指定されていない場合、ターミナルインターフェースで動作するように方向付けられた独自のファイルセレクター実装をBtに提供します。
public class CliFileSelector extends TorrentFileSelector { private static final String PROMPT_MESSAGE_FORMAT = "Download '%s'? (hit <Enter> or type 'y' to confirm or type 'n' to skip)"; private static final String ILLEGAL_KEYPRESS_WARNING = "*** Invalid key pressed. Please, use only <Enter>, 'y' or 'n' ***"; private AtomicReference<Thread> currentThread; private AtomicBoolean shutdown; public CliFileSelector() { this.currentThread = new AtomicReference<>(null); this.shutdown = new AtomicBoolean(false); } @Override protected SelectionResult select(TorrentFile file) { while (!shutdown.get()) { System.out.println(getPromptMessage(file)); try { switch (readNextCommand(new Scanner(System.in))) { case "": case "y": case "Y": { return SelectionResult.select().build(); } case "n": case "N": { System.out.println("Skipping..."); return SelectionResult.skip(); } default: { System.out.println(ILLEGAL_KEYPRESS_WARNING); } } } catch (IOException e) { throw new RuntimeException(e); } } throw new IllegalStateException("Shutdown"); } private static String getPromptMessage(TorrentFile file) { return String.format(PROMPT_MESSAGE_FORMAT, String.join("/", file.getPathElements())); } private String readNextCommand(Scanner scanner) throws IOException { currentThread.set(Thread.currentThread()); try { return scanner.nextLine().trim(); } finally { currentThread.set(null); } } public void shutdown() { this.shutdown.set(true); Thread currentThread = this.currentThread.get(); if (currentThread != null) { currentThread.interrupt(); } } }
1つのメソッドでクラスを実装する必要があります。このメソッドは、個々のファイルごとに、ダウンロード方法またはスキップ方法を決定します。 この場合、ユーザーから対話的に目的のアクションをリクエストします。 ユーザーがEnterキーを押すか「y」を入力すると、ファイルがダウンロードされ、ユーザーが「n」を入力すると、ファイルはスキップされます。
clientBuilder.afterTorrentFetched(printer::onTorrentFetched); clientBuilder.afterFilesChosen(printer::onFilesChosen);
, , :
- (
magnet
-), ( , 20- URI). - .
UI , .
, , , stopWhenDownloaded()
, . , .. , .
if (options.getMetainfoFile() != null) { clientBuilder = clientBuilder.torrent(toUrl(options.getMetainfoFile())); } else if (options.getMagnetUri() != null) { clientBuilder = clientBuilder.magnet(options.getMagnetUri()); } else { throw new IllegalStateException("Torrent file or magnet URI is required"); } this.client = clientBuilder.build();
, .torrent
, magnet
-. java.util.function.Supplier<Torrent>
, (, ).
: ! main()
, .
public static void main(String[] args) throws IOException { Options options; try { options = Options.parse(args); } catch (OptionException e) { Options.printHelp(System.out); return; } configureLogging(options.getLogLevel()); configureSecurity(); registerLog4jShutdownHook(); CliClient client = new CliClient(options); client.start(); } // ... private void start() { printer.start(); client.startAsync(state -> { boolean complete = (state.getPiecesRemaining() == 0); if (complete) { if (options.shouldSeedAfterDownloaded()) { printer.onDownloadComplete(); } else { printer.stop(); client.stop(); } } printer.updateState(state); }, 1000).join(); }
start()
, startAsync()
. , , — , , — -, ( — 1 ).
:
- UI ( .. , ..)
- .
, .. , , -.
, . SessionStatePrinter , UI. , , .
,
, , , .
System.out InterruptedException, , .
- , :
magnet:?xt=urn:btih:985BAD472E60E763F5C77B13CBE41AE2892604B6
, , public domain. 12 1959-1961 .
おわりに
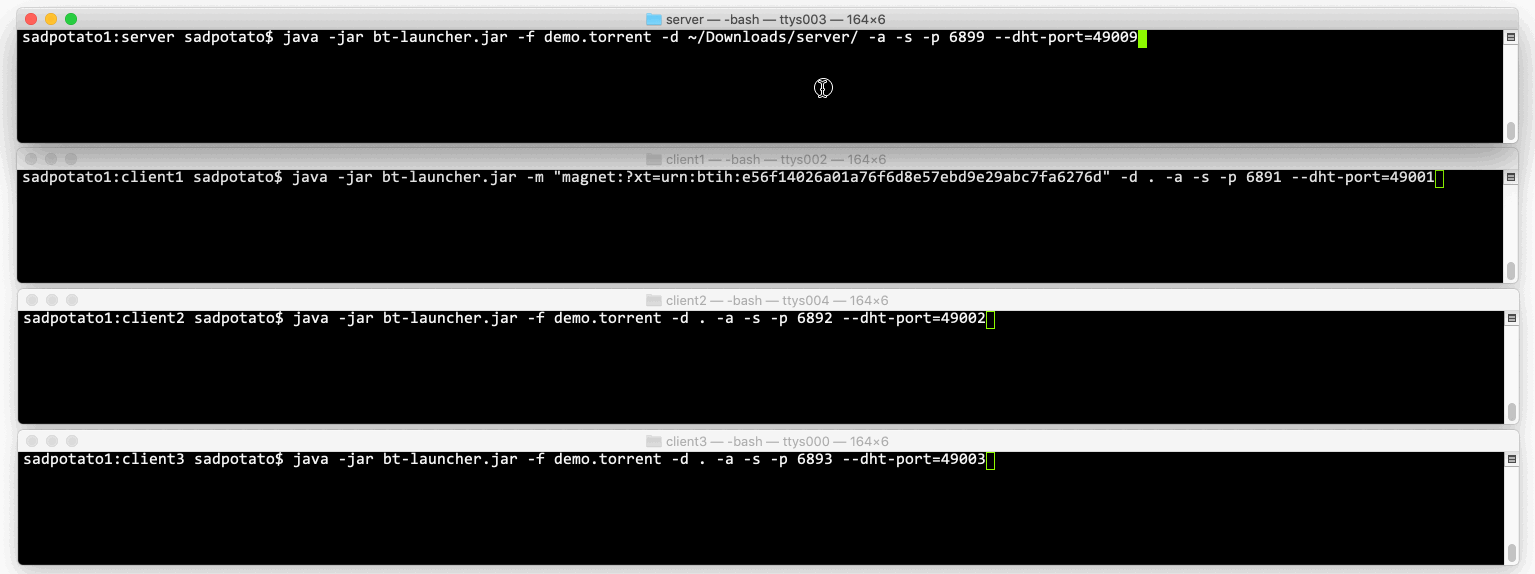
, Bt. API BitTorrent , uTorrent, Transmission, Deluge ., , , ..
, : 2 . , . BitTorrent , [17] , Bt.
, BitTorrent . , , , . , Java BitTorrent , .. , Android [18] .
最後まで読んでくれてありがとう! .
参照資料
[1] https://github.com/atomashpolskiy/bt
[2] https://github.com/mpetazzoni/ttorrent
[3] https://github.com/bitletorg/bitlet
[4] https://github.com/google/jimfs
[5] http://atomashpolskiy.github.io/bt/extension-protocol/
[6] http://atomashpolskiy.github.io/bt/javadoc/latest/bt/runtime/Config.html
[7] https://en.wikipedia.org/wiki/Mainline_DHT
[8] https://en.wikipedia.org/wiki/Local_Peer_Discovery
[9] https://en.wikipedia.org/wiki/Peer_exchange
[10] https://en.wikipedia.org/wiki/BitTorrent_protocol_encryption
[11] https://github.com/atomashpolskiy/bt-cli-demo
[12] https://pholser.github.io/jopt-simple/
[13] http://www.oracle.com/technetwork/java/javase/downloads/jce8-download-2133166.html
[14] http://www.oracle.com/technetwork/java/javase/8u152-relnotes-3850503.html
[15] http://atomashpolskiy.github.io/bt/encryption/
[16] https://github.com/atomashpolskiy/bt/issues/9
[17] http://bittorrent.org/beps/bep_0052.html
[18] https://www.makeuseof.com/tag/8-legal-uses-for-bittorrent-youd-be-surprised/