
モノのインターネットを操作するために、NodeJSをサポートできるより深刻なさまざまなデバイスがよく使用されます。 そのようなデバイスの例は、最も人気のあるRaspberry PIメーカーボードの1つです。 したがって、このトピックを無視することはできず、NodeJS対応デバイスがAzure IoTハブとどのように機能するかを理解することにしました。
さらに、猫の下では、証明書でSSL接続を保護する可能性と、自己署名証明書を作成するプロセスが考慮されます。
NodeJSをダウンロードしてインストールします。 これを行う方法に関する英語のマニュアルは、ここから入手できます。
パッケージマネージャー経由でNode.jsをインストールする
新しいディレクトリを作成します。 CMDまたはBashを開き、作成したディレクトリに移動します
コマンドを実行する
npm init
質問への回答の結果として、package.jsonファイルが作成されます。
コマンドを使用して、いくつかのパッケージをインストールします。
npm install azure-iot-device azure-iot-device-mqtt –save
この例では、不必要な情報を含まないMQTTプロトコルを使用します。MQTTプロトコルは多くの機能を備えていませんが、IoTデバイス専用に設計されています。
何らかの種類のJSファイルを作成します。 index.jsという名前のファイルがあるとします。 それでは、ファイルに次のコードを追加して考えてみましょう。
'use strict'; // require('package-name') var clientFromConnectionString = require('azure-iot-device-mqtt').clientFromConnectionString; var Message = require('azure-iot-device').Message; var connectionString = 'HostName=ArduinoDemoHub.azure-devices.net;DeviceId=ArduinoAzureTwin;SharedAccessKey=Fqve19DXyMOx3vQI63eHxW0bK6VmT+R6iqPK23vhdiQ='; var client = clientFromConnectionString(connectionString); function printResultFor(op) { return function printResult(err, res) { if (err) console.log(op + ' error: ' + err.toString()); if (res) console.log(op + ' status: ' + res.constructor.name); }; } var connectCallback = function (err) { if (err) { console.log('Could not connect: ' + err); } else { console.log('Client connected'); // «» writeLine client.onDeviceMethod('writeLine', onWriteLine); // IoT Hub setInterval(function(){ var iotdata = Math.round((Math.random() * 25)); var data = JSON.stringify({ deviceId: 'ArduinoAzureTwin', iotdata: iotdata }); var message = new Message(data); console.log("Sending message: " + message.getData()); client.sendEvent(message, printResultFor('send')); }, 1000); } }; function onWriteLine(request, response) { response.send(200, 'Input was written to log.', function(err) { if(err) { console.error('An error ocurred when sending a method response:\n' + err.toString()); } else { console.log('Response to method \'' + request.methodName + '\' sent successfully.' ); } }); } client.open(connectCallback);
もちろん、IoTハブを作成して、コードの接続文字列を独自のものに置き換える必要があります。 この例では、データはdeviceIdおよびiotdataという名前で送信されます。 一部のデータを送信できます。
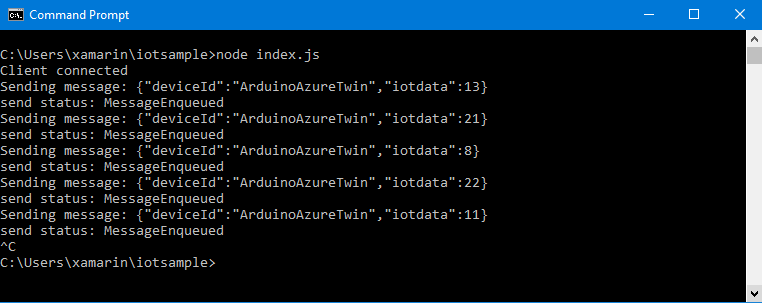
コマンドを使用してコードを実行できます
node index.js
すべてが正しく行われた場合、結果は次のようになります。
公式マニュアルへのリンク:
Nodeを使用して仮想デバイスをInternet of Things Centerに接続する
IoTデバイス(Node.js)で直接メソッドを使用する
すべて動作しますが、セキュリティの観点からはあまりうまくいっていません。
接続を保護するために、X.509 TLS証明書を使用できます。 もちろん、運用環境では、証明機関が発行した証明書を使用することをお勧めします。 ただし、テストには、自己署名証明書を使用できます。 作成して接続を保護しましょう。
証明書を作成するために、最初にmakecertアプリケーションを使用することを考えましたが、すでに非推奨と見なされていることがわかりました。 そこで、PowerShellスクリプトを使用することにしました。
管理者権限でPowershellを開きます。 CN =証明書に名前を付けたい名前を指定して、次のコマンドを実行します。
$cert = New-SelfSignedCertificate -Type Custom -KeySpec Signature ` -Subject "CN=AlexRootCert" -KeyExportPolicy Exportable ` -HashAlgorithm sha256 -KeyLength 2048 ` -CertStoreLocation "Cert:\CurrentUser\My" -KeyUsageProperty Sign -KeyUsage CertSign
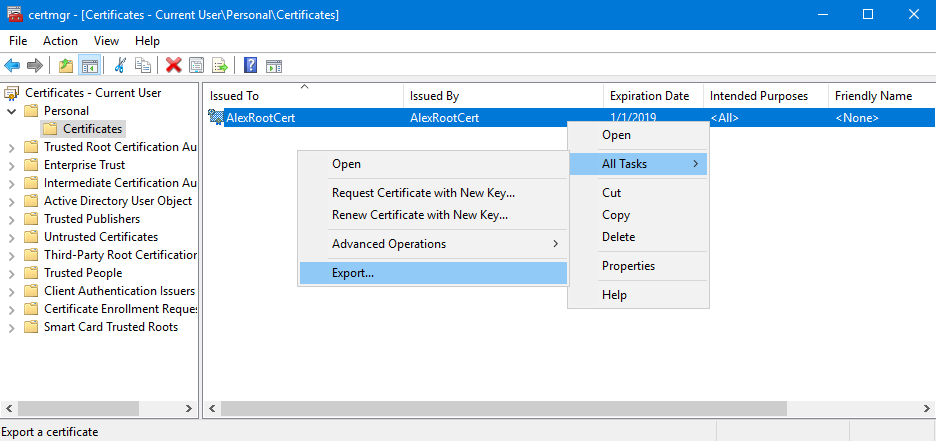
これで、 certmgr.mscユーティリティを開いて、 Certificatesフォルダーで現在のユーザー/個人/証明書の証明書を検索できます。
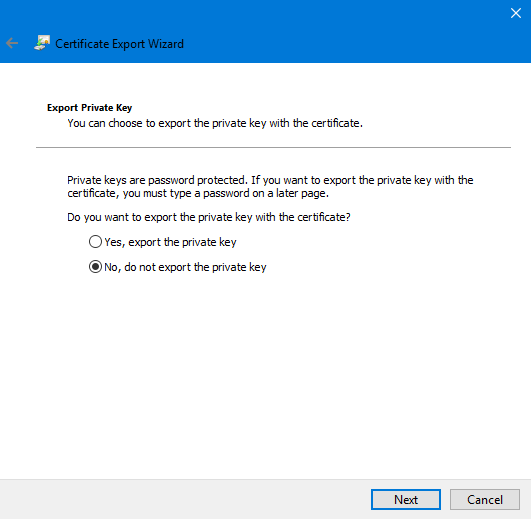
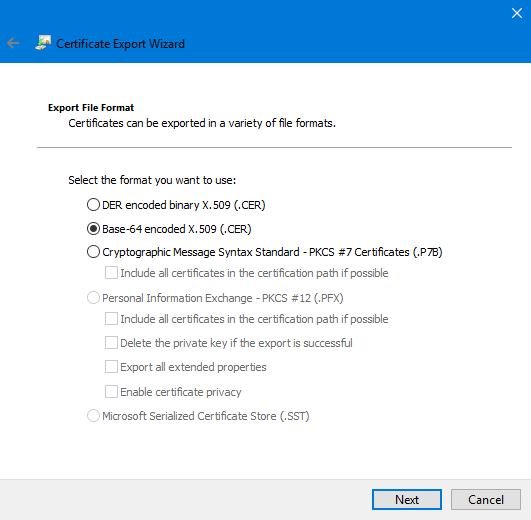
証明書は次のようにエクスポートする必要があります(秘密キーなし):
この証明書をIoT Hubにアップロードします。
ルート証明書を生成した後、Powershellウィンドウを閉じないことをお勧めします。 閉じなかった場合、クライアント証明書の生成は非常に簡単です。 結局、$ cert変数を使用できます。
閉じている場合は、 公式ドキュメントを読みます (そこで例2を探します)。 または、スポイラーを開いて、証明書変数の宣言方法に関する説明を読んでください。
証明書変数を宣言する方法
コマンドを実行する
次のような答えが得られます。
PSParentPath:Microsoft.PowerShell.Security \ Certificate :: CurrentUser \ My
Thumb印の件名
--FDF386B2AE761CBDD5A111CEF047CC5419F9425A CN = AlexRootCert
この回答からThumb印証明書をコピーして、コマンドに貼り付けます。
Get-ChildItem -Path "Cert:\CurrentUser\My"
次のような答えが得られます。
PSParentPath:Microsoft.PowerShell.Security \ Certificate :: CurrentUser \ My
Thumb印の件名
--FDF386B2AE761CBDD5A111CEF047CC5419F9425A CN = AlexRootCert
この回答からThumb印証明書をコピーして、コマンドに貼り付けます。
$cert = Get-ChildItem -Path "Cert:\CurrentUser\My\FDF386B2AE761CBDD5A111CEF047CC5419F9425A"
クライアント証明書を作成します。 コマンドで作成された証明書の名前以外は何も変更する必要はありません。
New-SelfSignedCertificate -Type Custom -KeySpec Signature ` -Subject "CN=AlexClientCert" -KeyExportPolicy Exportable ` -HashAlgorithm sha256 -KeyLength 2048 ` -CertStoreLocation "Cert:\CurrentUser\My" ` -Signer $cert -TextExtension @("2.5.29.37={text}1.3.6.1.5.5.7.3.2")
次に、IoTハブで作成された最初の証明書をアップロードしましょう。 ルート証明書をダウンロードするには、証明書セクションのIoTハブに移動します。

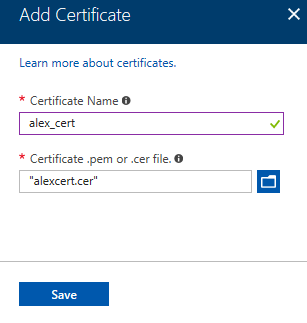
自己署名されているため、「Unverified」と表示されます。 証明書の確認は、所有証明と呼ばれます。 証明書のプロパティウィンドウを開き、最後の2つのフィールドまでスクロールします。

[検証コードの生成]ボタンをクリックして、生成されたコードをコピーします。 再度、PowerShellを開き、次のコードを実行します。
function New-CASelfsignedCertificate([string]$subjectName, [object]$signingCert, [bool]$isASigner=$true) { # Build up argument list $selfSignedArgs =@{"-DnsName"=$subjectName; "-CertStoreLocation"="cert:\LocalMachine\My"; "-NotAfter"=(get-date).AddDays(30); } if ($isASigner -eq $true) { $selfSignedArgs += @{"-KeyUsage"="CertSign"; } $selfSignedArgs += @{"-TextExtension"= @(("2.5.29.19={text}ca=TRUE&pathlength=12")); } } else { $selfSignedArgs += @{"-TextExtension"= @("2.5.29.37={text}1.3.6.1.5.5.7.3.2,1.3.6.1.5.5.7.3.1", "2.5.29.19={text}ca=FALSE&pathlength=0") } } if ($signingCert -ne $null) { $selfSignedArgs += @{"-Signer"=$signingCert } } if ($useEcc -eq $true) { $selfSignedArgs += @{"-KeyAlgorithm"="ECDSA_nistP256"; "-CurveExport"="CurveName" } } # Now use splatting to process this Write-Host ("Generating certificate {0} which is for prototyping, NOT PRODUCTION. It will expire in 30 days." -f $subjectName) write (New-SelfSignedCertificate @selfSignedArgs) } function New-CAVerificationCert([string]$requestedSubjectName) { $cnRequestedSubjectName = ("CN={0}" -f $requestedSubjectName) $verifyRequestedFileName = "D:\verifyCert4.cer" $ert = Get-ChildItem -Path "Cert:\CurrentUser\My\FDF386B2AE761CBDD5A111CEF047CC5419F9425A" Write-Host "Using Signing Cert:::" Write-Host $ert $verifyCert = New-CASelfsignedCertificate $cnRequestedSubjectName $ert $false Export-Certificate -cert $verifyCert -filePath $verifyRequestedFileName -Type Cert if (-not (Test-Path $verifyRequestedFileName)) { throw ("Error: CERT file {0} doesn't exist" -f $verifyRequestedFileName) } Write-Host ("Certificate with subject {0} has been output to {1}" -f $cnRequestedSubjectName, (Join-Path (get-location).path $verifyRequestedFileName)) } New-CAVerificationCert "8957B1DCD5D19DDFD06BFCC90A9B740C9EF7B4DBEC84C5AB"
このコードでは、Azureから受け取った確認コードを最後の行に挿入します。 そして次の行:
$ert = Get-ChildItem -Path "Cert:\CurrentUser\My\FDF386B2AE761CBDD5A111CEF047CC5419F9425A"
ルート証明書から以前に受け取ったthumb印を挿入します。 または、Powershellを最初から閉じていない場合は、この行を削除できます。
必要に応じて、生成された証明書のディレクトリと名前を変更できます。 ファイルが作成されたら、IoT Hubにアップロードします。
次に、二重デバイスを作成する必要があります。 IoT Hubで、メニュー項目「IoTデバイス」を開きます。 X.509自己署名認証タイプを選択し、ある種の証明書のフィンガープリントが求められることを理解しています。 さらに2枚の印刷物です。

証明書マネージャーcertmgr.mscに移動し、クライアント証明書を2回クリックします。 プロパティウィンドウが開き、必要なものを見つけることができます。

print印値がコピーされ、デバイスダブルを作成するためのウィンドウに貼り付けられます。 証明書をその場でスペアと交換できる特別なシナリオでは、2番目のフィンガープリントが要求されます。
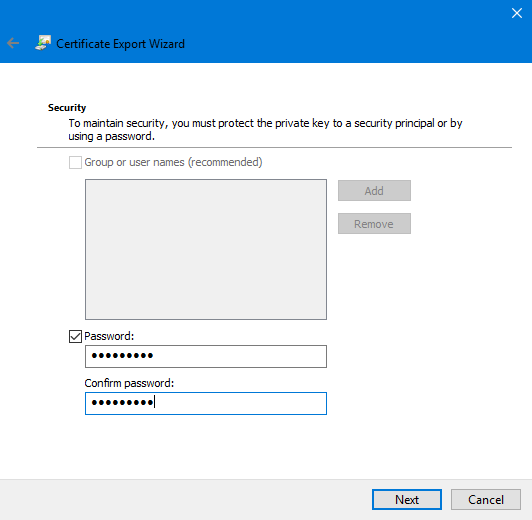
それだけではありません。 プライベートキーなし(cerの形式)およびプライベートキーあり(pxf形式)でクライアント証明書をエクスポートする必要があります。 pxf形式でエクスポートされたクライアント証明書から、pem形式でキーファイルを作成する必要があります。
秘密鍵のないクライアント証明書は、ルート証明書を既にエクスポートしたのと同じ方法でエクスポートされます。 ただし、pfx形式では、証明書は別のコンピューターにインストールするためにルート証明書がエクスポートされるのと同じ方法でエクスポートされます。


[証明書のプライバシーを有効にする]を有効にしない場合、証明書の内容は暗号化されません。 保護は秘密鍵にのみ適用されます。 証明書の内容は、certutilを使用して表示できます。
すべての拡張プロパティのエクスポートは、Microsoftプラットフォームのみに適用され、いくつかの追加情報をエクスポートします。
PEMファイルを作成するには、OpenSSLが必要です。 WSLを使用して、WindowsにOpenSSLをインストールできます。 Microsoft StoreからUbuntuをインストールしてから、OpenSSLをインストールします
sudo apt-get update sudo apt-get install openssl
次に、cdコマンドを使用して証明書のあるディレクトリに移動し、次のコマンドを実行する必要があります。
openssl pkcs12 -in alex-client-cert.pfx -out key.pem -nodes
このコマンドは、既存の証明書の名前と作成されるpemファイルの名前を指定します。
または、次のユーティリティを使用できます。Win64OpenSSL v1.0.2n
インストールされたユーティリティのディレクトリ(C:\ OpenSSL-Win64 \ bin)に移動し、次のコマンドを実行します。
.\openssl pkcs12 -in D:\iotapp\alex-client-cert.pfx -out D:\iotapp\key.pem -nodes
コードを証明書で保護されたコードに変更することは残っています。 例として、以下を使用しました: simple_sample_device_x509.js
'use strict'; var clientFromConnectionString = require('azure-iot-device-mqtt').clientFromConnectionString; var Message = require('azure-iot-device').Message; var connectionString = 'HostName=ArduinoDemoHub.azure-devices.net;DeviceId=NodeTwin;x509=true'; var fs = require('fs'); var certFile = 'alex-client-cert.cer'; var keyFile = 'key.pem'; var passphrase = 'KJu86Hfjw3jG'; var client = clientFromConnectionString(connectionString); function printResultFor(op) { return function printResult(err, res) { if (err) console.log(op + ' error: ' + err.toString()); if (res) console.log(op + ' status: ' + res.constructor.name); }; } var connectCallback = function (err) { if (err) { console.log('Could not connect: ' + err); } else { console.log('Client connected'); client.onDeviceMethod('writeLine', onWriteLine); // Create a message and send it to the IoT Hub every second setInterval(function(){ var iotdata = Math.round((Math.random() * 25)); var data = JSON.stringify({ deviceId: 'ArduinoAzureTwin', iotdata: iotdata }); var message = new Message(data); console.log("Sending message: " + message.getData()); client.sendEvent(message, printResultFor('send')); }, 1000); } }; function onWriteLine(request, response) { console.log('sdfdsf'); response.send(200, 'Input was written to log.', function(err) { if(err) { console.error('An error ocurred when sending a method response:\n' + err.toString()); } else { console.log('Response to method \'' + request.methodName + '\' sent successfully.' ); } }); } var options = { cert : fs.readFileSync(certFile, 'utf-8').toString(), key : fs.readFileSync(keyFile, 'utf-8').toString(), passphrase: passphrase }; client.setOptions(options); client.open(connectCallback);
公式マニュアルへのリンク:
Azure IoT CenterでX.509セキュリティ証明書を構成する