少し前まで、 8つのトレーニングプロジェクトを作成することを提案するハブに関する記事がありました。 そこで私は暗号通貨トラッカーが好きだったので、少なくともGetリクエストよりも少なくとも何らかの形で面白かったので、Kotlinで作成することにしました。 したがって、このチュートリアルでは次のことを学びます。
- Retrofitでリクエストを取得する方法
- レトロフィットとRx
- Kotlinを使用したRecyclerView
- APIからデータを抽出する
はじめに
Kotlinのサポートを有効にする方法や、プロジェクトの作成など、他の明白で理解しやすいものを見逃すことにしましょう。 このAPIを使用します
マニフェストのセットアップ
要求を行うには、ネットワークを使用する権限が必要です。
<uses-permission android:name="android.permission.INTERNET"/>
Gradleへのライブラリの追加
RetrofitとRxAndroidが必要になります。
//Retrofit compile "com.squareup.retrofit2:retrofit:2.3.0" compile "com.squareup.retrofit2:adapter-rxjava2:2.3.0" compile "com.squareup.retrofit2:converter-gson:2.3.0" //RxAndroid compile "io.reactivex.rxjava2:rxandroid:2.0.1"
レイアウトを作成する
activity_main.xml
<?xml version="1.0" encoding="utf-8"?> <android.support.constraint.ConstraintLayout xmlns:android="http://schemas.android.com/apk/res/android" xmlns:tools="http://schemas.android.com/tools" android:layout_width="match_parent" android:layout_height="match_parent" tools:context="com.kram.vlad.cryptocurrency.activitys.MainActivity"> <android.support.v7.widget.RecyclerView android:id="@+id/recyclerView" android:layout_width="match_parent" android:layout_height="match_parent"/> </android.support.constraint.ConstraintLayout>
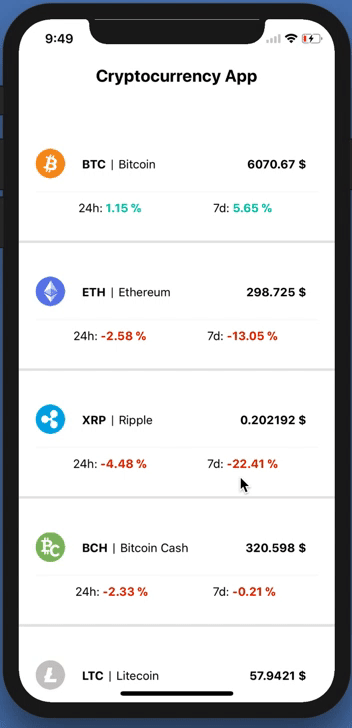
RecyclerViewは、その要素がどのように見えるかを知る必要がありますこのために、item.xmlを作成する必要があります。
item.xml
<?xml version="1.0" encoding="utf-8"?> <android.support.constraint.ConstraintLayout xmlns:android="http://schemas.android.com/apk/res/android" xmlns:app="http://schemas.android.com/apk/res-auto" android:layout_width="match_parent" android:layout_height="wrap_content"> <android.support.v7.widget.CardView android:layout_width="match_parent" android:layout_height="wrap_content"> <RelativeLayout android:layout_width="match_parent" android:layout_height="match_parent"> <ImageView android:id="@+id/imageView" android:layout_width="wrap_content" android:layout_height="wrap_content" app:srcCompat="@drawable/ic_launcher_background"/> <TextView android:id="@+id/symbol" android:layout_width="wrap_content" android:layout_height="wrap_content" android:layout_alignParentTop="true" android:layout_marginStart="11dp" android:layout_marginTop="11dp" android:layout_toEndOf="@+id/imageView" android:text="TextView" android:textColor="@android:color/black" android:textSize="18sp" android:textStyle="bold"/> <TextView android:id="@+id/textView2" android:layout_width="wrap_content" android:layout_height="wrap_content" android:layout_alignBottom="@+id/symbol" android:layout_marginStart="11dp" android:layout_toEndOf="@+id/symbol" android:text="|" android:textColor="@android:color/black" android:textSize="18sp"/> <TextView android:id="@+id/name" android:layout_width="wrap_content" android:layout_height="wrap_content" android:layout_alignBottom="@+id/textView2" android:layout_marginStart="12dp" android:layout_toEndOf="@+id/textView2" android:text="TextView" android:textColor="@android:color/black" android:textSize="14sp"/> <TextView android:id="@+id/money" android:layout_width="wrap_content" android:layout_height="wrap_content" android:layout_alignBottom="@+id/name" android:layout_alignParentEnd="true" android:layout_marginEnd="13dp" android:text="TextView" android:textColor="@android:color/black" android:textSize="14sp" android:textStyle="bold"/> <TextView android:id="@+id/textView6" android:layout_width="wrap_content" android:layout_height="wrap_content" android:layout_alignBottom="@+id/imageView" android:layout_marginBottom="10dp" android:layout_marginLeft="20dp" android:layout_toEndOf="@+id/imageView" android:text="24h:"/> <TextView android:id="@+id/textView7" android:layout_width="wrap_content" android:layout_height="wrap_content" android:layout_alignBaseline="@+id/textView6" android:layout_alignBottom="@+id/textView6" android:layout_alignEnd="@+id/name" android:text="7d:"/> <TextView android:id="@+id/hours" android:layout_width="wrap_content" android:layout_height="wrap_content" android:layout_alignBaseline="@+id/textView6" android:layout_alignBottom="@+id/textView6" android:layout_toEndOf="@+id/textView6" android:text="-2.94%" android:textStyle="bold"/> <TextView android:id="@+id/days" android:layout_width="wrap_content" android:layout_height="wrap_content" android:layout_alignBottom="@+id/textView7" android:layout_toEndOf="@+id/textView7" android:text="+10.19%" android:textStyle="bold"/> </RelativeLayout> </android.support.v7.widget.CardView> </android.support.constraint.ConstraintLayout>
応答を解析するためのモデルを作成する
そのような目的には、いくつかのpojoジェネレーターが適しています。
ResponseItrem
data class ResponseItem(@SerializedName("id") @Expose var id: String?, @SerializedName("name") @Expose var name: String?, @SerializedName("symbol") @Expose var symbol: String?, @SerializedName("rank") @Expose var rank: String?, @SerializedName("price_usd") @Expose var priceUsd: String?, @SerializedName("price_btc") @Expose var priceBtc: String?, @SerializedName("24h_volume_usd") @Expose var _24hVolumeUsd: String?, @SerializedName("market_cap_usd") @Expose var marketCapUsd: String?, @SerializedName("available_supply") @Expose var availableSupply: String?, @SerializedName("total_supply") @Expose var totalSupply: String?, @SerializedName("max_supply") @Expose var maxSupply: String?, @SerializedName("percent_change_1h") @Expose var percentChange1h: String?, @SerializedName("percent_change_24h") @Expose var percentChange24h: String?, @SerializedName("percent_change_7d") @Expose var percentChange7d: String?, @SerializedName("last_updated") @Expose var lastUpdated: String?) {
シンプルなGetリクエストを作成する
Rxを使用して、Get関数がObservableを返すようにします。 また、ここでFactoryを作成し、そこからRetrofitオブジェクトを受け取ります。
GetInterface
interface RetrofitGetInterface { @GET("v1/ticker/") fun getCryptocurrency(): Observable<List<ResponseItem>> companion object Factory { fun create(): RetrofitGetInterface { val retrofit = Retrofit.Builder() .addCallAdapterFactory(RxJava2CallAdapterFactory.create()) .addConverterFactory(GsonConverterFactory.create()) // .baseUrl("https://api.coinmarketcap.com/") // .build() return retrofit.create(RetrofitGetInterface::class.java) } } }
お願いします
クエリには、Rxを使用します。 リアクティブプログラミングに慣れていない場合、何が失われているのかわかりません。
リクエストコード
val apiService = RetrofitGetInterface.create() apiService.getCryptocurrency() .observeOn(AndroidSchedulers.mainThread())// .subscribeOn(Schedulers.io()) // io - .subscribe({ result -> arrayListInit(result) // }, { error -> error.printStackTrace() })
リスト用のアダプターを作成する
class RecyclerViewAdapter(private val result: List<ResponseItem>, val resources: Resources):RecyclerView.Adapter<RecyclerViewAdapter.CardViewHolder>()
リクエストから受け取ったデータは、配列(リスト)ResponseItemにプッシュする必要があります。 リストに入力できるように、アダプターに転送する必要があります。
GetItemCountでは、配列のサイズを返す必要があります。これにより、アダプターは、リストに含まれる要素の数を知ることができます。
override fun getItemCount() = result.size //
OnCreateViewHolderでは、アイテムのレイアウトを膨らませる必要があります。
override fun onCreateViewHolder(parent: ViewGroup?, viewType: Int): CardViewHolder { return CardViewHolder(LayoutInflater.from(parent?.context) .inflate(R.layout.item, parent, false)) // RecyclerView item }
常に、一部のCardViewHolderがコードで点灯しています。 各アイテムのビューに配列のデータを入力する必要があります。
class CardViewHolder(itemView: View?) : RecyclerView.ViewHolder(itemView) { fun bind(result: List<ResponseItem>, position: Int, resources: Resources) { val responseItem: ResponseItem = result.get(position) itemView.symbol.text = responseItem.symbol itemView.name.text = responseItem.name ... } }
バインド関数は、必要なすべてのデータを取得し、それらをビューで満たします。 onBindViewHolderでこの関数を参照します。 そして、言語の構文のおかげで、私たちはそれを非常にうまくやっています。
override fun onBindViewHolder(holder: CardViewHolder, position: Int) = holder.bind(result, position, resources)
最後のステップ:アダプターを取り付ける
これを行うには、コールバックに登録するだけです。
recyclerView.adapter = RecyclerViewAdapter(result, resources) recyclerView.layoutManager = LinearLayoutManager(this)
ソースはこちらです。 チュートリアルは非常に短くシンプルであったため、説明はほとんどありませんでしたが、何か明確でない場合は答えることができますが、既製の暗号通貨トラッカーがあります。