みなさんこんにちは! 今週末、 DevFest Siberia 2016でIoTインターコムプロジェクトについて講演しました 。 非常に雰囲気のある会議でした。 しかし、会話は彼女についてではありません。 レポートの中で、ドアスピーカーフォンでGoogle DUOのKnock Knockテクノロジーのアナログを編成する方法をHabrで個別に伝えることを約束しました。
Googleからの少しの助け :
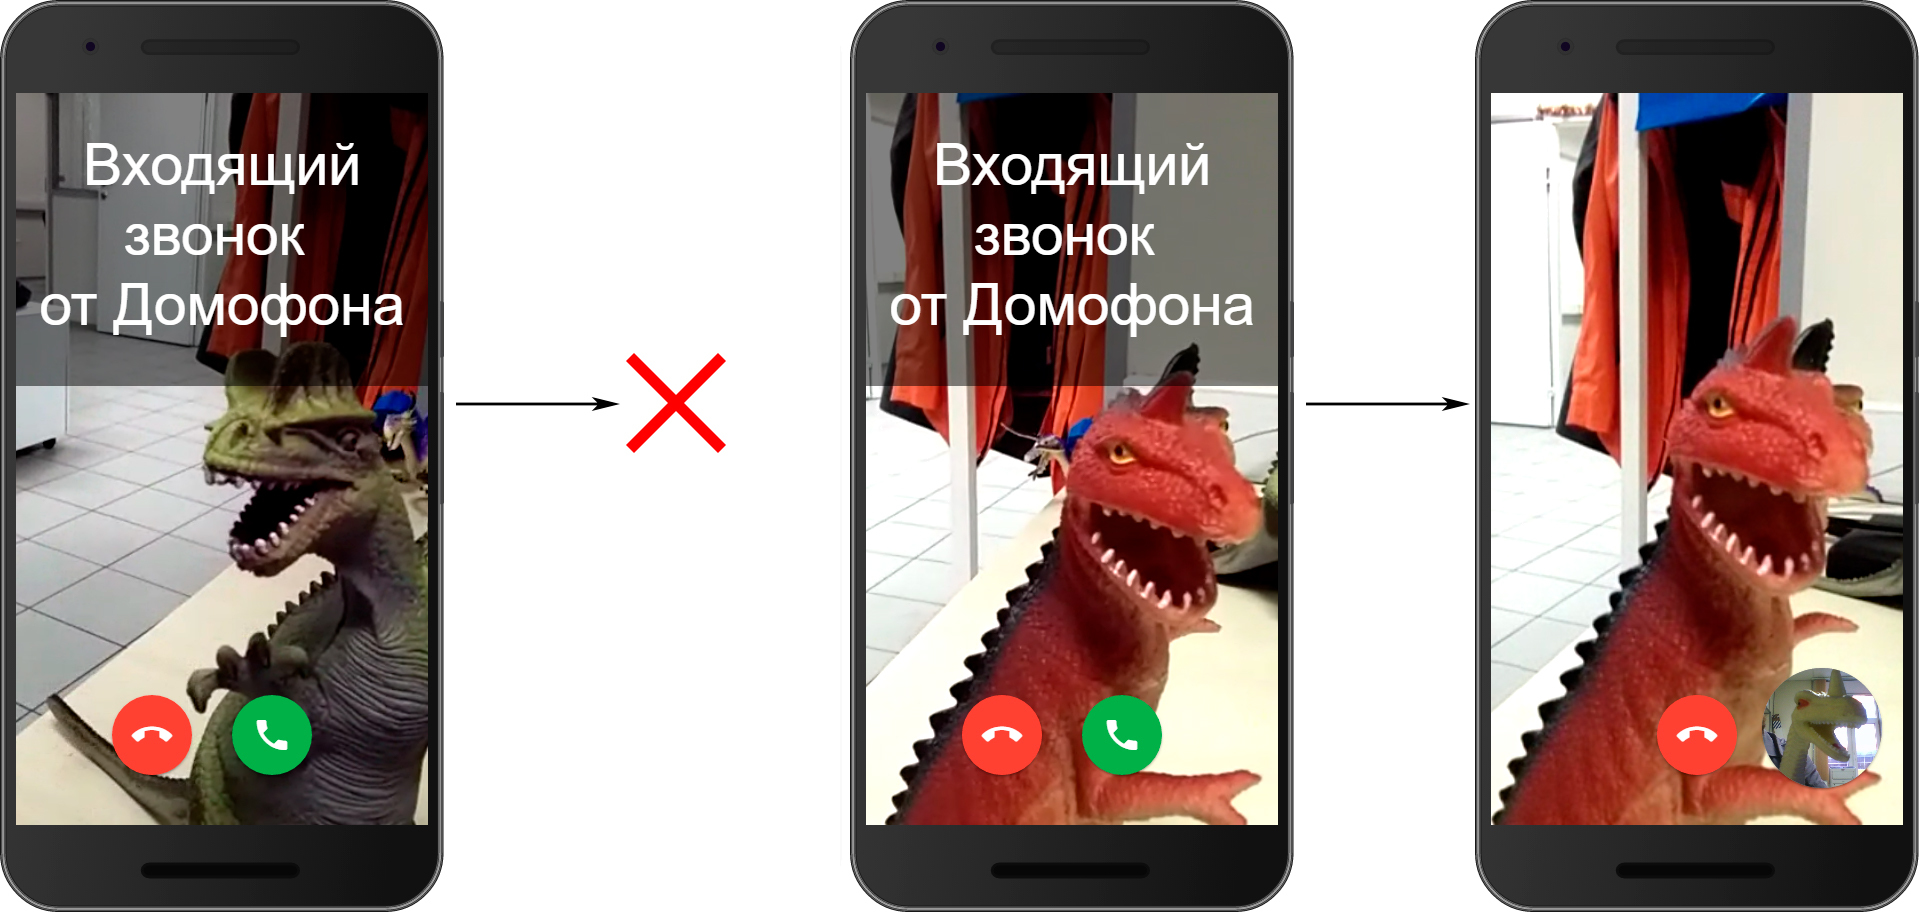
「Duoで連絡先に電話をかけると、あなたが連絡先の1人であれば、チャンネル登録者はあなたの動画を見ることができます。 呼び出し元が呼び出しに応答した後にのみ、呼び出し元が表示されます。」
このチュートリアルでは、インターコムのコードを作成します。これにより、一方が呼び出しを行い、もう一方が呼び出しを受信できるようになります。 インターホンに電話をかけるのは奇妙です。公衆電話に電話するようなものです。
本格的なビデオチャットを行うには、1つのページで両方のサンプルのコードを組み合わせるだけです。
発信者
それを美しくするために、いくつかのhtml + cssを実行しましょう。 最終的に何が出てくるかは、KDPVの記事をご覧ください。
<!DOCTYPE html> <html lang="en"> <head> <meta charset="UTF-8"> <meta name="viewport" content="width=device-width"> <title>Intercom</title> <script type="text/javascript" src="//cdn.voximplant.com/edge/voximplant.min.js"></script> <link href="https://fonts.googleapis.com/icon?family=Material+Icons" rel="stylesheet"> </head> <body> <!-- , , --> <div class="it_remote_wrapper"> <div class="it_remote_video"></div> </div> <!-- , --> <div class="it_local_video"></div> <!-- --> <div class="it_exit_link"> <i class="material-icons">call_end</i> </div> <!-- --> <div class="it_connecting"> <br> <br> </div> <!-- --> <audio src="/assets/31800_81339-lq.mp3" id="beeptone" loop autoplay></audio> </body> </html>
主催者
<div class="mdl-layout mdl-js-layout"> <main class="mdl-layout__content"> <h1>Please, wait incoming call.</h1> </main> <div class="callpopup"> <div class="it_remote_wrapper"> <div class="it_remote_video"></div> </div> <div class="it_local_video"></div> <div class="it_exit_link"> <i class="material-icons">call_end</i> </div> <div class="it_start_link"> <i class="material-icons">call</i> </div> <div class="it_connecting"> Incoming call </div> </div>
レイアウトについて特別なことはありません。 これは好みと好みの問題です。
次に、Voximplantにスクリプトを追加します。
VoxEngine.forwardCallToUserDirect(function(call1,call2){ call2.addEventListener(CallEvents.InfoReceived,function(e){ call1.sendMessage(e.body); }); },true);
このコードを使用すると、P2Pモードで通話を発信し、電話間の通話の開始に関する独自の信号を転送できます。 ここでは、通話が一般的にどのように進むか、このシナリオが通常の通話とどのように異なるかについて話す価値があります。
一般に、スキームは次のとおりです。
- ポールAがポールBに電話
- Pavel Bはコールを受信しますが、メディアストリームを送信しません
- ポールBがポールAを見て、外観上、応答するかどうかを決定する
- ポールBは応答することを決定し、メディアストリームをポールAに送信します
- ...再交渉...
- 利益!
主な違いは、クライアントでの再ネゴシエーションの適用です。
顧客コードを書きましょう。
最初の部分は、WebSDKの初期化とログインです。 二者にとっては同じです。
var vox = VoxImplant.getInstance(); vox.init({micRequired: true, videoSupport:true, progressTone:true }); vox.addEventListener(VoxImplant.Events.SDKReady, function(){ vox.connect(); }); var call; vox.addEventListener(VoxImplant.Events.ConnectionEstablished,function(){ vox.showLocalVideo(true); vox.login(settings.users[0].name+"@"+settings.app_name+"."+settings.account_name+".voximplant.com",settings.users[0].pass); vox.addEventListener(VoxImplant.Events.AuthResult,function(e){ }); });
次に、発信者のコードにフルスクリーンで自分のビデオを表示させます。
vox.showLocalVideo(true); var localvideo = document.querySelector('#voximplantlocalvideo'); document.querySelector('.it_remote_video').appendChild(localvideo); localvideo.style.height = "100%"; localvideo.play(); // play ,
そして、私たち自身のシグナリングでコールの受け入れに関する情報を受け取ると(詳細は後述)、受信側のビデオをそこに表示し、コーナーのビデオを削除します。
call.addEventListener(VoxImplant.CallEvents.MessageReceived,function(e){ if(e.text=="CONNECTED"){ document.querySelector('.it_local_video').style.display = "block"; document.querySelector('.it_local_video').appendChild(localvideo); document.querySelector('.it_connecting').style.display = "none"; localvideo.style.height = "140px"; localvideo.style.marginLeft = "-40px"; localvideo.play(); var remotevideo = document.getElementById(call.getVideoElementId()); document.querySelector('.it_remote_video').appendChild(remotevideo); remotevideo.style.height = "100%"; remotevideo.removeAttribute("height"); remotevideo.removeAttribute("width"); remotevideo.play(); } });
さて、私たちはあなたを第二の側に電話させます。
call = vox.call(settings.users[1].name,true);
第二の側面。
最初のクライアントから初期化を挿入します。
今、私たちは挑戦を巧妙に受け入れる必要があります。 オーディオとビデオは送信しません。
次に、着信コードを作成します。SDKの観点からは、自動応答になります。
vox.addEventListener(VoxImplant.Events.IncomingCall,function(e){ e.call.sendAudio(false); document.querySelector('.callpopup').style.display = 'block'; call = e.call; call.answer(); call.addEventListener(VoxImplant.CallEvents.Connected,function () { call.mutePlayback(); var remotevideo = document.getElementById(call.getVideoElementId()); document.querySelector('.it_remote_video').appendChild(remotevideo); remotevideo.style.height = "100%"; remotevideo.removeAttribute("height"); remotevideo.removeAttribute("width"); remotevideo.play(); }); call.addEventListener(VoxImplant.CallEvents.Disconnected,cancelCall); call.addEventListener(VoxImplant.CallEvents.Disconnected,Failed); })
発信者からの音は消音されることに注意してください。 少し後で、これは会話をより早く開始するのに役立ちます。
これで、呼び出し元が表示されます。 「返信」ボタンと「終了」ボタンについて説明します。
エンドコールから始めましょう。
function cancelCall() { if(typeof call!="undefined") call.hangup(); document.querySelector('.it_remote_video').removeChild(document.querySelector('.it_remote_video').childNodes[0]); document.querySelector('.it_connecting').style.display = "block"; document.querySelector('.it_exit_link').style.marginLeft = '-110px'; document.querySelector('.it_start_link').style.display = 'block'; document.querySelector('.callpopup').style.display = 'none'; document.querySelector('.it_local_video').style.display = 'none'; }
返信ボタンは素晴らしいです。 そのハンドラーには、例が機能するための魔法のちょうど半分が含まれています。 ユーザーがクリックするとすぐに、オーディオとビデオのストリームをSDKに接続し、再ネゴシエーションを実行します。
function answerCall(){ document.querySelector('.it_exit_link').style.marginLeft = '-40px'; document.querySelector('.it_start_link').style.display = 'none'; vox.showLocalVideo(true); var localvideo = document.querySelector('#voximplantlocalvideo'); document.querySelector('.it_local_video').appendChild(localvideo); document.querySelector('.it_local_video').style.display = 'block'; document.querySelector('.it_connecting').style.display = "none"; localvideo.style.height = "140px"; localvideo.style.marginLeft = "-40px"; localvideo.play(); call.unmutePlayback(); call.sendAudio(true); call.sendVideo(true); call.sendMessage('CONNECTED'); }
完成したプロジェクトのリポジトリにリンク→ github.com/voximplant/demo_callstats.io
デプロイするには、次を実行します。
npm install npm start
このプロセスでは、 api_keyとaccount_idを入力する必要があります