プログラミングも好きです。 主にC#およびJava(Android)で。 WPFテクノロジに精通し、グラフィカルユーザーインターフェイスの実装がいかに簡単かを知ったとき、私の喜びは際限がありませんでした。 「しかし、これはSCADAシステムのキラーです」と私は思いました。 どういうわけか、.NETプロジェクトを入出力デバイス(PLC)に接続する必要があります。
そして、ある時点ですべてのマシンガンナーにやってくるというアイデアが浮かびました。 独自のSCADAシステムを作成します。 そして、SCADAシステムだけでなく、.NET開発者向けのSCADAシステム(主に自分用)。 なぜなら、Visual Studioから「最新の」SCADAシステムのエディターに切り替えるとき、最後の髪を引き裂きたいことがあるからです。 しかし、実際の困難は、基本を超える機能を実装する必要があるときに始まります。 もう1つのことは、プログラマーの世界です。 ほとんどすべての質問に対する回答は、 google.com検索インターフェイスを使用してstackoverflow.comですばやく見つけることができます。
次に、私がやったことを説明します。 プロジェクトのソースコードはhttps://github.com/phmi/phmiで入手できます 。
設置
PHmiを使用するには(呼び出したとおり)、次の条件を満たしている必要があります。
- PHmi
- PostgreSQL DBMS v9.2以降( www.postgresql.comからダウンロードできます)
- Microsoft Visual Studio 2010以降(ExpressバージョンまたはCommunity Editionで可能)
プロジェクト開発
プロジェクト開発は、サーバー構成とクライアントプロジェクト開発の2つのフェーズに分けることができます。
サーバー構成
PHmiConfigurator.exeを実行します。 次のウィンドウが表示されます。
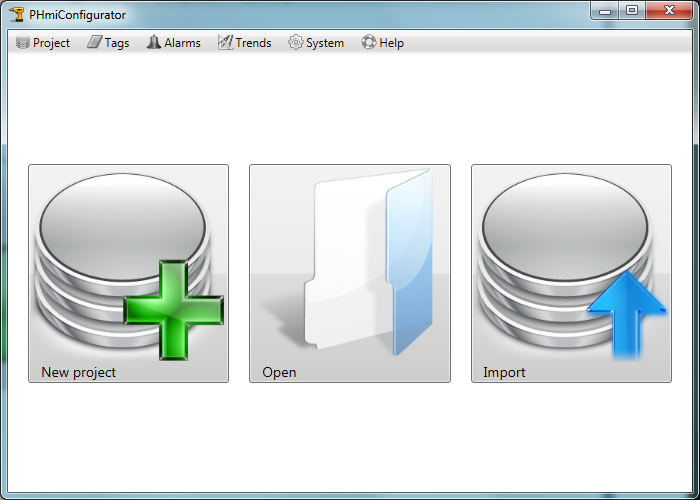
「新規プロジェクト」ボタンをクリックします。 「新しいプロジェクト」ウィンドウが表示されます。
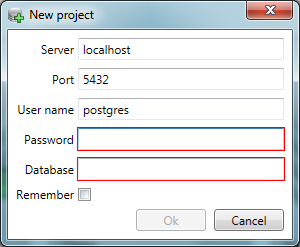
PostgreSQLと通信するためのパラメーターと目的のデータベース名を入力します。
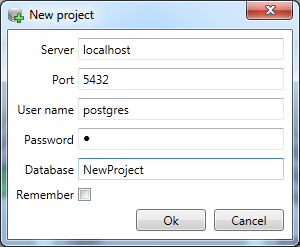
「OK」ボタンをクリックすると、新しいプロジェクトが作成されます。

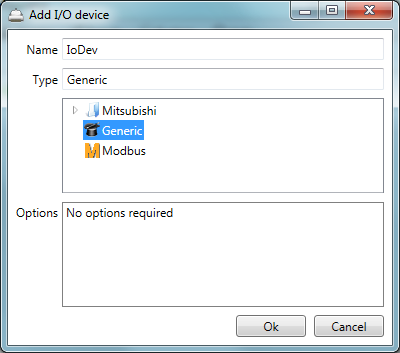
「I / Oデバイス」ボタンをクリックします。 コンフィギュレーターで、「I / Oデバイス」タブが開きます。
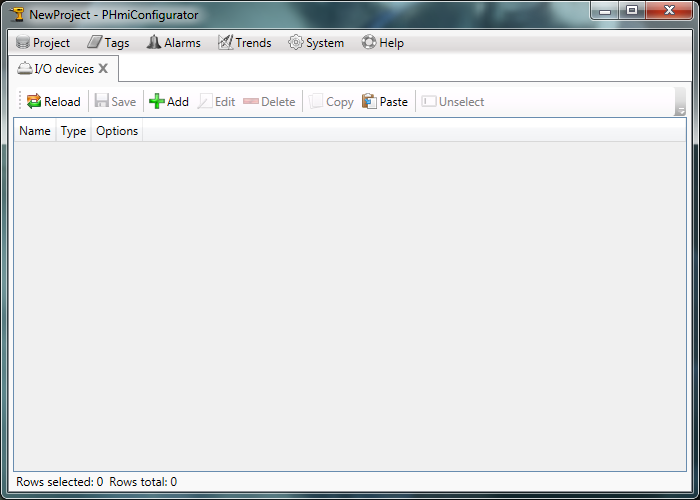
「汎用」タイプの新しい「IoDev」入力/出力デバイスを追加します。 ジェネリックは、デバッグ用の入力/出力デバイスです。 または、実際のデバイスに接続する必要がないときに使用されます。 任意のタグアドレスをサポートします。
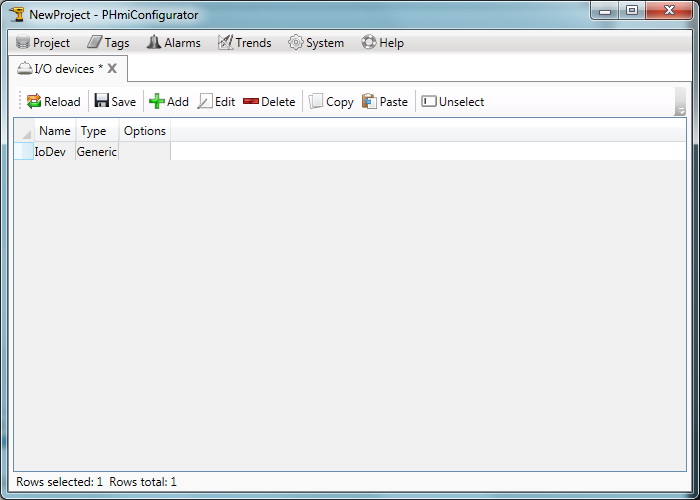
[保存]ボタンをクリックして、タブを閉じます。
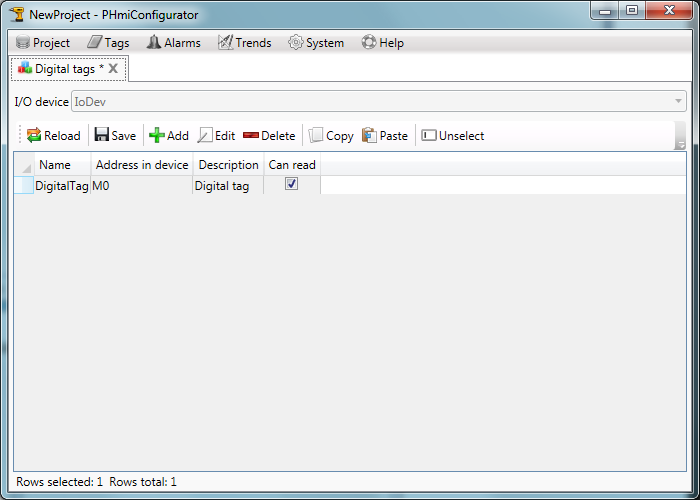
[デジタルタグ]タブを開き、新しいデジタルタグを作成します。
「数値タグ」タブを開き、新しいアナログタグを作成します。
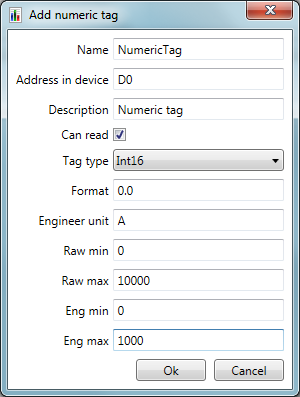
説明、形式、測定単位、キャリブレーション境界のフィールドはオプションであり、省略できます。
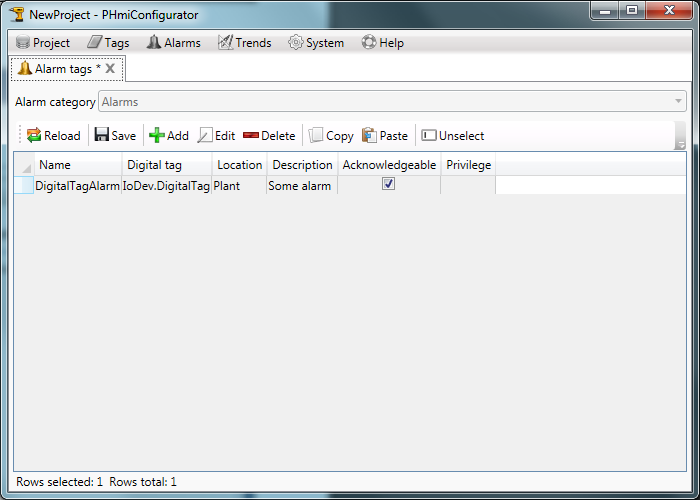
事故の新しいカテゴリを作成します。
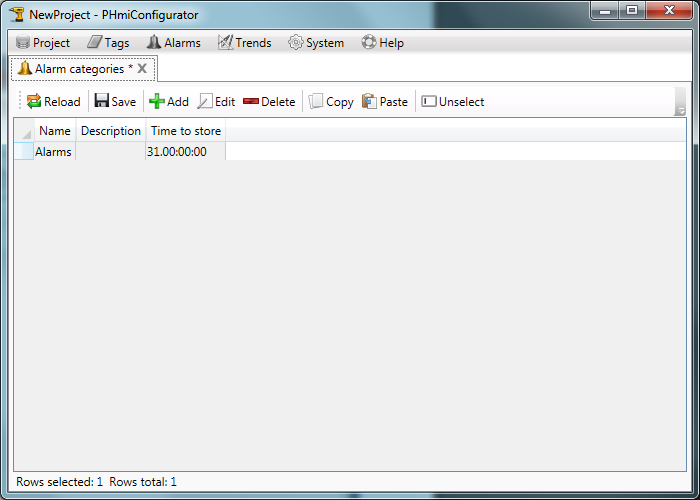
新しいアラームタグを作成します。
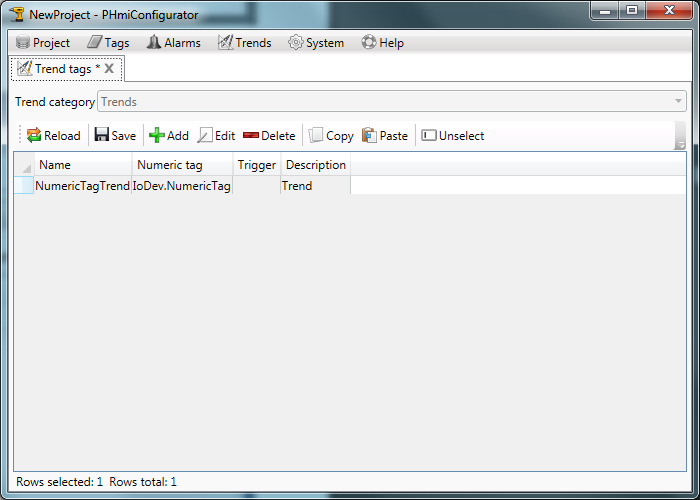
トレンドのカテゴリを作成します。
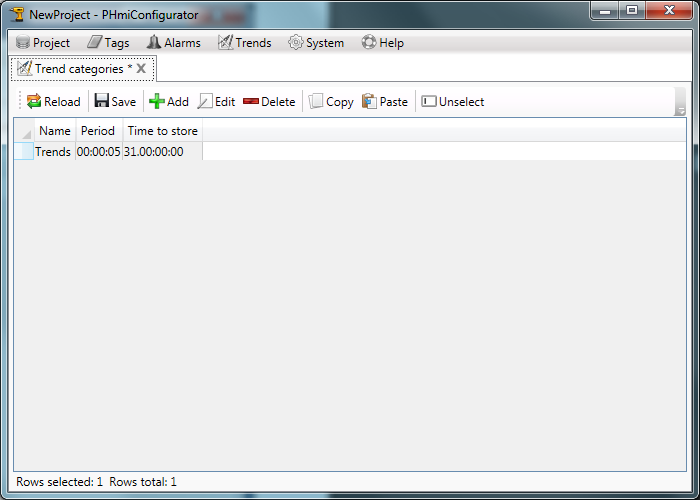
新しいトレンドタグを作成します。
顧客プロジェクト開発
コンフィギュレーターで、「クライアントのビルド」ボタンをクリックします。
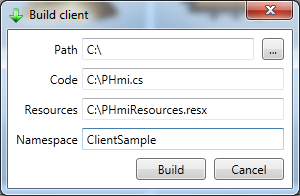
ファイルへのパスを選択して作成します。
「名前空間」は、将来のVisual Studioプロジェクトの名前と一致する必要があります。
「ビルド」ボタンをクリックします。
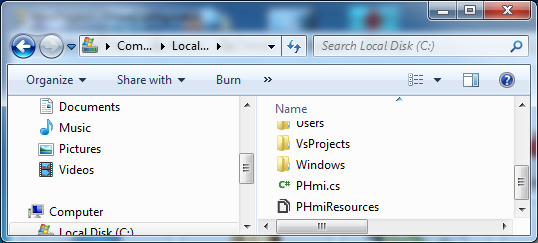
ファイルは指定されたパスに表示されます:
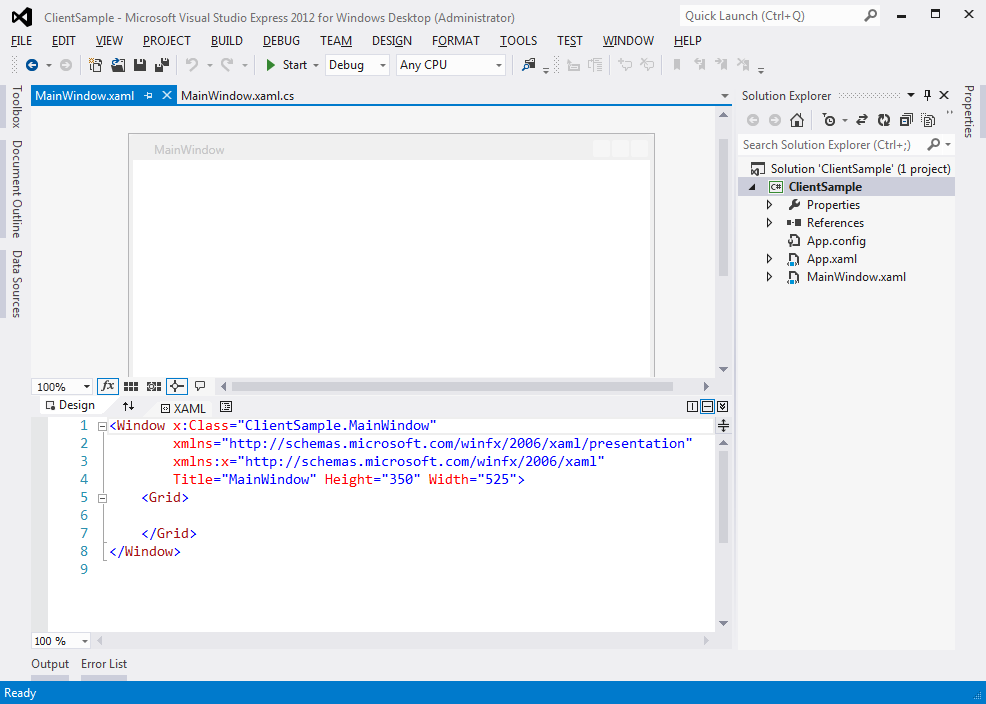
Microsoft Visual Studioを起動して、新しいWPFプロジェクトを作成します。 ターゲットフレームワークは「.Net Framework 4.0」以上である必要があります。

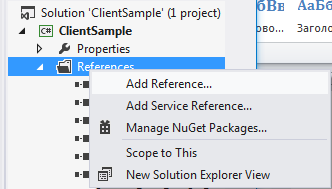
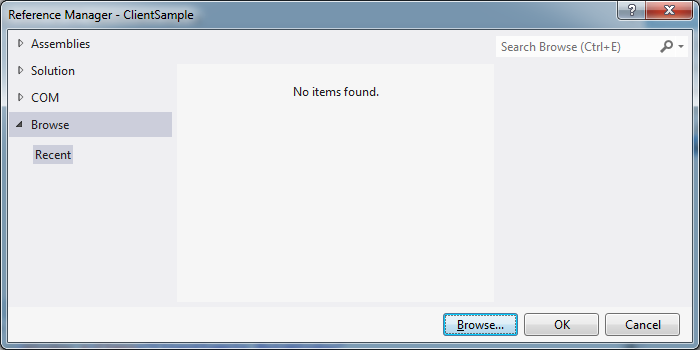
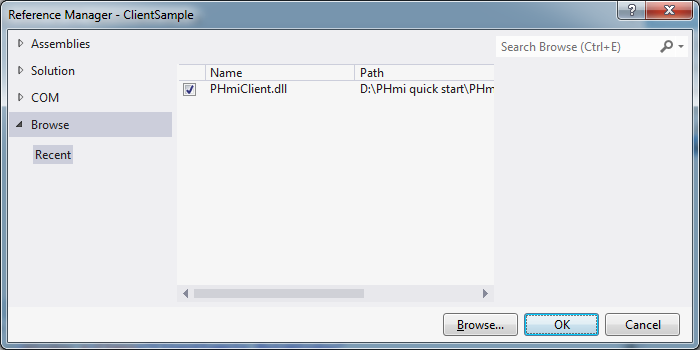
PHmiClient.dllへのリンクを追加します。
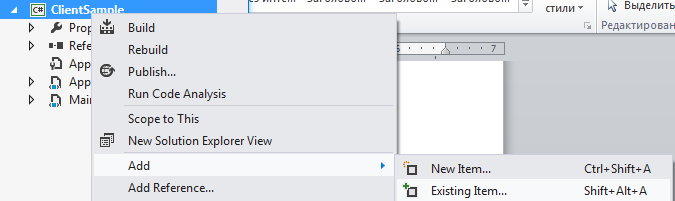
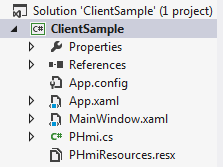
事前に作成されたPHmi.csおよびPHmiResources.resxファイルを追加します。
PHmiResources.resxをダブルクリックし、「アクセス修飾子」を「パブリック」に変更します。

MainWindow.xamlを開きます。 Knotrol Rootをルートグリッドに追加します。
<Window x:Class="ClientSample.MainWindow" xmlns="http://schemas.microsoft.com/winfx/2006/xaml/presentation" xmlns:x="http://schemas.microsoft.com/winfx/2006/xaml" xmlns:pHmiControls="clr-namespace:PHmiClient.Controls;assembly=PHmiClient" Title="MainWindow" Height="350" Width="525"> <Grid> <pHmiControls:Root/> </Grid> </Window>
PHmiをDataContextルートにバインドします。 これを行うには、ウィンドウリソースに新しいPHmiオブジェクトを作成します。
<Window x:Class="ClientSample.MainWindow" xmlns="http://schemas.microsoft.com/winfx/2006/xaml/presentation" xmlns:x="http://schemas.microsoft.com/winfx/2006/xaml" xmlns:pHmiControls="clr-namespace:PHmiClient.Controls;assembly=PHmiClient" xmlns:clientSample="clr-namespace:ClientSample" Title="MainWindow" Height="350" Width="525"> <Window.Resources> <clientSample:PHmi x:Key="PHmi"/> </Window.Resources> <Grid> <pHmiControls:Root DataContext="{StaticResource PHmi}"/> </Grid> </Window>
ページの「ページ」フォルダーを追加します。 「HomePage」というユーザーコントロールを追加します。
ページはIPageインターフェースを実装する必要があります。 HomePage.xaml.csのリストを以下に示します。
using PHmiClient.Controls.Pages; using System; using System.Windows.Controls; namespace ClientSample.Pages { /// <summary> /// Interaction logic for HomePage.xaml /// </summary> public partial class HomePage : UserControl, IPage { public HomePage() { InitializeComponent(); } public object PageName { get { return "Home page"; } } public PHmiClient.Controls.IRoot Root { get; set; } } }
Xamlファイルのマークアップは次のとおりです。
<UserControl x:Class="ClientSample.Pages.HomePage" xmlns="http://schemas.microsoft.com/winfx/2006/xaml/presentation" xmlns:x="http://schemas.microsoft.com/winfx/2006/xaml" xmlns:mc="http://schemas.openxmlformats.org/markup-compatibility/2006" xmlns:d="http://schemas.microsoft.com/expression/blend/2008" xmlns:clientSample="clr-namespace:ClientSample" mc:Ignorable="d" d:DesignHeight="300" d:DesignWidth="300" d:DataContext="{d:DesignInstance clientSample:PHmi, IsDesignTimeCreatable=True}"> <Grid> <StackPanel> <TextBlock Text="{Binding Path=IoDev.DigitalTag.Value}"/> <TextBlock Text="{Binding Path=IoDev.NumericTag.ValueString}"/> </StackPanel> </Grid> </UserControl>
タグ値を表示するTextBlockを追加しました。
ホームページのタイプをルートにバインドします。
<Window x:Class="ClientSample.MainWindow" xmlns="http://schemas.microsoft.com/winfx/2006/xaml/presentation" xmlns:x="http://schemas.microsoft.com/winfx/2006/xaml" xmlns:pHmiControls="clr-namespace:PHmiClient.Controls;assembly=PHmiClient" xmlns:clientSample="clr-namespace:ClientSample" xmlns:pages="clr-namespace:ClientSample.Pages" Title="MainWindow" Height="350" Width="525"> <Window.Resources> <clientSample:PHmi x:Key="PHmi"/> </Window.Resources> <Grid> <pHmiControls:Root DataContext="{StaticResource PHmi}" HomePage="{x:Type pages:HomePage}"/> </Grid> </Window>
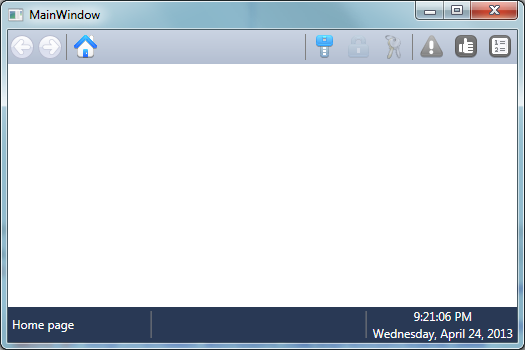
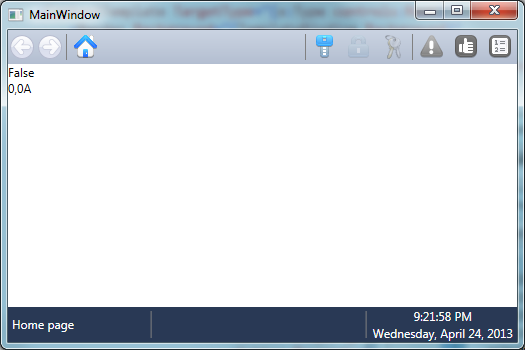
アプリケーションを実行して、何が起こったかを確認します。
タグ値は表示されません。 これは、PHmiRunner.exeが実行されていないためです。 コンフィギュレーターの「実行」ボタンをクリックします。
次に、ページにコントロールを追加します。
<UserControl x:Class="ClientSample.Pages.HomePage" xmlns="http://schemas.microsoft.com/winfx/2006/xaml/presentation" xmlns:x="http://schemas.microsoft.com/winfx/2006/xaml" xmlns:mc="http://schemas.openxmlformats.org/markup-compatibility/2006" xmlns:d="http://schemas.microsoft.com/expression/blend/2008" xmlns:clientSample="clr-namespace:ClientSample" xmlns:pHmiControls="clr-namespace:PHmiClient.Controls;assembly=PHmiClient" mc:Ignorable="d" d:DesignHeight="300" d:DesignWidth="300" d:DataContext="{d:DesignInstance clientSample:PHmi, IsDesignTimeCreatable=True}"> <Grid> <StackPanel> <TextBlock Text="{Binding Path=IoDev.DigitalTag.Value}"/> <TextBlock Text="{Binding Path=IoDev.NumericTag.ValueString}"/> <CheckBox IsChecked="{Binding Path=IoDev.DigitalTag.Value, Mode=TwoWay}" Content="{Binding Path=IoDev.DigitalTag.Description}"/> <pHmiControls:NumericInput NumericTag="{Binding Path=IoDev.NumericTag}"/> </StackPanel> </Grid> </UserControl>
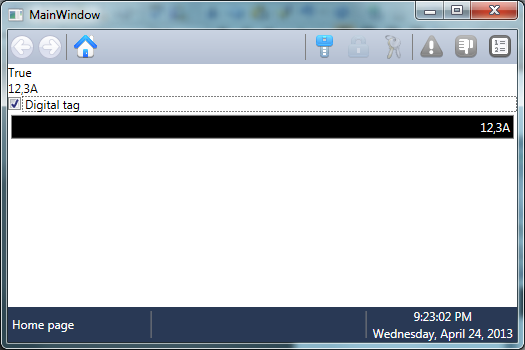
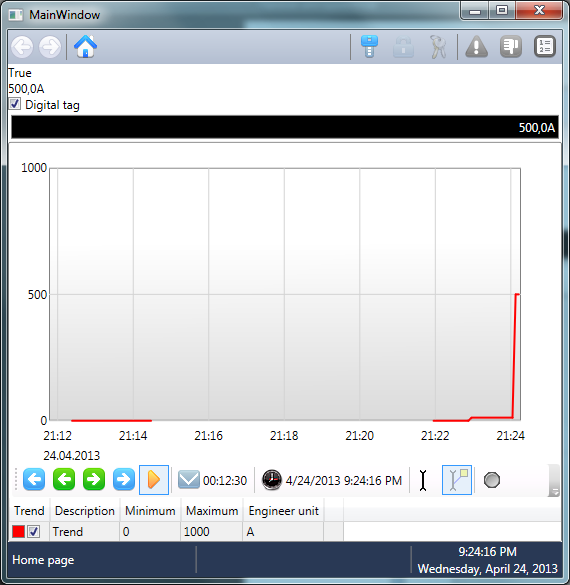
「デジタルタグ」を有効にすると、アラームが発生します。
ページにトレンドを追加します。
<UserControl x:Class="ClientSample.Pages.HomePage" xmlns="http://schemas.microsoft.com/winfx/2006/xaml/presentation" xmlns:x="http://schemas.microsoft.com/winfx/2006/xaml" xmlns:mc="http://schemas.openxmlformats.org/markup-compatibility/2006" xmlns:d="http://schemas.microsoft.com/expression/blend/2008" xmlns:clientSample="clr-namespace:ClientSample" xmlns:pHmiControls="clr-namespace:PHmiClient.Controls;assembly=PHmiClient" xmlns:trends="clr-namespace:PHmiClient.Controls.Trends;assembly=PHmiClient" mc:Ignorable="d" d:DesignHeight="300" d:DesignWidth="300" d:DataContext="{d:DesignInstance clientSample:PHmi, IsDesignTimeCreatable=True}"> <Grid> <StackPanel> <TextBlock Text="{Binding Path=IoDev.DigitalTag.Value}"/> <TextBlock Text="{Binding Path=IoDev.NumericTag.ValueString}"/> <CheckBox IsChecked="{Binding Path=IoDev.DigitalTag.Value, Mode=TwoWay}" Content="{Binding Path=IoDev.DigitalTag.Description}"/> <pHmiControls:NumericInput NumericTag="{Binding Path=IoDev.NumericTag}"/> <trends:TrendViewer Height="400"> <trends:TrendPen TrendTag="{Binding Path=Trends.NumericTagTrend}" Brush="Red"/> </trends:TrendViewer> </StackPanel> </Grid> </UserControl>
ウィンドウ言語の設定
地域の設定(日付、時刻など)に従って文字列を表示するには、ウィンドウコンストラクターでXmlLanguageを変更する必要があります。
using System.Threading; using System.Windows; using System.Windows.Markup; namespace ClientSample { /// <summary> /// Interaction logic for MainWindow.xaml /// </summary> public partial class MainWindow : Window { public MainWindow() { Language = XmlLanguage.GetLanguage( Thread.CurrentThread.CurrentUICulture.IetfLanguageTag); InitializeComponent(); } } }
よろしくお願いします!