I’m Mikhail Kravchenko, game interface designer.
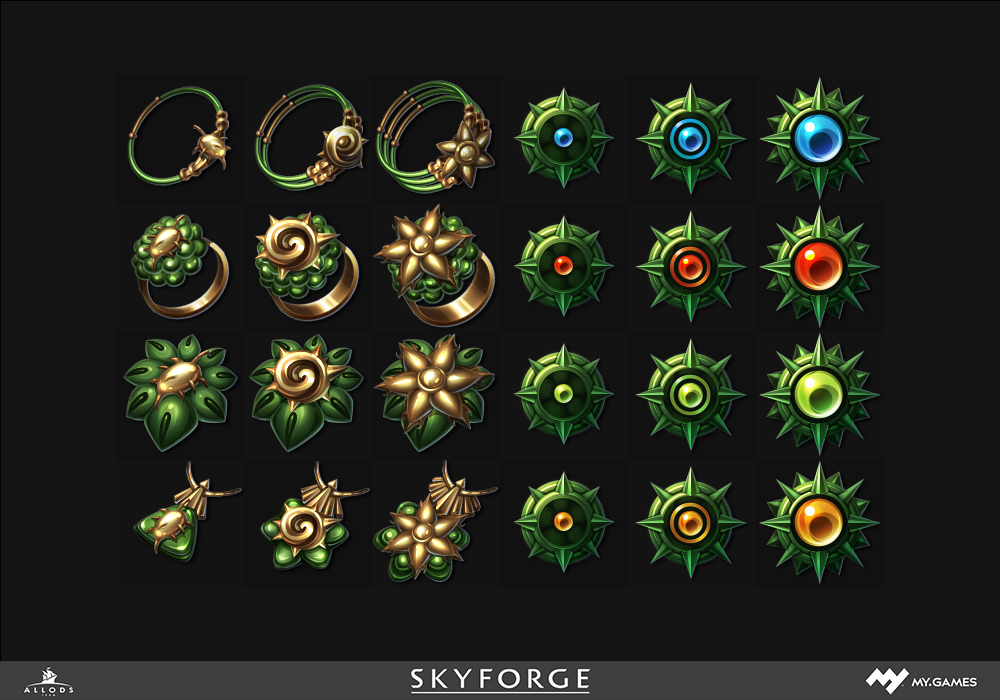
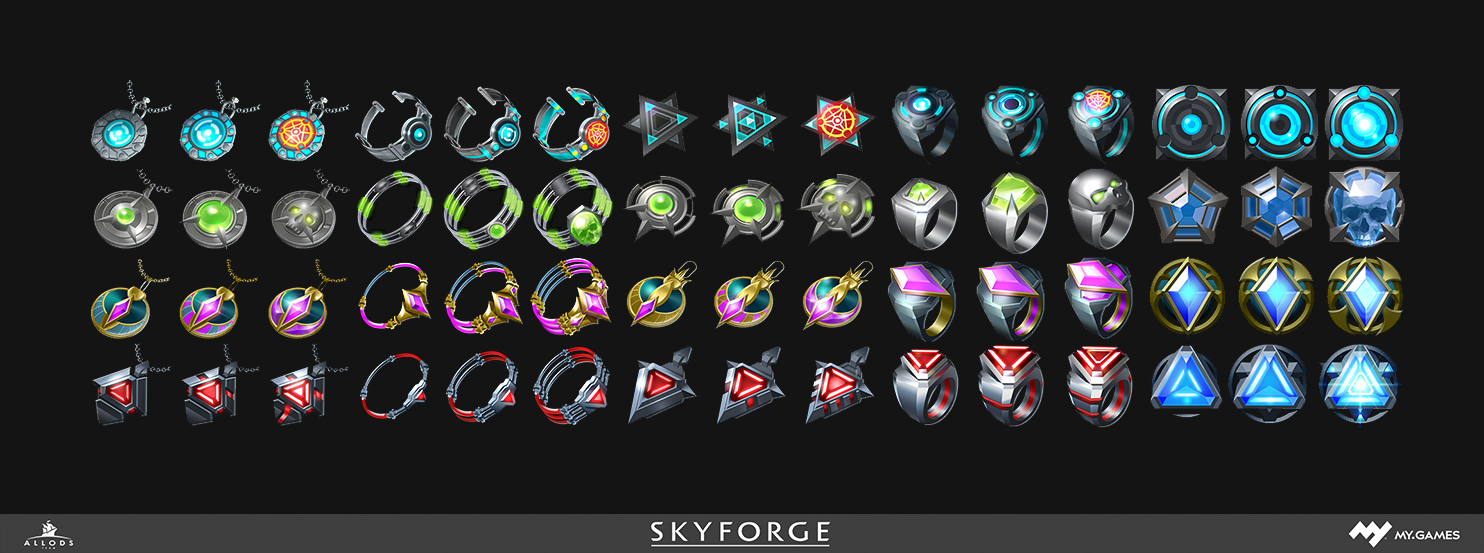
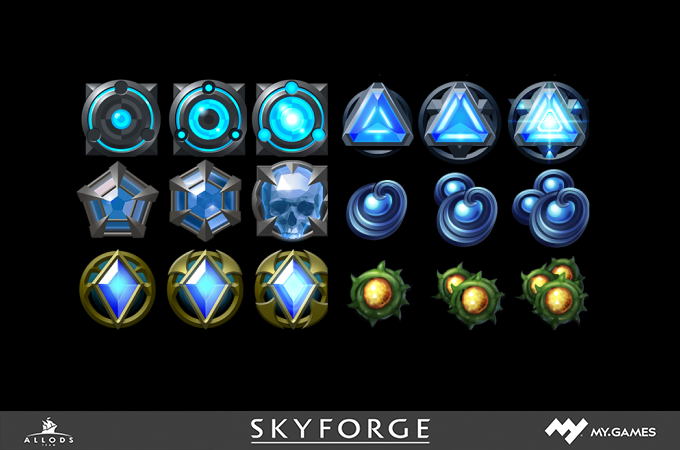
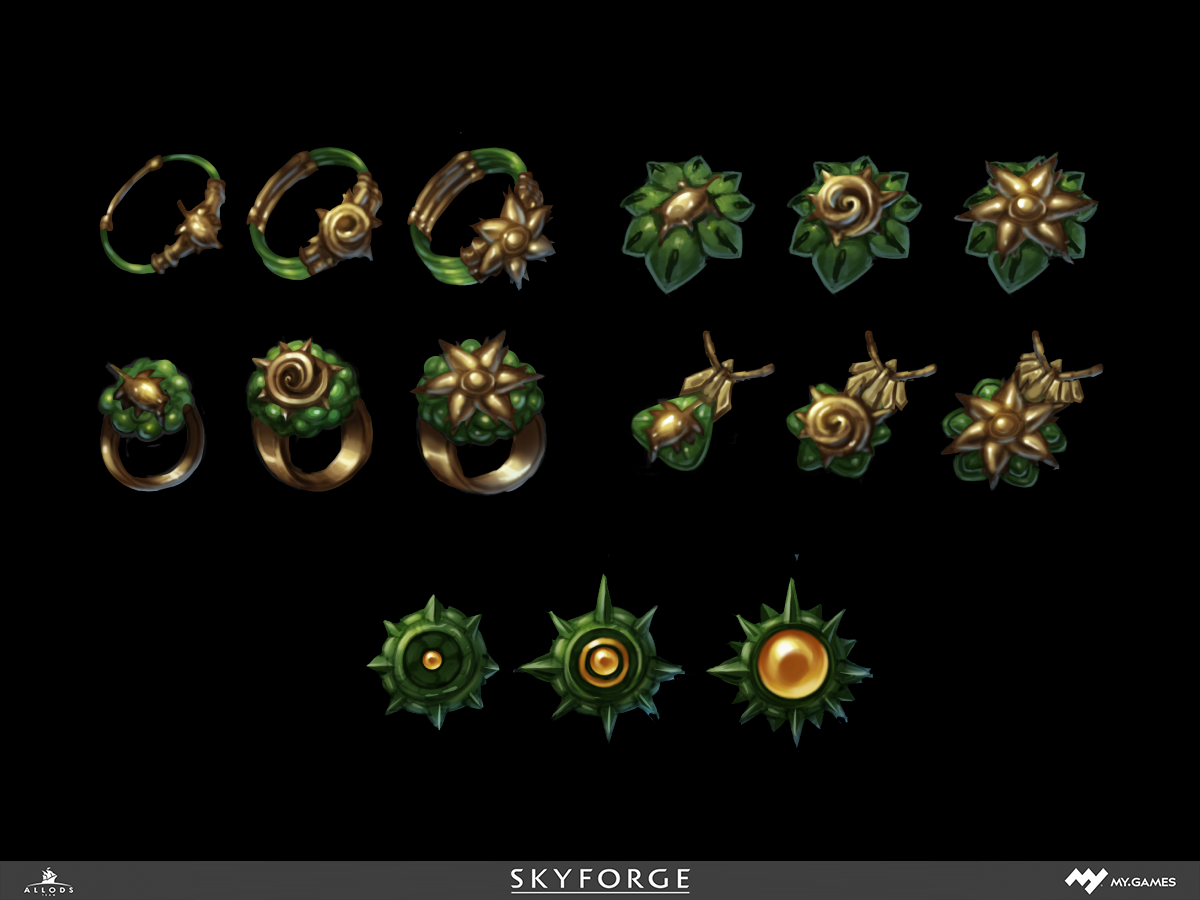
This article is about how to draw a pack of icons for the game. Below you see the result.
We fix the requirements for the result
So a task of about this content flew over to us. In the game, an event begins - the invasion of the alien race on our planet. We will defeat the invaders, various objects will drop out of them, and these objects need to be drawn.
First of all, it is necessary to formulate and fix the requirements for the result, this is the foundation of our work. Having such requirements before our eyes, with a lesser chance we will draw not what we need, we will have much more mutual understanding with the customer and the team, and there will also be something to check the result of our work with.
A list of requirements should be made based on the description of the problem and your own ideas about how to solve this problem. Next, you need to go to the customer with this list and make sure that we understand the problem the same way. Perhaps the list will need to fix something. As a result, we obtain a list of requirements for the result.
Here is an example of such a list:
- Items should be similar to other similar items from past intrusions;
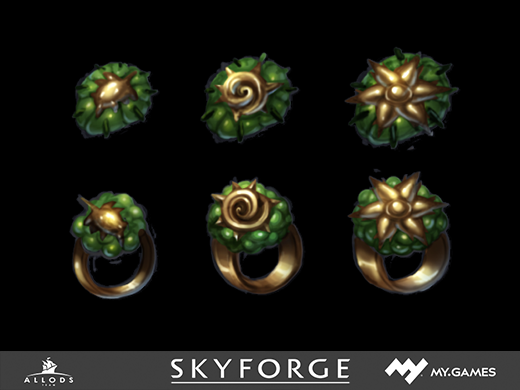
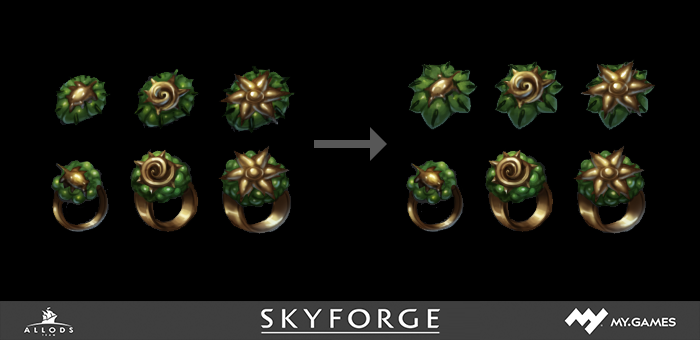
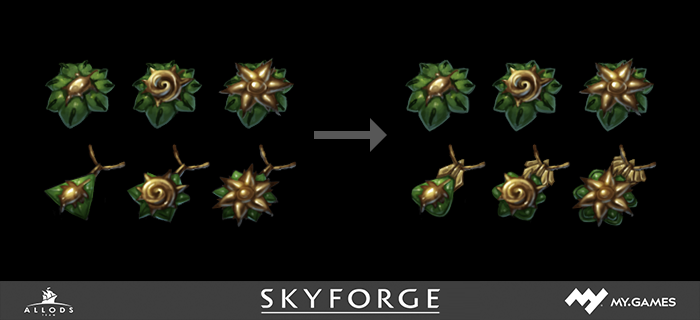
- There will be 5 types of items - rings, bracelets, brooches, pendants and stones;
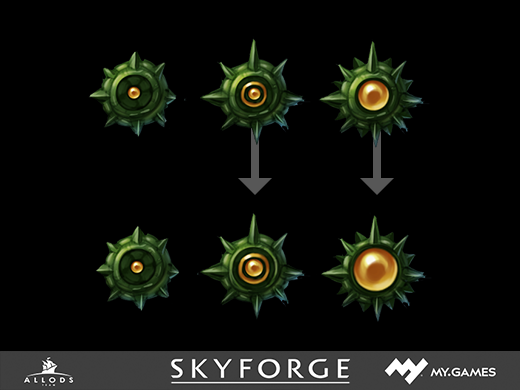
- Each type of item will have three degrees of rarity. The rarer the object, the more power it gives;
- The degree of rarity of the item must somehow be shown visually;
- In addition to rarity, stones have 4 colors - blue, red, yellow and green;
- Items drop out of the soldiers of the invading army, therefore, they should have the characteristics and colors characteristic of these opponents;
- Pictures are needed in Tga format, size - 128x128 pixels.
We have decided on the requirements, now you can start working with references.
References
Find objects that have already been painted for such events. We will need to draw in the same direction, and these objects will help us not to stray from the right path.
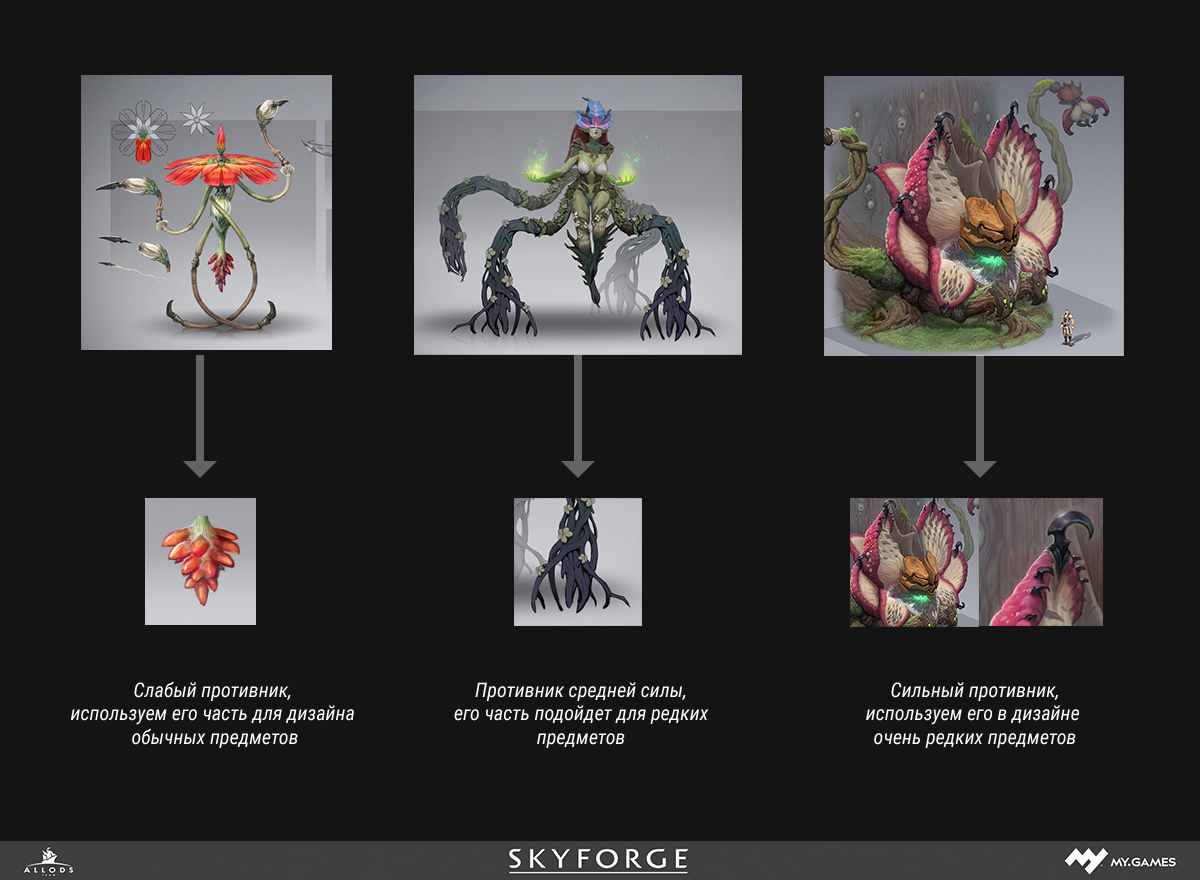
In addition, we must study the soldiers of the invading army. Our items will have to have some common features with them, so it’s worth collecting more pictures with invaders and building a design based on them.
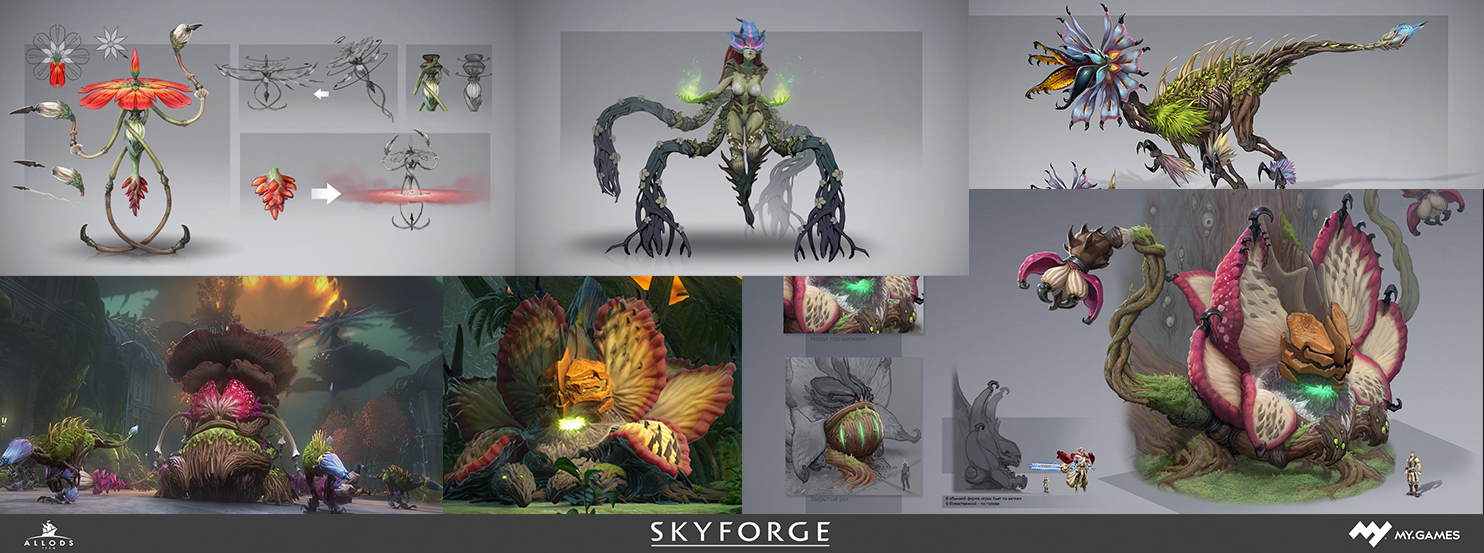
Opponents differ in their strength - there are ordinary, medium and strong. You can push off from this. For example, to use parts of weak opponents in the design of ordinary objects, and parts of strong opponents in the design of rarer ones.
Palette
We will need to draw many icons in one style, it will be much more convenient to work if we make a single palette and those. painting process for all items. If we don’t make a palette, but pick a color with a pipette from the reference, most likely the objects will corrode in color.
We select the references for the colors from the objects already in the game. Our opponents are a race of plants, so the green color is quite suitable. And as a second color, you can take gold. Below you see pictures with references.

Now you need to collect the colors from the references and make them a palette. Take the main color, he
It is located approximately in the middle between light and dark areas of the subject, colors for light and dark places, colors for highlights and especially dark places. And also color for reflexes from the environment. It turned out two sets of colors, one for the gold part, and the second for the green.

The preparation is completed, we proceed to the outline.
Outline
In the process, we will try different options for the design of objects, and when we get a result that satisfies us, we will coordinate it with the customer. Wishes and suggestions will arrive from the customer, some of them will help us improve the result, we will discuss and reject others. Some things in our design will not be entirely suitable and a number of points will need to be corrected or redone.
Important point
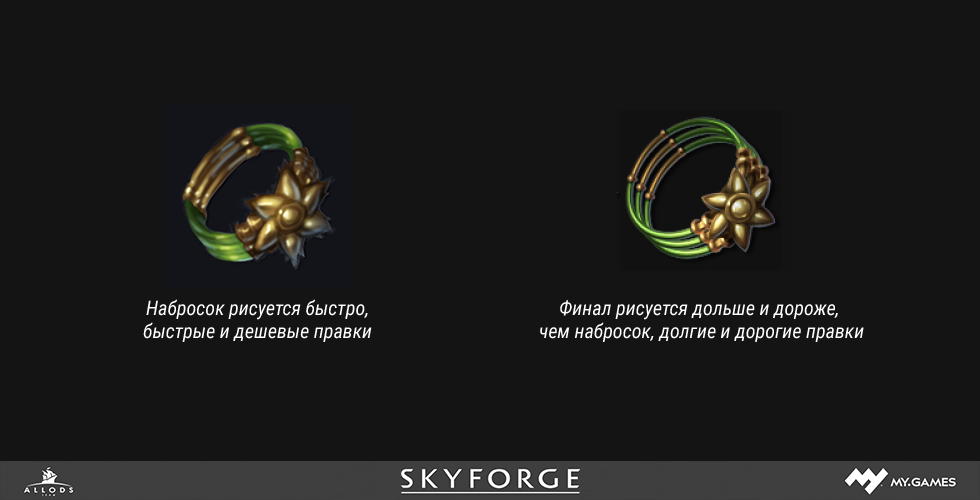
If we immediately do the work in final quality, it will take a significant amount of time. Then we are most likely to be asked to correct or change something, and it certainly will not work to do this easily and quickly. Most likely you will need to spend a significant amount of time and effort again.
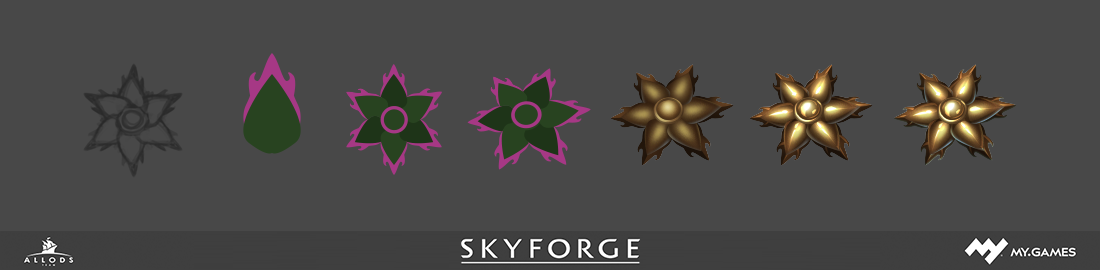
Therefore, we first sketch. The sketch takes a little time and effort, while it allows to outline in general terms what the final result will be. So we can quickly and cheaply go through several design options, and if they ask us to fix something, there will be no problems with that either.
Sketches begin with a lineart. It’s better to take a round brush with the Opacity and Flow parameters in the region of 30%, which vary depending on the force pressing the pen. Before our eyes we hold the parts of the opponents that we have chosen to show the rarity of objects, as well as the images of jewelry that are already in the game. We are looking for a suitable form for objects, in the process of such a search, you can go through several options, below you see an example of such a search.

If some elements in your design are repeated, it makes sense to wrap them in smart objects. It is likely that over time you will want to change something in them, and correcting one smart object is much easier than going through all the places in which the element is used.

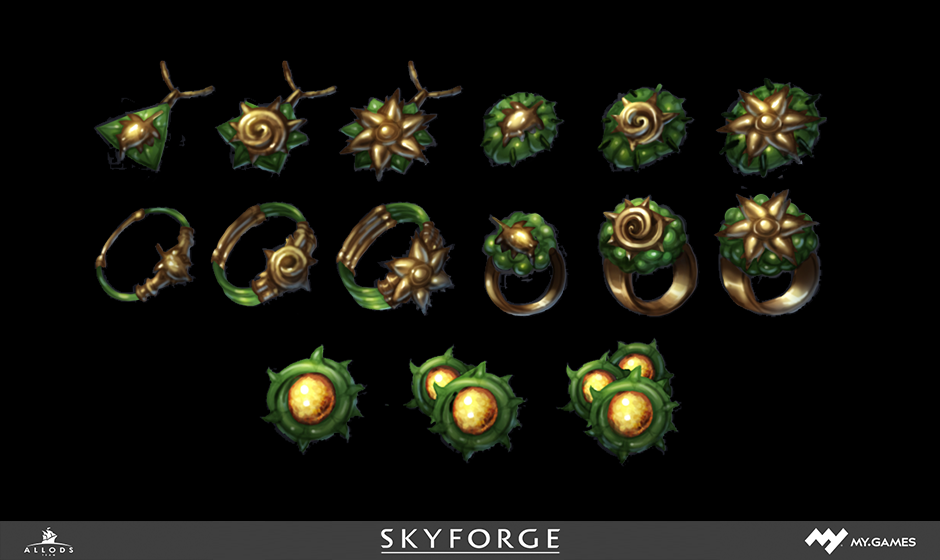
And now the lineart for all objects is ready. You can proceed to painting. We place prominently the prepared palettes and pictures of reference objects for flowers.
First you need to color one item to make sure that the current palette allows you to achieve the desired result. And get a sample, based on which we can color all other objects.
You cannot draw such a pattern in one layer because in this case we will not be able to paint other objects in the same way. Therefore, we add each color from the palette in a separate layer in order to have a painting process before our eyes and be able to repeat it when we paint other objects.

It is likely that the result that we will get will not suit us and it will be necessary to slightly change the colors to make it more suitable. It’s good that each color lies on a separate layer and you can edit any color separately from the rest. If we change the colors of the sample object, we must not forget to correct the same colors on the palette.
Here is a sample for painting ready, it suits us completely and you can also paint all other items.
We create a mask in the shape of all the objects so as not to creep over their edges, make separate groups for the golden and green parts of the object, we make the contents of these groups the same as in the sample object. The following shows the process of painting one item.

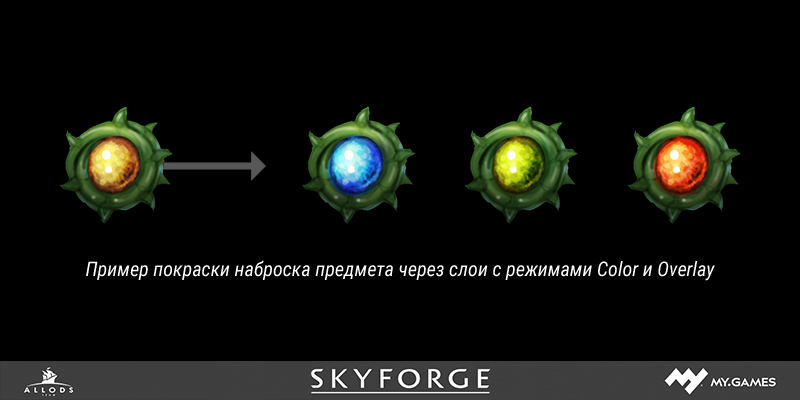
We also have stones in the problem and they have different colors - blue, yellow, green and blue. To get the desired result, just draw a set of stones, make three copies of it, put a layer with Color blending mode on top of them and paint the core of the stones in the colors we need. You can also put a layer with Overlay overlay on top of the layer with the Color mode and experiment with painting in it; drawing in such a layer increases the contrast of the picture and the color saturation.
Here we have ready sketches for all objects and you can proceed to the next stage - approval of the design with the customer and colleagues.
Design approval
Before showing the sketches to the customer, you need to fix somewhere the path by which we came to this decision and show it along with the sketches. When this path is visible to the customer and colleagues, many questions disappear by themselves, and we spend much less time on explanations. Figma, or another similar online service, is well suited for presenting such a path.
We show the sketch to the customer. It is likely that he will ask to correct a couple of points, we will be ready for this. When we agreed with the customer, we need to show the result to colleagues and ask them to share their opinion on the result. This is worth doing for several reasons.
Firstly, colleagues can notice things that we did not pay attention to. For example, I once drew a symbol for a new class and it fit the description of the task well, but then a colleague saw that symbol and said that the one-on-one symbol is similar to the May Target service logo and because of this it looks rather strange. I googled this logo, and it turned out that my icon is very similar to it.
Secondly, colleagues may experience unpleasant, or strange associations with the subject. And if such associations arose in one person, they may well arise in the players, and it is not at all profitable for us to provoke negative emotions in them.
Thirdly, someone may recall that we already have similar objects in the game, and if you add another one almost the same, it will confuse the player.
That is, checking the result with the help of colleagues helps us avoid some mistakes, or at least reduce the chances of their occurrence.
An example of working with feedback from colleagues
The following is an example of working with colleagues' comments.
Comment 01
The shape of the stones is almost the same as that of another invasion race.
We look at all the stones and see that different races have stones of different shapes, and our stones are really similar in shape to stones of another race.
We change the shape of the stones.
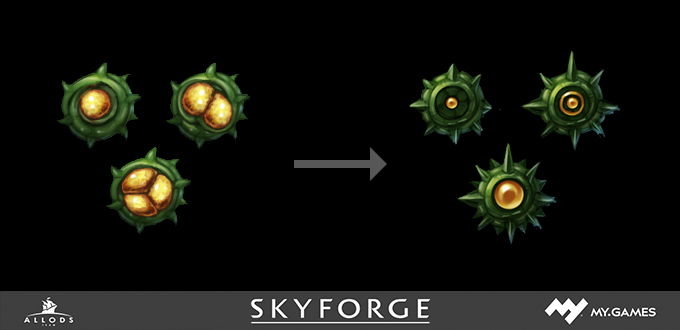
Comment 02
This form of the core of the stone gives associations with some kind of painful tumors, which makes the item not attractive.
If such an association appeared in one person, it can be assumed that others will appear. Something else needs to be invented.
Comment 03
It is necessary to correct the core of the middle stone - it is similar to that of the stone of demons.
We look at the stones of the demon race, we see that the stones are very different and the current version is suitable, and the author of the comment is wrong.
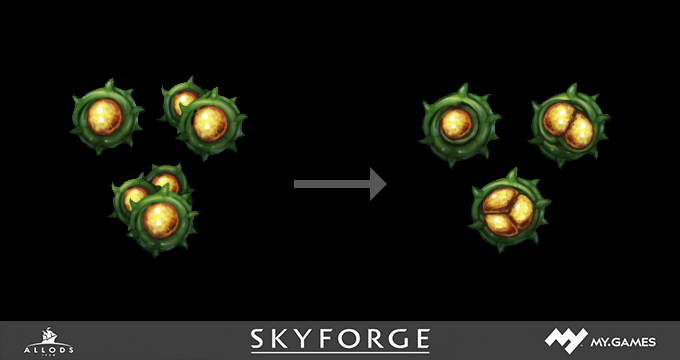
Comment 04
There is a proposal to increase the central part of the stone, depending on its degree of rarity.
Sounds logical, let's try.
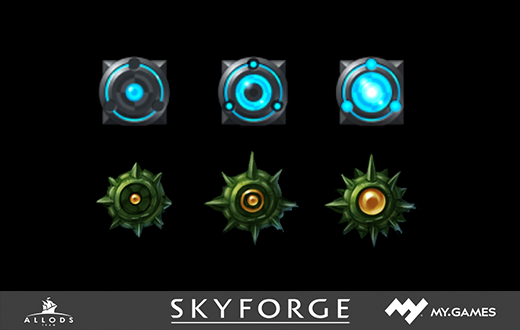
It turned out pretty well, let’s leave it like that.
Comment 05
The brooch is too much like a simply torn off top of the rings. MB they need some kind of substrate or other form.
Compare items.
It really seems that it can confuse a person, we change the shape of the green part.
Comment 06
Now the brooch is different from the ring, but it starts to look like an amulet. You can enhance their difference.
Compare objects, strengthen the difference, making the gold part more massive.
Important point
To edit the sketches faster, you can copy the group with them and collapse it into one layer, hotkey - Ctrl + E. Make changes in the resulting layer, and a copy of the group from those. the painting process to save for later. It will be needed when you need to draw objects in the final quality.
And so we approved the outline of the objects - everyone agrees with everything and we can proceed to the fine rendering of the objects.
Fine Rendering
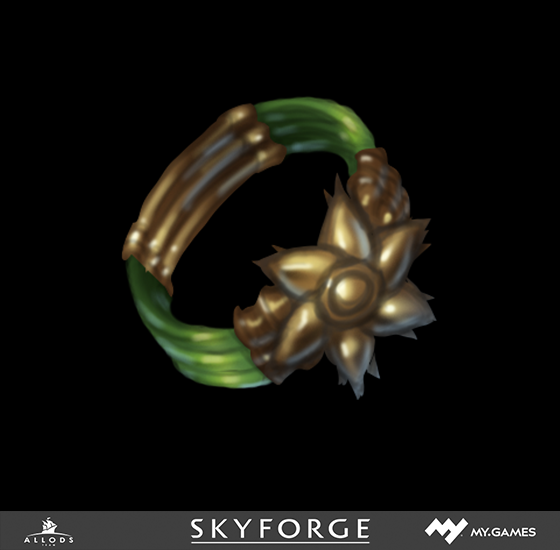
The most important thing at this stage is to observe a single tech. the drawing process for each item. In this case, all objects will be drawn the same way and none will be knocked out of the general style. To speed up the process, you can draw in a vector, at a scale of 100% of the required. To display the main forms with a pen, and then create a layer on top, turn it into a Clipping Mask and paint over the desired areas with a soft brush. Hotkey on the Clipping Mask - Ctrl + Alt + G. The picture below shows the process of painting part of the subject.
Here are all the items ready and they can be shown to the customer and the team.
Most likely there will be a minimum of wishes and comments since we have already agreed on everything at the draft stage.
After the items are approved, you need to save them in the correct format. I highly recommend marking up the document with the Slice tool and give a name to each cell. And then save all the items at once through the Save for Web function. It is very comfortable.
I hope this article was useful to you. I wish you all good luck and creative success.