On the demoscene, I'm more sympathetic than an active participant. My main interests are in the development of retro games and sound software. Earlier, I made only one conditionally full demo for a red phone , which has since become a scene meme, and about a dozen small intros for different platforms. The CAFe organizers, who had begun the personal agitation of the authors in advance, first remotely, through mutual friends, and then in personal meetings, eventually motivated me to create my first truly full-fledged work in the category of full-length demo. As it happened, on another not the most popular platform - the NES / Famicom game console, known to most under the name Dandy.
Planning
Initially, I was going to make a long-conceived demo for another, more popular 8-bit platform. But for its implementation, it was necessary to carry out a significant amount of research work, that is, there was no understanding of either the timing, the fundamental feasibility of the idea, or the quality of the possible result. Therefore, specific actions were taken very slowly. The deadlines began to significantly run out, and it became clear that if I want to keep the promise of participation, it is urgent to choose another, more predictable project in implementation. After thinking over the second idea, for the Wild category, which also required experimentation, I decided to return to the old demos for NES , made three years ago, then for the Multimatograph . As a result, they themselves were not really used, but the direction of work was finally determined.
The plan to do work specifically for NES was finally approved in early October, until CAFe was about three weeks away. The project folder was created on October 5, but some movements took place before that.
The first question that needed to be solved was how many effects (scenes) are needed to make the duration of the demo sufficient for claiming a large form, rather than a simple intro. It was also required to understand what this sufficient duration was.
For this, among other things, the current top works for the selected platform on Pouet were reviewed , and the two best ones, High Hopes and NESPECCY, were analyzed . The last one, which is an invitation to the same demopati, was released in December 2018, and until that moment I somehow hadn’t caught my eye. At first, it even hit motivation somewhat, since I initially assumed a level easier for my future work.
According to the results of the analysis, it turned out that in High Hopes there are about six effects and a duration of 2:45, and in NESPECCY about 11 effects and a duration of 3:45. That is an average of about 25 seconds per effect. I suggested that, on average, 10-15 effects will be enough, based on the assumption that only 3-5 of them will be relatively complicated technically, and the rest can be simple but pretty fillers. In order not to delay the display of simple scenes, on average it will turn out about 15 seconds per effect, with the total duration of the demo in about the same two or three minutes.
This was followed by a calculation of how much time can be spent on creating each effect. It turned out one and a half to two days, not counting the many other necessary works, such as music, graphics, some kind of idea, and just preparing a technical basis that combines effects. Such a schedule didn’t look very realistic, but I decided to make as many effects as I could, trying to fit into two days for each.
Thus, the priority task was determined - to have time to do at least something suitable for participation in the competition, as well as the development mode in the style of “no time to explain”. This also ruled out the development diary, and now you have to recover events from memory, trying not to lie too much.
The task to do the job, claiming first place, was not posed. The main thing is not victory, but participation and all that, and in general the main victory is above oneself. I did not make any special forecasts based on the results of the competition for the unpopularity of the selected category, expecting that in the worst (best) case of participation in the competition of several fairly strong works, mine will become compo fillers, which are also necessary and important, and if there are no works, then I will again a winner among himself, as has already happened in other disciplines. Of course, I wanted to win a decent fight, but I myself rated my work lower than what the audience finally estimated.
The code
After the deadlines were set, it became clear that in order to have time to raise such a project, it was necessary to tie up with inappropriate perfectionism and not try to make the most technologically advanced or compact demo code. The simpler and faster, the better, while maintaining sufficient external effect.
It was decided to choose a fairly powerful and even redundant configuration - an MMC3 mapper with 256 kilobytes of ROM code and 256 kilobytes of graphics ROM, and try not to worry that its full potential would remain unsolved. This configuration is not the most advanced of the existing and even more possible, it has been widely used in commercial games, starting with Super Mario Bros. 3 (1988), but previously the authors of the demo for NES were limited to simpler mappers and less memory. As a result, 80% of the volume of the ROM code was used and a little less than two-thirds of the volume of the ROM graphics. The excessive amount of memory allowed us not to waste extra time solving the data compression problem, although it could not do without it.
The development method was also obvious - mainly in C language, with assembler inserts as needed, mainly copying to video memory, interrupt handlers and a music player. I have long and successfully applied this approach to retro platforms. It greatly saves development time, since code prototyping can be done locally: first implement it in C and immediately get a result that works on NES , and then, if it does not work fast enough, rewrite it in parts to assembler according to an already prepared template until it The required speed has been reached.

One of the main expected problems, which, however, did not cause much trouble in practice, was the amount of main RAM - at NES it is only 2 kilobytes, and in my work I decided to do without expanding it, although the mapper basically allowed this move. The memory in systems based on the 6502 processor, in view of its total eight-bit capacity, is often considered in 256-byte pages, and in them the distribution of RAM turned out as follows:
- One page for “fast” variables;
- One page for the hardware stack and palette (a significant part of the stack is not used);
- One page for the sprite list buffer (features of the video controller architecture require it);
- One page for a list of video memory updates;
- One page for a list of parameters for raster effects.
The last two are declared in the program in the form of ordinary unsigned char arrays of 256 bytes and in some places are also reused for other purposes. The remaining three pages are given under the cc65 program stack, that is, under the global and local program variables in C.
It should be noted that dynamic memory allocation (malloc / free) is practically not used on such platforms, a static solution was required. At first, I adhered to the method of using as many local variables as possible, which allowed me to automatically reuse the memory of the software stack for them. But local variables work much more slowly, and as a result, the volume available for global variables became insufficient, and it was just uncomfortable to write code in this way, repeatedly using variables of the same name. Then I applied a previously unused solution: an ad in the linker configuration of several RAM segments physically located at the same addresses. Groups of variables used within the same effect were placed using compiler directives in these segments, allowing reuse of the same memory.
Another problem - the distribution of C program code by code memory banks ( NES uses page addressing for extended memory) - was previously solved by me in other projects, and did not cause problems. The code for placing in pages is limited to 16 kilobytes (the size of the switched memory window) to a functionally completed section, and is called by the overlay method: the desired page is connected, the code from it is processed, execution returns to the main page, and memory access between pages is impossible. Functions are allocated to banks manually, through compiler directives. The code required in all parts of the program, such as a music player, sprite output and interrupt handlers, is located in the upper non-switchable memory window, also 16 kilobytes in size.
When working on the last effect, the corridor with Mario, I came across an entertaining compilation error message: local label overflow . As I understand it, the compiler has an internal limit on the number of local labels generated (apparently 65536) inside one object module, but I used one common module to simplify the management of shared memory. One of the possible solutions was to split the code into several modules, and I already planned to apply it, however, after moving one array of constants from the source in C to the assembler part ( incbin with an external label), the problem resolved by itself, the limit ceased to be exceeded, and even after adding a couple more hundred lines of code an error message no longer occurred.
Development
In the choice of effects there was a plan to limit ourselves to simple, but always smooth, working at full display speed (60 frames per second). Traditional demo effects such as plasma and zoom rotators were not initially considered, since they do not fit well with the architecture of the set-top box, which has significant restrictions on access to video memory - this would look lousy compared to platforms where such effects are repeatedly implemented in all its glory.
At first, I wanted to make the bulk of the effects according to a three-year-old plan, based on line-by-line manipulations with the displayed raster - changing the vertical and horizontal displacement of each line, as well as the banks of the displayed graphic, as the beam passes through the raster. Such an approach could work on the basis of one common block of code, saving development time, but the effects would turn out to be quite uniform, and also quite traditional, found in many other works. In addition, there were difficulties debugging this general block of code, and as a result, the demo included only one effect of this type, a rotating cartridge.
Fiddling with a couple of effects based on old ideas, one of which eventually became the Kirby effect, and the second did not go into the demo, I began to write a text document where I wrote down all ideas that came to my head, both for individual effects and for the general concept. This list included more than 40 effects, while in the final work less than 15 were implemented. At the same time, most of the effects are animations of one kind or another, although each of its variants is quite unique and uses various tricks to ensure an acceptable memory consumption and the required smooth operation . It also unintentionally happened that the predominant type of effects is the rotation of something. In principle, this is a good coincidence, as a kind of conceptual unity arose.
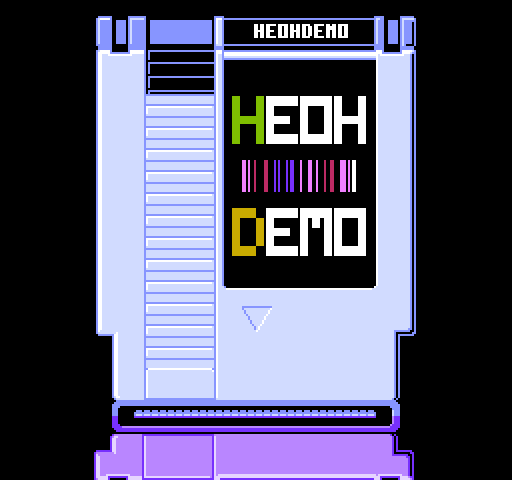
An intro with an elephant was conceived and made, as a joke on the topic of my previous work, then an effect with colored stripes and interference. Without much thought, the working title, HEOHdemo , was chosen as a continuation of the joke from the introduction (HE IS NOT HE). When it came to the realization of the scene with the display of the name, it was approved as final, because there were no more successful ideas by that time, and there was no time to come up with them.
A spontaneous decision with the name demo prompted the final concept of all the work, which finally took shape ten days before the deadline. It implied the use of recognizable video game and pop culture material, such as characters, logos, scenes from games, but modified in such a way as to make the originals a bit different (like “not them”). It was also decided to spread the humor from the initial and final scenes to the entire demo, thus compensating for the not-so-high technical level, which is in the spirit of the cited era (mid-90s), and appeals to a wider audience - after all, old game consoles have their own, not intersecting with the demoscene and not very enlightened in technology, but a very vast audience. Around the same time, it was decided to use the inherent demo of the 90s dividing into separate independent scenes, since they are easier to do in the time available, and this subsequently greatly helped with the musical part and the synchronization of effects with it.
The ideas of scenes with Vid, a rotating logo and partly with Mario in the corridor also arose naturally during the work. They were made out of turn, as a kind of procrastination - until the main planned effects were glued.
Assembly
Initially, it was clear that the longest time in timing would take parts with an introduction, title, greetings, and final credits. Work on them was carried out in the first place, so at some point it turned out that the demo already has a full beginning and end (the same as in the final release), but there is almost no middle ground for which only one was more or less ready the effect. The deadlines were drawing to a close. Work on the project turned into an hours-long marathon, taking up all possible free, and not free too, time. The effects remaining in the plans were sorted by complexity, all ideas were simplified as much as possible. Space invaders were made, problems with a rotating cartridge were defeated, and an easy-to-implement tower was creaked with a squeak (experimented with appearance). As the effects were ready, the sequence of their display was determined.
Each trifle took three times more time than it seemed at first, and a few days before the deadline, when there was still not half of the effects, nor music, there was a persistent feeling that it would not work out. Plan B was considered, to complete and exhibit work already on another demopati, or outside it. But then a more effective decision was made: urgently to collect and finish everything that is already there, into at least some semblance of a product ready for release, even completely stupid, to write some music for this, and if there is still time left after that, try to add more effects. Among such scenes added at the last moment were Pakman and the corridor, both in the most simplified version compared to the original ideas.
This method of assembly led to a noticeable incoherence of effects in the middle of the demo and a complete change of music between many scenes. However, it helped to save a lot of time, and in fact the work was quite ready for release a day before the deadline. This extra time was spent on finalizing various trifles in all parts and in music. In particular, it was at this time that the invaders and the toad acquired their alternative appearance.
Debugging
For lack of debugging capabilities on real hardware, as well as hardware itself, the demo was debugged exclusively in emulators. The main work was in the FCEUX emulator. It is not very accurate, but it has a good debugger and it starts up very quickly, which is important with the development method of "appended a couple of lines, launched, checked." Time-critical effects were also debugged in much more accurate but less convenient Mesen , punes and Nestopia .
Since the demo format itself implies the desire to get from the platform what nobody previously did on it, this tests the accuracy of emulators for strength, including by showing their disagreement about various extreme cases. Having debugged the effect in one emulator, you can get artifacts in it in other emulators. Because of this, and also because of the features of the NES architecture, many effects tied to precise timings had to be debugged repeatedly many times. As a result, I set up the demo for clean work in the popular FCEUX emulator, with which it was sent to the contest, and for normal work in all other emulators.
Of the interesting errors found during debugging, there was a problem in the scene with a rotating logo, manifesting itself exclusively in the Mesen emulator. Initially, in this effect, the render turned off immediately under the inscription inspired by to transfer a large block of data to the video memory, and did not turn back on until the start of the next frame. This worked fine in all emulators, but in Mesen, inexplicably, the display of flying coin sprites completely stopped working normally. Enabling rendering after forwarding fixed this problem.
The demo directly supports only the NTSC version of the set-top box, since PAL support would greatly increase the amount of work and debugging time - some effects require very different settings, and to preserve the duration of the demo and the speed of the music, you would need to make two sets of music data and execute twice manual adjustment of effects. Therefore, at startup, a system determination is made, and if a PAL version is detected, a warning is issued about possible incorrect operation. The demo itself starts up, but works with strong visual artifacts in some effects and is 17% slower.
After the release, some viewers started the demo on various real consoles - the American NES , Famicom AV , and even Pegasus (an analogue of our Dendy Classic 2 in Poland, the Czech Republic and some other countries). It turned out that on all consoles the demo works mostly normally, but with visual problems in some scenes, and most interestingly, these problems are different for everyone. Some of them are probably related to the insufficiently accurate implementation of the MMC3 mapper in popular Flash cartridges, since the least number of problems arose on a conventional cartridge with a real MMC3 . The next least problematic configuration turned out to be Pegasus , although the demo there should not have worked normally in principle - it only shows a small artifact on the stage with Mario. To my surprise, the most difficult to debug and timing-critical effect - the rotating cartridge - works stably on any test iron configuration.
The problems found on the hardware are not critical, and eventually the final version will be released, where they will be fixed. But for this, it remains to be seen which of the problems relate specifically to the demo code, and which of the features of the test configurations. After that, the obtained information can be used to improve the quality of emulators and Flash cartridges.
Music
Work on music began with the selection of a theme from the program "New Reality" and attempts to cross it with "Glory." This process took an indecent time. Then AON’s inspired the idea of making drums in the initial part of the demo in the form of simple jerky signals of two different heights, and a fragment of music with such drums for an effect called a demo was roughly sketched. The idea also arose that the same fragment, but in a different arrangement, could be used in the part with greetings, as a semblance of a general musical theme. For the most part, work on music stopped there, and the rest of it was written two days before the deadline. At the same time, a joint adjustment of effects and musical material was performed.
Despite the modest capabilities of the NES sound system, several traditions of chiptune have developed on the platform at once, each with its own recognizable sound, down to the ability to guess the sound of the development company. After some experiments, I chose a mixed style, without a chord arpeggio, which is typical for music of Japanese origin, but with synthetic drums in the European tradition, which sound quite powerful and do not require the use of a sample channel. This channel is not involved in the demo because of its strong influence on the runtime of the code, which would complicate the debugging of effects related to the time the beam passes through the raster.
Selection and experiments were carried out in Reaper using a MIDI keyboard, while the music itself was written in the traditional way for modern development, in the popular FamiTracker editor. While composing melodies, the search for ideas was carried out by improvisation on a MIDI keyboard, voiced in Reaper, while FamiTracker played a previously programmed rhythm in a loop.
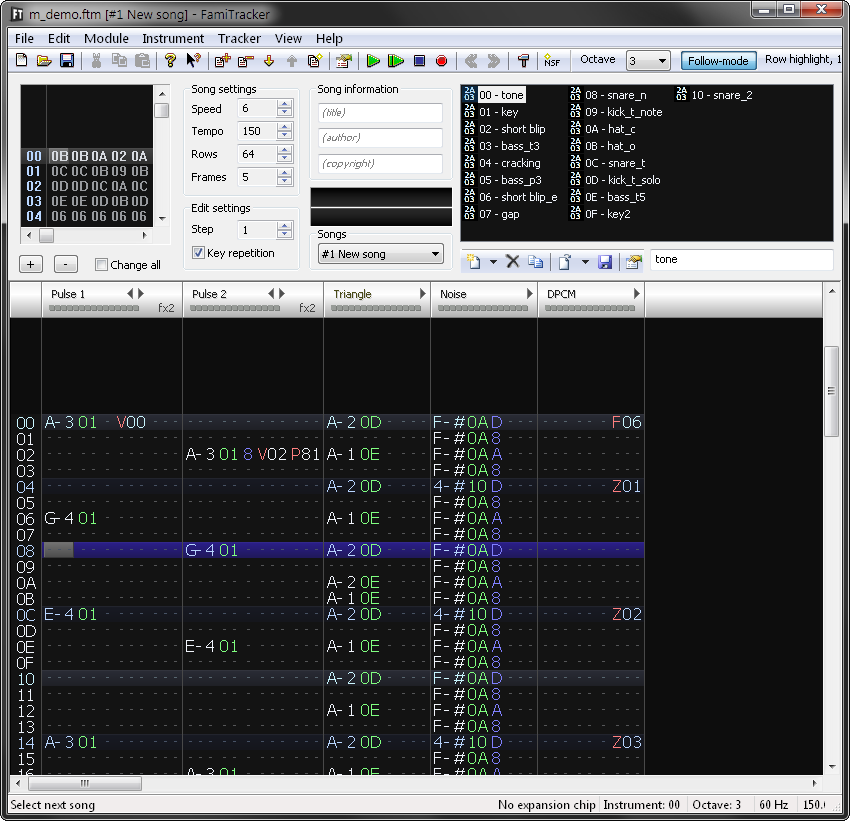
Since the standard FamiTracker player loads the NES processor quite significantly, taking up to one fifth of the frame time, and alternative players greatly limit the possibilities, it was decided to use the register dump classic for demos on low-power computers - as fast as possible, but requiring significant amounts of memory. There was enough space on the cartridge to dispense with the simplest format without compression. To create a dump, a utility was created that "loses" the NSF file, unloaded from FamiTracker, and writes all the register changes to a binary file. In other words, the entire logic of the music player is taken to the compilation stage, and on NES only completely ready data is sent to the sound generator.
For better synchronization with effects, markers have also been added to the music data stream. In the demo, they are used for flashes in a scene with a title and greetings. Markers are installed directly in FamiTracker by the Zxx team, which is designed to directly set the DAC level of the sample channel.
Parsing effects
Inscription at the beginning
The code is borrowed from an old project.The appearing part of the line is displayed with sprites with different palettes, then imprinted in the background. The inscription “based on real effects” hints that further effects are not like that, this is a joke on the topic of constant debate about the acceptability and role of animation in the demo.
Intro with elephant and creeping line
The idea of the effect evolved from a short insert that immediately started with a running line to a full-fledged scene. So the first character appeared in the demo.
Technically, the scene is very simple, the main difficulty in it is the conversion of the graphics drawn in Graphics Gale into a multi-layer sprite to provide an unusually large number of colors in it (10). Only four layers, each with its own palette. The layers are individually converted to the NES Screen Tool and manually stacked into a common sprite in the metasprite editor.

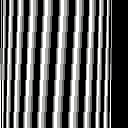
Interference
There was no interference in the original idea of the intro, but a similar effect was in principle planned, it was only unclear where it would be most appropriate. It became one of the first, serving as the basis for the development of subsequent, more complex effects.
The tile set contains 8 sets of noise of different densities of 32 tiles, generated by a simple program on a PC. They are displayed in the first eight lines of the tile map. Using the MMC3 interrupt that fires every seven lines of the raster (one is lost for synchronization), for each tile line, a random offset of the background layer is set by rough setting the display address. This allows you to get a more realistic animation of interference than simple noise of the same density.
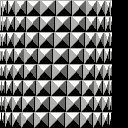
Colored stripes
The first full-fledged effect that was written for the demo. In fact, it consists of two parts - first a timer is displayed showing the current demo timing close to the real one, then the effect switches to an animation of increasing bands.
Although the timer looks very simple visually, and you can’t notice this with a cursory glance, it also does something unusual within the framework of the platform. The numbers are 12x16 pixels in size, but the background layer consists of 8x8 tiles, and sprites cannot cover more than a quarter of the screen width - while the timer takes two-thirds. To get the possibility of displaying a font that doesn’t fit into the grid, a trick was applied - a graphic of all pairs of digits from 00 to 99 was prepared, and then converted to a set of tiles with removing duplicates - so it fit into one and a half hundred tiles. The timer drop effect is made by a simple vertical scroll. Since the graphics of the color bars are a solid color fill, their movement does not appear visually.
After the inscription leaves the screen, the same MMC3 interrupt handler is turned on as in the interference effect, but this time it is configured to simply duplicate the top line of the tile map in all displayed lines of the screen.
The animation of decreasing and enlarging is done for one line of the tile map, that is, it is required to update only 32 bytes of video memory. The effect contains 238 frames, so the animation data takes up 7 kilobytes. The set of tiles during the display of the effect does not change, it contains all possible color transitions of bands that do not fall on the borders of tiles, there are a total of 53. The color transitions themselves are drawn manually, and the animation of the bands is generated by a more complex program for PC, first drawing a frame of the desired scale of the bands, and then picking up the appropriate tiles and attributes from the ready-made set.
Title
At first, two other, more complex effects with the same letters pretended to this scene; as a result, the third option that was easier to implement was chosen.
The font is made rectangular for ease of animation. Each letter essentially has a height of five conventional pixels and a width of four. There are five different pixel combinations in each line of the letter. Blender has prepared an animation of smooth rotation from edge to plane of all five combinations. The frames are combined into one file, the color is reduced to three colors, after which the image was imported into the NES Screen Tool - this gave a set of 82 tiles and a tile map for the animation itself. In fact, there are two such sets, for rotating letters in different directions.
The rotating letter is displayed in the tile map; it is composed of five required animated stripes. Since only one letter animation is visible at a time, the color of the face can be changed, this creates the illusion of multi-color. The letters arriving on the screen on the edge are displayed by sprites, their coordinates and speeds are very accurately selected manually to create the necessary smoothness and changes in the speed of objects. Once the sprite reaches the desired location on the screen, it is replaced by animation on the background layer.
Horizontal stripes flying at different speeds are made through the interrupt handler MMC3 , this time it sets the horizontal horizontal pixel offset of the background layer for each row of tiles.
Space invaders
The idea of this very simple scene with the rotation of large pixels gathering in a certain picture arose closer to the beginning of the work, and at the same time several options for the animation of rotation were manually drawn in Gale . The scene itself was realized much later, when the concept of the demo was finally established, and the idea appeared to show cult characters.
Tiles are output by recording in the video memory in the background layer. Stars are displayed by sprites.
The protractedness of the scene is explained by its synchronization with music, in the image per measure. There was no special elaboration of the time for showing effects, and without thinking it seemed that it did not look very boring.
Rotating logo
Due to the lack of effects and the time to develop them, I decided to reuse a small intro written a couple of years ago, in which letters flew along the same path around a static logo. Recently, I again became interested in the N64 prefix , which I overlooked in the late 90s, and in the process of working on other effects, a spontaneous idea came up with animation of the rotation of the famous logo, which seemed very simple to implement - these two thoughts came together, but the implementation took significantly longer than expected.
The main technical complexity of the scene is the reduction in the amount of memory required for such a smooth and large animation. If you store its frames without compression, one frame would occupy one 4-kilobyte set (since two frames would not fit in 256 tiles), and it would take 256 kilobytes of graphics ROM, that is, all the volume used in the demo volume. To solve this problem, three tricks were applied at once: animation of rotation only by 90 degrees (64 frames), after which two face colors are swapped; lossy graphics conversion to place groups of four frames in sets of 256 tiles; as well as updating the video memory in the visible part of the raster. Thus, the animation took up four times less space.
Letter model and rotation animation made in Blender. In the process, the idea came to mirror it, which corresponds to the concept of a demo, and it seemed funny - the scene seemed to say “and-and-and-and-and-and-and-and-and-and-and-without-. Animation frames are grouped, color depth reduced to 4, and these images are converted by the lossy import function in the NES Screen Tool . This function is perhaps my main secret weapon - if the tile limit is exceeded during compression, it searches for the most similar visual tiles and combines them until the required number of tiles remains. Of course, this gives visual conversion artifacts and requires subsequent manual refinement, but it allows you to squeeze more complex images with less labor into the limit.
For animation of the logo, sets of tiles are switched, and the window of 14 by 14 tiles in the background tile map is updated, for which the MMC3 interrupt, which is triggered before a text line, is used. The line also requires switching the graphics set to the font, after which there is a delay in the code for the time the lines of the inscription are displayed, then the display turns off (the background color is constantly displayed) and data is transferred to the video memory.
Coins are displayed by sprites and fly along a more or less honestly calculated (using a fixed point) path. The old code has been modified so that the rotation proceeds, if possible without intersecting with the larger logo, as well as so that the coins appear and disappear gradually at the right moments. They go beyond the graphics of the logo using the priority flag that each sprite has.
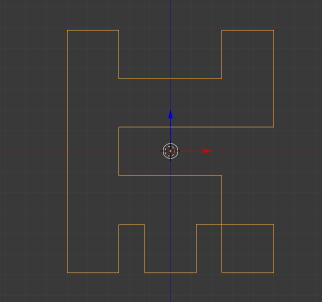
Rotating cartridge
The effect is very simple in words, but it took a long time to debug. The interrupt handler launches a raster effect on the desired line (to leave time for the main thread). Next, the code with very precisely selected timings is executed to set the pixel-by-pixel vertical offset of the displayed tile map for each line of the screen. This requires a very tricky scheme of writing to PPU registers , and some of them must exactly fall into a certain place on the line. In the NTSC version of the set-top box, the processor clock speed and pixel repetition rate are not multiple, and the code execution time may vary slightly depending on several factors, so the timings of each line gradually float away and require correction.
The main part of the graphics for this scene was drawn several years ago for a previous attempt to make a demo for NES , but now it has been supplemented with other faces of the cartridge and the demo logo. The original image is stacked in height in one screen. To simplify the effect code, the same lines are duplicated multiple times on the back of the cartridge.
The rotation animation is fully calculated in advance using a PC program and takes up a significant amount of code in ROM - three banks of 16 kilobytes each, in which for each of the 256 frames of the animation a table is stored in 176 numbers of the displayed raster lines. It was possible to make an effect in real time, I already did a similar demo for another platform, but in this case there was enough free memory and there was no extra time.
Pacman
Initially, a more complex scene was planned, but due to the total lack of time, she entered the demo in the most minimalistic version, in the form of a breakdown of the scenes at the time of the change of music.
The main problem was finding a way to quickly create animations. At first the idea came up to use Blender or other graphic programs again . But after the first attempts and some calculations, it became clear that only eight frames of the animation of opening the mouth from a completely closed to a completely open position would be enough, and it would be much easier and faster to draw them manually in Gale .
Next, a program was written for the PC, taking a sequence of frames of a full animation cycle and finding frames that changed between tiles. The addresses of these tiles in the tile map in the video memory are saved as variable-length lists, the effect in the demo simply updates the changed sections of these lists. The graphics of all frames fit in one tile set and does not change during the effect.
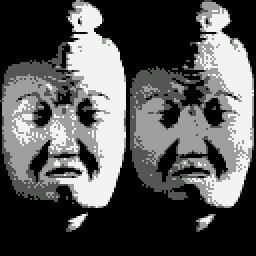
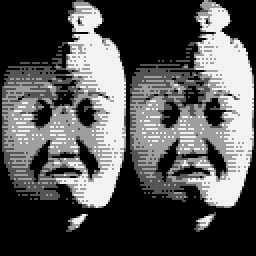
Kirby
This effect was debugged on my old Catrix picture . There was a plan to change the image of a cat's face to an alternative picture with a Cheshire cat through some kind of visual effect. When the idea came up to add game characters to the demo, after a short election - it was urgent to draw two new full-screen pictures - it was decided to take Kirby and make it a “Cheshire” version. The effect of changing images in the process has been simplified to a short flicker.
Moving blocks of the image are displayed as sprites and imprinted on the tile map when they get to the right place. Similarly, block deletion occurs.
Tower
I always liked the effect in the final level of the Battletoads game , and I have long wanted to repeat it. In the demo, he came to a place in the scene with greetings.
The technical part is very simple, this is a normal vertical scrolling of a background layer. The rotation effect is achieved by animation of the graphics of tiles, but the map of tiles remains unchanged. For animation, the MMC3 mode is used with four switchable CHR windows . The first window contains tiles of the static part, while the other three switch at different speeds. One of the windows also smoothly changes the direction of the animation. Since 64 tiles are placed in each window, and the animated element requires only 28, the graphics of the tiles are duplicated in each window to receive animation in the opposite direction.
The main problem in realizing the effect was the preparation of the animation. It was executed by a program on a PC that takes a 16x16 texture and a speed table for each pixel column at the input, and generates a block of 16 frames of animation, in the form of a set of 256 tiles (some of them are empty). Sets are converted to the desired format in the NES Screen Tool and distributed to banks of ROM graphics with the desired offsets through the options of the incbin assembler directive .
Another important task regarding greetings was not to forget to pass them on to everyone who would like to. Since this number tends to infinity, and an overly long scene would look boring. I decided to limit myself only to those with whom I had been crossing for a year. Names collected in a text file as they came to mind. Of course, after completing the work, it turned out that I still forgot to mention a lot of people.
Corridor
There was a desire to make some kind of scene with a perspective, such as a classic tunnel. Classic tunnels or a real Wolfenstein 3D rakester have disappeared due to complexity. In addition, NES already has several real rakasters, including textures, but they all look not very impressive due to the extremely low speed.
I am very interested in pseudo-three-dimensional graphics in early games, and among the old developments there was already a sprite corridor with smooth animation of turns, inspired by the Zig Zag game for ZX Spectrum. It was decided to use it. Since the abstract corridor itself is not very interesting, an internal plot of the scene with Mario and toilet humor was invented, which logically completes it, as well as the demo as a whole. The scene was made the very last, and despite the use of blanks, work on it took more than 11 hours in a row, not counting the preparatory work during the planning.
All motion frames are traced manually in Gale. This is the only effect in the demo, going at a speed below 60 frames per second, although it can work at that speed without any problems. For reasons of visual readability and synchronization with music while throwing along the corridor, the screen refresh rate was limited to 30 frames per second, as an alternative to adding intermediate phases of movement, for the preparation of which there was no time left.
Graphics frames took two sets of tiles. At the right moments of the animation, the background layer is updated, the desired set of graphics is connected and two colors are set in two palettes (for the upper and lower half of the screen), since when turning 90 degrees, the colors of the walls change places.
Animation tile cards are first copied to RAM by a code in a fixed bank from one of the two plug-in lower banks of the ROM. During the display of the raster immediately below the displayed window of the effect, the render is turned off and data is transferred from RAM to the video memory. Turning off the render also serves as the lower bound of the visual clipping for the Mario sprite.
Captions
This scene was one of the first, after the color bars, based on the code from one of the old projects. It already had support for two fonts, different palettes and slowdowns at the end. For the demo, new fonts were drawn, which are used everywhere, and an effect was added at the edges of the screen.
At first I wanted to make the edges smoothly dimming, but in the course of preliminary experiments I tried options with horizontal line offset, I liked the result, and I decided not to spend extra time. Slight shading is added using the controversial feature of the NES video controller , gain-muting of color components. The controversy lies in the fact that in different regional versions and clones of the console, this function works differently, but in this application there should not be any special problems (apart from the so-called RGB PPU , where the edges will be filled with white).
View
Around the time the caption scene was being made, the idea of this scene spontaneously arose. The initial idea was to insert it at a random moment, but in the end, it successfully fit into the ending. Despite the short duration, the scene consists of three elements: simulating the scaling of the sprite, increasing the number of shades of gray by alternating two frames, and programmatically playing a DPCM sample.
To simulate scaling, the fact that all large sprites on NES are composed of small ones, in this case 8x16 in size, is used. If you shift them relative to each other, you can get the effect of scaling or distortion, which looks pretty decent with small values of changes. For this effect, you need to multiply the offset of each sprite from the center by a scale, but since the NES processor cannot cope with a large number of even integer multiplications, the trick is applied - at the beginning of the frame, the coordinate grid along the X and Y axes is considered, and the sprite output uses these pre-calculated values . Thus, the number of required multiplications is significantly reduced - with a composite spray of 8x8 elements (64 sprites), only 16 (8 + 8) multiplications are required instead of 128 (8 * 8 * 2).
NES can only display 4 shades of gray, including white and black. The effect imitates 7 gradations: if you display a white and white pixel through the frame, it will be white, if gray and gray it will be gray, and if you alternate white and gray, then visually it will look like an intermediate gradation between white and gray. The main difficulty again is the preparation of graphics, namely two half-frames of the image, which was performed by a number of manual manipulations in Gale and GIMP . To reduce flicker, the lines of the half-frames alternate.
Programmatic playback of DPCM was required because there was no space for the sample in better formats, hardware support could not play samples from the lower half of the memory, but there was no space for a sample of such length in the upper non-switchable memory. The sound fragment itself is not from the original screen saver, but a rather similar sounding jingle from the well-known game with cruel finishing moves, sounding at the time of the finishing move itself.
Memory card
In development, the NES Space Checker utility was constantly used, which visualizes the filling of memory banks. It is quite interesting to see a good example of what and where is inside the program.

PRG00 ... PRG02 - music data
PRG03 - sample for a scene with a View
PRG04 ... PRG06 - cartridge rotation animation data
PRG07 - tile animation deep into the corridor
PRG08 - tile rotation animation in the corridor
PRG09 - tower scene code
PRG0A - scene code with a rotating logo
PRG0B - scene code with a name and a corridor
PRG0C - scene code with rotating cartridge, Kirby, View, invaders, Pakman
PRG0D - scene code with intros, noise, color bars, captions
PRG0E - the main bank of the code, contains only calls of all scenes
PRG0F - fixed code bank, music player, sprite output, interrupt handlers
CHR00 - baby elephant and tiles for colored stripes
CHR01 - font and noise
CHR02 - View sprite and tiles of rotating letters in the name
CHR03 - Normal Kirby Tiles
CHR04 - Cheshire Kirby Tiles
CHR05 - Graphics for a scene with a rotating cartridge
CHR06 ... CHR0D - animation of a rotating logo
CHR0E - font for greetings and animation of invader tiles
CHR0F - Pakman Tiles
CHR10 ... CHR13 - tower texture animation
CHR14 - Corridor Tiles
CHR15 - Sprite Mario
CHR16 ... CHR1F - not used
Instead of a conclusion
I’ll end with a combo meme: in any incomprehensible situation, write demo scenes, gentlemen!