Application on TSD and communication with 1C: Enterprise 8.3 through HTTP-Service. Part 5 (Menu, companion object)
Each application has global variables. For example, one of them is the database name. I do not know how much this is correct from the point of view of kotlin-way. In order to set global variables for an application, we will do the following. Create a new project
Navigation Drawer Activity
. In it we will learn to work with the menu, and create a page with the settings. Next to MainActivity, create a new class
class MyApp: Application() { companion object { var baseUrl = "http://192.168.0.1/unf/hs/inntsd/v1/" const val dbName = "mws_db" var user1C = "tsd" var pass1C = "123123" } }
In
AndroidManifest.xml
in the
<application
tag, add the line
android:name=".MyApp"
AndroidManifest.xml
<?xml version="1.0" encoding="utf-8"?> <manifest xmlns:android="http://schemas.android.com/apk/res/android" package="com.domain.myapp"> <application android:name=".MyApp" android:allowBackup="true" android:icon="@mipmap/ic_launcher" android:label="@string/app_name" android:roundIcon="@mipmap/ic_launcher_round" android:supportsRtl="true" android:theme="@style/AppTheme"> <activity android:name=".MainActivity" android:label="@string/app_name" android:theme="@style/AppTheme.NoActionBar"> <intent-filter> <action android:name="android.intent.action.MAIN" /> <category android:name="android.intent.category.LAUNCHER" /> </intent-filter> </activity> </application> </manifest>
Everything. Now, from any part of the application, we can take our variables by referring to them as
MyApp.
We pass to the second part. Let's play with the menu. Let's immediately decide that we will have our own menu for each fragment. Now in the project it looks like this.
res 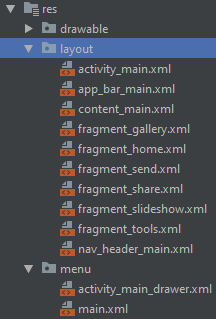
Create a new menu.
New - Menu resource file
Place the following text in the file.
orderInCategory
indicates the position of the menu. Less is higher. We recall
BASIC
and number 10, 20, 30 - So we will always have the opportunity to add another item between the elements. -!>
<?xml version="1.0" encoding="utf-8"?> <menu xmlns:android="http://schemas.android.com/apk/res/android" xmlns:app="http://schemas.android.com/apk/res-auto"> <item android:id="@+id/gallery_clear" android:orderInCategory="10" android:title="" app:showAsAction="never" /> <item android:id="@+id/gallery_send" android:orderInCategory="20" android:title="" app:showAsAction="never" /> </menu>
We believe that our main Activity does not have its own menu. Therefore, we boldly delete the function
override fun onCreateOptionsMenu(menu: Menu): Boolean { // Inflate the menu; this adds items to the action bar if it is present. menuInflater.inflate(R.menu.main, menu) return true }
And in the
ui/gallery/GalleryFragment
file,
ui/gallery/GalleryFragment
redefine two functions.
override fun onCreate(savedInstanceState: Bundle?) { setHasOptionsMenu(true) //, . super.onCreate(savedInstanceState) } override fun onCreateOptionsMenu(menu: Menu, inflater: MenuInflater) { inflater.inflate(R.menu.menu_gallery, menu) // . super.onCreateOptionsMenu(menu, inflater) }
And in the end we add the function
override fun onOptionsItemSelected(item: MenuItem): Boolean { when (item.getItemId()) { R.id.gallery_clear -> Log.d("MenuDebug", " ") R.id.gallery_send -> Log.d("MenuDebug", " ") } return super.onOptionsItemSelected(item) }
That's all. By analogy for each fragment, we can now add our own menu.