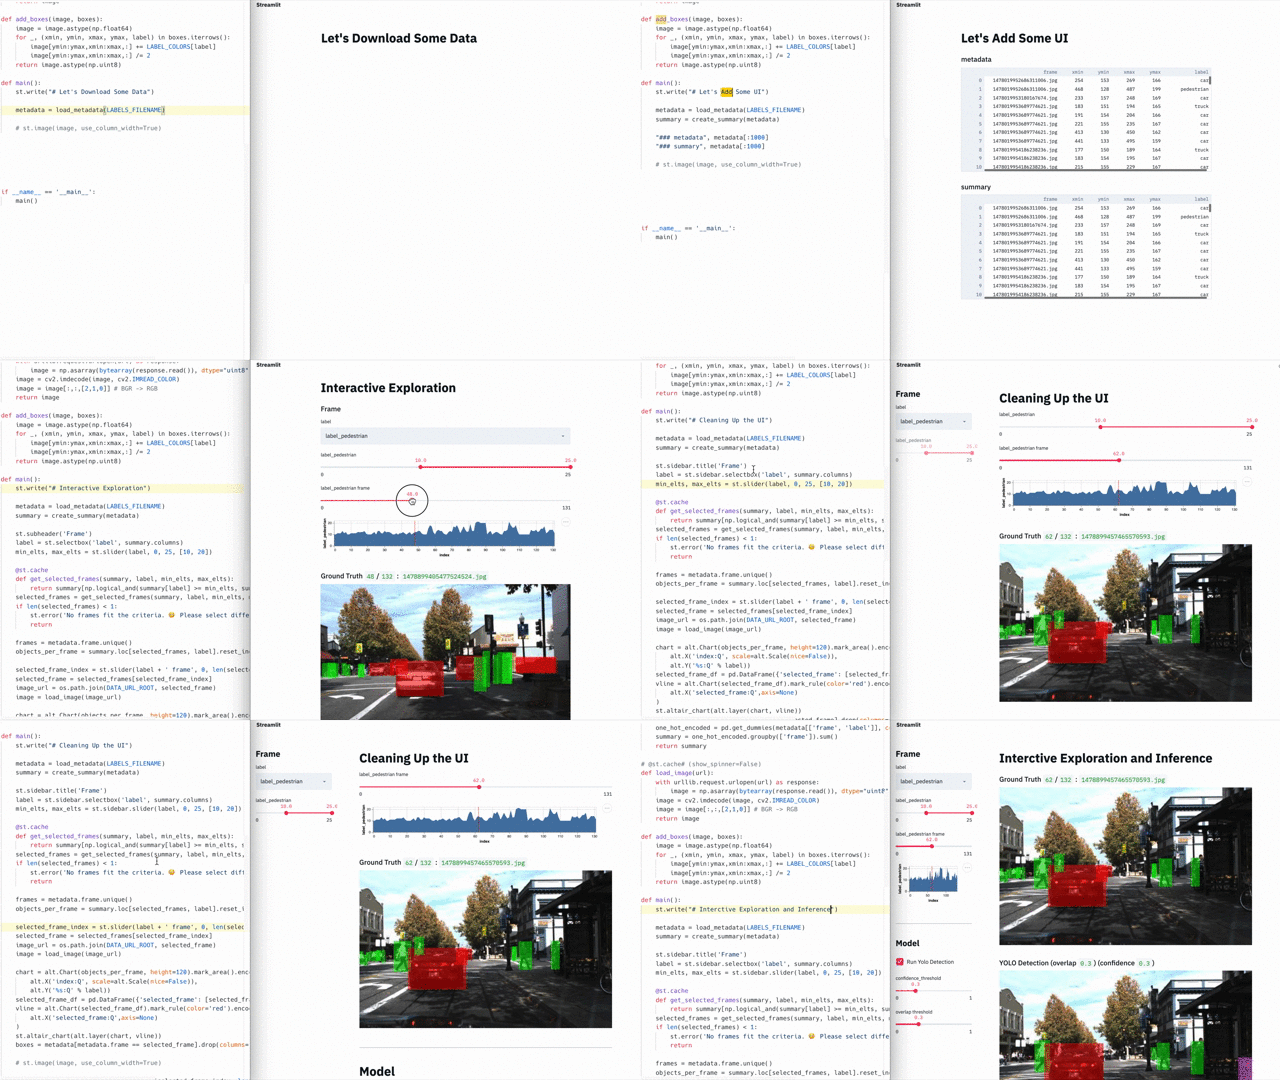
We create a semantic search engine with real-time machine learning for 300 lines of Python code.
My experience suggests that any more or less complex machine learning project will sooner or later turn into a set of complex unsupported internal tools. These tools are usually a mishmash of scripts from Jupyter Notebooks and Flask, which are difficult to deploy and integrate with solutions such as Tensorflow GPU sessions.
I first encountered this at Carnegie University, then at Berkeley, at Google X, and finally, when creating standalone robots at Zoox. Tools sprang up in the form of small Jupyter notebooks: a sensor calibration utility, a simulation service, a LIDAR application, a scripting utility, etc.
With the growing importance of tools, managers appeared. The bureaucracy was growing. Requirements increased. Small projects turned into huge awkward nightmares.

Cycle: 1. Explore in Jupyter 2. Copy-paste to the Python script 3. Write a Flask application with HTML, JS and more 4. Add more functionality. // Support problems begin as early as step 3
When the tool became critical, we engaged a team to create the tools . They used Vue and React. Their laptops were covered with stickers from declarative framework conferences. They had their own debugged process:

A streamlined process: 1. Collection of requirements 2. Template for reactive components 3. Creating an application in HTML, CSS, Python, React, etc. 4. A month later: “The application is ready, we can update it in a couple of months.” // After step 4, the work moves at a turtle speed
The process was wonderful. Here are just the tools appeared every week. And the tool team supported ten more other projects. Adding new functionality took months.
So we went back to creating our own tools, deploying Flask applications, writing HTML, CSS and JavaScript, and trying to port all of this from Jupyter while preserving the styles. So my old Google X friend Thiago Teheheira and I began to ponder the question: What if we could create tools as easily as we write scripts in Python?
We wanted machine learning specialists to be able to make elegant applications without involving teams to create tools. Internal tools should not be an end in itself, but a byproduct of working with ML. Writing a utility should be felt as part of the work of training a neural network or conducting analysis in Jupyter! But at the same time, we wanted to have the flexibility and power of a web framework. In fact, we wanted something like this:
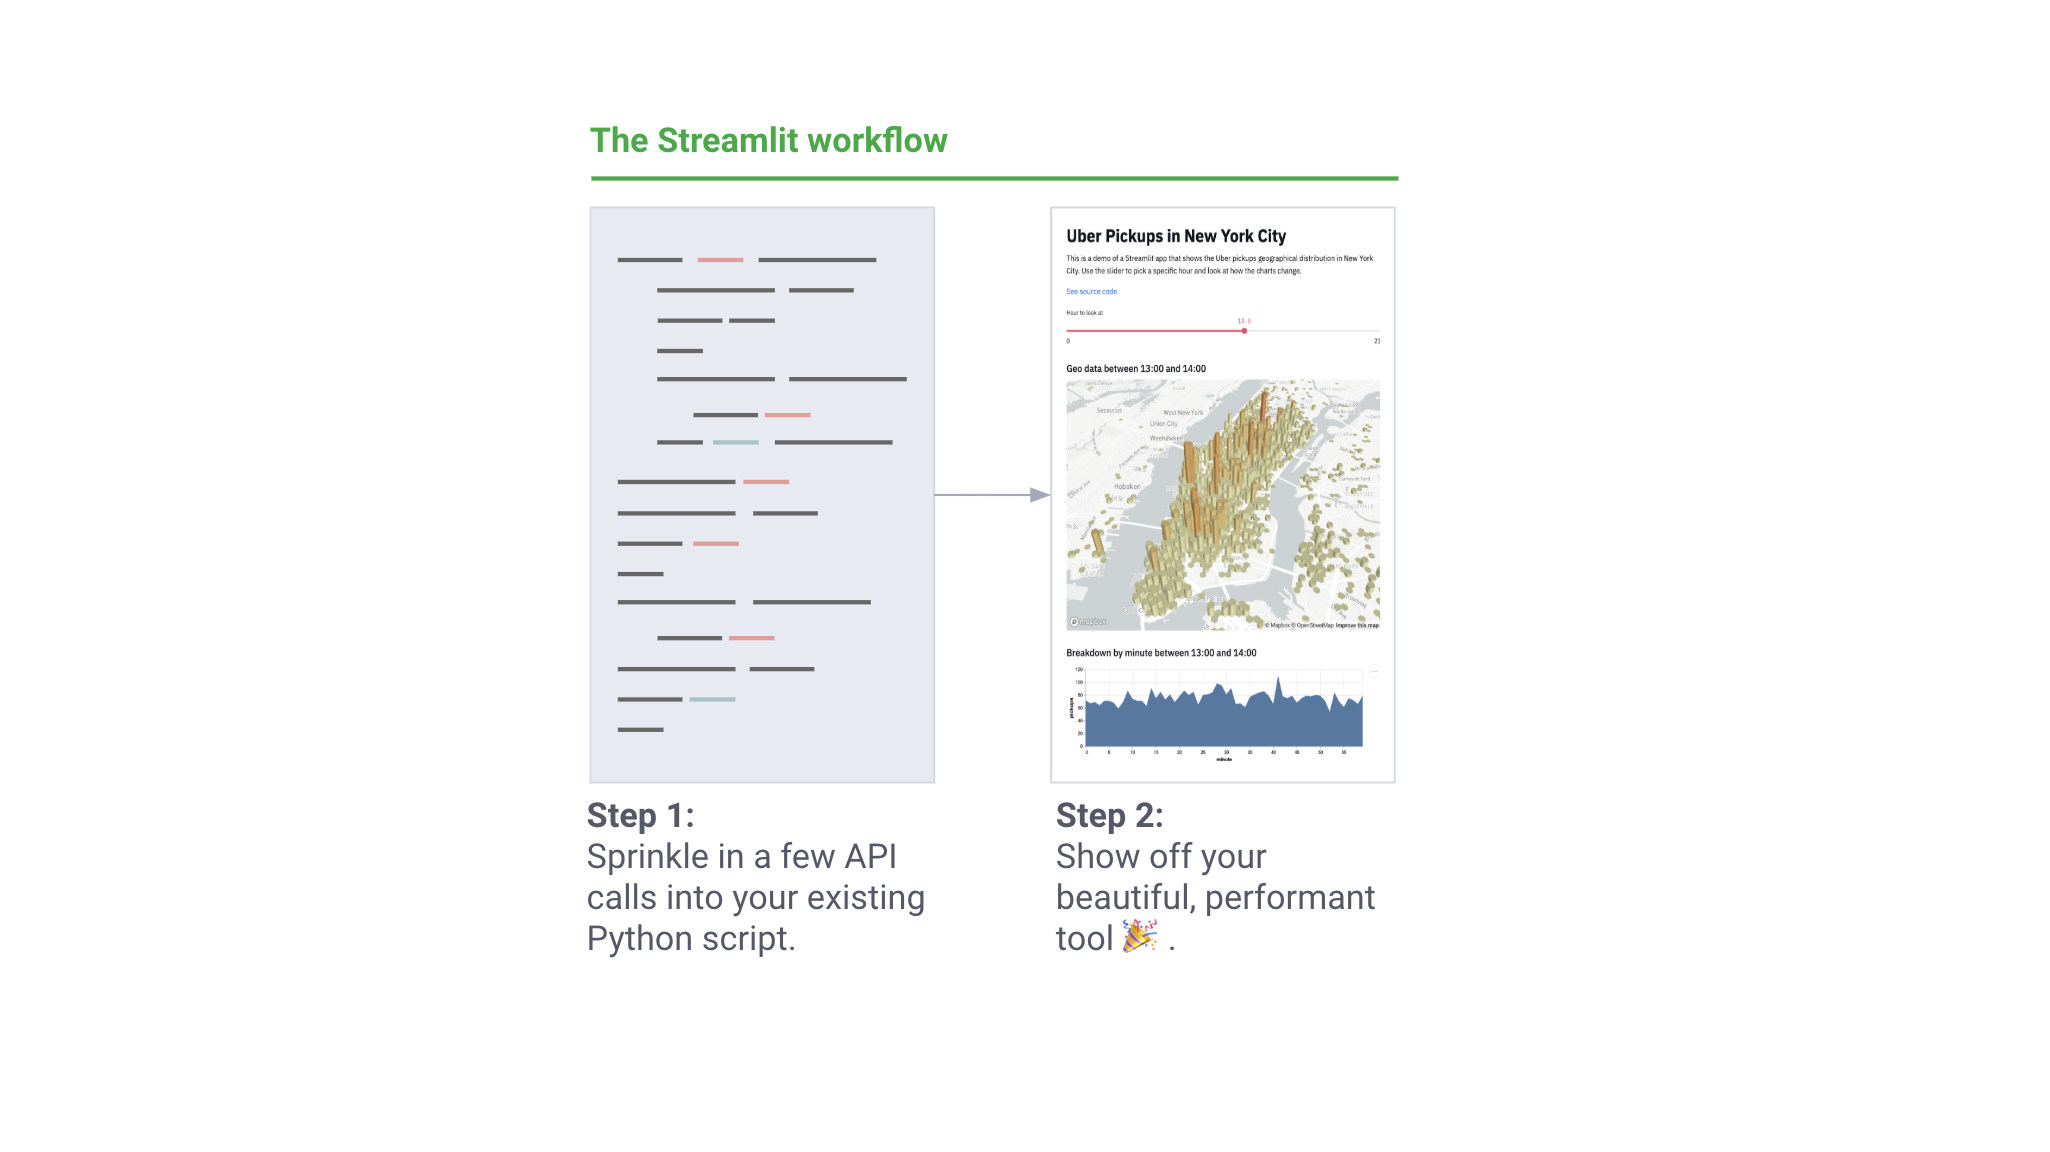
The process of working in Streamlit: 1. Add a couple of calls to the API in your script 2. A beautiful tool is ready!
With the help of an excellent community of engineers from Uber, Twitter, Stitch Fix and Dropbox, we have developed Streamlit over the course of the year - a free open source framework for helping machine learning workers. With each subsequent iteration, the principles at the core of Streamlit became simpler. This is what we have come to:
# 1: Use Python knowledge. Streamlit applications are scripts that run from top to bottom. There is no hidden state in them. If you can write in Python, you can create applications in Streamlit. Here's how the screen is displayed:
import streamlit as st st.write('Hello, world!')
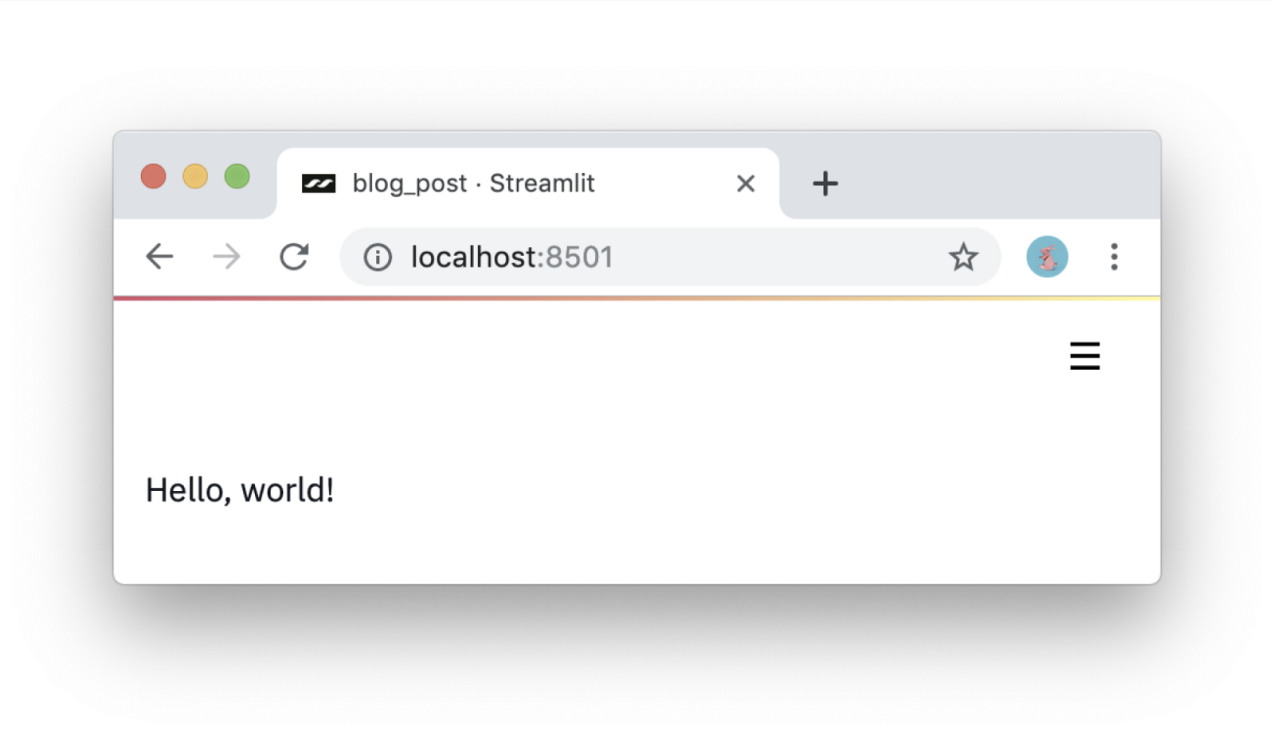
First meeting.
# 2: Think of widgets as variables. There are no callbacks in Streamlit ! Each change simply restarts the script from top to bottom. This approach allows you to write code cleaner:
import streamlit as st x = st.slider('x') st.write(x, 'squared is', x * x)
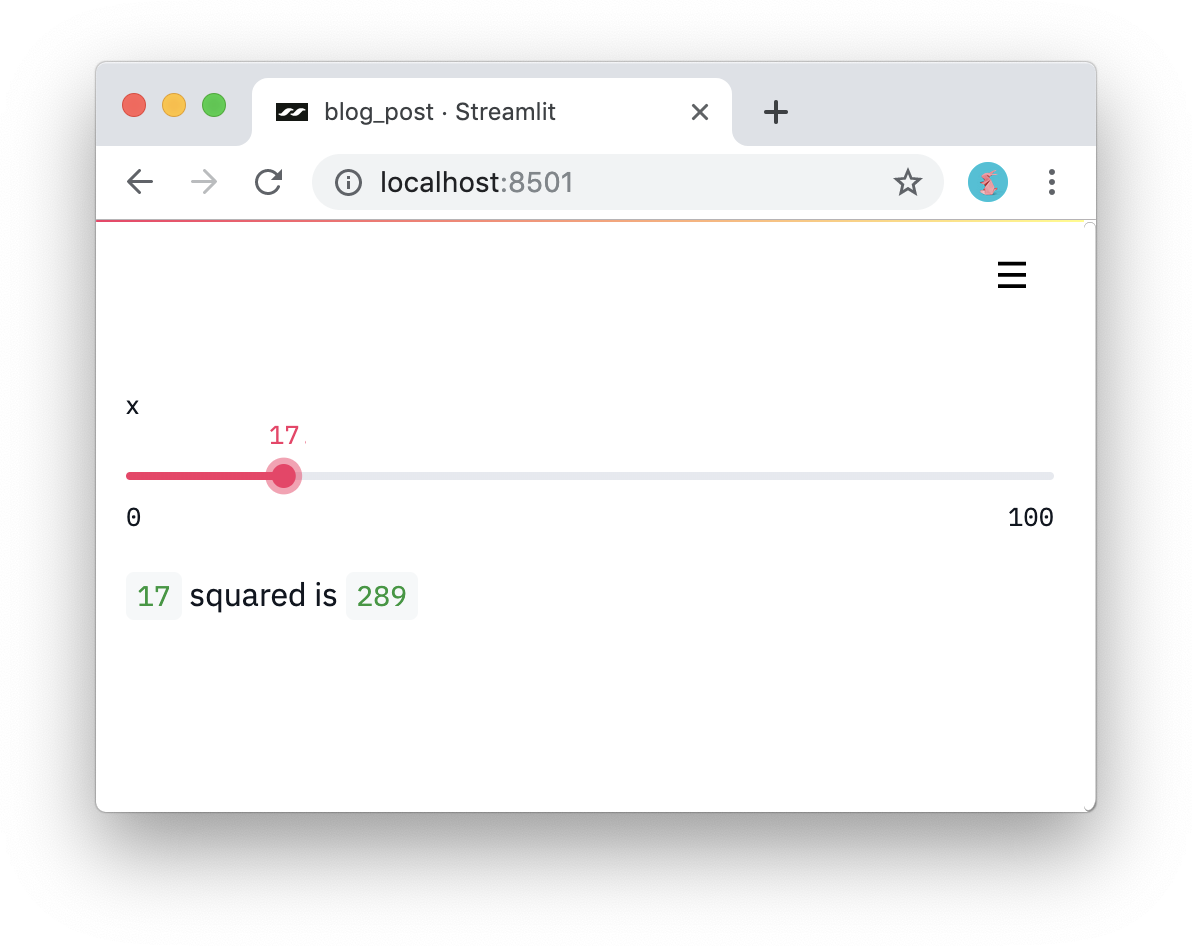
An interactive application in three lines of code.
# 3: Use data and calculations repeatedly. What if you downloaded a lot of data to perform lengthy calculations? Then it will be important to reuse them between restarts. Streamlit has a primitive for persistent caching of default unchanged state. So, for example, the code below downloads data from the Udacity project on self-managed cars once , producing a simple and beautiful application:
import streamlit as st import pandas as pd # Reuse this data across runs! read_and_cache_csv = st.cache(pd.read_csv) BUCKET = "https://streamlit-self-driving.s3-us-west-2.amazonaws.com/" data = read_and_cache_csv(BUCKET + "labels.csv.gz", nrows=1000) desired_label = st.selectbox('Filter to:', ['car', 'truck']) st.write(data[data.label == desired_label])
To run the code above, follow the instructions from here .

And here is how the result will look.
In short, Streamlit works like this:
- The script is re-run every time
- Streamlit assigns each variable the current value from the widgets.
- Caching avoids unnecessary network access or lengthy recalculations.
Streamlit's work in pictures:
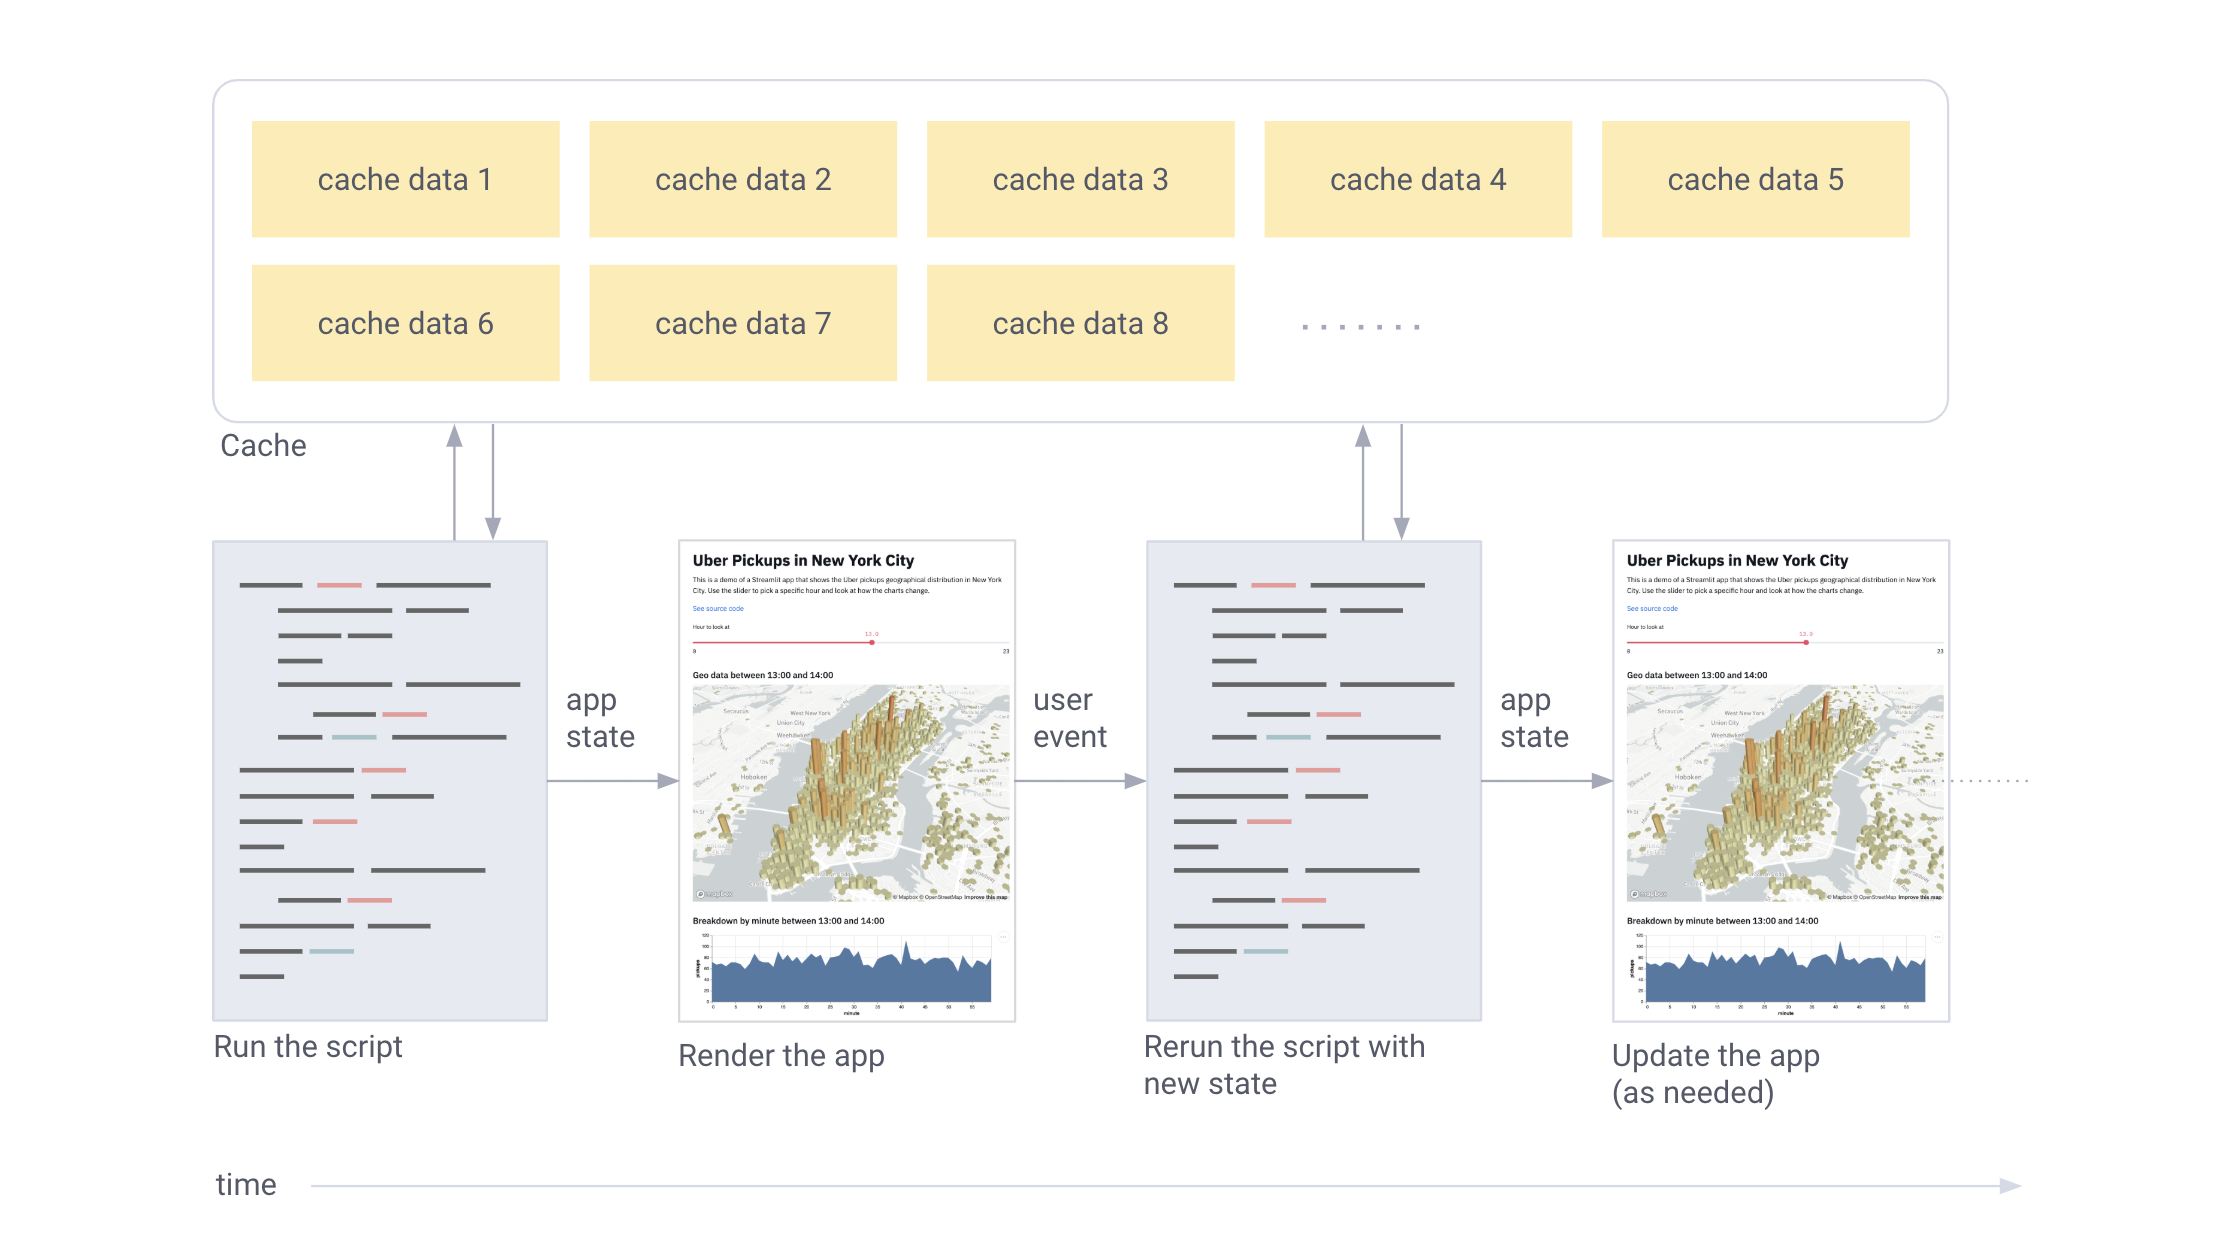
User input restarts the script. Between restarts, only the cache is saved.
Are you intrigued? Then try it yourself! Run:
$ pip install --upgrade streamlit $ streamlit hello . URL: http://localhost:8501 URL: http://10.0.1.29:8501
This code will open the Streamlit application in a browser. If this does not happen, just click on the link.

To see more examples like this fractal animation, just run streamlit hello from the command line.
Not played enough with fractals? Be careful, fractals can stick for a long time.
The simplicity of the examples should not be misleading: you can create huge applications on Streamlit. Working at Zoox and Google X, I saw how self-driving auto projects inflated to gigabytes of visual data that needed to be found and processed, including testing different models to compare performance. Each small project on self-driving machines sooner or later grew to the size of requiring a separate development team.
But with Streamlit, creating such applications is trivial. Here is a demo on Streamlit , where a full-fledged semantic search is implemented across the entire Udacity data array for self-driving machines , visualization of people annotated labels and the launch of a full-fledged neural network ( YOLO ) in real time inside the same application [1].

This 300-line demo on Streamlit combines semantic search with real-time results from a neural network.
The application is completely self-sufficient, most of the 300 lines are machine learning. Moreover, the Streamlit API is only called 23 times . Try it yourself!
$ pip install --upgrade streamlit opencv-python $ streamlit run https://raw.githubusercontent.com/streamlit/demo-self-driving/master/app.py
In the process of working with machine learning teams, we realized that a few simple ideas pay off handsomely:
Streamlit applications are regular Python files. So, you can use your favorite editor to develop the entire application.

My workflow with Streamlit includes VSCode on the left and Chrome on the right.
Clean scripts are stored without problems in Git or other version control systems. Working with pure python, you get a huge pool of ready-made tools for development as a team.
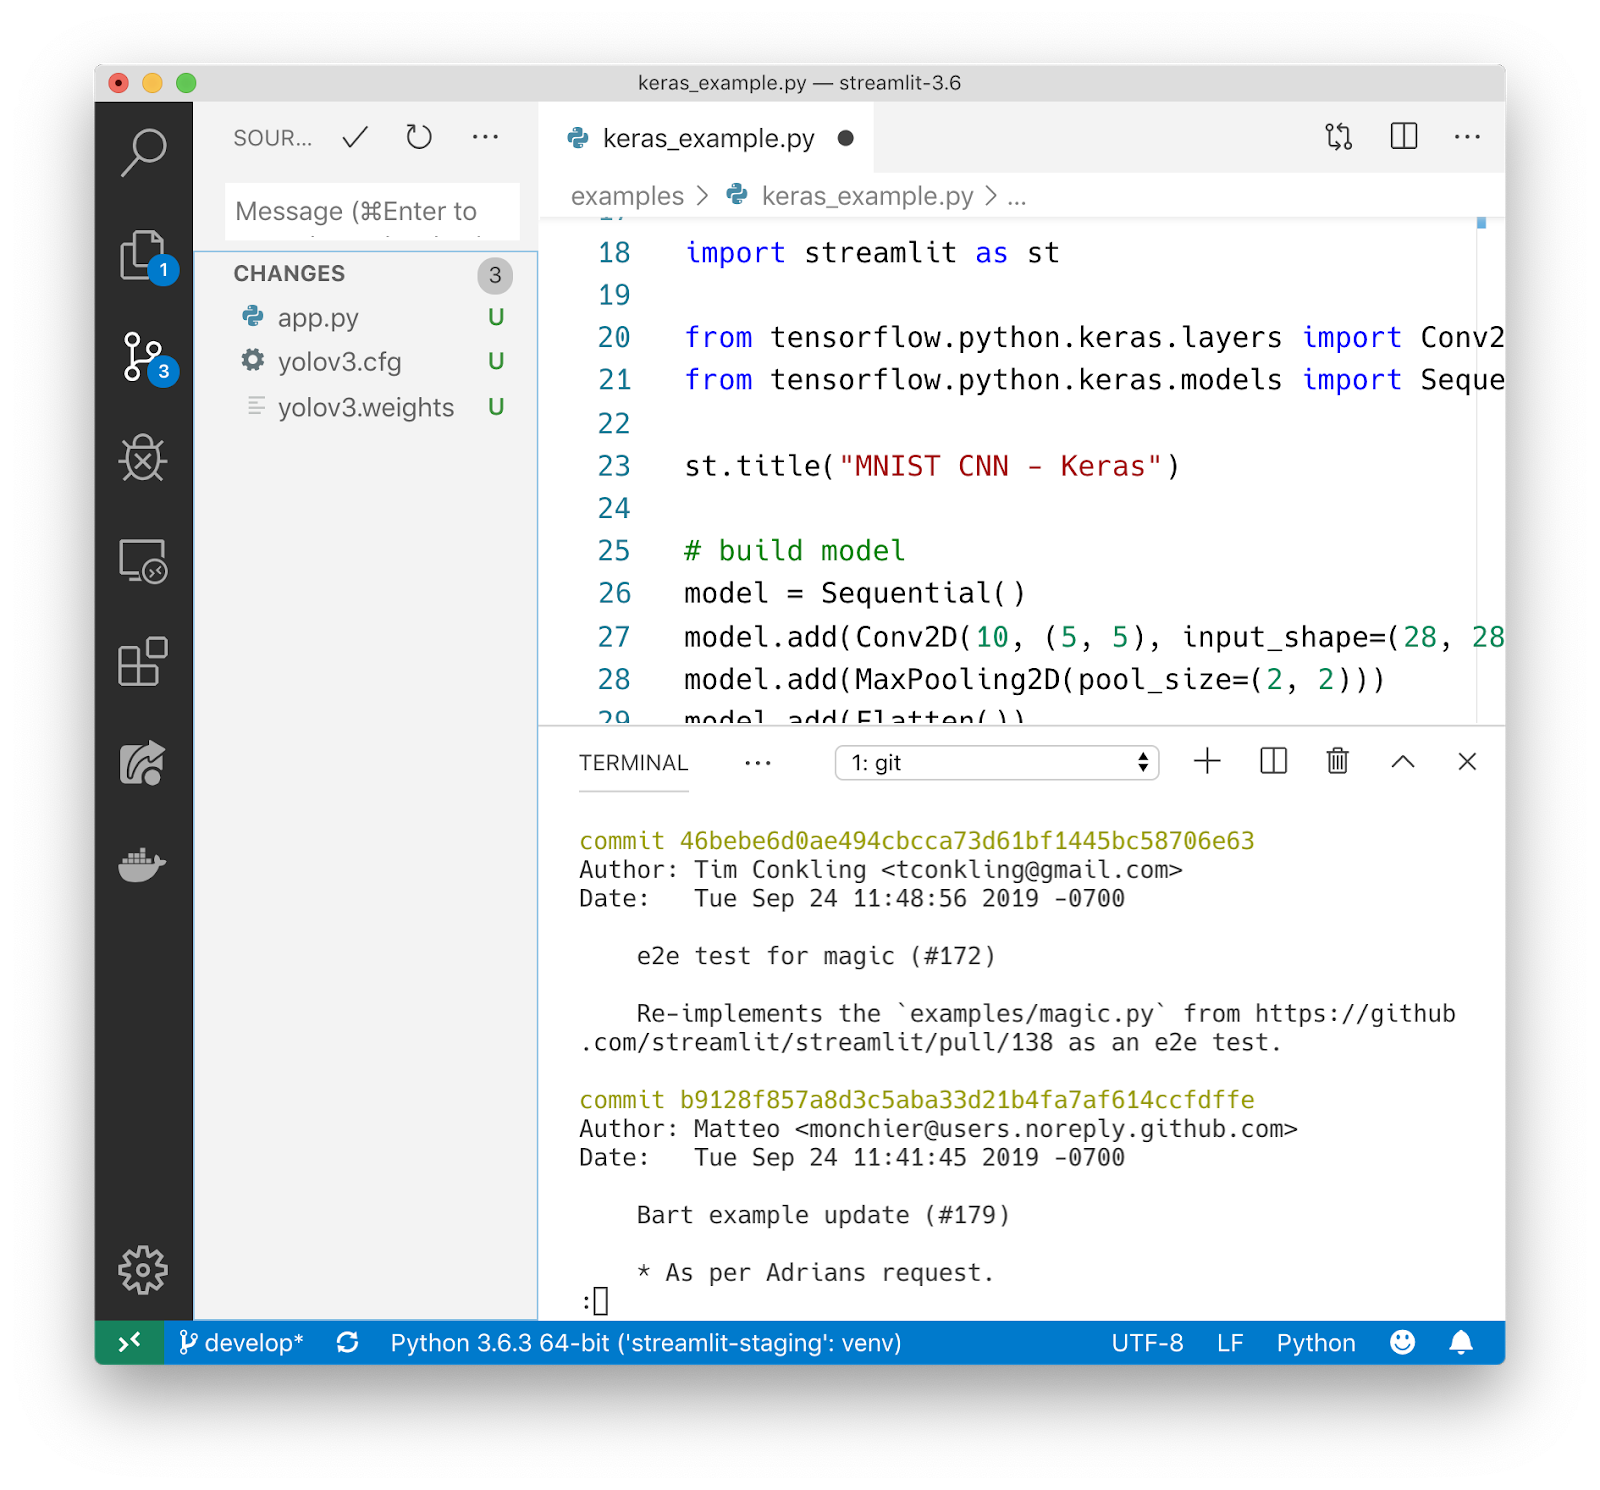
Streamlit app is fully hosted in Git.
Streamlit is an instant response coding environment. Just click Always rerun when Streamlit notices a change in the source file.

Click “Always rerun” for instant response coding.
Caching greatly simplifies the work with the computation chain. Combining multiple caching results works great as an efficient pipeline for computing! Take a look at this code taken from the Udacity demo :
import streamlit as st import pandas as pd @st.cache def load_metadata(): DATA_URL = "https://streamlit-self-driving.s3-us-west-2.amazonaws.com/labels.csv.gz" return pd.read_csv(DATA_URL, nrows=1000) @st.cache def create_summary(metadata, summary_type): one_hot_encoded = pd.get_dummies(metadata[["frame", "label"]], columns=["label"]) return getattr(one_hot_encoded.groupby(["frame"]), summary_type)() # Piping one st.cache function into another forms a computation DAG. summary_type = st.selectbox("Type of summary:", ["sum", "any"]) metadata = load_metadata() summary = create_summary(metadata, summary_type) st.write('## Metadata', metadata, '## Summary', summary)
Pipeline for computing on Streamlit. To run the script, follow this instruction .
In fact, the pipeline is load_metadata -> create_summary. Each time the script is run, Streamlit recounts only what is needed for the correct result . Cool!
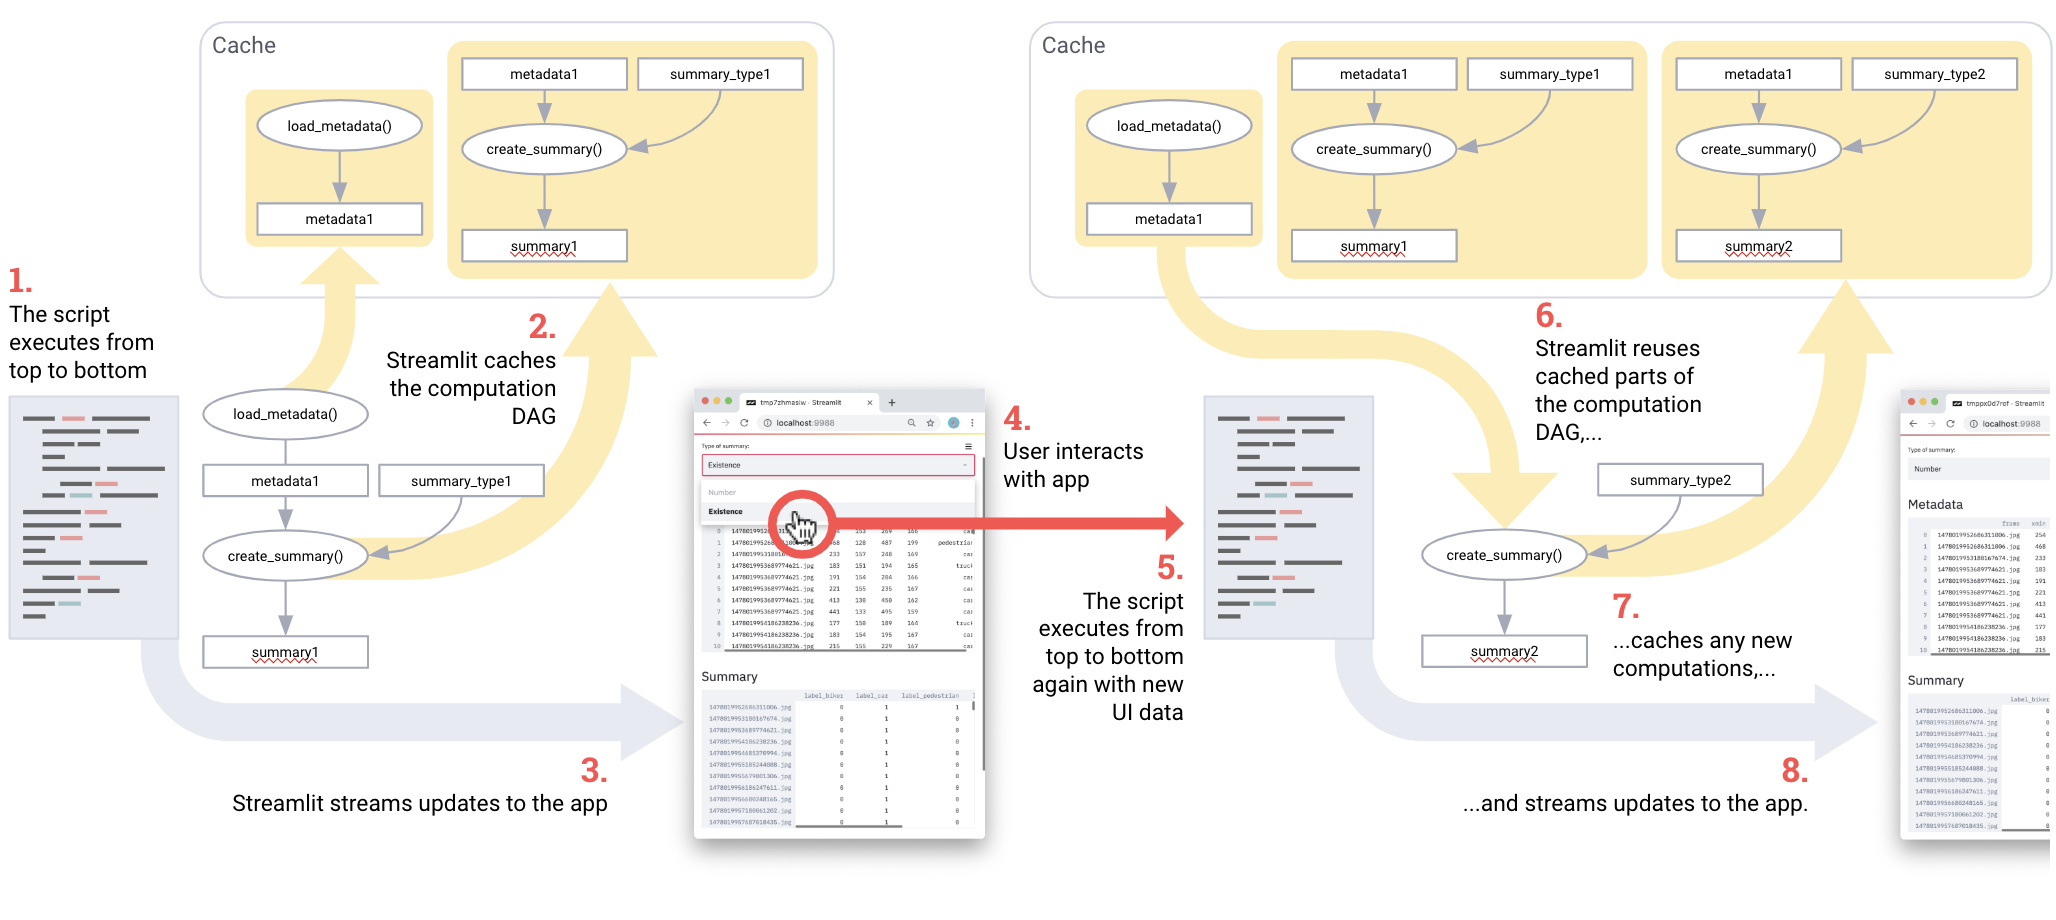
For maximum performance, Streamlit recounts only what is really needed to update the UI.
Streamlit is designed to work with the GPU. Streamlit allows you to work directly with TensorFlow, PyTorch and other similar libraries. For example, in this demo, Streamlit’s cache stores GANs of celebrities from NVIDIA [2]. This allows you to achieve an almost instantaneous response when changing the values of the slider.

The Streamlit app demonstrates the GAN of celebrity faces from NVIDIA [2] using Shaobo Guan's TL-GAN [3].
Streamlit is an open source project . You can freely distribute applications on Streamlit without asking us for permission. You can even run applications on Streamlit locally without an internet connection! And existing projects can implement Streamlit gradually.

Several ways to use Streamlit. (The icons are taken from fullvector / Freepik .)
And this is just a general overview of the features of Streamlit. One of the coolest aspects of the library is the ease of combining primitives into huge applications. We have more to tell about the Streamlit infrastructure and plans for the future, but we will save it for future publications.
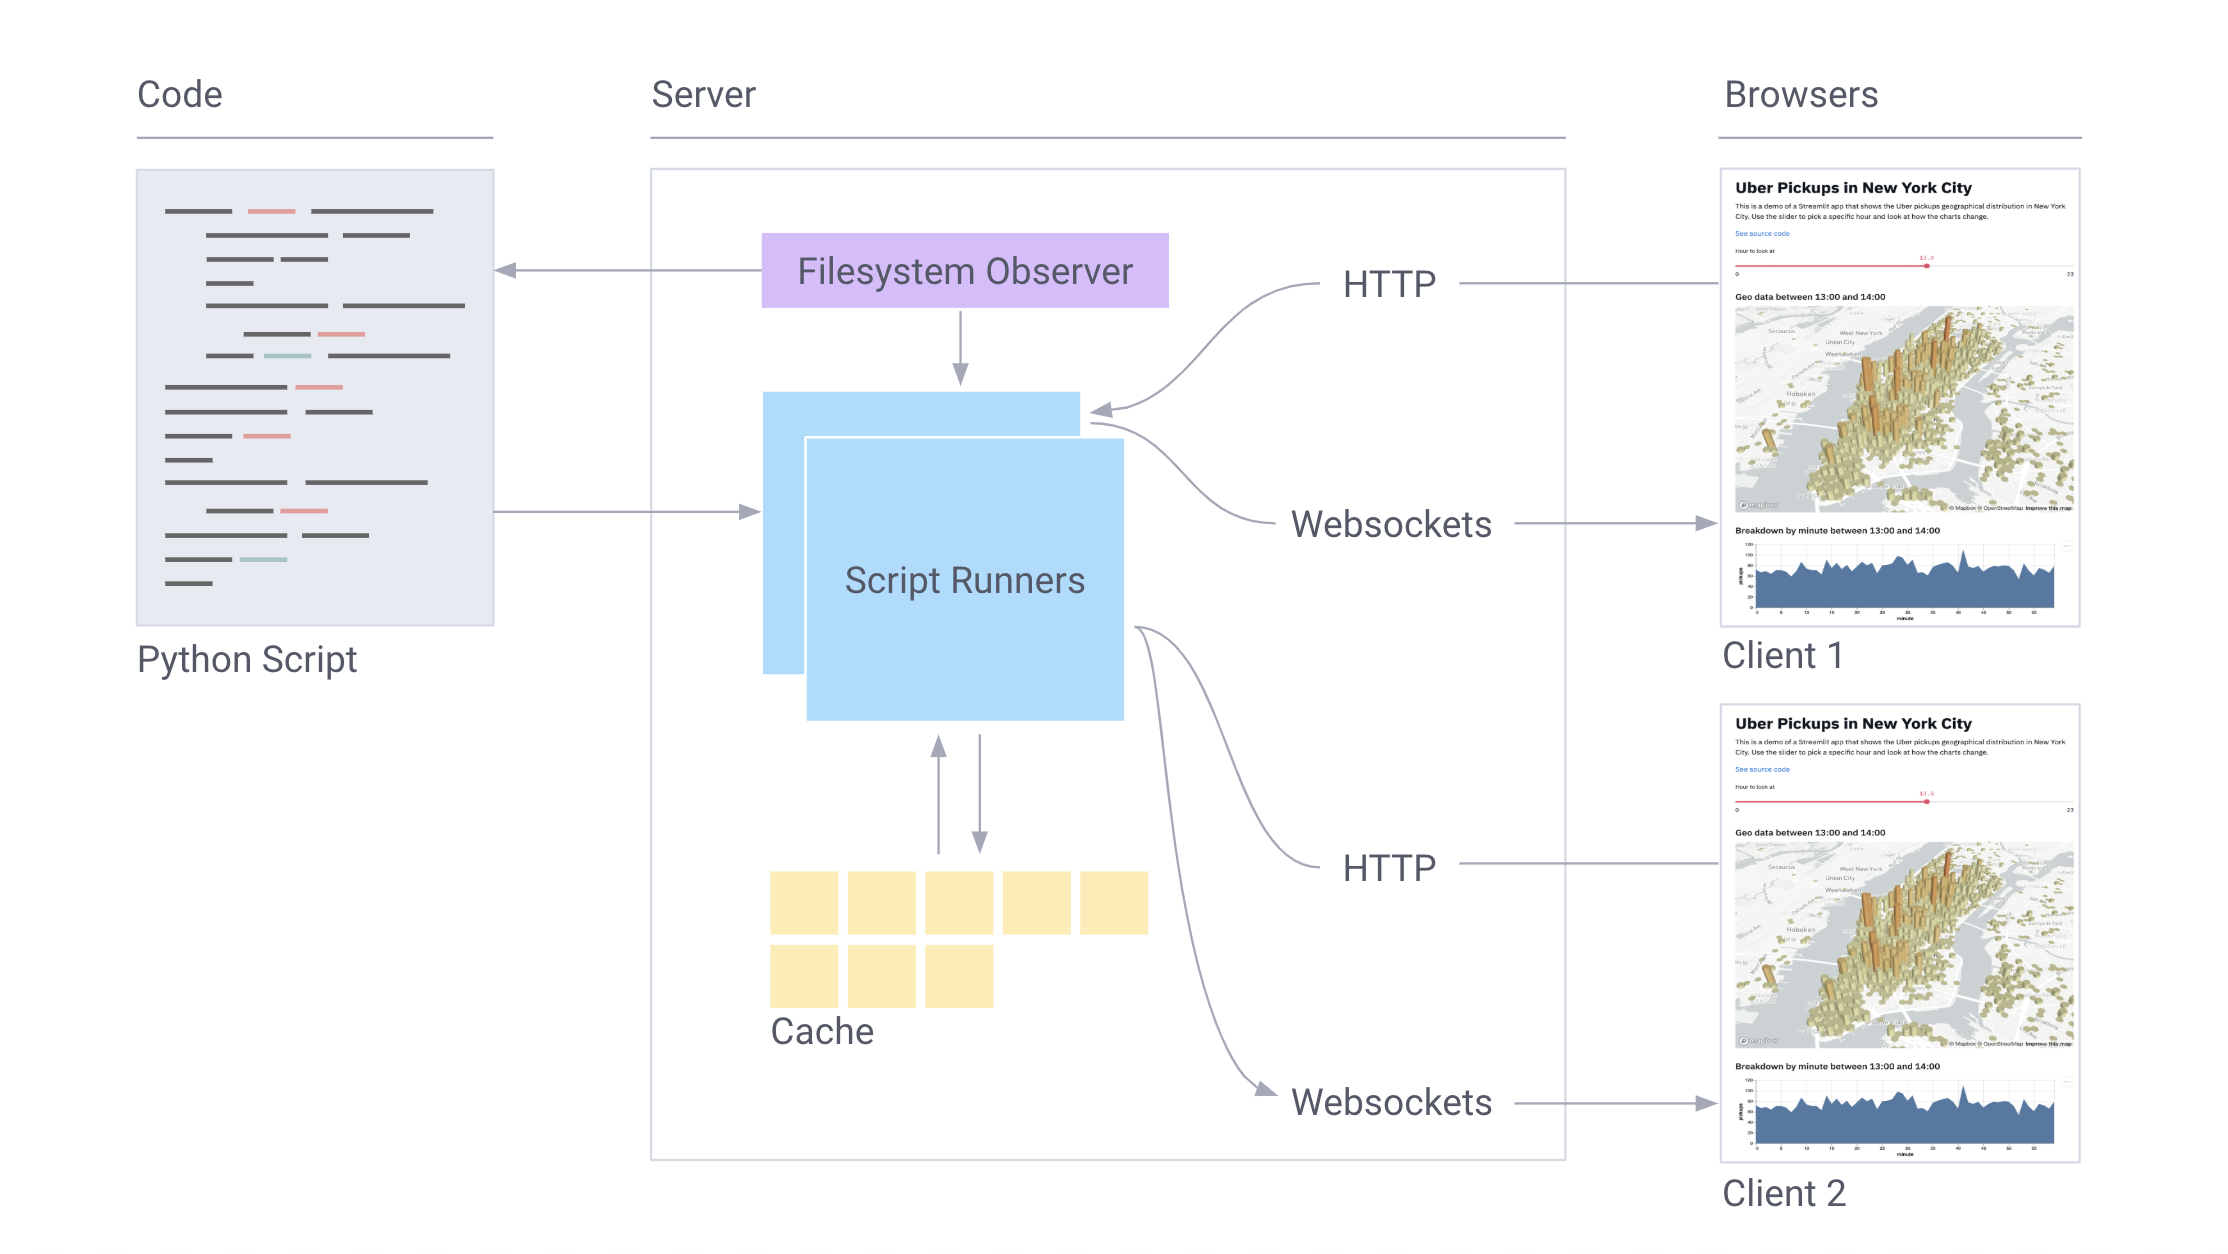
Streamlit component diagram. Wait for further publications!
We are happy to share Streamlit with the world and we hope that with it your Python ML scripts will turn into beautiful full-fledged applications.
References:
[1] J. Redmon and A. Farhadi, YOLOv3: An Incremental Improvement (2018), arXiv.
[2] T. Karras, T. Aila, S. Laine, and J. Lehtinen, Progressive Growing of GANs for Improved Quality, Stability, and Variation (2018), ICLR.
[3] S. Guan, Controlled image synthesis and editing using a novel TL-GAN model (2018), Insight Data Science Blog.