In the process of preparing the report at GolangConf'2019, I used LaTeX. Despite some outdated things, a little unusual behavior, meager or complex documentation, I suddenly enjoyed it. I did not become a LaTeX “guru,” but I was able to make quite good slides. And I want to describe the main points of creating a modern presentation on LaTeX. This should especially go to IT specialists who program by occupation. Programming your presentation is fun.

Why LaTeX:
- Flexible overlays (when information on a slide appears in turn)
- Repeatability and Uniqueness
- We write as a program. Some resources can be stored as separate files - code, list of links
Why NOT LaTeX:
- Only PDF output
- Fine tuning tables and columns, if any, can take more time than moving the mouse. No need to make a presentation in five complex slides in LaTeX. And in 55 - it is necessary
Let's start with the installation
In practice, now there is one leading LaTeX / TeX utilities distribution that has absorbed the rest - TexLive. Issues there are numbered by year. Do not put archaeological versions earlier than 2018. So almost all Ubuntu users are right here . There is a separate set for poppy drivers. Or you can use the universal installer, including for Windows .
CentOS users must suffer.
In any case, you can create your own Dockerfile and use it. But keep in mind that some utilities will want to see system fonts.
TexLive distribution is heavy, takes up to 5Gb. You need to install texlive-full or a similar package (the name may vary from distribution to distribution).
However, in the courtyard of the XXI century, and you can use one of the online services to work with LaTeX. For some reason, few even scientists are not aware of this. For example, one of the most advanced.
A little about LaTeX
This is not a step-by-step guide on how to get started with LaTeX. We’ll take a quick look at how to make a presentation, and along the way you will use Google yourself. But the basic references I will do. Also pay attention to Wikiquote .
This will look like a simple presentation using the beamer package - it is he who is responsible for the presentation:
\documentclass{beamer}% % \title{My Super Topic} \author{Ashot and Alice} \begin{document}% \begin{frame}% \titlepage \end{frame} \begin{frame}% Hello, World! \end{frame} \end{document}
Go
And here is the finished presentation that I made at GolangConf2019 . Around her, we will spin.
The first thing you should do is forget as a nightmare all references to TeX fonts. Donald Knuth began developing the METAFONT font system in 1977, and introduced it in 1979. It was VERY cool at the time. But in the yard in 2019, today you can drag standards for file names 8 + 3 and special bitmap fonts only in minutes of boredom. All modern systems work with modern vector fonts. TexLive utilities include a new document compiler - xelatex . It is fully compatible with pdflatex, but works with system fonts. All that needs to be done is to load the fontspec or xltxtra package (it loads fontspec) and set the fonts:
% !TeX TS-program = xelatex \documentclass[aspectratio=169]{beamer} \usepackage{xltxtra} \usepackage[main=russian,english]{babel} \setmainfont{Arial} \setromanfont{Times New Roman} \setsansfont{Arial} \setmonofont{Courier New} ...
In the example, we immediately set the size of the presentation (16cm by 9cm), made a comment on how to assemble it and connected the babel package, which we will not disassemble. For Linux users, let me remind you that in 2019 TTF fonts can be dropped into the .fonts directory in the home directory.
Themes
You can make a presentation without any special design, but the feeling of beauty by default in the beamer is strange, so almost everyone uses certain topics. Typically, skins are a collection of .sty files located where the compiler can find them, i.e. in the same place as the presentation file itself. The topic is connected with the corresponding line in the presentation preamble:
\usetheme{gcr2019}%
There is, by the way, a wonderful guide to creating the simplest presentation design theme. I made 3 topics at the next conference of Oleg Bunin, one for myself, two - to illustrate this article: one , two and three .
In principle, everything that is defined in these topics can be a regular sheet in your presentation file. There is nothing wrong. Topics are needed when repeatability is needed. In each of the above themes there is an example of use and a compiled result.
Overlay
Overlay - this is when your information gradually appears on the same slide. For example:
\begin{frame} \begin{itemize} \item<1-> , !.. , ! \item<2-> – . \item<2-> – \item<3-> ! \end{itemize} \end{frame}
First, the first line appears, then the second and third, and then the fourth. At the same time, we saw how to make an unordered list. The system of overlays can be fastened to almost anything. For example, I did so highlighting lines of code (we will consider below).
Pay attention to the lines in my templates:
\setbeamercolor{itemize item}{fg=black} \setbeamercolor{itemize subitem}{fg=black} \setbeamercolor{alerted text}{fg=black} \setbeamertemplate{itemize items}{\textbullet}% \setbeamerfont*{itemize/enumerate subbody}{parent=itemize/enumerate body} \setbeamerfont*{itemize/enumerate subsubbody}{parent=itemize/enumerate subbody} \setbeamerfont{alerted text}{series=\bfseries}
Comment out the lines (use the% symbol for comments) and see what happens. Not the color, the blue triangles and that’s all.
I did not find where to determine this. beamer provides the ability to use the same slide several times. This one is really cool:
\begin{frame}[label=again]{ } ... \end{frame} ... \againframe{again}
Pictures
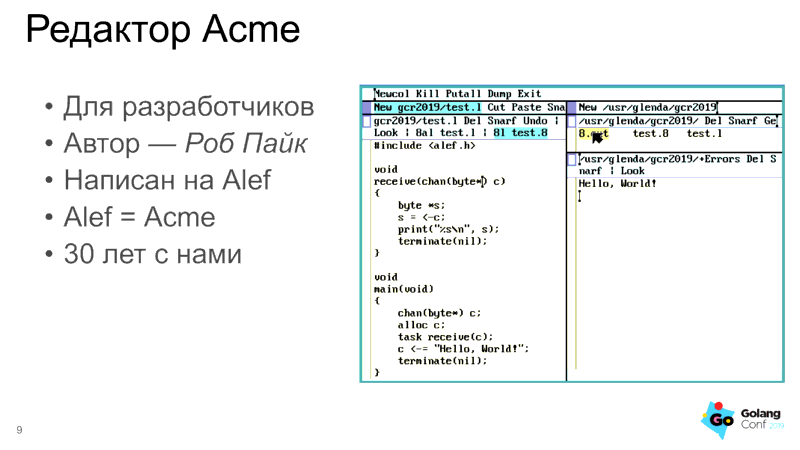
Take an example from my presentation. Two columns, an unordered list on the left, and a picture on the right:
\begin{frame}{ Acme} \begin{columns}[T,onlytextwidth] \begin{column}{0.44\textwidth} \begin{itemize} \item \item --- \emph{ } \item Alef \item Alef = Acme \item 30 \end{itemize} \end{column} \begin{column}{0.56\textwidth} \includegraphics[width=\textwidth]{acme-alef.png} \end{column} \end{columns} \end{frame}
The [T, onlytextwidth] parameter indicates that vertical alignment is performed along the baseline of the lines up, and the column block has a width equal to the width of the frame for the text. LaTeX itself will compress the picture as it should. You can create your own example and play with the parameters to see how and what will overlap.
Code listing
Immediately make a reservation that syntax highlighting in the code listing in the presentation is not needed. If you need her there, you are doing something wrong. More selection needed. I use the standard listings package, which can syntax highlighting, and can not select. You can see the listing block layout settings in any of my examples:
\definecolor{acmebg}{HTML}{FFFFEF} \definecolor{acmel}{HTML}{52AAAD} \lstset{ columns=flexible, keepspaces=true, showstringspaces=false, showtabs=false, tabsize=4, frame=single, basicstyle=\fontsize{10pt}{12}\bf\ttfamily\color{black}, backgroundcolor=\color{acmebg}, commentstyle=\color{black}, keywordstyle=\color{black}, stringstyle=\color{red}, rulecolor=\color{acmel}, framerule=1pt }
To highlight the background, I use the lstlinebgrd package, which is "abandoned". You have to insert the corrective code . But this additional code gives me the \ btLstHL command, which allows me to highlight lines in the overlay:
\begin{frame}[fragile]{Limbo. } \begin{lstlisting}[basicstyle=\fontsize{12pt}{12}\bf\ttfamily\color{black},linebackgroundcolor={% \btLstHL<1>{1}% \btLstHL<2>{2-3}% \btLstHL<3>{5,6}% \btLstHL<4>{8,9}% \btLstHL<5>{11}% }] i, j: int; k := 1; # int b := byte 2; # byte s: string; # s1 := s[0:]; # a: array of int; a = array[10] of int; myfunc: fn(i, k: int, s: string) : (list of string, int); \end{lstlisting} \end{frame}
Bibliography
For simplicity and versatility, I use the biblatex package. Here is the difficulty. The beamer package overrides some of the biblatex defaults. These commands remove the icons and set the font for the bibliography:
\setbeamertemplate{bibliography item}{\insertbiblabel} \renewcommand*{\bibfont}{\fontsize{8}{1}\selectfont}
We must remember an important point - the bibliography is set in a separate file. In the examples in the templates, I write a bibliography in the main text using the filecontents package, which in turn creates the desired real file. And compilation takes place in FOUR steps. First, xelatex simply compiles the file and creates the supporting files. Then the biber utility compiles the bibliography file, then you need to run xelatex twice more. Yes, everything is complicated with preprocessors.
The biblatex package is also configurable. But for the first time, I have enough of what I have in the examples.
Afterword
I enjoyed the preparation of the presentation and the preparation of materials for this article. I hope if someone wanted to, but could not decide to start using LaTeX in their work - I broke this barrier. Of course, I did not make packages, I did not dig in depth, I did not mention important drawing topics. But I think that this will all come as soon as you start using the tool. There are good practical articles on Habr by the tag #latex .
I hope that my templates will help someone at the upcoming conferences. Perhaps someone will draw up those scraps of the auxiliary code with backlight that have been lying on the Internet for years in a suitable package. Go for it!