Cockpit - simplify typical administrative tasks in Linux through a convenient web interface
In this article I will talk about the capabilities of the Cockpit tool. Cockpit is designed to facilitate the administration of Linux. In short, it allows you to perform the most common Linux administrator tasks through a nice web interface. Cockpit features: installing and checking updates for the system and turning on auto-updates (patch process), user management (creating \ deleting \ changing passwords \ lock \ granting superuser rights), disk management (creating \ editing lvm, creating / mounting file systems), setting up networks (team, bonding, ip managing, etc.), management of systemd units / timers.
Interest in Cockpit is due to the release of Centos 8, where Cockpit is already built into the system and you only need to activate it with the command "systemctl enable --now cockpit.service". Other distributions will require manual installation from the batch repository. We will not consider the installation here, see the official manual.
After installation, we need to go to the 9090 port of the server on which Cockpit is installed in the browser (i.e. ip-server : 9090). For example, 192.168.1.56 : 9090
We enter the usual username / password from the local account and check the box “Reuse my password for privileged tasks” so that it is possible to run some commands as a privileged user (root). Naturally, your account should be able to execute commands through sudo.
After logging in, you will see a beautiful and intuitive web interface. First of all, switch the interface language to English, because the translation is simply awful.

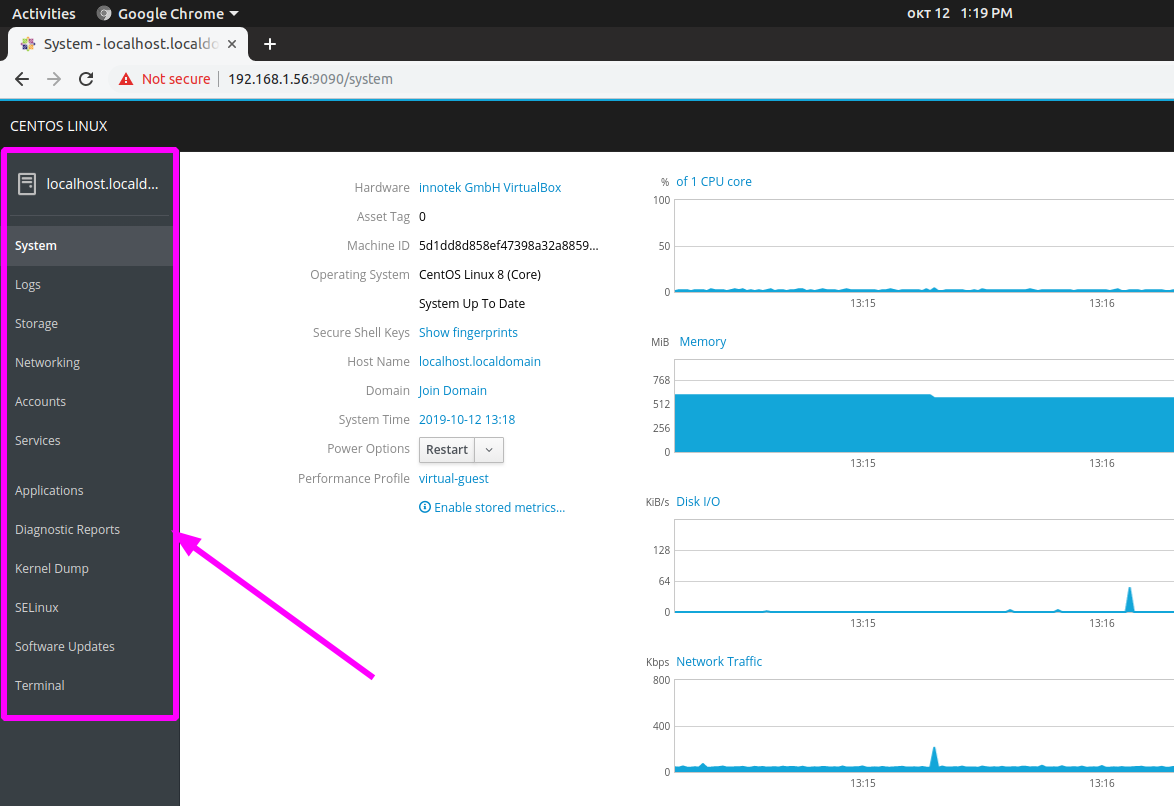
The interface looks very clear and logical, on the left you will see the navigation panel:

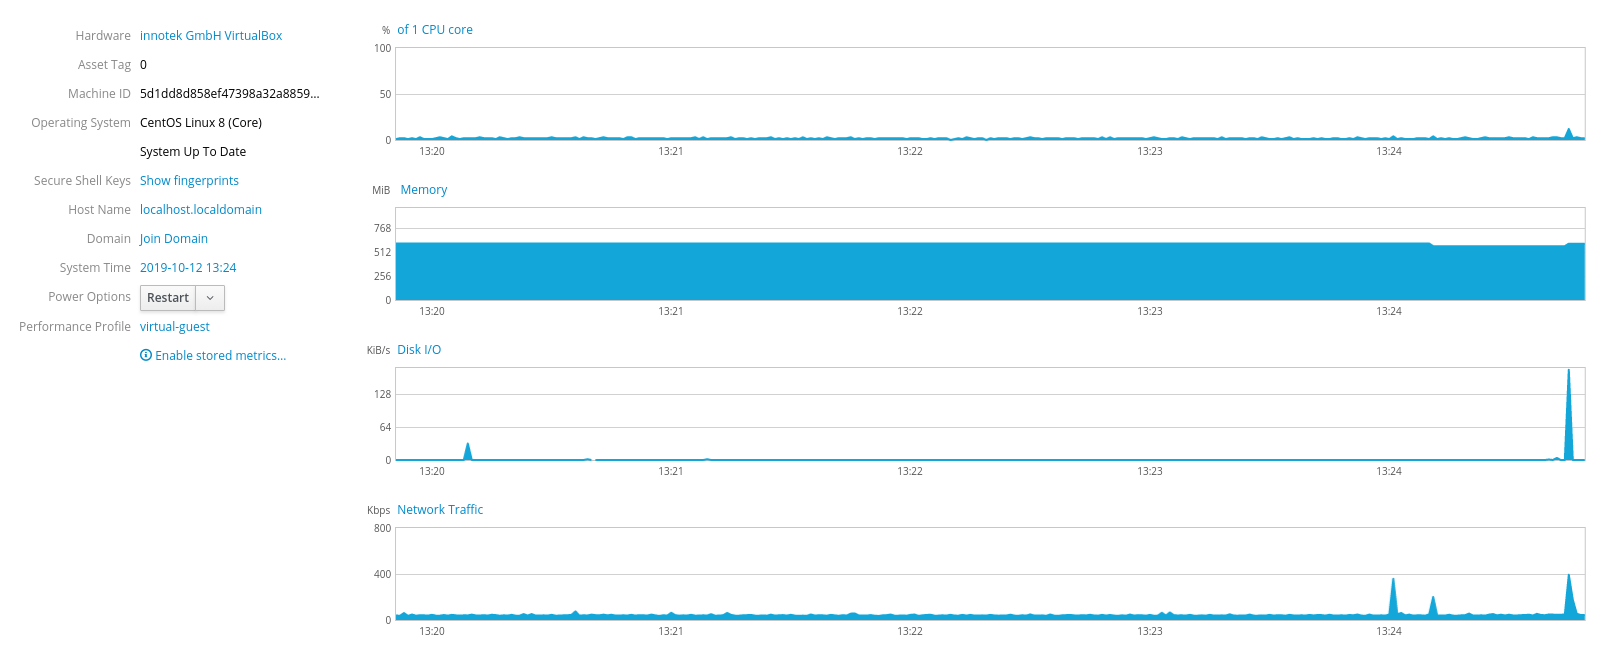
The start section is called “system”, where you can see information on the utilization of server resources (CPU, RAM, Network, Disks):
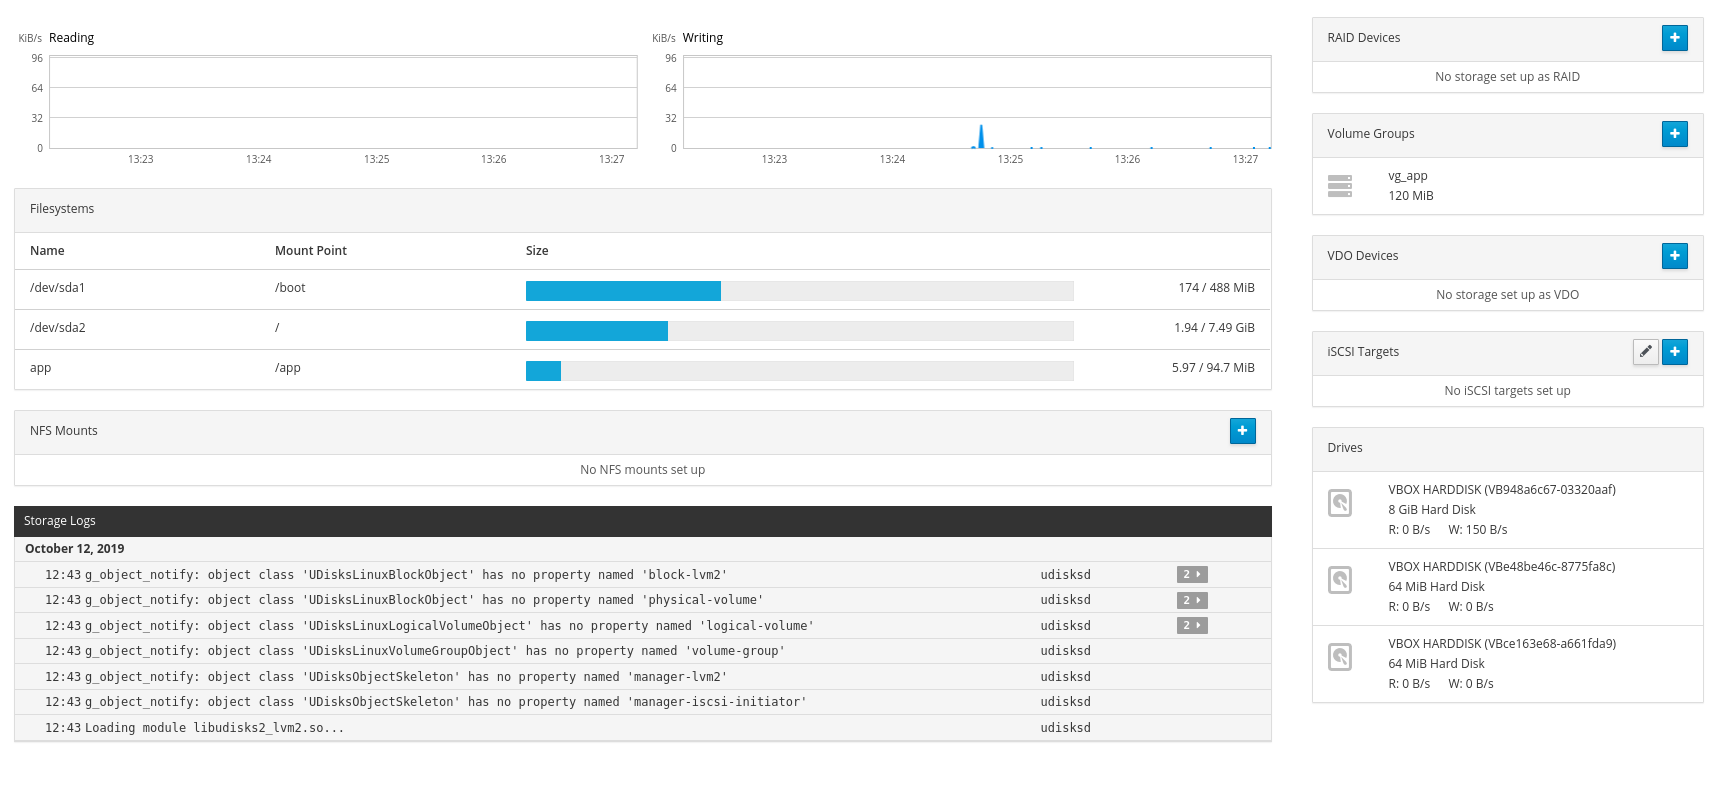
To see more detailed information, for example, on disks, just click on the appropriate inscription and you will immediately be taken to another section (storage):
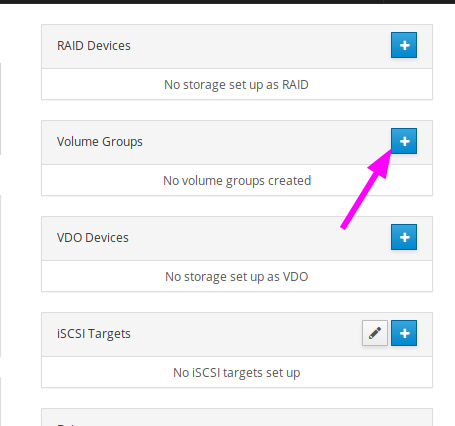
You can create lvm right here:
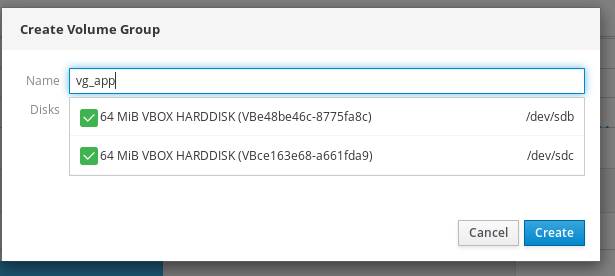
Choose a name for the vg group and the drives you want to use:
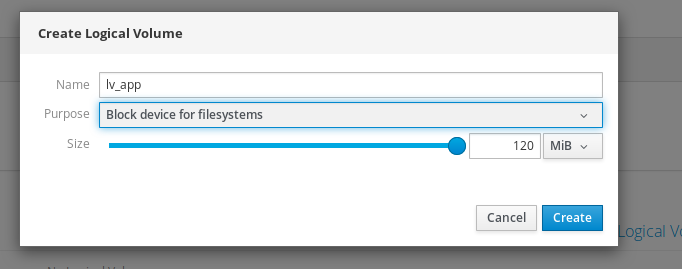
Set a name for lv and choose a size:
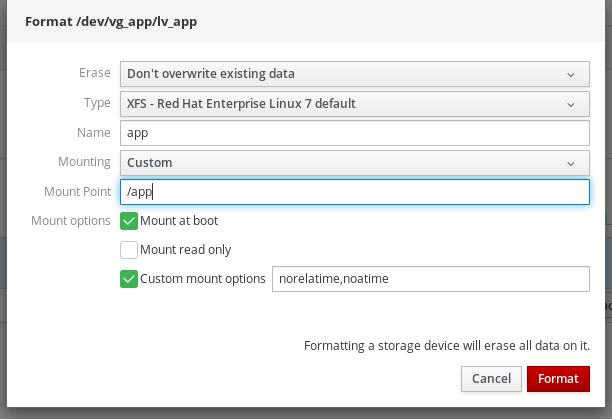
And finally, create a file system:

Please note that Cockpit itself will write the desired line in fstab and mount the device. You can also specify specific mount options:
Here it looks in the system:

Here you can expand / compress file systems, add new devices to a vg-group, etc.
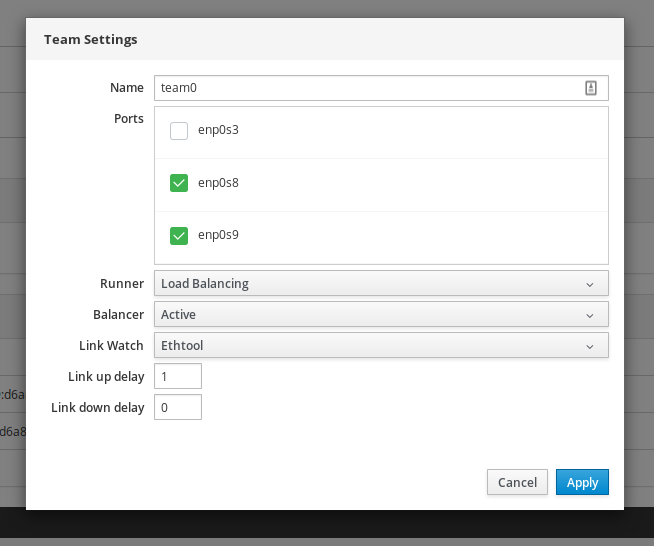
In the “Networking” section, you can not only change typical network settings (ip, dns, mask, gateway), but also create more complex configurations, such as bonding or teaming:
This is how the finished configuration looks in the system:

Agree that tuning through vi \ nano would be a little longer and harder. Especially for beginners.
In "services" you can control systemd units and timers: stop them, restart, remove from startup. Also create your timer very quickly:

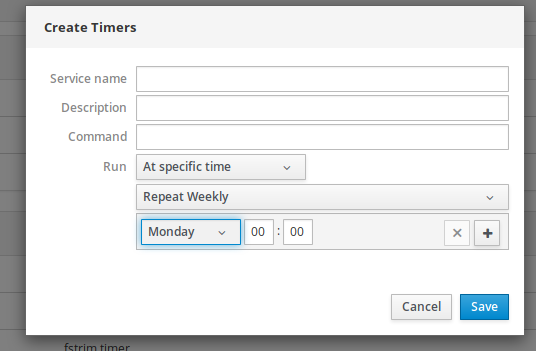
The only thing done poorly: it is not clear how often the timer starts. You can only see when it was last launched and when it will start again.
In “Software updates”, as you might guess, you can see all the available updates and install them:
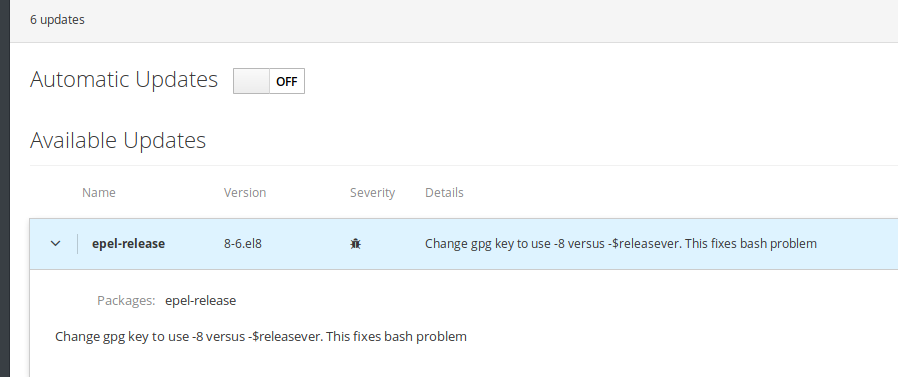
The system will notify us if a reboot is required:
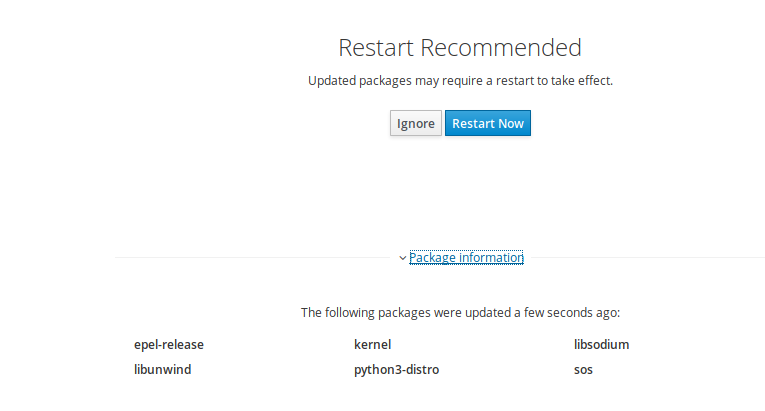
Here you can turn on automatic system updates and customize the installation of updates:

Also in Cockpit you can control SeLinux, create sosreport (useful when communicating with vendors when solving technical problems):

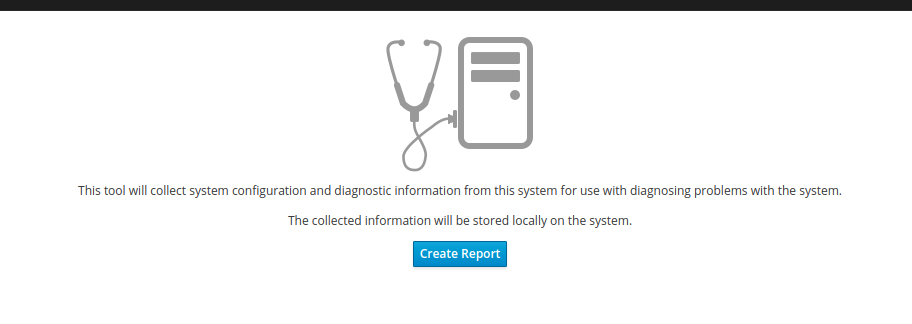
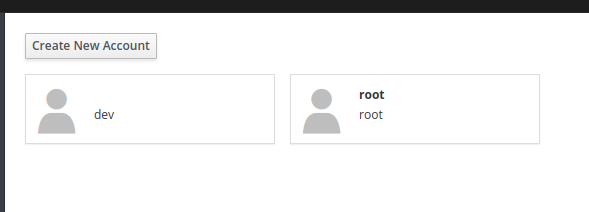
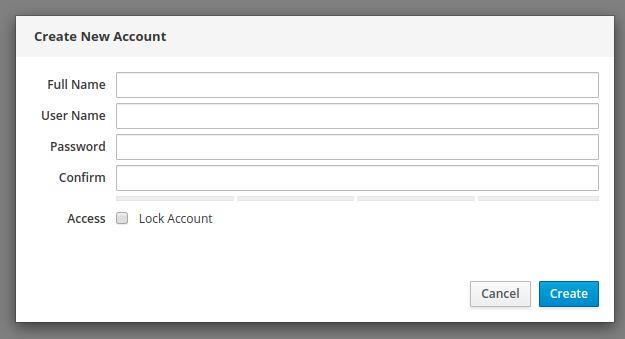
User management is implemented as simple and straightforward as possible:
By the way, you can add ssh keys.
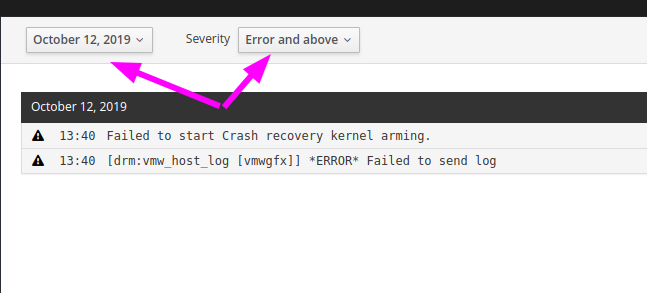
And finally, you can read the system logs and sort them by importance:
We went through all the main sections of the program.
Here's a quick overview of the possibilities. Whether or not to use Cockpit is up to you. In my opinion, Cockpit can solve several problems and reduce the cost of server maintenance.
Main advantages:
Disadvantages discovered by me:
As we can see, the utility has very good potential. If you expand the functionality, then the implementation of many tasks can become even faster and easier.
upd: it is also possible to manage multiple servers from one web interface by adding the necessary servers to the “Machines dashboard”. Functionality, for example, can be useful when mass updating multiple servers at once. Read more in the official documentation .

Interest in Cockpit is due to the release of Centos 8, where Cockpit is already built into the system and you only need to activate it with the command "systemctl enable --now cockpit.service". Other distributions will require manual installation from the batch repository. We will not consider the installation here, see the official manual.
After installation, we need to go to the 9090 port of the server on which Cockpit is installed in the browser (i.e. ip-server : 9090). For example, 192.168.1.56 : 9090
We enter the usual username / password from the local account and check the box “Reuse my password for privileged tasks” so that it is possible to run some commands as a privileged user (root). Naturally, your account should be able to execute commands through sudo.
After logging in, you will see a beautiful and intuitive web interface. First of all, switch the interface language to English, because the translation is simply awful.

The interface looks very clear and logical, on the left you will see the navigation panel:

The start section is called “system”, where you can see information on the utilization of server resources (CPU, RAM, Network, Disks):

To see more detailed information, for example, on disks, just click on the appropriate inscription and you will immediately be taken to another section (storage):

You can create lvm right here:

Choose a name for the vg group and the drives you want to use:

Set a name for lv and choose a size:

And finally, create a file system:

Please note that Cockpit itself will write the desired line in fstab and mount the device. You can also specify specific mount options:

Here it looks in the system:

Here you can expand / compress file systems, add new devices to a vg-group, etc.
In the “Networking” section, you can not only change typical network settings (ip, dns, mask, gateway), but also create more complex configurations, such as bonding or teaming:

This is how the finished configuration looks in the system:

Agree that tuning through vi \ nano would be a little longer and harder. Especially for beginners.
In "services" you can control systemd units and timers: stop them, restart, remove from startup. Also create your timer very quickly:


The only thing done poorly: it is not clear how often the timer starts. You can only see when it was last launched and when it will start again.
In “Software updates”, as you might guess, you can see all the available updates and install them:

The system will notify us if a reboot is required:

Here you can turn on automatic system updates and customize the installation of updates:

Also in Cockpit you can control SeLinux, create sosreport (useful when communicating with vendors when solving technical problems):


User management is implemented as simple and straightforward as possible:


By the way, you can add ssh keys.
And finally, you can read the system logs and sort them by importance:

We went through all the main sections of the program.
Here's a quick overview of the possibilities. Whether or not to use Cockpit is up to you. In my opinion, Cockpit can solve several problems and reduce the cost of server maintenance.
Main advantages:
- The threshold for entering the Linux OS administration is significantly reduced thanks to such tools. Almost any person can perform standard and basic actions. Administration can be partially delegated to developers or analysts to reduce the cost of production and speed up work. After all, now you do not need to type pvcreate, vgcreate, lvcreate, mkfs.xfs in the console, create a mount point, edit fstab, and finally type mount -a, just click a couple of times
- You can offload Linux administrators and save them from routine so that they focus on more complex tasks.
- You can reduce the number of human errors. You must admit that it’s more difficult to make a mistake through the web interface than through the console
Disadvantages discovered by me:
- Limited utility. You can only do basic operations. It is impossible, for example, to immediately expand lvm after increasing the disk from the virtualization side, you need to type pvresize in the console and only then continue working through the web interface. You cannot add a user to a specific group, you cannot change the rights of directories, analyze the place used. I would like more extensive functionality
- Section "Applications" did not work correctly
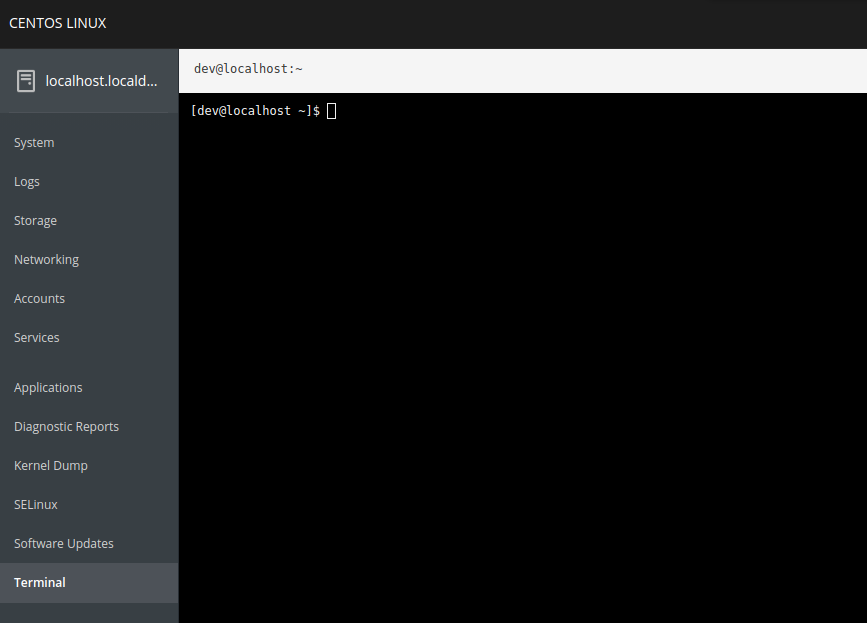
- You cannot change the color of the console. For example, I can only work comfortably on a light background with a dark font:
As we can see, the utility has very good potential. If you expand the functionality, then the implementation of many tasks can become even faster and easier.
upd: it is also possible to manage multiple servers from one web interface by adding the necessary servers to the “Machines dashboard”. Functionality, for example, can be useful when mass updating multiple servers at once. Read more in the official documentation .
All Articles