Certified Temperature Monitoring
Our company uses a Quality Management System (QMS). As part of one of the ISO: 9001 certification, it was ordered to collect temperature and humidity readings in some rooms, for example, in the server room or in warehouses.
Because Since all bureaucratic procedures require pieces of paper, then data collection should be carried out by a verified device.
In this regard, the most ordinary hygrometer was hanged and for several years people daily wrote testimonies in a journal. Agree, uncomfortable.

In order to automate this procedure, searches for a device for collecting temperature and humidity were started.
The goal was to somehow collect data and transfer it all to Zabbix. (Zabbix, any storage place is not required for the QMS, but I did not want to make any other separate system for temperature monitoring).
In principle, there were many ready-made kits for this, for example, Equicom PING3 or netping, and there are still a bunch of such examples, you could also build your system on arduino or raspeberry,
but all these options did not fit because all of them do not have certification, or rather metrological verification, and therefore cannot be considered official measuring instruments and are not suitable for passing ISO: 9001.
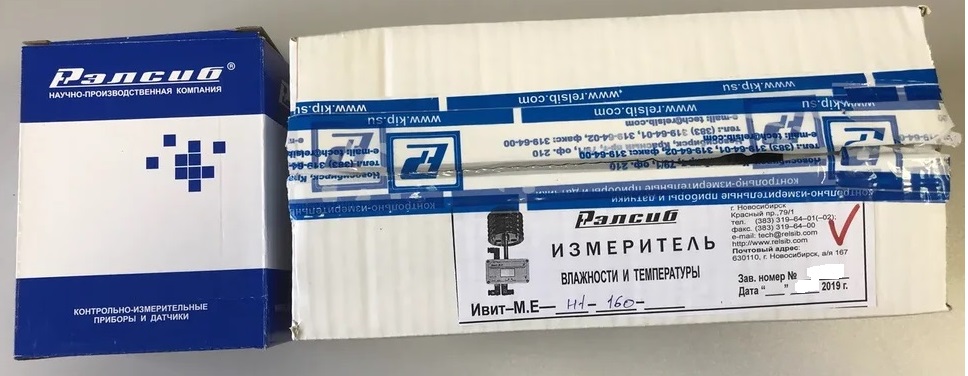
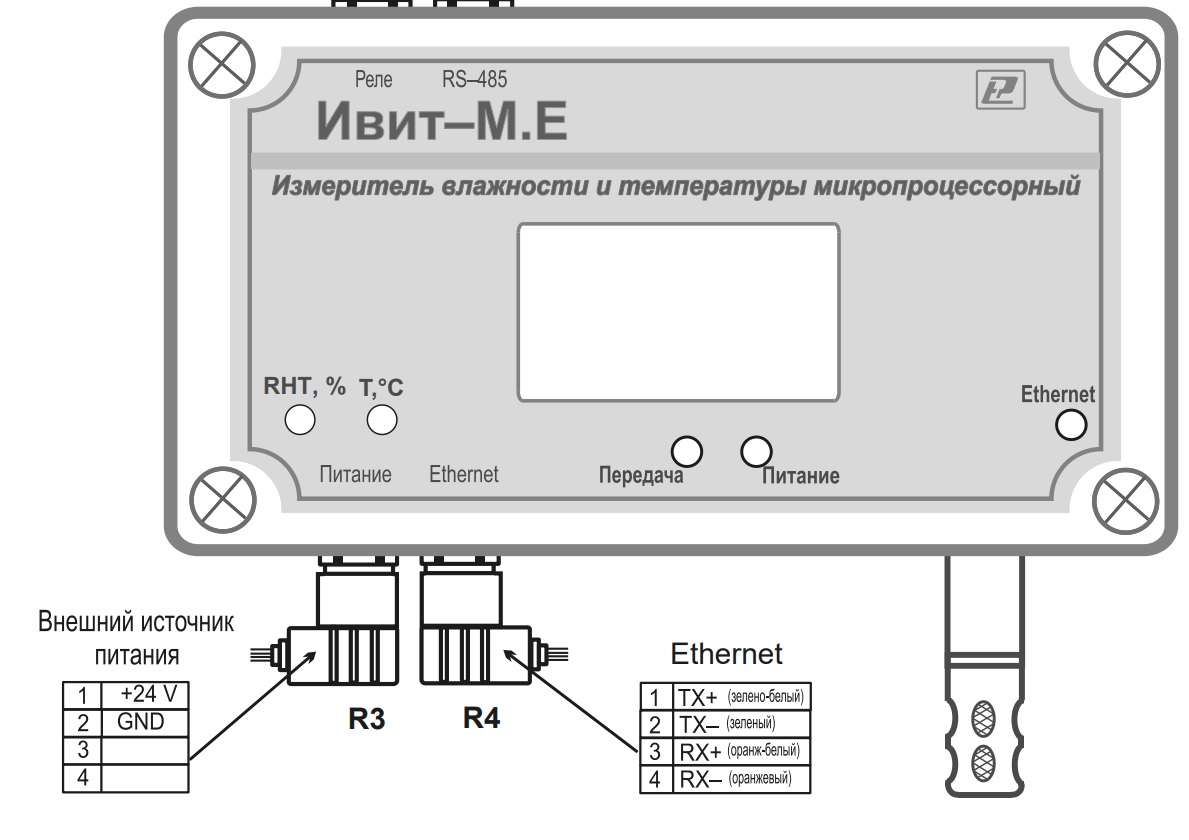
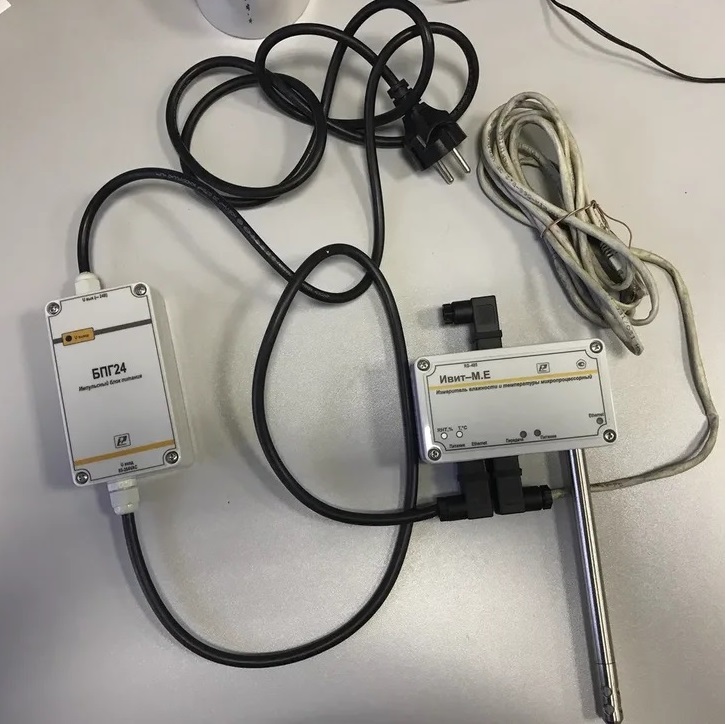
As a result, a device was found that was able to transmit data via ethernet and included in the register of measuring instruments. It turned out to be "Ivit-M.E." developed in Novosibirsk, and produced there. Ordered (by the way, the order takes a long time. Production time is about a month, plus verification, plus delivery to Moscow).
All this comes in this form. When you pick it up you immediately realize that this is a Russian production :-)
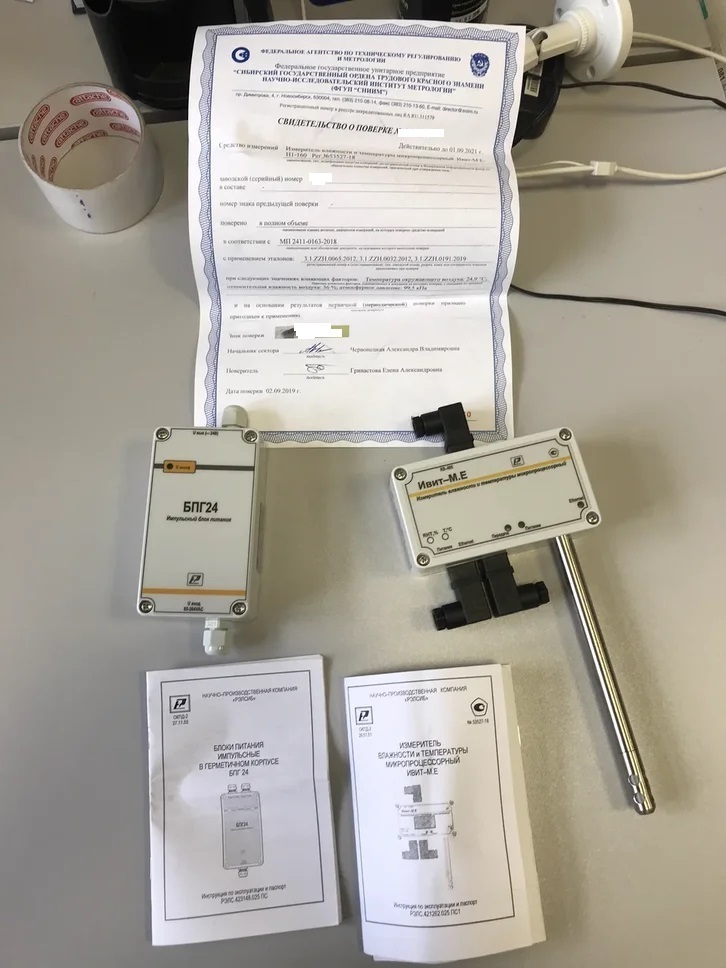
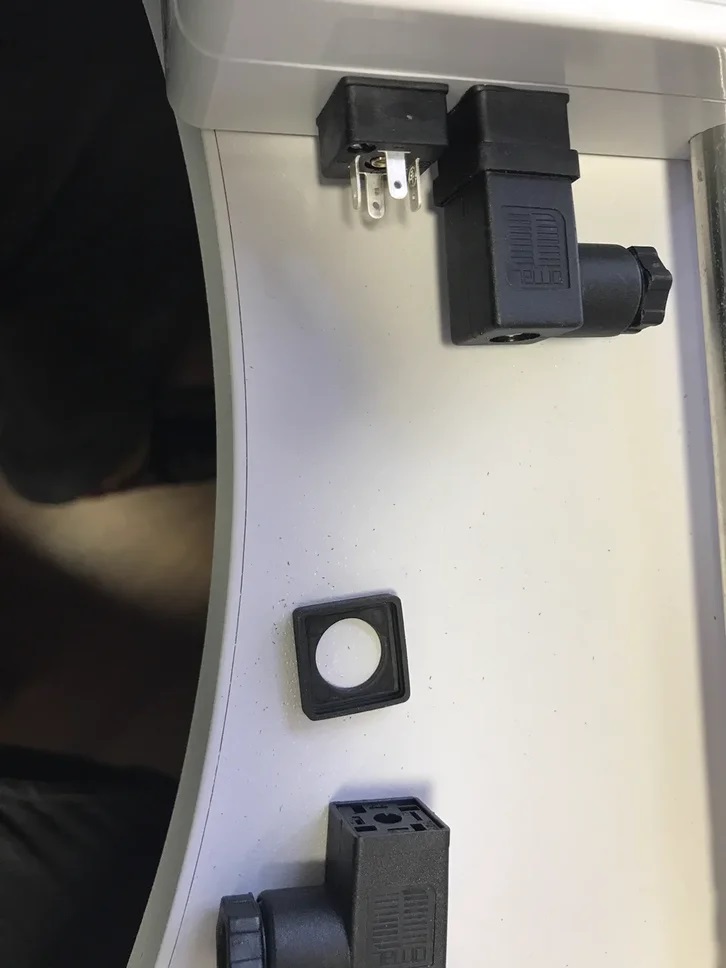
The power supply (ordered separately) is not connected to the sensor.
Therefore, we disassemble it and begin to connect.
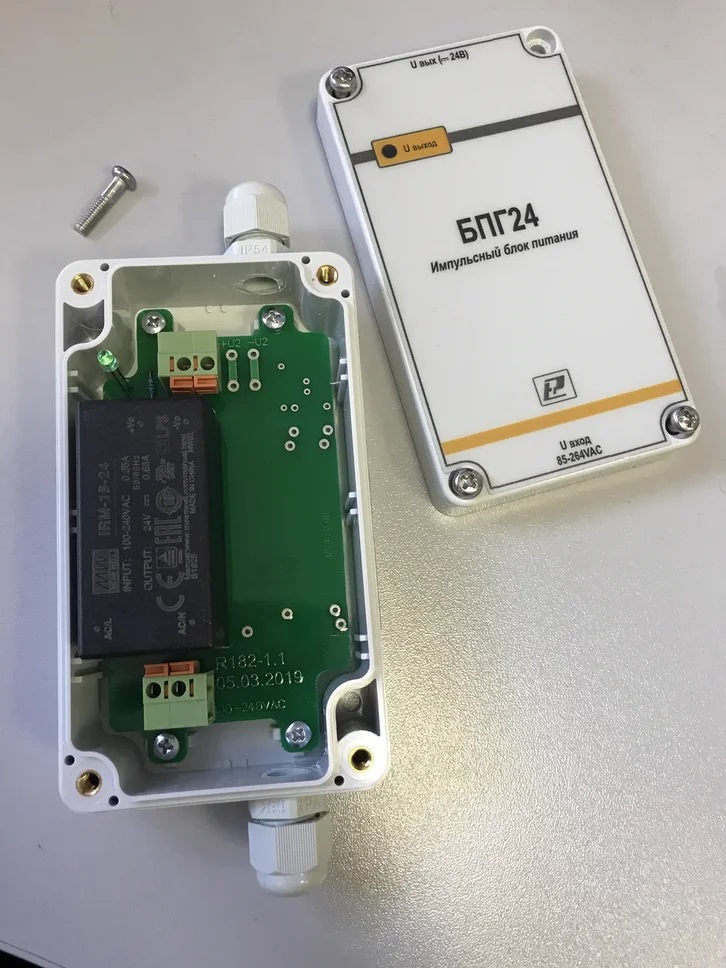
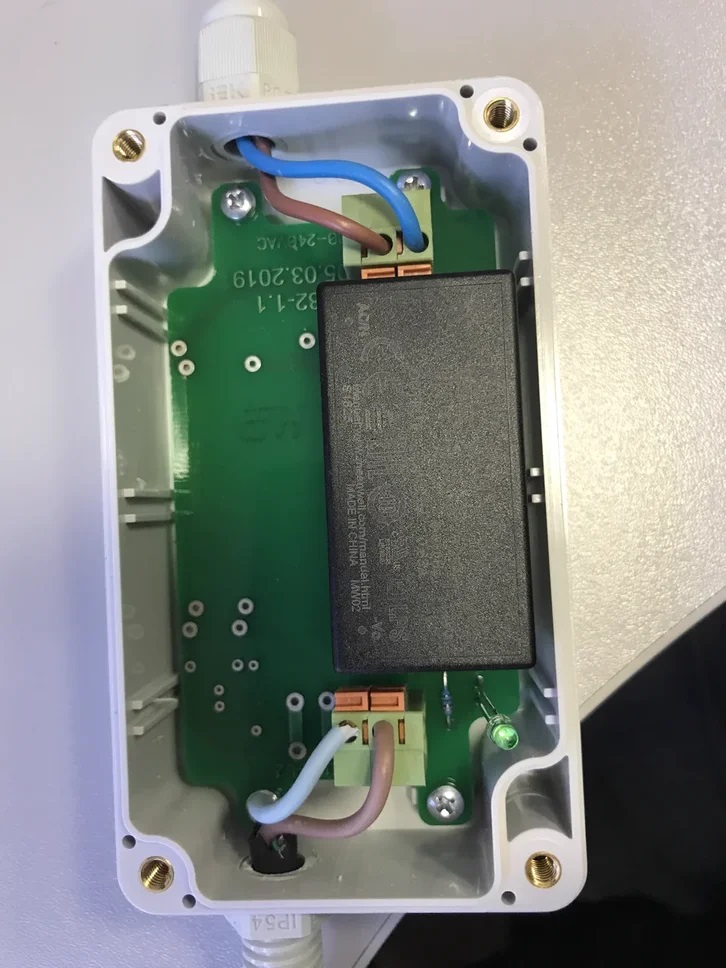
We connect the input anyway. Alternating current. I used a regular power cable from a computer.
The output is direct current. Plus and minus are signed directly on the board.
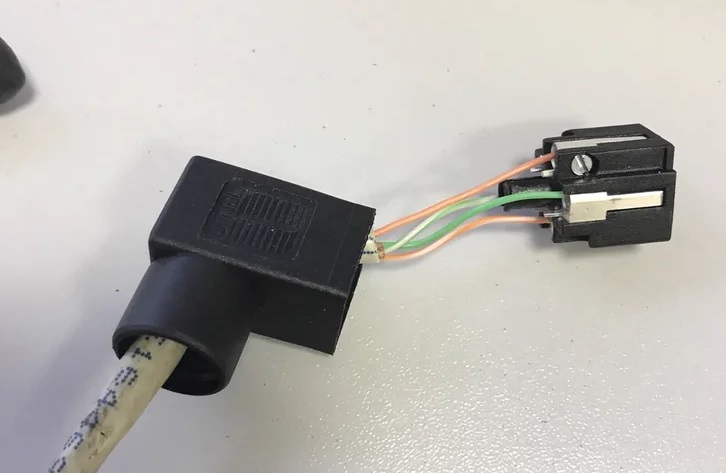
Then we connect the wires directly to the sensor itself. According to instructions
The terminals themselves look like this:
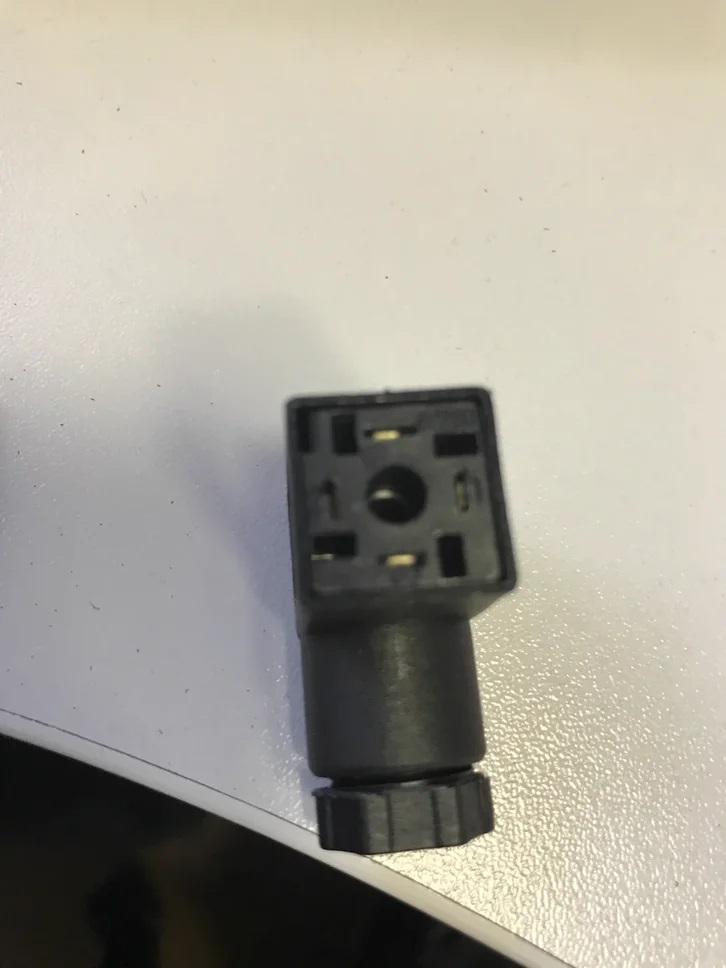
We unscrew, remove and pick out the liner from the L-shaped half.
We connect power and network.
The result is something like this:
Of the minuses of this device - it does not know how to send data via SNMP, it works using the Modbus protocol.
In principle, there are many SCADA systems and OPC servers that can read on Modbus, but most of them are either paid or collected in some kind of database of their own, from which it is also not clear how to pull out data for transferring them later to the zabbix.
Therefore, a small python script was written to directly access the sensor.
The data in the registers are stored in the form of a float and come when accessing them in this form
To configure the sensor there is a config-ivit.exe application
There are not very many settings. You can configure the network, mail.

in the configurator, the registers are specified in the hexadecimal system, but in the Python script you need to specify the registers in the 10-decimal system.
We bring the data to a normal readable form according to the ieee-754 standard.
There are two ways to implement the transfer of data received from the script to the zabbix.
The first method: using userparametr, on some node where the python and zabbiks agent are installed. For example, I had on the zabbix server itself.
From the side of the zabbix in zabbix_agentd.conf, specify:
In the zabbix itself, we will need to transfer only the register number and the IP address of the device to whom we want to contact:
for example:
Register numbers:
22 - Humidity
34 - Temperature
36 - dew point
The second way: pass values through zabbix_sender. This method is convenient in that you can create a separate network node that does not have an agent, and accordingly it will be possible to make a template for many devices.
All that remains is to run this script to execute on the crown, specifying only the IP address of the devices and the Hostname of the host
Next, configure the triggers, which are considered critical for us. For example, minimum or maximum temperature, humidity.
That's all. Thus, we got certified temperature monitoring, which is suitable for passing through the QMS and ISO: 9001
UPD: Updated the script to be sent via sender to connect to multiple sensors
Because Since all bureaucratic procedures require pieces of paper, then data collection should be carried out by a verified device.
In this regard, the most ordinary hygrometer was hanged and for several years people daily wrote testimonies in a journal. Agree, uncomfortable.
In order to automate this procedure, searches for a device for collecting temperature and humidity were started.
The goal was to somehow collect data and transfer it all to Zabbix. (Zabbix, any storage place is not required for the QMS, but I did not want to make any other separate system for temperature monitoring).
In principle, there were many ready-made kits for this, for example, Equicom PING3 or netping, and there are still a bunch of such examples, you could also build your system on arduino or raspeberry,
but all these options did not fit because all of them do not have certification, or rather metrological verification, and therefore cannot be considered official measuring instruments and are not suitable for passing ISO: 9001.
As a result, a device was found that was able to transmit data via ethernet and included in the register of measuring instruments. It turned out to be "Ivit-M.E." developed in Novosibirsk, and produced there. Ordered (by the way, the order takes a long time. Production time is about a month, plus verification, plus delivery to Moscow).
All this comes in this form. When you pick it up you immediately realize that this is a Russian production :-)
The power supply (ordered separately) is not connected to the sensor.
Therefore, we disassemble it and begin to connect.
We connect the input anyway. Alternating current. I used a regular power cable from a computer.
The output is direct current. Plus and minus are signed directly on the board.
Then we connect the wires directly to the sensor itself. According to instructions
The terminals themselves look like this:
We unscrew, remove and pick out the liner from the L-shaped half.
We connect power and network.
The result is something like this:
Of the minuses of this device - it does not know how to send data via SNMP, it works using the Modbus protocol.
In principle, there are many SCADA systems and OPC servers that can read on Modbus, but most of them are either paid or collected in some kind of database of their own, from which it is also not clear how to pull out data for transferring them later to the zabbix.
Therefore, a small python script was written to directly access the sensor.
The data in the registers are stored in the form of a float and come when accessing them in this form
READ_INPUT_REGISTERS (16855, 57976)
To configure the sensor there is a config-ivit.exe application
There are not very many settings. You can configure the network, mail.
in the configurator, the registers are specified in the hexadecimal system, but in the Python script you need to specify the registers in the 10-decimal system.
We bring the data to a normal readable form according to the ieee-754 standard.
There are two ways to implement the transfer of data received from the script to the zabbix.
The first method: using userparametr, on some node where the python and zabbiks agent are installed. For example, I had on the zabbix server itself.
import modbus_tk.defines as cst import modbus_tk.modbus_tcp as modbus_tcp import sys def check_reg(reg,ip): reg = int(reg) master = modbus_tcp.TcpMaster(host=ip, port=int(502)) master.set_timeout(1.0) getDI = master.execute(1,cst.READ_INPUT_REGISTERS, reg, 2) Num1 = str(bin(getDI[0]))[2:] while len(Num1) < 16: Num1 = '0' + Num1 Num2 = str(bin(getDI[1]))[2:] while len(Num2) < 16: Num2 = '0' + Num2 res = Num1 + Num2 znak = int(res[0], 2) znak2 = (0 - 1) ** znak e = int(res[1:9], 2) - 127 exp = 2 ** e m = 1 + (int(res[9:], 2) / float(2 ** 23)) F = znak2 * exp * m print(round(F, 1)) check_reg(sys.argv[1],sys.argv[2])
From the side of the zabbix in zabbix_agentd.conf, specify:
UserParameter=check_reg[*], /usr/bin/python /home/appliance/scada.py $1 $2
In the zabbix itself, we will need to transfer only the register number and the IP address of the device to whom we want to contact:
for example:
check_reg[22,192.168.100.100]
Register numbers:
22 - Humidity
34 - Temperature
36 - dew point
The second way: pass values through zabbix_sender. This method is convenient in that you can create a separate network node that does not have an agent, and accordingly it will be possible to make a template for many devices.
import modbus_tk.defines as cst import modbus_tk.modbus_tcp as modbus_tcp import sys, os def check_reg(reg,ip): reg = int(reg) master = modbus_tcp.TcpMaster(host=ip, port=int(502)) master.set_timeout(1.0) getDI = master.execute(1,cst.READ_INPUT_REGISTERS, reg, 2) Num1 = str(bin(getDI[0]))[2:] while len(Num1) < 16: Num1 = '0' + Num1 Num2 = str(bin(getDI[1]))[2:] while len(Num2) < 16: Num2 = '0' + Num2 res = Num1 + Num2 znak = int(res[0], 2) znak2 = (0 - 1) ** znak e = int(res[1:9], 2) - 127 exp = 2 ** e m = 1 + (int(res[9:], 2) / float(2 ** 23)) F = znak2 * exp * m return round(F, 1) os.system('zabbix_sender -z 127.0.0.1 -s '+ sys.argv[2]+' -k Humidity -o '+ str(check_reg(22,sys.argv[1]))) os.system('zabbix_sender -z 127.0.0.1 -s '+sys.argv[2]+' -k Temper -o '+ str(check_reg(34,sys.argv[1]))) os.system('zabbix_sender -z 127.0.0.1 -s '+sys.argv[2]+' -k Rosa -o '+ str(check_reg(36,sys.argv[1])))
All that remains is to run this script to execute on the crown, specifying only the IP address of the devices and the Hostname of the host
*/1 * * * * /home/ivitsender.py 192.168.100.100 Ivit1
*/1 * * * * /home/ivitsender.py 192.168.100.200 Ivit2
Next, configure the triggers, which are considered critical for us. For example, minimum or maximum temperature, humidity.
That's all. Thus, we got certified temperature monitoring, which is suitable for passing through the QMS and ISO: 9001
UPD: Updated the script to be sent via sender to connect to multiple sensors
All Articles