Modular sprite characters and their animation
This blog post is entirely devoted to my character animation system, it is filled with useful tips and code snippets.
Over the past two months, I have created as many as 9 new player actions (such funny things as blocking with a shield, dodging a jump and weapons), 17 new wearable items, 3 sets of armor (plate, silk and leather) and 6 types of hairstyles. I also finished creating all the automation and tools, so everything is already in use in the game. In the article I will tell how I achieved this!
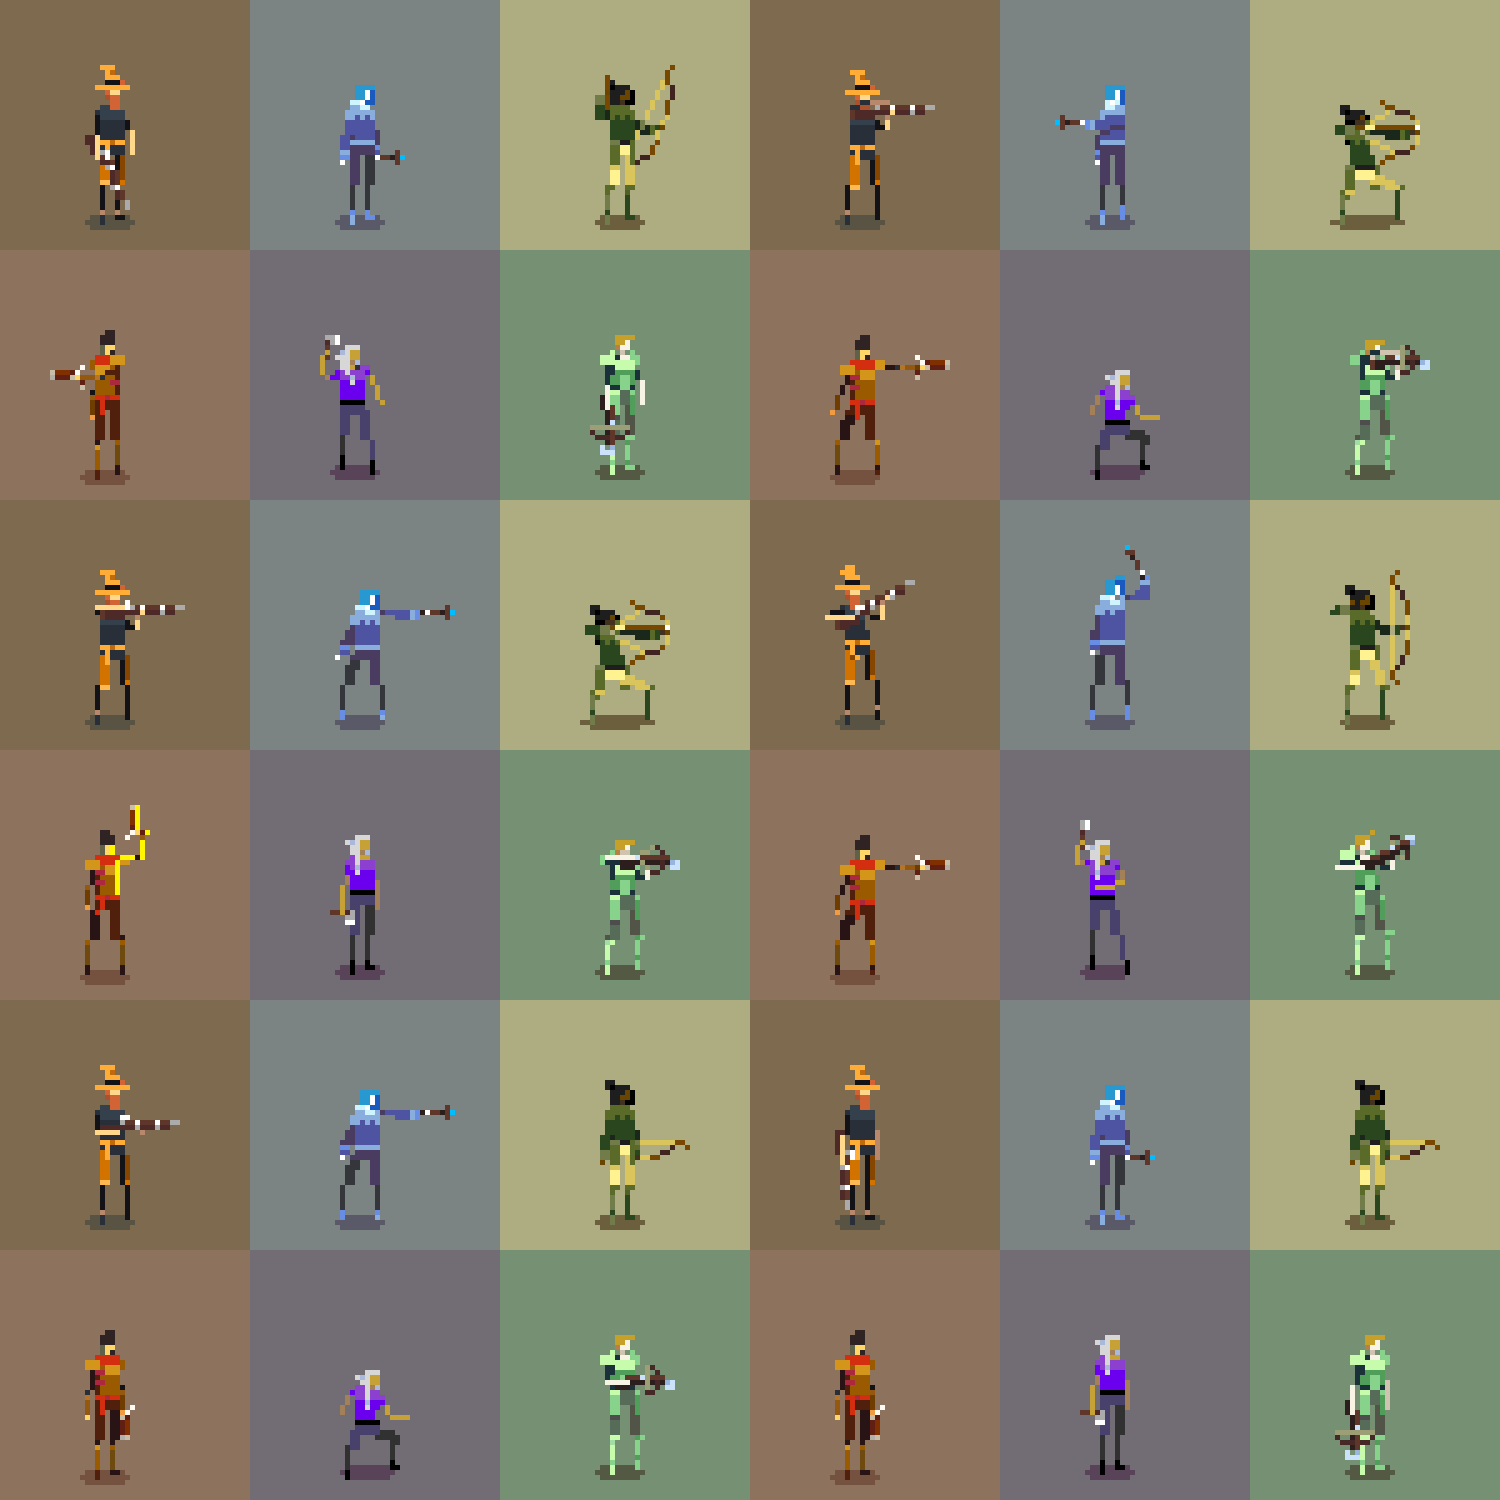
I hope this information proves useful and proves that it is not necessary to be a genius in order to independently create such tools / automation.
Initially, I wanted to check whether it is possible to combine sprites superimposed on each other with synchronized animators to create a modular character with replaceable hairstyles, equipment and wearable items. Is it possible to combine hand-drawn pixel animation with a truly customizable character.
Of course, such functions are actively used in 3D and 2D games with pre-rendered sprites or in 2D games with skeletal animation, but as far as I know, there are not many games combining manually created animation and modular characters (usually because the process turns out to be too monotonous).
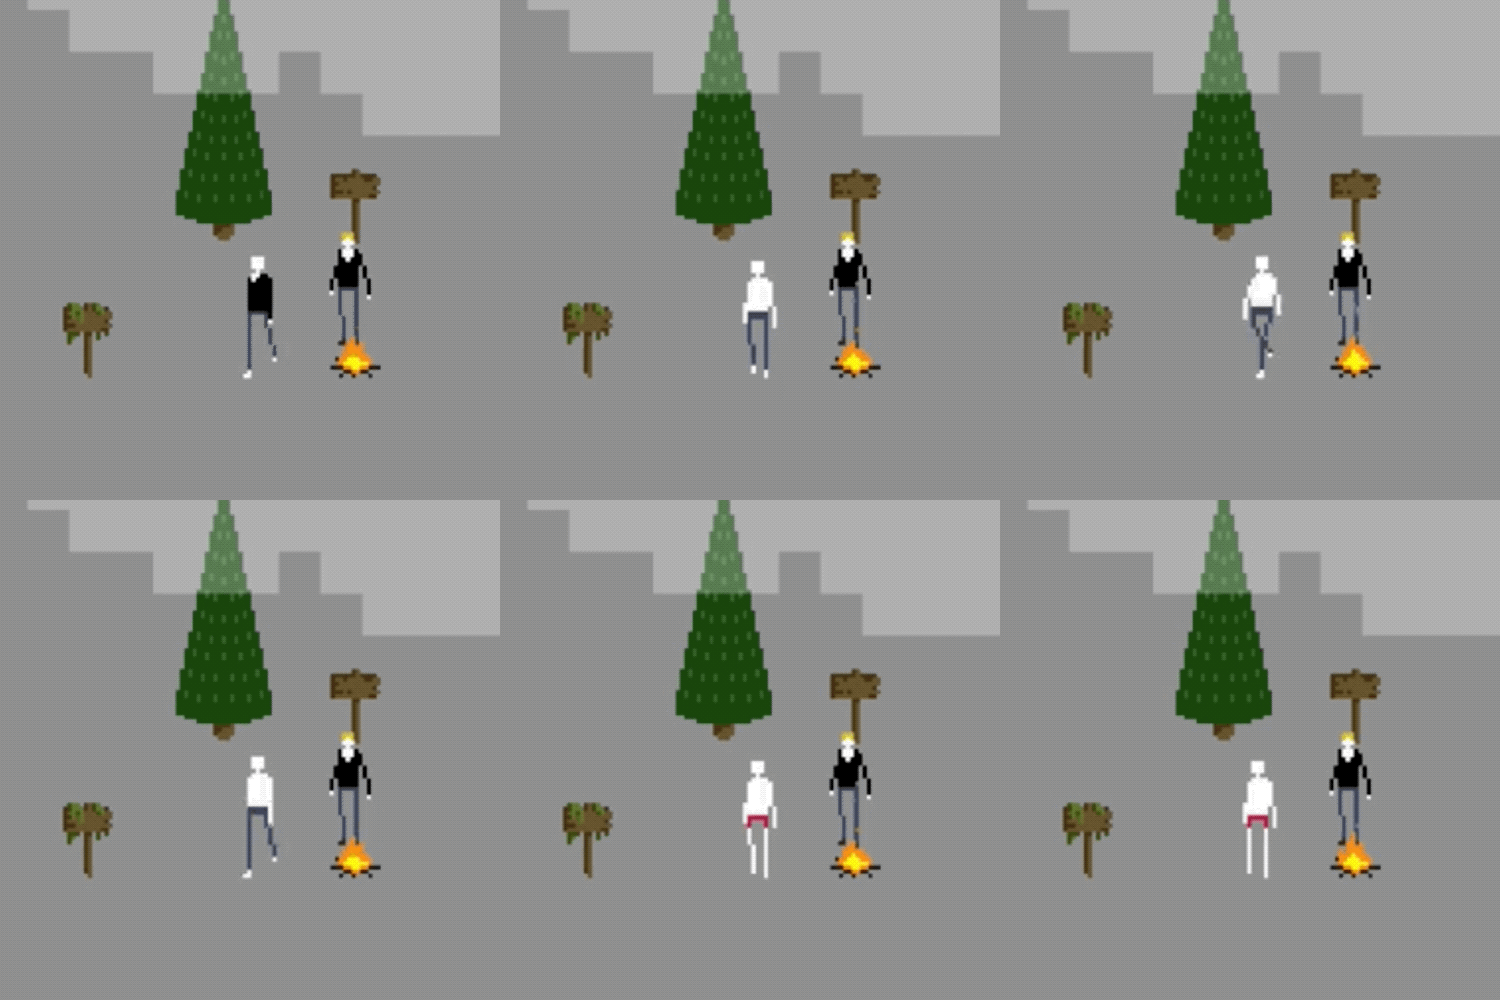
I unearthed this ancient GIF of my first month of working with Unity. In fact, this modular sprite was one of my first experiments in game development!
I created a prototype using the Unity animation system, and then added one shirt, one pair of pants, one hairstyle and three items to test the concept. This required 26 separate animations.
At that time I created all my animation in Photoshop and did not bother with the automation of the process, so it was very boring. Then I thought: “So, the basic idea worked, later I will add new animations and equipment.” It turned out that “later” is a few years later.
In March of this year, I drew the design of a large amount of armor (see my previous post), and noticed how this process can be made more convenient. I continued to postpone the implementation, because even with the automation I was nervous that nothing would work.
I expected that I would have to abandon the character’s customization and create the only main character, as in most games with manual animation. But I had a plan of action, and it was time to check if I could defeat this monster!
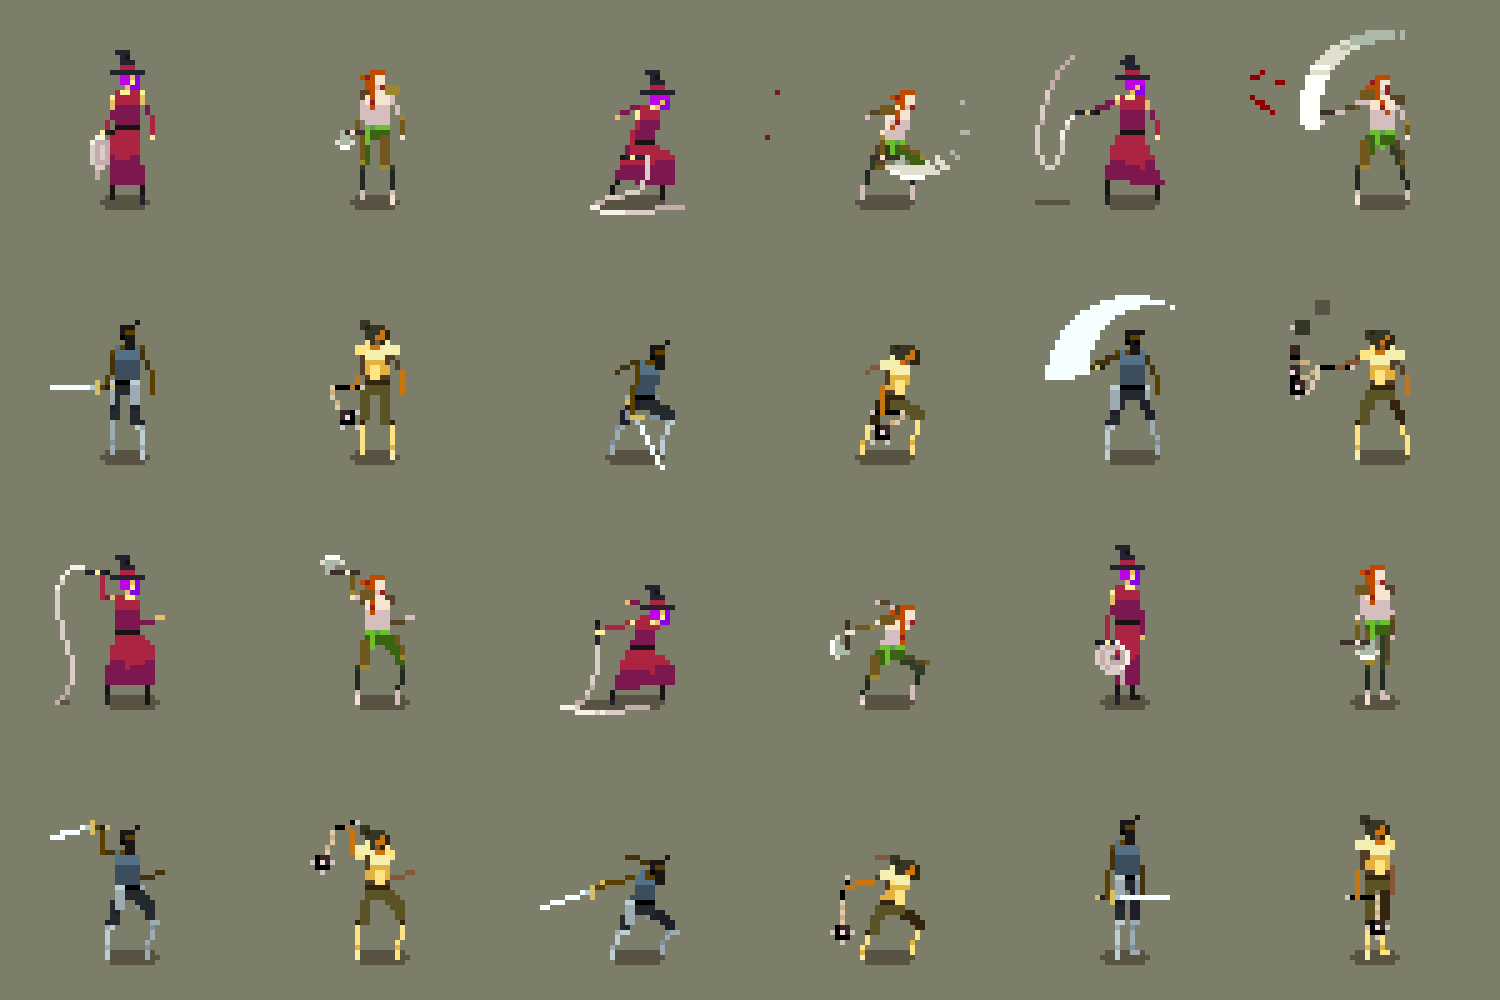
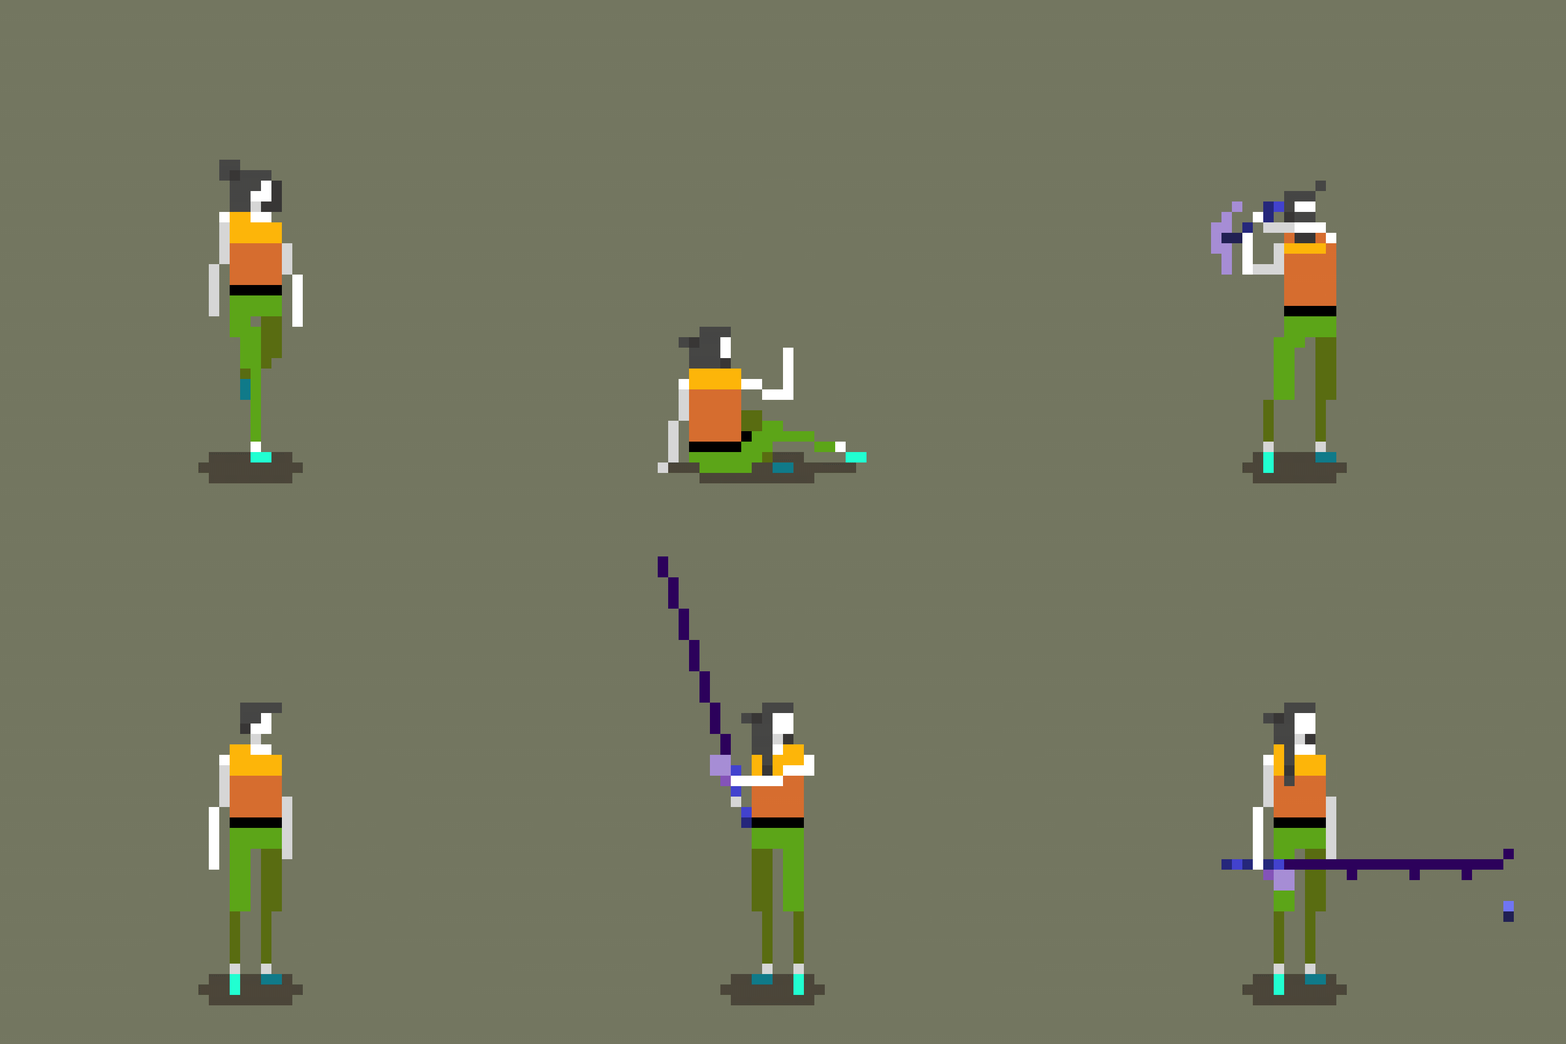
Spoiler: Everything turned out great. Below I will reveal my *** secrets ***
Previously, I conducted many tests of art and time control to find out how long such work can take and whether a similar level of quality will be achievable for me.
I wrote down all my ideas for animation, put them together in a spreadsheet and arranged them according to various criteria, such as usefulness, beautifulness and repeated use. To my surprise, the very first on this list was the cast animation of the item (potions, bombs, knives, axes, ball).
I came up with a numerical score for each animation and abandoned everything with poor performance. Initially, I planned to create 6 sets of armor, but quickly realized that it was too much, and threw out three types.
The aspect of time tracking turned out to be very important, and I highly recommend using it to answer questions like: “How many enemies can I afford to create in the game?”. After only a few tests, I managed to extrapolate a fairly accurate estimate. With further work on animations, I continued to keep track of time and revise my expectations.
I will share a copy of my journal of work over the past two months. Please note that this time is in addition to my usual work, where I spend 30 hours a week:
https://docs.google.com/spreadsheets/d/1Nbr7lujZTB4pWMsuedVcgBYS6n5V-rHrk1PxeGxr6Ck/edit?usp=sharing
Using the colors in the sprite design wisely, you can draw one sprite and create many different variations by changing the palette. You can change not only the colors, but also create various on and off elements (for example, replacing colors with transparency).
Each set of armor has 3 variations, and by mixing the upper and lower parts, you can get many combinations. I plan to implement a system in which you can collect one set of armor for the appearance of the character, and another for his characteristics (as in Terraria).
In the process, I was pleasantly surprised by the discovered curious combinations. If you connect the plate top with a silk bottom, you can get something in the style of a war mage.
It’s best to change the palettes using the colors encoding the value in the sprite so that you can take them later to find the real color from the palette. I know I'm simplifying a bit, so here's a video to get you started:
I will not explain everything in detail, but instead I will talk about ways to implement this technique in Unity, and their pros and cons.
This is the best strategy for creating variations of enemies, backgrounds and everything where a lot of sprites have the same palette / material. Different materials cannot be grouped into batches, even if they use the same sprite / atlas. Working with textures is quite painful, but you can change the palettes in real time by replacing materials using SpriteRenderer.sharedMaterial.SetTexture or MaterialPropertyBlock if you need different palettes for each instance of the material. Here is an example of a fragment shader function:
I settled on this decision because I needed to replace the palettes every time the character's appearance changes (for example, when putting on items), and create some palettes dynamically (to display the player’s chosen hair and skin colors). It seemed to me that at runtime and in the editor it would be much easier to work with arrays for these purposes.
The code:
I presented my palettes as a ScriptableObject type and used the MonoBehaviour tool to edit them. Having worked for a long time on editing palettes in the process of creating animations in Aseprite, I realized what tools I needed and wrote these scripts accordingly. If you want to write your own tool for editing palettes, then here are some functions I definitely recommend implementing:
- Updating palettes on various materials when editing colors to display changes in real time.
- Assigning names and changing the order of colors in the palette (use the field to store the color index, not its order in the array).
- Select and edit multiple colors at a time. (Tip: you can copy and paste the Color fields in Unity: just click on one color, copy, click on another color, paste - now they are the same!)
- Apply overlay color to the entire palette
- Record palette in texture
If you want to switch palettes on the fly, but at the same time you need to do the batching to reduce the number of draw calls, then you can use this technique. It may be useful for mobile platforms, but using it is quite inconvenient.
Firstly, you will need to pack all the palettes into one large texture. Then you use the color specified in the SpriteRenderer component (AKA vertex color) to determine the line to be read from the palette texture into the shader. That is, the palette of this sprite is controlled through SpriteRenderer.color. Vertex color is the only SpriteRenderer property that can be changed without breaking the condition (provided that all materials are the same).
In most cases, it is best to use the alpha channel to control the index, because you probably will not need a bunch of sprites with different transparency.
The code:
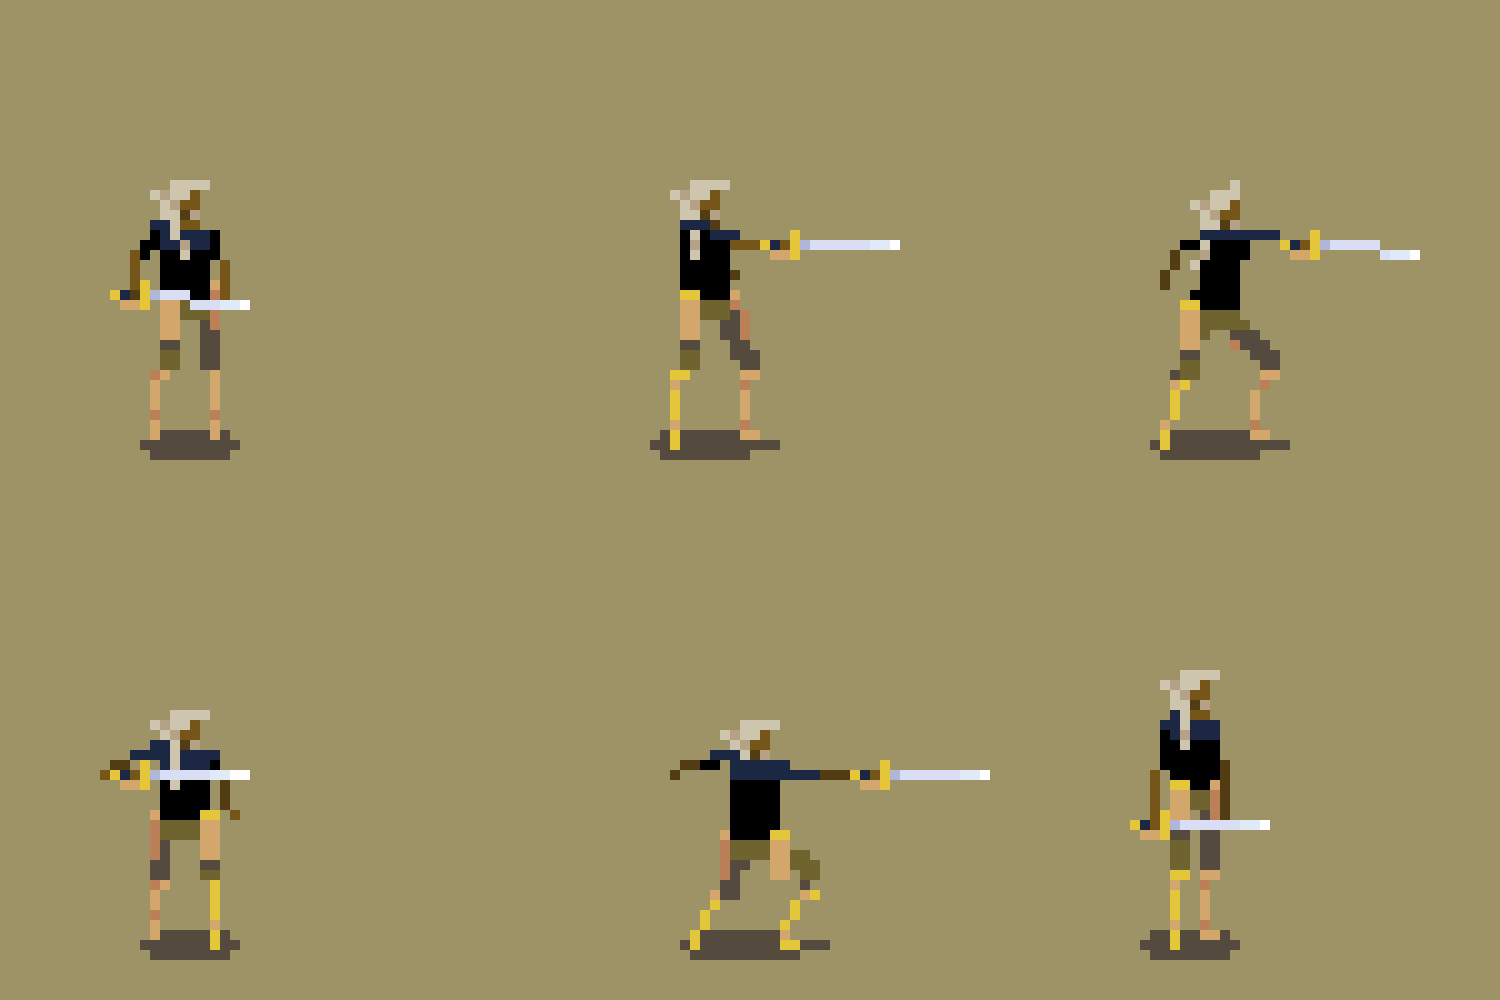
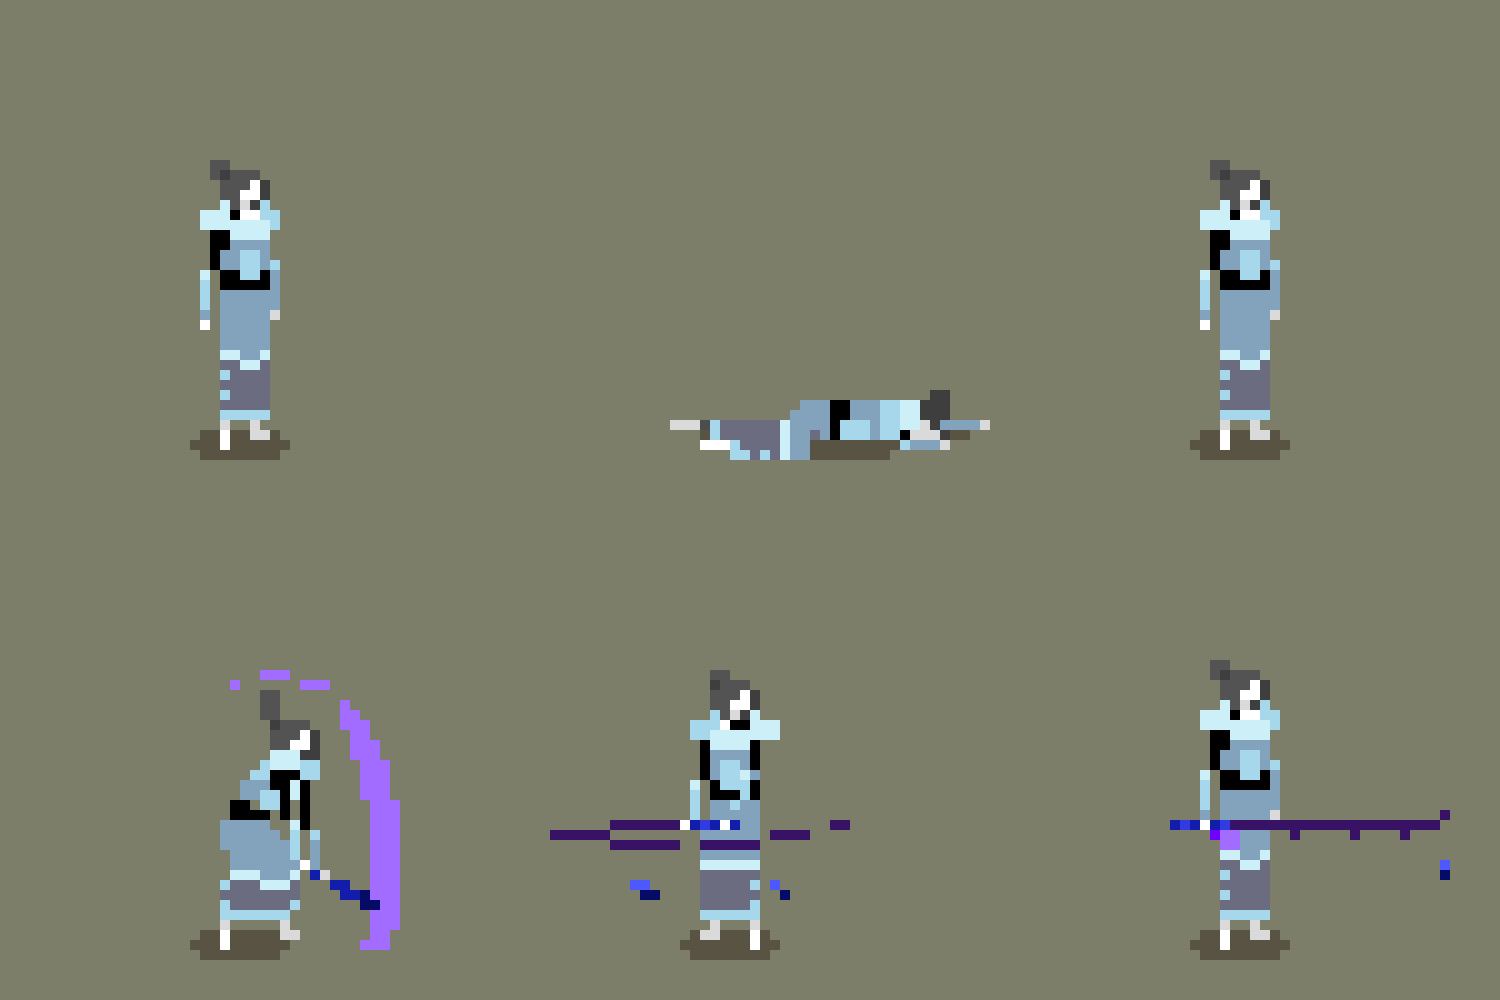
The wonders of replacing palettes and sprite layers. So many combinations.
To implement this function, automation was absolutely necessary, because as a result I got about 300 animations and thousands of sprites.
My first step was to create an exporter for Aseprite to manage my insane sprite layer scheme using a convenient command line interface . This is just a perl script that bypasses all layers and labels in my Aseprite file and exports images in a specific directory and name structure so that I can read them later.
Then I wrote an importer for Unity. Aseprite displays a convenient JSON file with frame data, so you can create animation assets programmatically. Handling Aseprite JSON and writing this data type turned out to be pretty tedious, so I bring them here. You can easily load them into Unity using JsonUtility.FromJson <AespriteData>, just remember to run Aseprite with the option --format 'json-array'.
The code:
On the Unity side, I had serious problems in two places: loading / slicing a sprite sheet and building an animation clip. A clear example would help me a lot, so here is a snippet of code from my importer so that you do not suffer so much:
The code:
If you haven’t done this yet, then believe me - it’s very easy to start creating your own tools. The simplest trick is to place a GameObject in the scene with the MonoBehaviour attached to it, which has the [ExecuteInEditMode] attribute. Add a button and you are ready for battle! Remember that your personal tools do not have to look good, they can be purely utilitarian.
The code:
When working with sprites, it is quite easy to automate standard tasks (for example, creating palette textures or batch replacing colors in several sprite files). Here is an example from which you can start learning how to change your sprites.
The code:
Over time, the prototype modular sprite system that I created using Mecanim became the biggest problem when upgrading Unity, because the API was constantly changing and was poorly documented. In the case of a simple state machine, it would be wise to be able to query the status of each clip or change clips at runtime. But no! For performance reasons, Unity bakes clips in their state and forces us to use a clumsy redefinition system to change them.
Mecanim itself is not such a bad system, but it seems to me that it does not manage to realize its main declared feature - simplicity. The idea of the developers was to replace what seemed complicated and painful (scripting) with something simple (visual state machine). However:
- Any non-trivial finite state machine quickly turns into a wild web of nodes and connections, the logic of which is scattered across different layers.
- Simple use cases are hindered by generalized system requirements. To play one or two animations, you need to create a new controller and assign states / transitions. Of course, there is an excessive waste of resources.
- It's funny that as a result, you still have to write code, because for the state machine to do something interesting, you need a script that calls Animator.SetBool and similar methods.
- For multiple use of the state machine with other clips, you need to duplicate it and replace the clips manually. In the future, you will have to make changes in several places.
- If you want to change what is in a state at runtime, then you have problems. The solution is either a bad API or a crazy graph with one node for every possible animation.
The story of how Firewatch developers got into the hell of visual scripting . The funny thing is that when the speaker shows the simplest examples, they still look crazy. Spectators literally groan at 12:41 . Add huge maintenance costs, and you will understand why I strongly dislike this system.
Many of these problems are not even the fault of Mecanim developers, but simply the natural result of incompatible ideas: you cannot create a common and at the same time simple system, and describing logic using images is more difficult than just words / symbols (does anyone remember the UML flowcharts?) . I recalled a fragment from Zack McClendon 's report at Practice NYC 2018 , and if I have time, I recommend that you watch the whole video!
However, I figured it out. Visual scripting is always censured by aggressive "write your own engine" nerds that do not understand the needs of the artist. In addition, it cannot be denied that most of the code looks like incomprehensible technical jargon.
If you are already a little programmer and make games with sprites, then you may need to think twice. When I started, I was sure that I could never write something related to the engine better than Unity developers.
And you know what? It turned out that the sprite animator is just a script that changes the sprite after a specified number of seconds. Be that as it may, I still had to write my own. Since then I have added animation events and other functions to my specific project, but the basic version that I wrote in half a day covers 90% of my needs. It consists of only 120 lines and can be downloaded for free from here: https://pastebin.com/m9Lfmd94 . Thank you for reading my article. See you!
Over the past two months, I have created as many as 9 new player actions (such funny things as blocking with a shield, dodging a jump and weapons), 17 new wearable items, 3 sets of armor (plate, silk and leather) and 6 types of hairstyles. I also finished creating all the automation and tools, so everything is already in use in the game. In the article I will tell how I achieved this!

I hope this information proves useful and proves that it is not necessary to be a genius in order to independently create such tools / automation.
Short description
Initially, I wanted to check whether it is possible to combine sprites superimposed on each other with synchronized animators to create a modular character with replaceable hairstyles, equipment and wearable items. Is it possible to combine hand-drawn pixel animation with a truly customizable character.
Of course, such functions are actively used in 3D and 2D games with pre-rendered sprites or in 2D games with skeletal animation, but as far as I know, there are not many games combining manually created animation and modular characters (usually because the process turns out to be too monotonous).

I unearthed this ancient GIF of my first month of working with Unity. In fact, this modular sprite was one of my first experiments in game development!
I created a prototype using the Unity animation system, and then added one shirt, one pair of pants, one hairstyle and three items to test the concept. This required 26 separate animations.
At that time I created all my animation in Photoshop and did not bother with the automation of the process, so it was very boring. Then I thought: “So, the basic idea worked, later I will add new animations and equipment.” It turned out that “later” is a few years later.
In March of this year, I drew the design of a large amount of armor (see my previous post), and noticed how this process can be made more convenient. I continued to postpone the implementation, because even with the automation I was nervous that nothing would work.
I expected that I would have to abandon the character’s customization and create the only main character, as in most games with manual animation. But I had a plan of action, and it was time to check if I could defeat this monster!


Spoiler: Everything turned out great. Below I will reveal my *** secrets ***
Modular sprite system
I. Know your boundaries
Previously, I conducted many tests of art and time control to find out how long such work can take and whether a similar level of quality will be achievable for me.
I wrote down all my ideas for animation, put them together in a spreadsheet and arranged them according to various criteria, such as usefulness, beautifulness and repeated use. To my surprise, the very first on this list was the cast animation of the item (potions, bombs, knives, axes, ball).
I came up with a numerical score for each animation and abandoned everything with poor performance. Initially, I planned to create 6 sets of armor, but quickly realized that it was too much, and threw out three types.
The aspect of time tracking turned out to be very important, and I highly recommend using it to answer questions like: “How many enemies can I afford to create in the game?”. After only a few tests, I managed to extrapolate a fairly accurate estimate. With further work on animations, I continued to keep track of time and revise my expectations.
I will share a copy of my journal of work over the past two months. Please note that this time is in addition to my usual work, where I spend 30 hours a week:
https://docs.google.com/spreadsheets/d/1Nbr7lujZTB4pWMsuedVcgBYS6n5V-rHrk1PxeGxr6Ck/edit?usp=sharing
II. Changing the palette for a brighter future
Using the colors in the sprite design wisely, you can draw one sprite and create many different variations by changing the palette. You can change not only the colors, but also create various on and off elements (for example, replacing colors with transparency).
Each set of armor has 3 variations, and by mixing the upper and lower parts, you can get many combinations. I plan to implement a system in which you can collect one set of armor for the appearance of the character, and another for his characteristics (as in Terraria).

In the process, I was pleasantly surprised by the discovered curious combinations. If you connect the plate top with a silk bottom, you can get something in the style of a war mage.
It’s best to change the palettes using the colors encoding the value in the sprite so that you can take them later to find the real color from the palette. I know I'm simplifying a bit, so here's a video to get you started:
I will not explain everything in detail, but instead I will talk about ways to implement this technique in Unity, and their pros and cons.
1. Search texture for each palette
This is the best strategy for creating variations of enemies, backgrounds and everything where a lot of sprites have the same palette / material. Different materials cannot be grouped into batches, even if they use the same sprite / atlas. Working with textures is quite painful, but you can change the palettes in real time by replacing materials using SpriteRenderer.sharedMaterial.SetTexture or MaterialPropertyBlock if you need different palettes for each instance of the material. Here is an example of a fragment shader function:
sampler2D _MainTex; sampler2D _PaletteTex; float4 _PaletteTex_TexelSize; half4 frag(v2f input) : SV_TARGET { half4 lookup = tex2D(_MainTex, input.uv); half4 color = tex2D(_PaletteTex, half2(lookup.r * (_PaletteTex_TexelSize.x / 0.00390625f), 0.5)); color.a *= lookup.a; return color * input.color; }
2. Array of colors
I settled on this decision because I needed to replace the palettes every time the character's appearance changes (for example, when putting on items), and create some palettes dynamically (to display the player’s chosen hair and skin colors). It seemed to me that at runtime and in the editor it would be much easier to work with arrays for these purposes.
The code:
sampler2D _MainTex; half4 _Colors[32]; half4 frag(v2f input) : SV_TARGET { half4 lookup = tex2D(_MainTex, input.uv); half4 color = _Colors[round(lookup.r * 255)]; color.a *= lookup.a; return color * input.color; }
I presented my palettes as a ScriptableObject type and used the MonoBehaviour tool to edit them. Having worked for a long time on editing palettes in the process of creating animations in Aseprite, I realized what tools I needed and wrote these scripts accordingly. If you want to write your own tool for editing palettes, then here are some functions I definitely recommend implementing:
- Updating palettes on various materials when editing colors to display changes in real time.
- Assigning names and changing the order of colors in the palette (use the field to store the color index, not its order in the array).
- Select and edit multiple colors at a time. (Tip: you can copy and paste the Color fields in Unity: just click on one color, copy, click on another color, paste - now they are the same!)
- Apply overlay color to the entire palette
- Record palette in texture
3. A single search texture for all palettes
If you want to switch palettes on the fly, but at the same time you need to do the batching to reduce the number of draw calls, then you can use this technique. It may be useful for mobile platforms, but using it is quite inconvenient.
Firstly, you will need to pack all the palettes into one large texture. Then you use the color specified in the SpriteRenderer component (AKA vertex color) to determine the line to be read from the palette texture into the shader. That is, the palette of this sprite is controlled through SpriteRenderer.color. Vertex color is the only SpriteRenderer property that can be changed without breaking the condition (provided that all materials are the same).
In most cases, it is best to use the alpha channel to control the index, because you probably will not need a bunch of sprites with different transparency.
The code:
sampler2D _MainTex; sampler2D _PaletteTex; float4 _PaletteTex_TexelSize; half4 frag(v2f input) : SV_TARGET { half4 lookup = tex2D(_MainTex, input.uv); half2 paletteUV = half2( lookup.r * _(PaletteTex_TexelSize.x / 0.00390625f), input.color.a * _(PaletteTex_TexelSize.y / 0.00390625f) ) half4 color = tex2D(_PaletteTex, paletteUV); color.a *= lookup.a; color.rgb *= input.color.rgb; return color; }

The wonders of replacing palettes and sprite layers. So many combinations.
III. Automate everything and use the right tools.
To implement this function, automation was absolutely necessary, because as a result I got about 300 animations and thousands of sprites.
My first step was to create an exporter for Aseprite to manage my insane sprite layer scheme using a convenient command line interface . This is just a perl script that bypasses all layers and labels in my Aseprite file and exports images in a specific directory and name structure so that I can read them later.
Then I wrote an importer for Unity. Aseprite displays a convenient JSON file with frame data, so you can create animation assets programmatically. Handling Aseprite JSON and writing this data type turned out to be pretty tedious, so I bring them here. You can easily load them into Unity using JsonUtility.FromJson <AespriteData>, just remember to run Aseprite with the option --format 'json-array'.
The code:
[System.Serializable] public struct AespriteData { [System.Serializable] public struct Size { public int w; public int h; } [System.Serializable] public struct Position { public int x; public int y; public int w; public int h; } [System.Serializable] public struct Frame { public string filename; public Position frame; public bool rotated; public bool trimmed; public Position spriteSourceSize; public Size sourceSize; public int duration; } [System.Serializable] public struct Metadata { public string app; public string version; public string format; public Size size; public string scale; } public Frame[] frames; public Metadata meta; }
On the Unity side, I had serious problems in two places: loading / slicing a sprite sheet and building an animation clip. A clear example would help me a lot, so here is a snippet of code from my importer so that you do not suffer so much:
The code:
TextureImporter textureImporter = AssetImporter.GetAtPath(spritePath) as TextureImporter; textureImporter.spriteImportMode = SpriteImportMode.Multiple; SpriteMetaData[] spriteMetaData = new SpriteMetaData[aespriteData.frames.Length]; // Slice the spritesheet according to the aesprite data. for (int i = 0; i < aespriteData.frames.Length; i++) { AespriteData.Position spritePosition = aespriteData.frames[i].frame; spriteMetaData[i].name = aespriteData.frames[i].filename; spriteMetaData[i].rect = new Rect(spritePosition.x, spritePosition.y, spritePosition.w, spritePosition.h); spriteMetaData[i].alignment = (int)SpriteAlignment.Custom; // Same as "Pivot" in Sprite Editor. spriteMetaData[i].pivot = new Vector2(0.5f, 0f); // Same as "Custom Pivot" in Sprite Editor. Ignored if alignment isn't "Custom". } textureImporter.spritesheet = spriteMetaData; AssetDatabase.ImportAsset(spritePath, ImportAssetOptions.ForceUpdate); Object[] assets = AssetDatabase.LoadAllAssetsAtPath(spritePath); // The first element in this array is actually a Texture2D (ie the sheet itself). for (int i = 1; i < assets.Length; i++) { sprites[i - 1] = assets[i] as Sprite; } // Create the animation. AnimationClip clip = new AnimationClip(); clip.frameRate = 40f; float frameLength = 1f / clip.frameRate; ObjectReferenceKeyframe[] keyframes = new ObjectReferenceKeyframe[aespriteData.frames.Length + 1]; // One extra keyframe is required at the end to express the last frame's duration. float time = 0f; for (int i = 0; i < keyframes.Length; i++) { bool lastFrame = i == keyframes.Length - 1; ObjectReferenceKeyframe keyframe = new ObjectReferenceKeyframe(); keyframe.value = sprites[lastFrame ? i - 1 : i]; keyframe.time = time - (lastFrame ? frameLength : 0f); keyframes[i] = keyframe; time += lastFrame ? 0f : aespriteData.frames[i].duration / 1000f; } EditorCurveBinding binding = new EditorCurveBinding(); binding.type = typeof(SpriteRenderer); binding.path = ""; binding.propertyName = "m_Sprite"; AnimationUtility.SetObjectReferenceCurve(clip, binding, keyframes); AssetDatabase.CreateAsset(clip, "Assets/Animation/" + name + ".anim"); AssetDatabase.SaveAssets();
If you haven’t done this yet, then believe me - it’s very easy to start creating your own tools. The simplest trick is to place a GameObject in the scene with the MonoBehaviour attached to it, which has the [ExecuteInEditMode] attribute. Add a button and you are ready for battle! Remember that your personal tools do not have to look good, they can be purely utilitarian.
The code:
[ExecuteInEditMode] public class MyCoolTool : MonoBehaviour { public bool button; void Update() { if (button) { button = false; DoThing(); } } }
When working with sprites, it is quite easy to automate standard tasks (for example, creating palette textures or batch replacing colors in several sprite files). Here is an example from which you can start learning how to change your sprites.
The code:
string path = "Assets/Whatever/Sprite.png"; Texture2D texture = AssetDatabase.LoadAssetAtPath<Texture2D>(path); TextureImporter textureImporter = AssetImporter.GetAtPath(path) as TextureImporter; if (!textureImporter.isReadable) { textureImporter.isReadable = true; AssetDatabase.ImportAsset(path, ImportAssetOptions.ForceUpdate); } Color[] pixels = texture.GetPixels(0, 0, texture.width, texture.height); for (int i = 0; i < pixels.Length; i++) { // Do something with the pixels, eg replace one color with another. } texture.SetPixels(pixels); texture.Apply(); textureImporter.isReadable = false; // Make sure textures are marked as un-readable when you're done. There's a performance cost to using readable textures in your project that you should avoid unless you plan to change a sprite at runtime. byte[] bytes = ImageConversion.EncodeToPNG(texture); File.WriteAllBytes(Application.dataPath + path.Substring(6), bytes); AssetDatabase.ImportAsset(path, ImportAssetOptions.ForceUpdate);
How I Outgrew Mecanim Opportunities: Complaint
Over time, the prototype modular sprite system that I created using Mecanim became the biggest problem when upgrading Unity, because the API was constantly changing and was poorly documented. In the case of a simple state machine, it would be wise to be able to query the status of each clip or change clips at runtime. But no! For performance reasons, Unity bakes clips in their state and forces us to use a clumsy redefinition system to change them.
Mecanim itself is not such a bad system, but it seems to me that it does not manage to realize its main declared feature - simplicity. The idea of the developers was to replace what seemed complicated and painful (scripting) with something simple (visual state machine). However:
- Any non-trivial finite state machine quickly turns into a wild web of nodes and connections, the logic of which is scattered across different layers.
- Simple use cases are hindered by generalized system requirements. To play one or two animations, you need to create a new controller and assign states / transitions. Of course, there is an excessive waste of resources.
- It's funny that as a result, you still have to write code, because for the state machine to do something interesting, you need a script that calls Animator.SetBool and similar methods.
- For multiple use of the state machine with other clips, you need to duplicate it and replace the clips manually. In the future, you will have to make changes in several places.
- If you want to change what is in a state at runtime, then you have problems. The solution is either a bad API or a crazy graph with one node for every possible animation.
The story of how Firewatch developers got into the hell of visual scripting . The funny thing is that when the speaker shows the simplest examples, they still look crazy. Spectators literally groan at 12:41 . Add huge maintenance costs, and you will understand why I strongly dislike this system.
Many of these problems are not even the fault of Mecanim developers, but simply the natural result of incompatible ideas: you cannot create a common and at the same time simple system, and describing logic using images is more difficult than just words / symbols (does anyone remember the UML flowcharts?) . I recalled a fragment from Zack McClendon 's report at Practice NYC 2018 , and if I have time, I recommend that you watch the whole video!
However, I figured it out. Visual scripting is always censured by aggressive "write your own engine" nerds that do not understand the needs of the artist. In addition, it cannot be denied that most of the code looks like incomprehensible technical jargon.
If you are already a little programmer and make games with sprites, then you may need to think twice. When I started, I was sure that I could never write something related to the engine better than Unity developers.
And you know what? It turned out that the sprite animator is just a script that changes the sprite after a specified number of seconds. Be that as it may, I still had to write my own. Since then I have added animation events and other functions to my specific project, but the basic version that I wrote in half a day covers 90% of my needs. It consists of only 120 lines and can be downloaded for free from here: https://pastebin.com/m9Lfmd94 . Thank you for reading my article. See you!
All Articles