Home-made Geiger counter on ESP8266 with touch screen
I developed and assembled a Geiger counter - a device capable of detecting ionizing radiation and warning about dangerous levels of radiation in the environment with familiar clicks. It can also be used to search for minerals, and determine if uranium ore is found in the stone you found!
On the Internet you can find many ready-made kits and instructions for assembling a Geiger counter, but I wanted to do something unique - and I developed a GUI-display with touch controls and beautiful display of information on the screen.
Step 1: basic theory
The principle of operation of the Geiger counter is simple. A thin-walled tube with gas at low pressure inside (Geiger-Muller tube) is exposed to high voltage current. The generated electric field is not enough for dielectric breakdown, so the current does not flow through the tube - until the photon of ionizing radiation passes through it.
When beta or gamma radiation passes through the tube, it can ionize part of the gas molecules inside, which leads to the appearance of free electrons and positive ions. Particles begin to move under the influence of an electric field, and electrons gain enough speed to begin to ionize other molecules, which leads to a cascade of charged particles that begin to conduct current for a short time. This brief current pulse can be detected using the above scheme, which creates a clicking sound, or, as in this case, transfers information to a microcontroller that can perform calculations with this data.
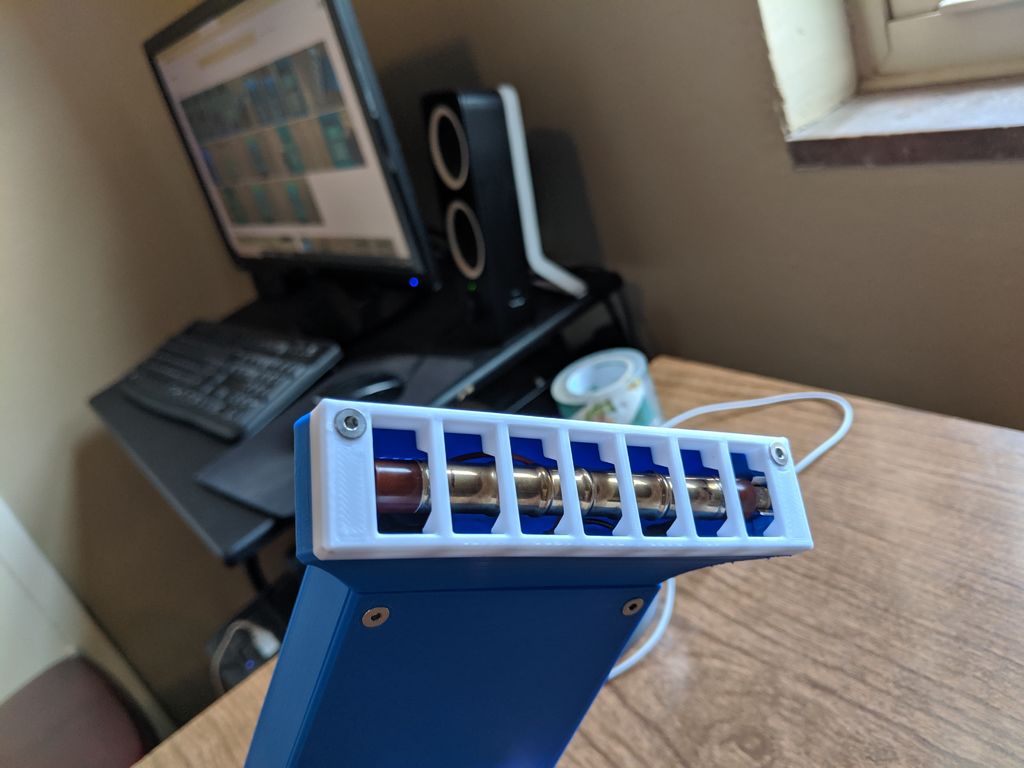
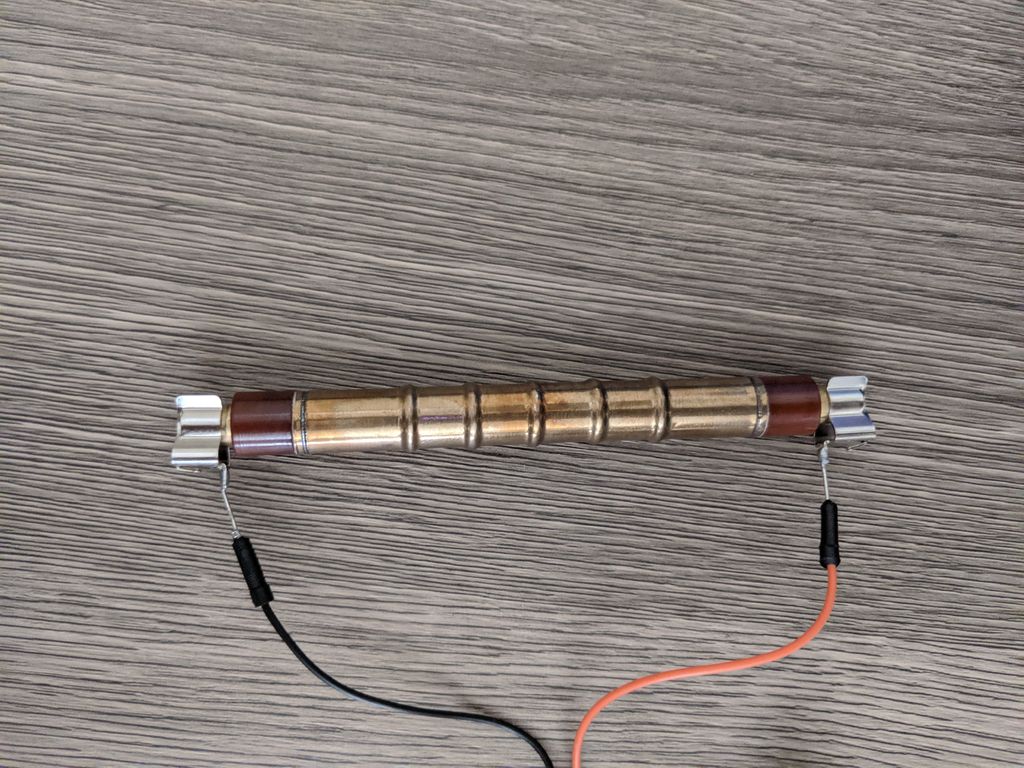
I use the SBM-20 Geiger-Muller tube because it is easy to find on eBay and it is quite sensitive to beta and gamma radiation.
Step 2: parts and assembly
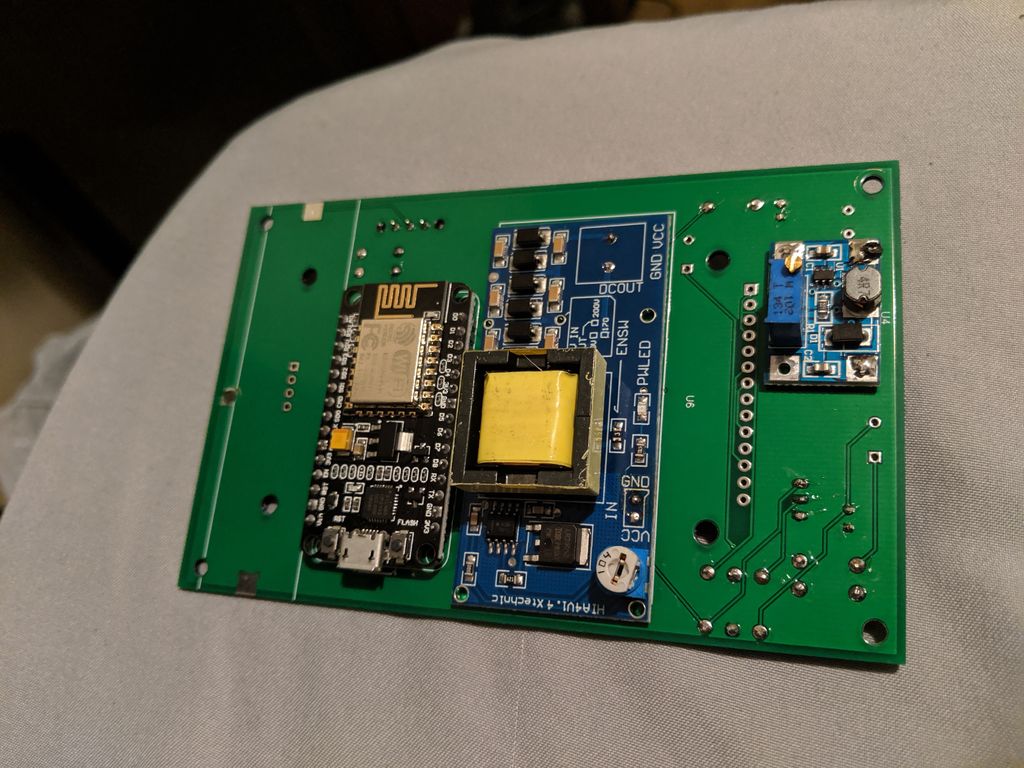
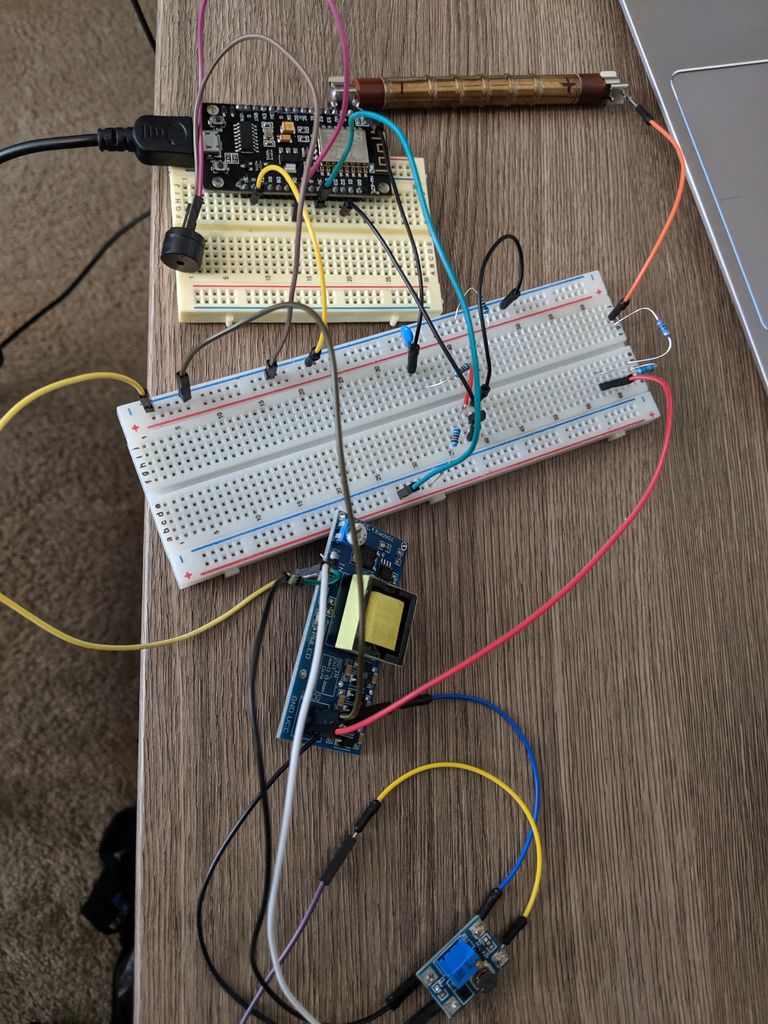
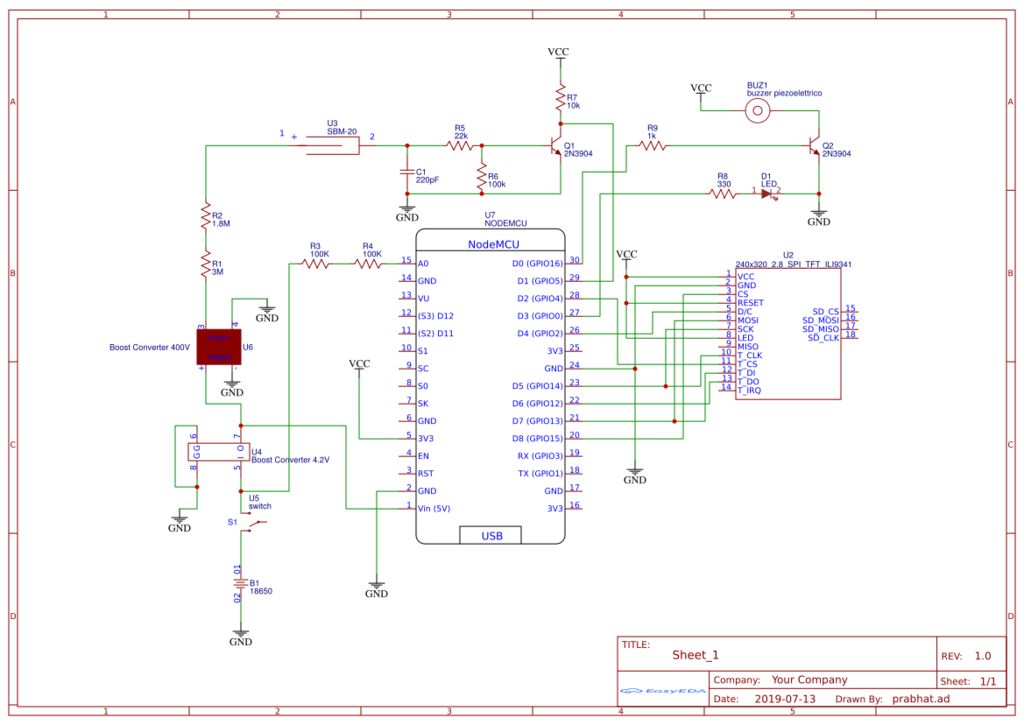
As the brain of the project, I used the NodeMCU board with the ESP8266 microcontroller. I wanted to take something that could be programmed like Arduino, and that would be fast enough to render the image on the screen without delay.
To supply high voltage, I used a transformer with Aliexpress - it supplies 400 V to the Geiger-Muller tube. Keep in mind that when checking the output voltage, it cannot be measured directly with a multimeter - if the impedance is too low, the voltage will drop and the readings will be inaccurate. Make a voltage divider with a resistance of at least 100 megohms in series with the multimeter.
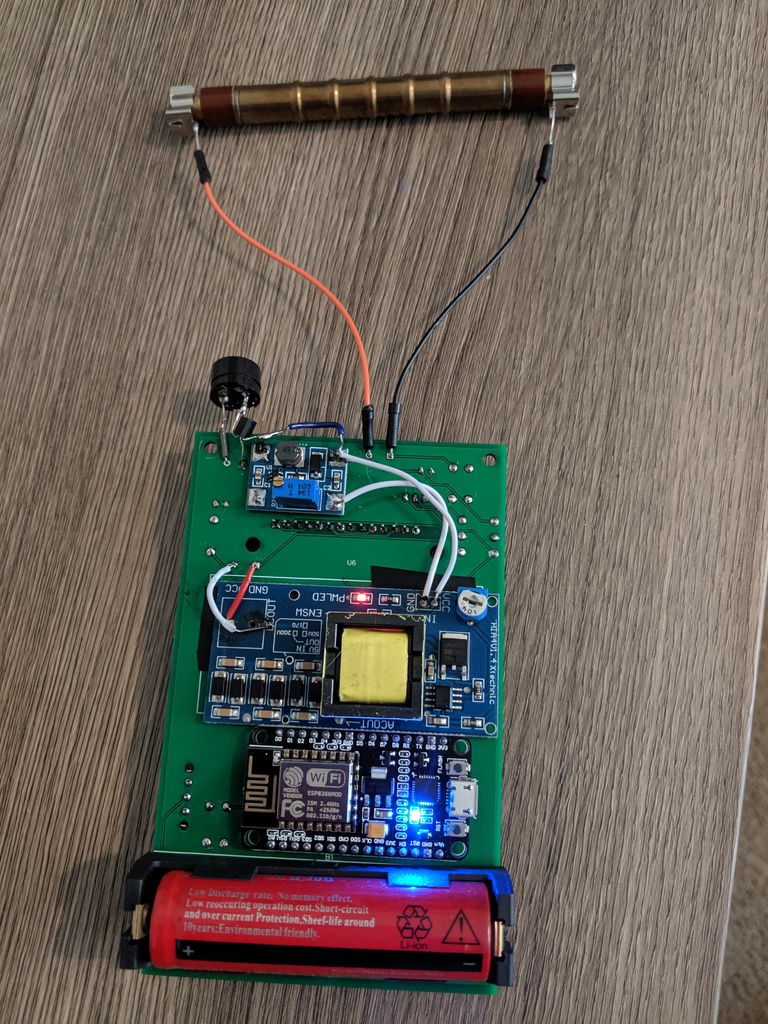
The device is powered by a 18650 format battery, through another transformer that supplies a stable 4.2 V to the remaining circuit.
Here is a list of all the necessary components:
- SBM-20 GM handset (search on eBay).
- High Voltage Transformer ( AliExpress ).
- Transformer for 4.2V ( AliExpress ).
- NodeMCU esp8266 board ( Amazon ).
- 2.8 "SPI touch screen ( Amazon ).
- 18650 battery ( Amazon ) or any 3.7 V LiPo battery (500+ mAh).
- 18650 battery holder ( Amazon ). This holder turned out to be too big for the board, and I had to bend the contacts inward. I recommend taking a smaller LiPo battery and soldering the wires from the JST connector to the power contacts on the board.
Various electronic components:
- Resistors at 330, 1K, 10K, 22K, 100K, 1.8M, 3M Ohms. To create a voltage divider, 10 MΩ resistors are also required.
- Capacitors: 220 pF.
- Transistors: 2N3904.
- LED 3 mm.
- Tweeter: any 12-17 mm piezoelectric element.
- Fuse holder 6.5 x 32 (for reliable mounting of the tube).
- 12 mm switch.
On my GitHub, I posted the diagram in PDF - it shows how to connect all the components. Most likely, it’s cheaper to order them from wholesalers like DigiKey or LCSC. GitHub has a tag plate with my order with LCSC for most components.
It is not necessary to make a board, but with it assembly of the circuit becomes easier and more accurate. I also posted the Gerber files for the production of the board on GitHub. After I received the finished board, I made several corrections in the circuit, so additional jumpers in the new circuit are not needed - although I did not check it.
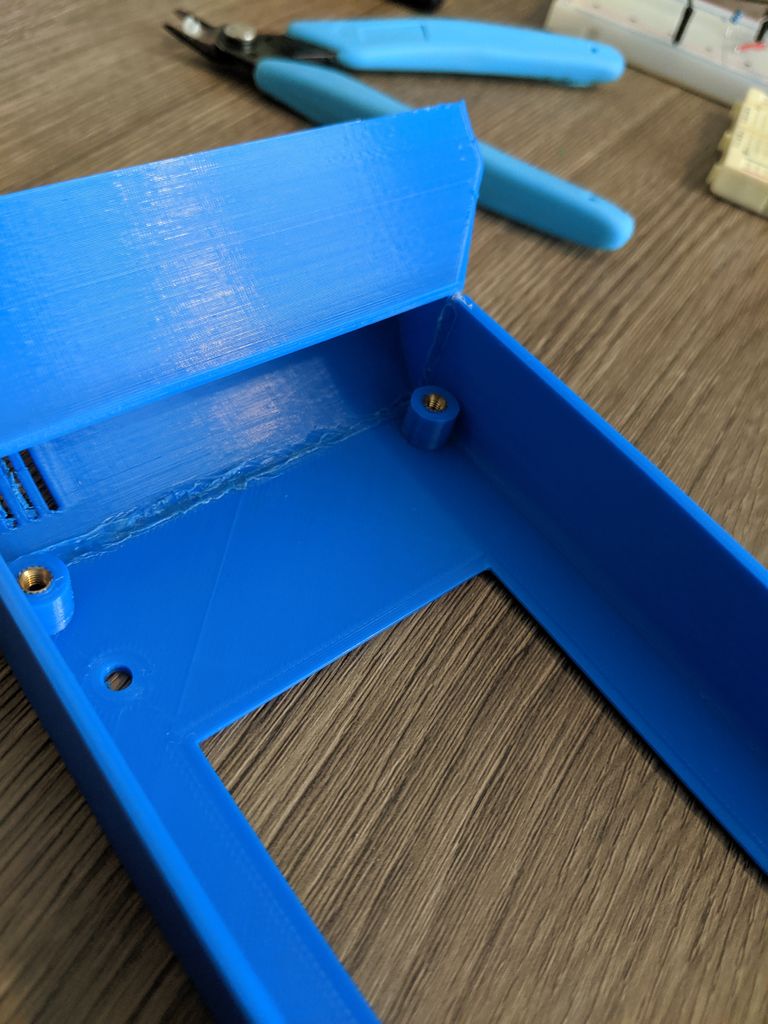
The case is printed on a 3D printer made of PLA plastic, they can be downloaded here . I tweaked the CAD files by adding holes for attaching a new board. Everything should work, although I have not tested it.
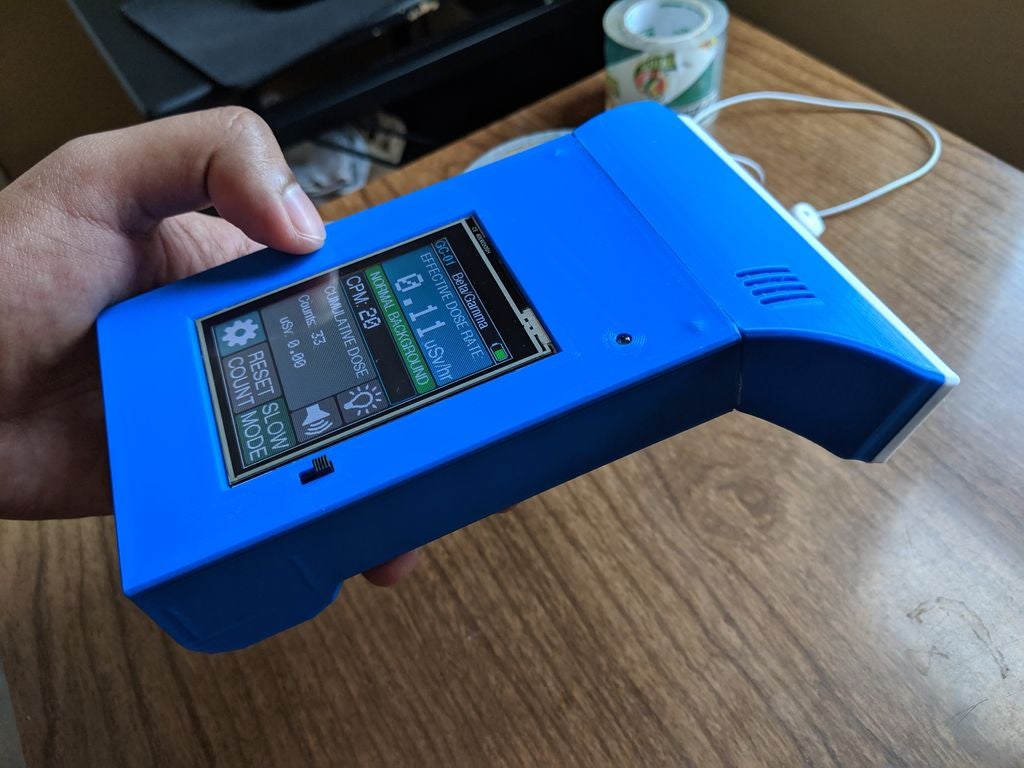
Step 3: code and user interface
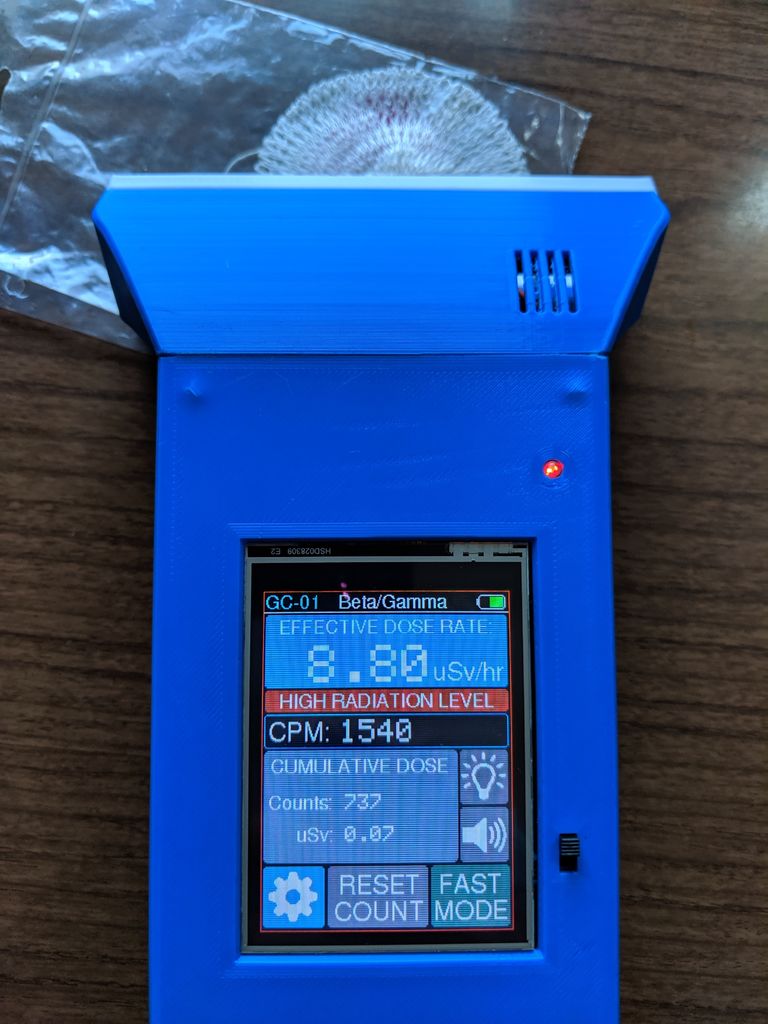

I used the Adafruit GFX library to create the display interface. The code is posted on GitHub .
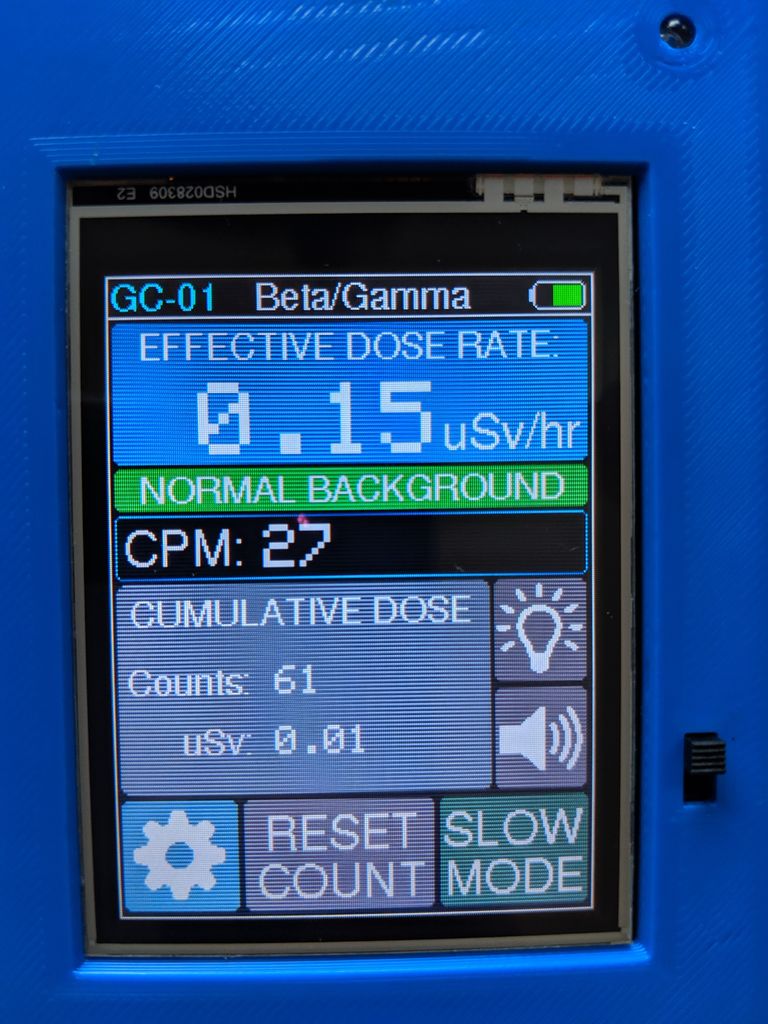
The main page of the interface shows the current dose, the number of operations per minute and the total accumulated dose since the device was turned on. The user can switch between fast and slow summation, changing the interval for calculating subtotals from 3 to 60 seconds. The squeaker and LED can be turned on and off separately.
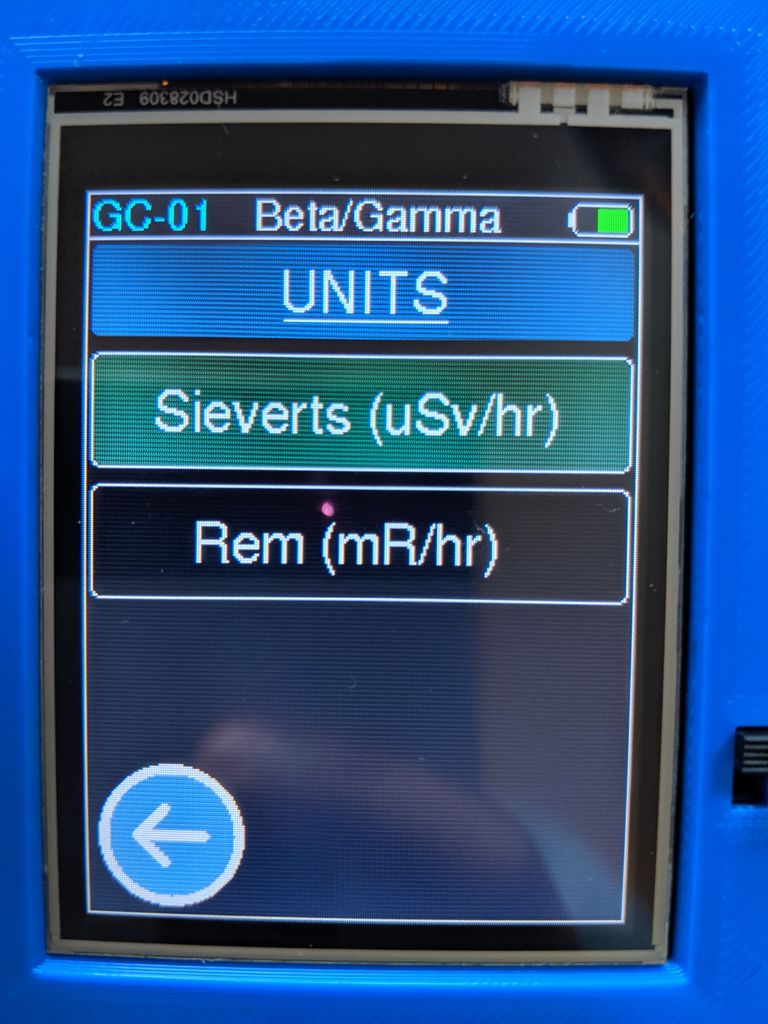
There is a menu of basic settings that allows the user to change the dose unit, warning threshold and calibration factor, which relates the number of operations per minute and the dose rate. All settings are saved in the EEPROM, and restored after a restart.
Step 4: verification and conclusion
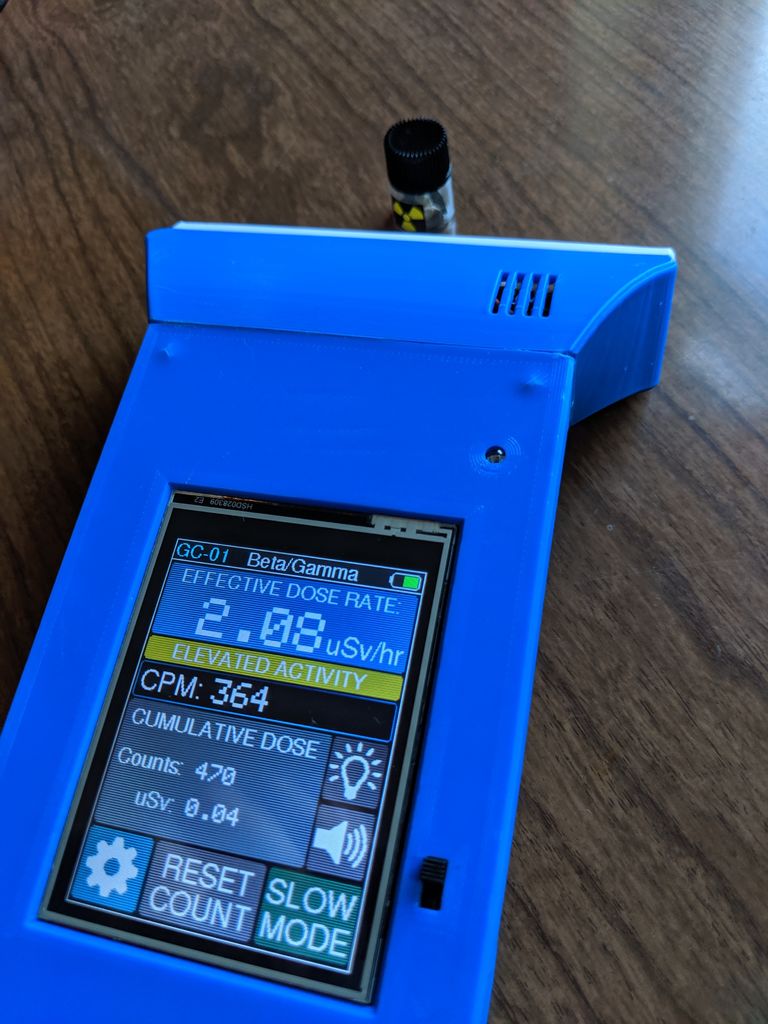
The Geiger counter is triggered 15-30 times per minute from natural background radiation, which is to be expected from the SBM-20 tube. A small sample of uranium ore is recorded as moderately radioactive, at around 400 clicks per minute, and a thorium lamp can cause the counter to record 5,000 clicks per minute, if you keep it close to it!
The meter consumes 180 mA at 3.7 V, so a 2000 mAh battery should last about 11 hours.
I plan to accurately calibrate the tube on a standard source of cesium-137, which will make the readings more accurate. As future improvements, you can add WiFi support and data recording, as the ESP8266 has built-in WiFi.
I hope you found my project interesting!
All Articles