My fourth day with Haiku: installation and boot problems

TL; DR: After a few days of experimenting with Haiku, I decided to put it on a separate SSD. But everything turned out to be not so difficult.
Haiku loading test work is underway.
Three days ago, I learned about Haiku, an unexpectedly good PC operating system. It’s the fourth day and I wanted to do more “real work” with this system, and the section in the Anyboot image is too small for this. Then I pick up a brand new 120GB SSD, I'm getting ready for the smooth operation of the installer ... And I’ll have a bummer!
Installation and download are usually given increased attention and love, as these are the first and most important impressions. It is hoped that the protocol of my "novice" experience will prove useful to the Haiku development team in their ongoing efforts to debug an operating system that "just works." I take all the mistakes on myself!
It seems to me that the situation with downloading via USB will be especially important, since not every user is ready to use the main SATA-drive (I'm already silent about NVME ...) for experiments with a completely unfamiliar operating system. It seems to me that downloading via USB is the most likely scenario for most users who decide to try Haiku on real hardware. Developers should seriously consider this.
Developer Comment:
We just started supporting EFI by quickly writing a beta version that loads on machines with EFI support. The results obtained are still far from the desired level of support. I don’t know if we should document the current work, or just focus on achieving the proper result, after which we will document everything.
It sounds meaningful, and there is hope that in the end everything will be much better than now. So far, I can only check what has been done for today. Let's get started ...
Anyboot image is too small
Despite the fact that the Anyboot image is surprisingly easy to write to a regular USB flash drive, it does not have enough space on the Haiku partition to install additional software.
Writing an Anyboot image to a USB flash drive is, in principle, quite simple, but as a result, there is not enough space for real work.
Quick fix: increase the default Haiku partition size.
So for real work with Haiku you still need to install it using the Installer application.
Installer does not do everything you need in one place
Remember the great Mac OS X installer?

Mac OS X 10.2 Installer
Is he:
- initializes disks (writes GPT, GUID partition table)
- creates partitions (EFI, primary) using "common sense" (for the best use of the drive)
- marks the boot partition (sets the bootable flag on it)
- copies files
In other words, he does "everything" without too much fuss for the user.
On the other hand, there is Installer for Haiku, which simply copies files and gives the user everything else, too cumbersome, which even if you have experience, you won’t immediately understand. Especially if you need a system that boots on both BIOS and EFI systems.
What should I do?
I will not say for sure, but, in any case, I assume this:
- Open DriveSetup
- Select a device to install
- Drive-> Initialize-> GUID Partition Map ...-> Continue-> Save Changes-> OK
- Right click on an empty space on the device where the system will be installed
- Create ...-> I enter 256 as the size-> EFI system data (not completely sure) -> Write changes
- Right click on "EFI system data" on the device where the system will be installed
- Initialize-> FAT32 File System ...-> Continue-> I enter the name: "EFI", the capacity of FAT: 32-> Format-> Write changes
- I repeat the right click on an empty place on the desired device
- Create ...-> I enter the name of the section: Haiku, the type of section: Be File System-> Create-> Write changes
- Right click on EFI-> Connect
- I run Installer-> confused by technosleng-> Continue-> To disk: Haiku (made sure that this is the same section that I created before) -> Install
- In the file manager, I copy the EFI directory from the current system to the EFI partition (I believe that this is necessary to boot from EFI)
- [approx. translator: removed this item from the translation; in short - the author did not quite master the creation of a hybrid system for loading both EFI and BIOS]
- turn off
- I connect the newly created disk to the port from which the system will boot exactly [strange, I didn’t have to do this. - approx. translator]
- turn on
It seems to me that it is clearly visible: we need a tool that does everything at the touch of a button, with timely (!) Confirmation that you can wipe the device.
A “quick” solution: make an automagic installer that does everything.
Well, even if not “fast,” then decent. These are the first impressions of the new system. If it fails to install (and I have had it several times), many will simply quietly leave forever.
Technical explanation for DriveSetup according to PulkoMandy
BootManager records a full-fledged boot menu, including the ability to boot several systems from a disk, for this it only needs about 2kb at the beginning of the disk. This is suitable for older disk partitioning schemes, but not for GPT, which uses the same sectors for the partition table. On the other hand, writembr writes a very simplified code to disk, which simply finds the active partition and continues downloading from it. The 400 first bytes on the disk are enough for this code, so it does not intersect with the GPT. It has limited support for GPT-marked drives (but for simple cases, everything will be as it should).
Quick solution: let the GUI to configure BootManager put everything that is installed using writembr onto the disk if GPT markup is detected. No need to put 2kb code on GPT disks. No need to set the bootable flag on the EFI partition, only on the Haiku partition.
First attempt: kernel panic
Equipment
- Acer TravelMate B117 N16Q9 (sold with EndlessOS)
- lspci
- lsusb
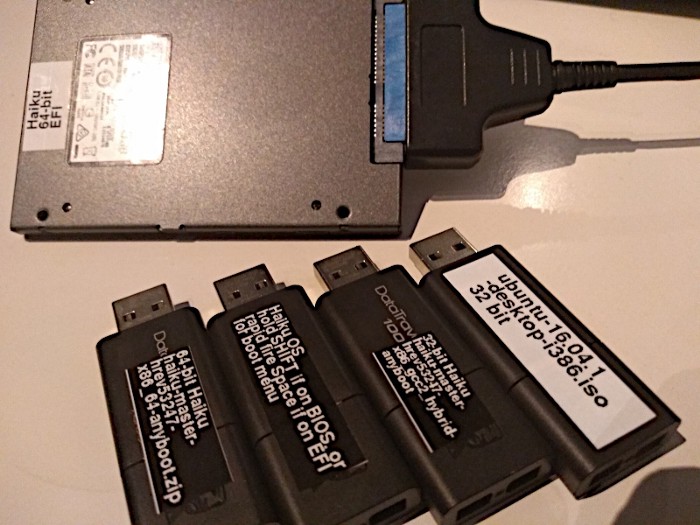
- the existing system was launched from a 16GB Kingston DataTraveler 100 flash drive made from an Anyboot image using Etcher on Linux inserted into a USB2.0 port (because it did not boot from a USB3 port)
- Kingston A400 SSD 120GB in size, only from the factory, plugged into the sata-usb3 adapter ASMedia ASM2115, which is plugged into a USB3 port in TravelMate B117.
results
Installer starts copying files, then an I / O error pops up, followed by kernel panic

kernel panic
Second attempt: non-bootable disk
Equipment
Everything is as before, but the SSD is connected to the adapter, which is connected to the USB2.0 Hub, plugged into the USB3 port in TravelMate. I checked using the Windows installation flash drive that this machine boots from USB3.
results
Unbootable system. Partitioning the disk seems to have flown due to the BootManager.

BootManager "Write boot menu" what destroys disk layout ?!
Third attempt: wow, it loads! But not through the USB3 port on this machine
Equipment
Everything is the same as in the second attempt, but this time I do not use BootManager at all.
Partitioning without starting BootManager looks like this if checked from Linux.

The "efi" section with the FAT32 file system is marked bootable without starting BootManager. Will it run on a non-EFI machine?
results
- EFI Mode, USB2 Port: Download Directly to Haiku
- EFI mode, USB2 hub connected to USB3 port: Message "no boot path found, scan for all partitions ..." , followed by a boot screen with "Select boot volume (Current: haiku)" . The "Continue booting" button is gray, not pressed. If you select "Select Boot Volume" -> Haiku (Current: Latest state) -> Latest state -> Return to main menu -> Continue booting - it loads directly into Haiku. I wonder why it can’t “just boot”, but requires dancing with a tambourine? Moreover, the boot section is clearly automatically found on the boot screen. Software bug?
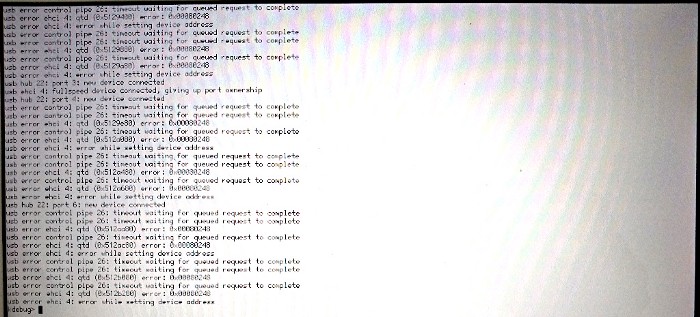
- EFI mode, USB3 port: loaded directly into Haiku. Wow, I'm glad ... Prematurely, as it turned out. A blue screen is displayed, but nothing happens for a long time. The “finger” cursor hangs in the middle of the screen and does not move. The sata-usb3 adapter is blinking. The case ended with kernel panic. The Anyboot image on the USB3 flash drive was not even recognized as bootable on current hardware. Bah, this is a bug! Regarding this, I made a request .

Kernel panic when booting from the USB3 port.
What is amazing is that you can still type commands, but you will have to use the English layout. So, I do as advised :

caption: syslog | tail 15
output syslog | tail 15
syslog | tail 15
- while the kernel panics
Invoking the reboot
command, unfortunately, does not work.
Fourth attempt: second car
I transferred the same (exactly working) disk to another machine, where I checked the work with different ports.
Equipment
All the same as in the third attempt, but on the Acer Revo One RL 85.
results
- EFI mode, USB2 port: Message "no boot path found, scan for all partitions ..." , followed by a boot screen with "Select boot volume (Current: haiku)" . The "Continue booting" button is gray, not pressed. If you select "Select Boot Volume" -> Haiku (Current: Latest state) -> Latest state -> Return to main menu -> Continue booting - it loads directly into Haiku. Shutdown hangs on the message "Shutting down ..." .
- EFI mode, USB2 hub plugged into USB3 port: requires clarification
- EFI mode, USB3 port: Message "no boot path found, scan for all partitions ..." , followed by the boot screen with "Select boot volume (Current: haiku)" . The "Continue booting" button is gray, not pressed. If you select "Select Boot Volume" -> Haiku (Current: Latest state) -> Latest state -> Return to main menu -> Continue booting - it loads directly into Haiku.
I draw your attention to the fact that, unlike the first system, there is a normal boot to the desktop without kernel panic. Shutdown hangs on the message "Shutdown is in progress". - EFI mode, sata port: Loaded directly to Haiku. Shutdown hangs on the message "Shutting down ..." .
- CSM BIOS mode, USB2 port: update needed
- CSM BIOS mode, USB2 hub connected to USB3 port: clarification needed
- CSM BIOS mode, USB3 port: update needed
- CSM BIOS mode, sata port: Black screen with the inscription "Reboot and Select proper Boot Device or Insert Boot Media in selected device and press a key" . Came from the CSM BIOS? [ Yes, the exact same message is issued by my system if it does not find the bootloader. - approx. translator]
Fifth attempt: third car
Transferred the same disk to a third machine, checked on different ports.
Equipment
The same as in the third attempt, but on the Dell Optiplex 780. If I am not mistaken - this machine has an early EFI, which apparently always works in the CSM BIOS mode.
results
- USB2 Port: Haiku Download
- USB3 port (via PCIe card, Renesas Technology Corp. uPD720202 USB 3.0 Host Controller): clarification needed
- Sata port: clarification required
Sixth attempt, fourth machine, MacBook Pro
Equipment
Everything is the same as in the third attempt, but with the MacBookPro 7.1
results
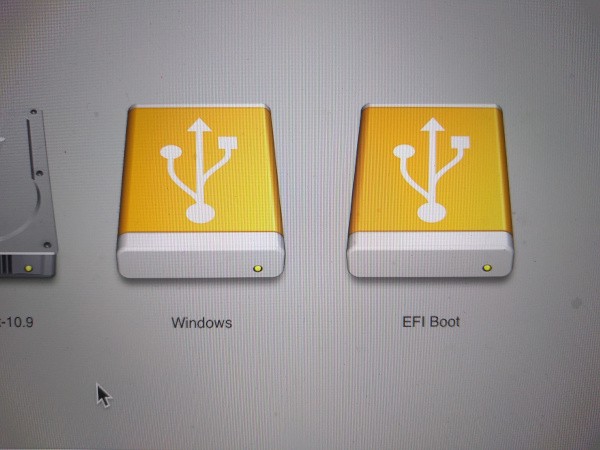
How Mac sees a flash drive with Haiku.
- CSM mode ("Windows"): black screen with the inscription "No bootable drive - insert boot disk and press any key" . Did she come from Apple CSM?
- UEFI mode ("EFI Boot"): stops at the boot device selection screen.
Seventh attempt, Lenovo netbook with 32-bit Atom processor
Equipment
A 16GB Kingston DataTraveler 100 flash drive made on Linux using Etcher using the 32-bit Anyboot image from here .
Lenovo ideapad s10 netbook based on an Atom processor without a hard drive.
lspci of this machine , shot on linux.
lsusb
00:1d.7 USB controller: Intel Corporation NM10/ICH7 Family USB2 EHCI Controller (rev 02) (prog-if 20 [EHCI]) Subsystem: Lenovo NM10/ICH7 Family USB2 EHCI Controller Control: I/O- Mem+ BusMaster+ SpecCycle- MemWINV- VGASnoop- ParErr- Stepping- SERR- FastB2B- DisINTx- Status: Cap+ 66MHz- UDF- FastB2B+ ParErr- DEVSEL=medium >TAbort- <TAbort- <MAbort- >SERR- <PERR- INTx- Latency: 0 Interrupt: pin A routed to IRQ 23 Region 0: Memory at f0844000 (32-bit, non-prefetchable) [size=1K] Capabilities: [50] Power Management version 2 Flags: PMEClk- DSI- D1- D2- AuxCurrent=375mA PME(D0+,D1-,D2-,D3hot+,D3cold+) Status: D0 NoSoftRst- PME-Enable- DSel=0 DScale=0 PME- Capabilities: [58] Debug port: BAR=1 offset=00a0 Kernel driver in use: ehci-pci
results
Downloading, then kernel panic happens, the syslog|tail 15
kDiskDeviceManager::InitialDeviceScan() failed: No such file or directory
displays kDiskDeviceManager::InitialDeviceScan() failed: No such file or directory
after several ATA errors. Note: I tried booting from USB, not sata.
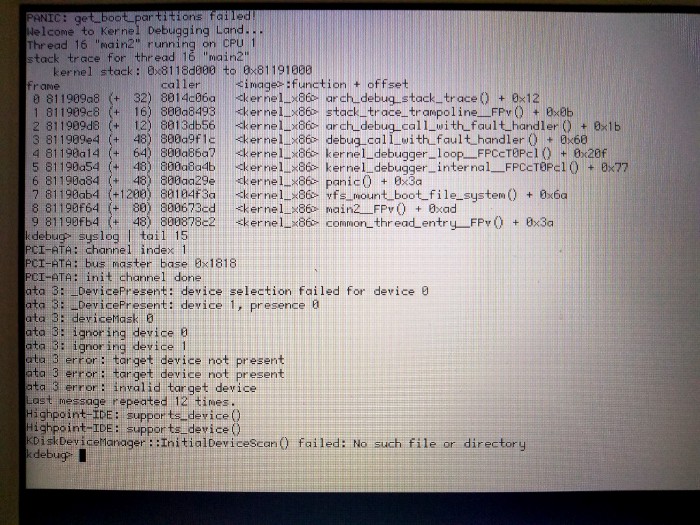
Kernel panic on Lenovo ideapad s10 netbook when booting from a flash drive.
For the sake of fun, I inserted the disk into the sata port, but did not notice much difference with the flash drive. Although I got different messages when using the syslog|tail 15
command (it said it found /dev/disk/ata/0/master/1
).
mr. waddlesplash asked me to execute the `syslog | grep usb
`syslog | grep usb
for this case, so here are the results. I'm still glad that you can run similar commands on the screen with kernel panic.

According to mr. waddlesplash this EHCI error is the same as in this application
Eighth attempt: MSI netbook with 32-bit Atom processor
Equipment
As before
- Netbook Medion Akoya E1210 (labeled MSI Wind U100) with an installed disk (which I do not use for Haiku).
- lspci of this machine
- lsusb of this machine
00:1d.7 USB controller: Intel Corporation NM10/ICH7 Family USB2 EHCI Controller (rev 02) (prog-if 20 [EHCI]) Subsystem: Micro-Star International Co., Ltd. [MSI] NM10/ICH7 Family USB2 EHCI Controller Control: I/O- Mem+ BusMaster+ SpecCycle- MemWINV- VGASnoop- ParErr- Stepping- SERR- FastB2B- DisINTx- Status: Cap+ 66MHz- UDF- FastB2B+ ParErr- DEVSEL=medium >TAbort- <TAbort- <MAbort- >SERR- <PERR- INTx- Latency: 0 Interrupt: pin A routed to IRQ 23 Region 0: Memory at dff40400 (32-bit, non-prefetchable) [size=1K] Capabilities: [50] Power Management version 2 Flags: PMEClk- DSI- D1- D2- AuxCurrent=375mA PME(D0+,D1-,D2-,D3hot+,D3cold+) Status: D0 NoSoftRst- PME-Enable- DSel=0 DScale=0 PME- Capabilities: [58] Debug port: BAR=1 offset=00a0 Kernel driver in use: ehci-pci
results
Boots into Installer Haiku. TouchPad works! (for example, scrolling). The video card was recognized as Intel GMA (i945GME)
.
Ninth attempt: 32-bit flash drive on MacBook Pro
Equipment
- As earlier.
- MacBook 7.1
results
A black screen that says "No bootable drive - insert boot disk and press any key".
Note: Apple Keyboard
In the lower left corner of any keyboard on the bottom row there are the following buttons:
non-Apple: Ctrl-Fn-Windows-Alt-Spacebar
Apple: Fn-Ctrl- (Option or Alt) -Command-Spacebar
It would be great if all the keyboards in Haiku behave the same, so that they can be used the same way, regardless of what is really knocked out on them.
On the Apple keyboard, the Alt button does not go immediately to the left of the space (instead of it there is the Command key).
In this case, I would find that Haiku would automatically use the Command key instead of the Alt key. So, while working on an Apple keyboard, I would feel that the keyboard is non-Apple.
Obviously, there are different options in the settings, but I would like to automatically recognize and adjust, because this is USB, after all.
Note: writembr for recovery?
I heard that using the writembr
command writembr
can make a system (working with EFI) bootable from the BIOS.
/> writembr /dev/disk/.../.../.../.../raw About to overwrite the MBR boot code on /dev/disk/scsi/0/2/0/raw This may disable any partition managers you have installed. Are you sure you want to continue? yes/[no]: yes Rewriting MBR for /dev/disk/.../.../.../.../raw MBR was written OK
It looks good, but as a result, the system is still impossible to load, as before. Perhaps because booting through the BIOS only works with appropriate markup, not GPT? [one should try protective MBR ... - approx. translator]
Conclusion
Haiku is awesome, but it takes a serious approach to gain installation experience. In addition, the boot process is a lottery, with approximately 1/3 chance of success, and it doesn’t matter if you have USB2 (Atom netbook) or USB3 (Acer TravelMate). But at least one developer has the same equipment. I hope that my “Nubian” experience will help developers understand what “mere mortals” need, and also make the result as elegant as the Mac OS X installer. Do not forget that this is not even version 1.0, so everything is very good!
Try it yourself! After all, the Haiku project provides daily download images from DVD or USB. To install, just download the image and write it to a USB flash drive using Etcher
Have a question? We invite you to the Russian-language telegram channel .
Bug Overview: How to shoot yourself in the foot in C and C ++. Haiku OS Recipe Collection
From the author of the translation: this is the fourth article from the Haiku series.
List of articles: First Second Third Fourth Fifth Sixth
All Articles