簡単なKotlinチップ電卓アプリケーションの作成方法を説明します。 より具体的には、Kotlin 1.3.21、Android 4、Android Studio3。この記事は、Androidアプリケーションの開発に旅を始める人々にとって、まず第一に興味深いものです。 アプリケーション内で何がどのように機能するかを理解できます。
このような計算機は、レストランやカフェで時間を過ごすことを決めた会社からのヒントの量を計算する必要があるときに役立ちます。 もちろん、お茶のすべてをウェイターに委ねるわけではなく、これは西洋の伝統ですが、そのようなアプリケーションを開発するプロセスはいずれにしても興味深いものです。
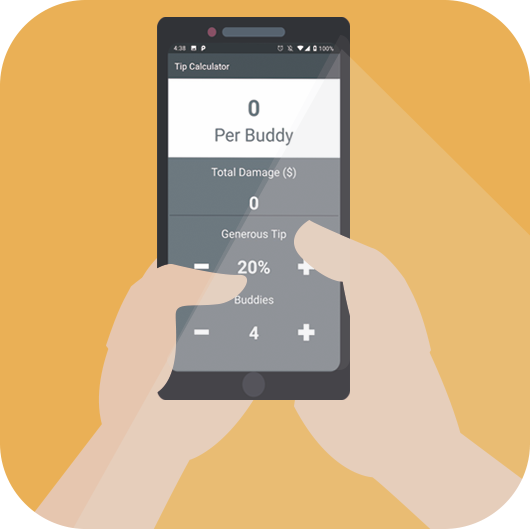
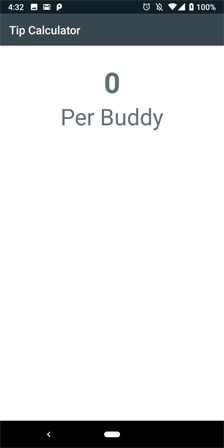
「Habr」の読者には、「Habr」プロモーションコードを使用してSkillboxコースに登録すると10,000ルーブルの割引があります。プロセスでのアプリケーションの外観は次のとおりです。
Skillboxの推奨事項:実践コース「Mobile Developer PRO」 。

合計金額の希望の割合、会議の参加者の数を入力し、結果-残すべきヒントの量を取得します。
はじめに
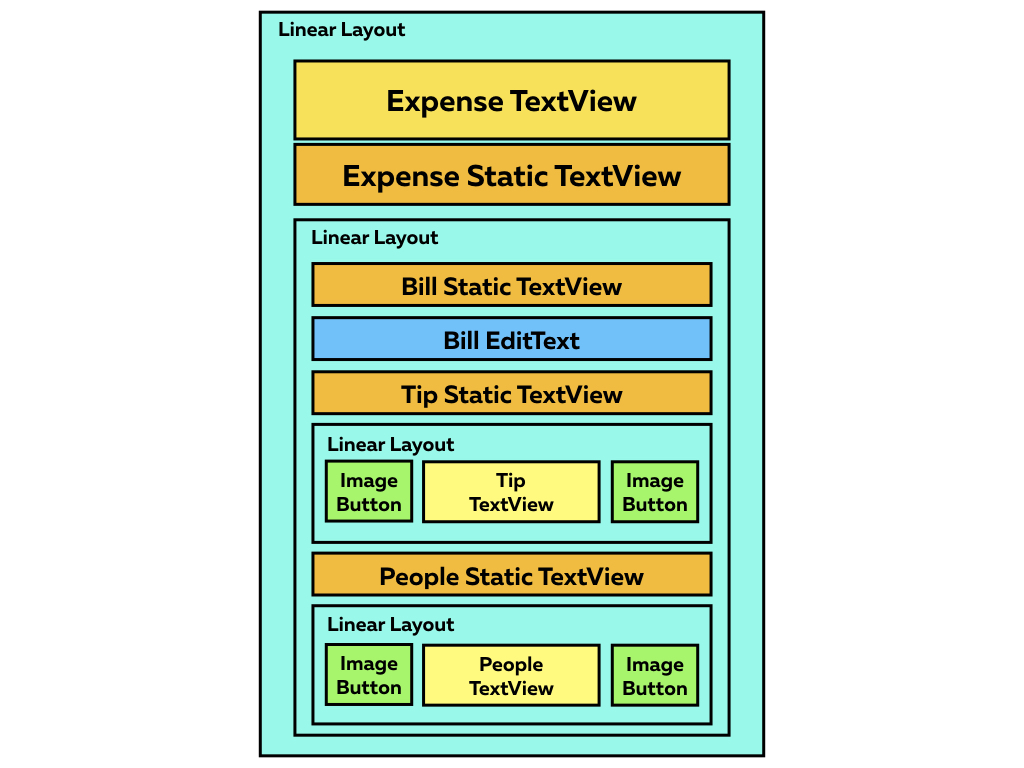
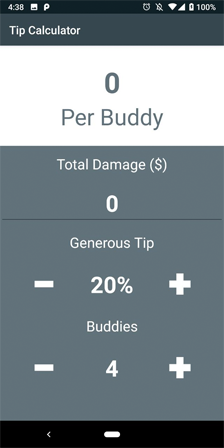
完全なアプリケーションインターフェイスは次のとおりです。
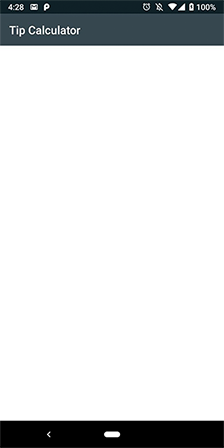
最初のステップは、プロジェクトの基本をダウンロードすることです。 Android Studio 3.0以降で開きます。 プロジェクトをビルドして起動すると、白い画面が表示されます。 すべて順調です。
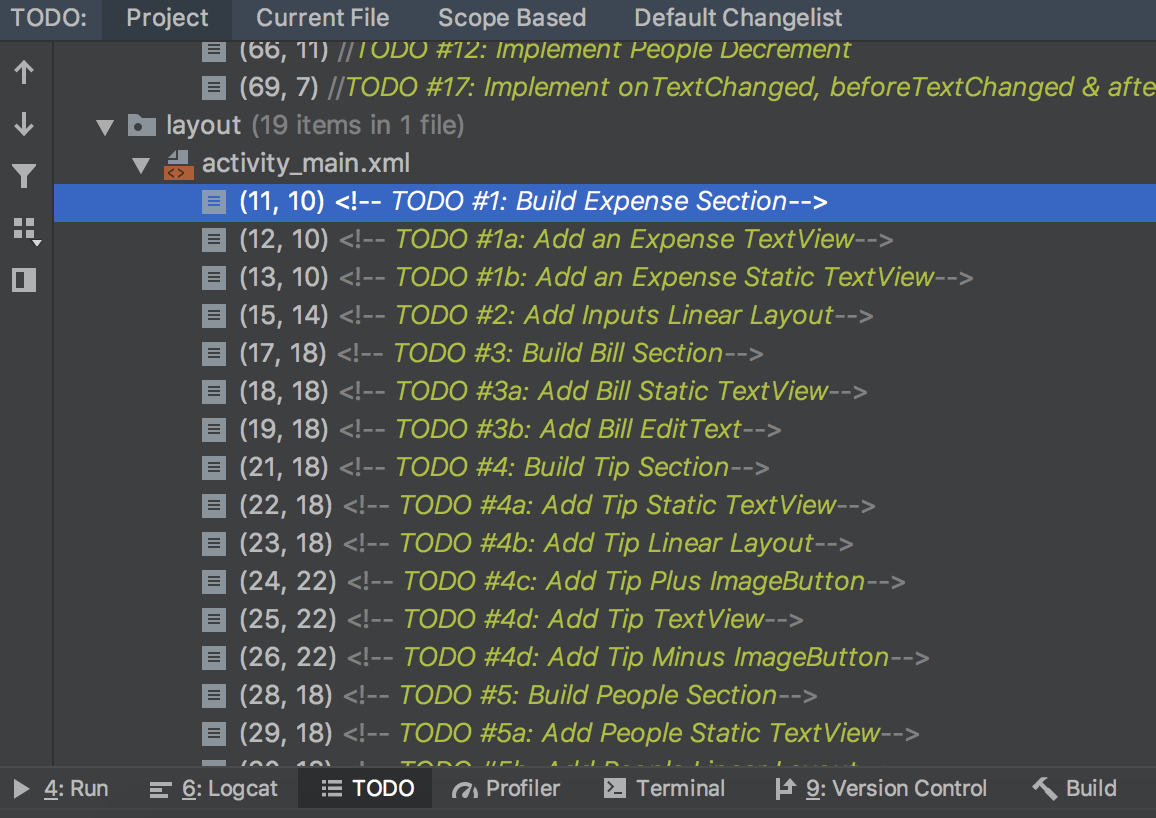
プロジェクトでは、ユーザーのアクションが時系列で記述されているため、すべてが明確になります。 表示するには、[表示]-> [ツールウィンドウ]-> [TODO]を開きます。
プロジェクトを調査し、colors.xmlを開いてカラーパレットを評価します。 テキストデータ(署名)は、strings.xmlに配置され、styles.xmlにはいくつかのフォントパターンがあります。
コストセクションの開発
activity_main.xmlを開き、LinearLayout(#1)に以下のコードを追加します。
<TextView android:id="@+id/expensePerPersonTextView" android:layout_width="match_parent" android:layout_height="wrap_content" android:paddingTop="30dp" style="@style/h1Bold" android:textColor="@color/colorAccent" android:text="0"/> <TextView android:layout_width="match_parent" android:layout_height="wrap_content" android:paddingBottom="25dp" style="@style/h2" android:textColor="@color/colorAccent" android:text="@string/perPersonStaticText"/>
これで、valuesディレクトリのスタイルをカスタマイズしたり、 material.ioツールを使用して色を試すことができます 。
プロジェクトは次のようになります。
ご覧のとおり、コストの計算はユーザーが作成したデータに従って行われます。
アカウントセクションの開発
経費セクション(#2)の後に、LinearLayoutで以下のコードを追加します。
<LinearLayout android:layout_width="match_parent" android:layout_height="match_parent" android:orientation="vertical" android:background="@color/colorAccent"> <! — TODO #3: Build Bill Section → … </LinearLayout>
TODOのリストの後にLinearLayoutを閉じ、新しいコードを追加して、LinearLayout内に配置します(#3):
<TextView android:layout_margin="15dp" android:layout_width="match_parent" android:layout_height="wrap_content" android:textColor="@color/colorWhite" style="@style/h4" android:text="@string/billStaticText"/> <EditText android:id="@+id/billEditText" android:layout_width="match_parent" android:layout_height="wrap_content" android:textColor="@color/colorWhite" android:inputType="numberDecimal" android:maxLines="1" style="@style/h2Bold" android:text="0"/>
アプリケーションの主なタスクは、レストランでの集まりの参加者ごとの個別のコストの計算なので、主な値はcostPerPersonTextViewによって再生されます。
EditTextは入力を1行に制限します;このパラメーターにはNumberDecimal inputType値が必要です。

テスト用のプロジェクトを開始し、全損傷のパラメーター(破損したカップ、プレートなど)を入力します
「人とヒント」セクションの開発
チップボリュームの選択を追加するには、新しいLinearLayoutセクションに以下のコードを挿入します(#4):
<TextView android:layout_margin="15dp" android:layout_width="match_parent" android:layout_height="wrap_content" android:textColor="@color/colorWhite" style="@style/h4" android:text="@string/tipStaticText"/> <LinearLayout android:layout_width="match_parent" android:layout_height="wrap_content" android:orientation="horizontal"> <ImageButton android:id="@+id/subtractTipButton" style="@style/operationButton" android:layout_marginLeft="20dp" android:layout_marginStart="20dp" android:src="@drawable/subtract"/> <TextView android:id="@+id/tipTextView" android:layout_margin="15dp" android:layout_width="0dp" android:layout_height="wrap_content" android:textColor="@color/colorWhite" android:layout_weight="1" style="@style/h2Bold" android:text="20%"/> <ImageButton android:id="@+id/addTipButton" style="@style/operationButton" android:layout_marginEnd="20dp" android:layout_marginRight="20dp" android:src="@drawable/add"/> </LinearLayout>
コードのこのセクションは、チップ量の正確な計算に必要です。 テキストのデフォルト値は20です。ImageButtonsには、書き込み許可を持つフォルダー内のアイコンが提供されます。
セクションを完全にコピーし、以下を追加します(#5):
- ImageButton id(subtractPeopleButton、addPeopleButton)
- TextView id(numberOfPeopleStaticText、numberOfPeopleTextView)
- numberOfPeopleTextViewのDefaultText(4でなければなりません)。
これで、アプリケーションを起動すると、請求書の金額を追加できるようになり、[追加/減算]ボタンも機能しますが、これまでのところ何も起こりませんでした。
ビューを追加
MainActivity.ktを開き、これをinitViews(#6)関数に追加します。
private fun initViews() { expensePerPersonTextView = findViewById(R.id.expensePerPersonTextView) billEditText = findViewById(R.id.billEditText) addTipButton = findViewById(R.id.addTipButton) tipTextView = findViewById(R.id.tipTextView) subtractTipButton = findViewById(R.id.subtractTipButton) addPeopleButton = findViewById(R.id.addPeopleButton) numberOfPeopleTextView = findViewById(R.id.numberOfPeopleTextView) subtractPeopleButton = findViewById(R.id.subtractPeopleButton) //TODO #8: Bind Buttons to Listener //TODO #16: Bind EditText to TextWatcher }
ボタンを完成させる
ボタンクリックのサポートを追加するには、クラスレベルのView.OnClickListener(#7)を実装します。
class MainActivity : AppCompatActivity(), View.OnClickListener {
現在、プロジェクトのコンパイルは機能しません。さらにいくつかの手順を実行する必要があります(#8):
override fun onClick(v: View?) { when (v?.id) { R.id.addTipButton -> incrementTip() R.id.subtractTipButton -> decrementTip() R.id.addPeopleButton -> incrementPeople() R.id.subtractPeopleButton -> decrementPeople() } }
Kotlinのボタンとスイッチに関しては、すべてが非常にクールに整理されています! 以下のコードをすべてのインクリメントおよびデクリメント関数に追加します
(#9-#12):
private fun incrementTip() { if (tipPercent != MAX_TIP) { tipPercent += TIP_INCREMENT_PERCENT tipTextView.text = String.format("%d%%", tipPercent) } } private fun decrementTip() { if (tipPercent != MIN_TIP) { tipPercent -= TIP_INCREMENT_PERCENT tipTextView.text = String.format("%d%%", tipPercent) } } private fun incrementPeople() { if (numberOfPeople != MAX_PEOPLE) { numberOfPeople += PEOPLE_INCREMENT_VALUE numberOfPeopleTextView.text = numberOfPeople.toString() } } private fun decrementPeople() { if (numberOfPeople != MIN_PEOPLE) { numberOfPeople -= PEOPLE_INCREMENT_VALUE numberOfPeopleTextView.text = numberOfPeople.toString() } }
ここで、コードは最大値(MAX_TIPおよびMAX_PEOPLE)でインクリメント関数を保護します。 さらに、このコードは、最小値(MIN_TIPおよびMIN_PEOPLE)でデクリメント関数を保護します。
次に、initViews関数でボタンをリスナーにバインドします(#13):
private fun initViews() { ... addTipButton.setOnClickListener(this) subtractTipButton.setOnClickListener(this) addPeopleButton.setOnClickListener(this) subtractPeopleButton.setOnClickListener(this) //TODO #15: Bind EditText to TextWatcher }
これで、合計ダメージ、ヒント、および会議の参加者の数を追加できます。 さて、今最も重要なこと...
原価計算セクション
このコードはコストを計算します(#14):
private fun calculateExpense() { val totalBill = billEditText.text.toString().toDouble() val totalExpense = ((HUNDRED_PERCENT + tipPercent) / HUNDRED_PERCENT) * totalBill val individualExpense = totalExpense / numberOfPeople expensePerPersonTextView.text = String.format("$%.2f", individualExpense) }
さて、ここでは、会社の人数を考慮してチップを計算できる関数が呼び出されます(#15):
private fun incrementTip() { … } private fun decrementTip() { … } private fun incrementPeople() { … } private fun decrementPeople() { … }
アプリケーションを起動します。 見た目も動作も正常です。 しかし、それは良いかもしれません。
請求書の金額を削除してからヒントや友人の数を増やすと、コスト値ゼロのチェックがないため、アプリケーションがクラッシュします。 また、請求書の金額を変更しようとしても、コストは更新されません。
最終ステップ
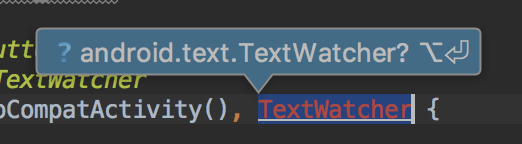
TextWatcherを追加(#16):
class MainActivity : AppCompatActivity(), View.OnClickListener, TextWatcher {
次に、billEditTextリスナーを埋め込みます(#17):
billEditText.addTextChangedListener(this)
さらに、TextWatcherを実行するコードを追加します(#18):
override fun onTextChanged(s: CharSequence?, start: Int, before: Int, count: Int) { if (!billEditText.text.isEmpty()) { calculateExpense() } } override fun afterTextChanged(s: Editable?) {} override fun beforeTextChanged(s: CharSequence?, start: Int, count: Int, after: Int) {}
さて、今では絶対にすべてが機能します! おめでとうございます、あなたはコットリンであなた自身のチップ計算機を書きました。
Skillboxの推奨事項:
- 2年間の実践コース「私はWeb開発者PRO」です。
- オンラインコース「C#-developer」 。
- 実用的な年次コース「PHP開発者0からPRO」 。