既存のIdentityDbContext、IdentityUserと連携します。
結果は、認証ごとにrefresh_tokenが1つ発行され、PersistedGrantsテーブルに格納されるシナリオになります。 これは、OAuth 2.0の4種類のアクセス許可の1つです。
リソース所有者のパスワード資格証明:サービス自体の一部であるアプリケーションなど、信頼できるアプリケーションで使用されます。
すべてのトークンメンテナンス作業は、フレームワークによって行われます。
それでは始めましょう。
解決方法を指定するには、「クライアント」を設定します。1つあります。
DataLayer.Config
new Client { ClientId = _configurationManager.Value.ClientId, AllowedGrantTypes = GrantTypes.ResourceOwnerPassword, // RequireClientSecret = false, //Client Secret , AllowedScopes = { _configurationManager.Value.ApiName, IdentityServerConstants.StandardScopes.OpenId, IdentityServerConstants.StandardScopes.Profile},// /connect/userinfo AllowOfflineAccess = true // - }
次に、このクライアントは作成時にデータベースに配置されます。
TestIdentityServer.Program
services.GetRequiredService<DbInitializer>().Initialize();
「初期化」メソッドでは、必要なデータベースを作成し、クライアントを含むデータを挿入するためのコードが追加されました。 ただし、その前に移行を実行する必要があります。最初のコンテキストがIdentityDbContext ApplicationUserで、残りがIdentityServer4の3つのコンテキストのデータベースを作成する必要があるためです。
DataLayer.DbInitializer
_context.Database.Migrate(); _configurationDbContext.Database.Migrate(); _persistedGrantDbContext.Database.Migrate();
if (!_configurationDbContext.Clients.Any()) { foreach (var client in _config.GetClients().ToList()) { _configurationDbContext.Clients.Add(client.ToEntity()); } _configurationDbContext.SaveChanges(); }
移行:
dotnet ef migrations add InitialIdentityServerPersistedGrantDbMigration -c PersistedGrantDbContext -o Data/Migrations/IdentityServer/PersistedGrantDb dotnet ef migrations add InitialIdentityServerConfigurationDbMigration -c ConfigurationDbContext -o Data/Migrations/IdentityServer/ConfigurationDb dotnet ef migrations add InitialAuthMigration -c AuthContext -o Data/Migrations/IdentityServer/Auth
コードへのリンクは最後にあります。
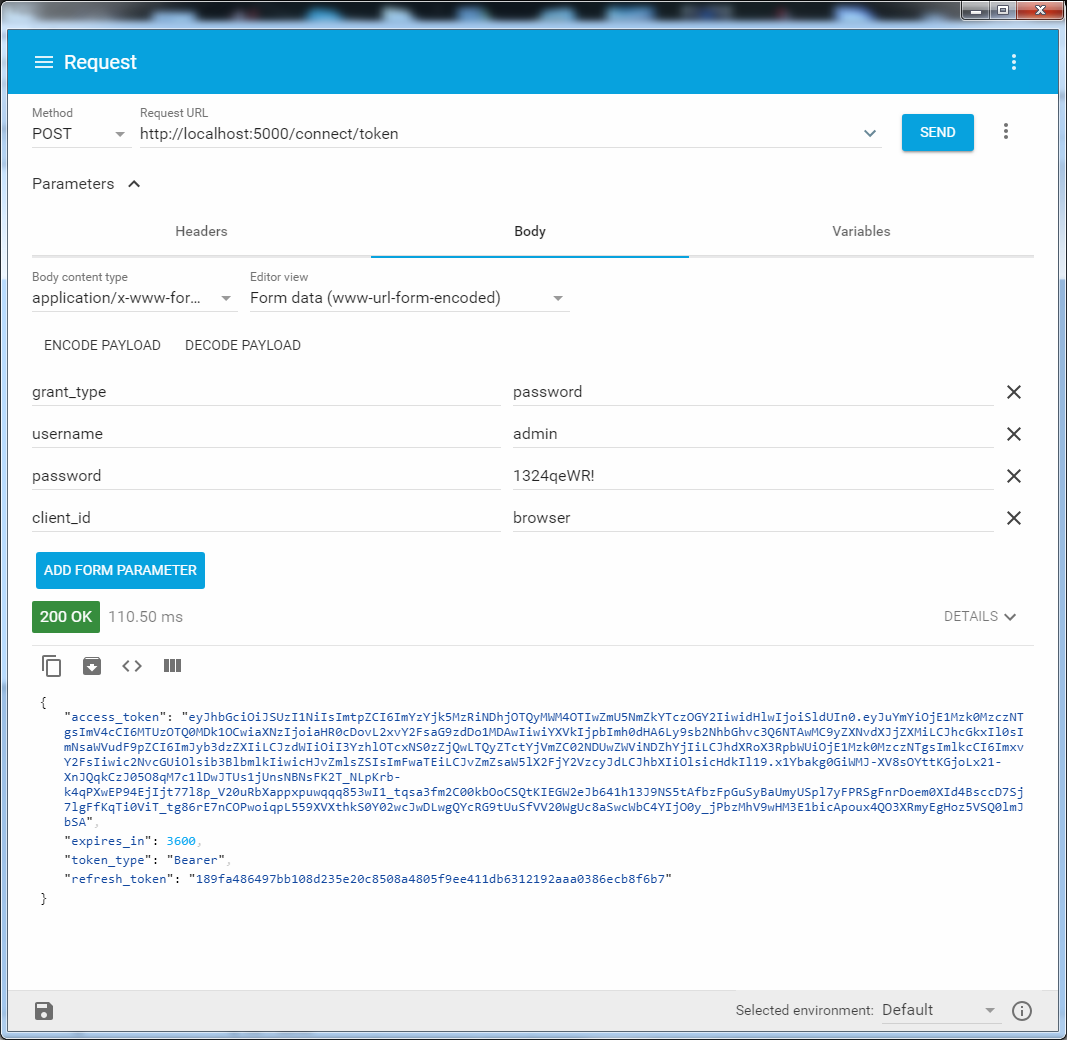
どうぞ クライアントを設定し、データベースを作成した後、サーバーは、パスワードを使用してログインし、refresh_tokenでaccess_tokenを発行することにより、既に「/ connect / token」リクエストを処理できます。
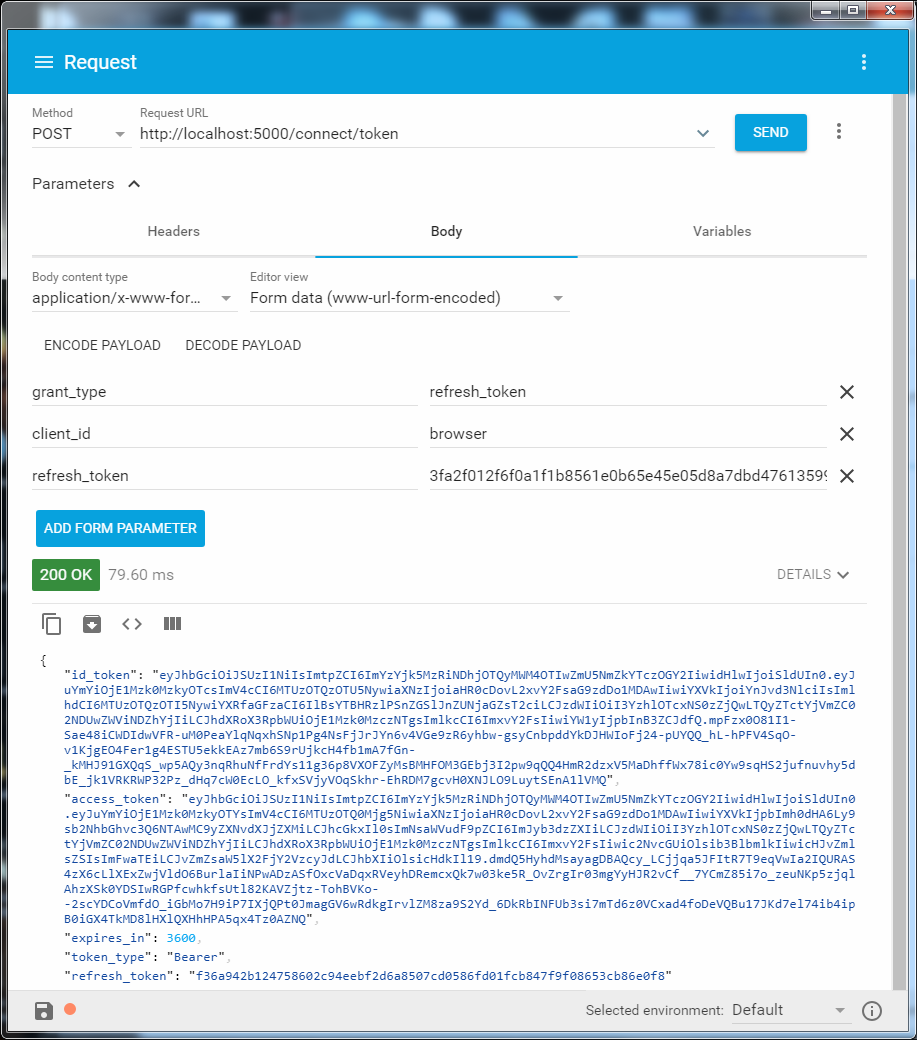
それに応じて、表示refresh_tokenで、それらを更新します。
ユーザー名パスワード:
refresh_token
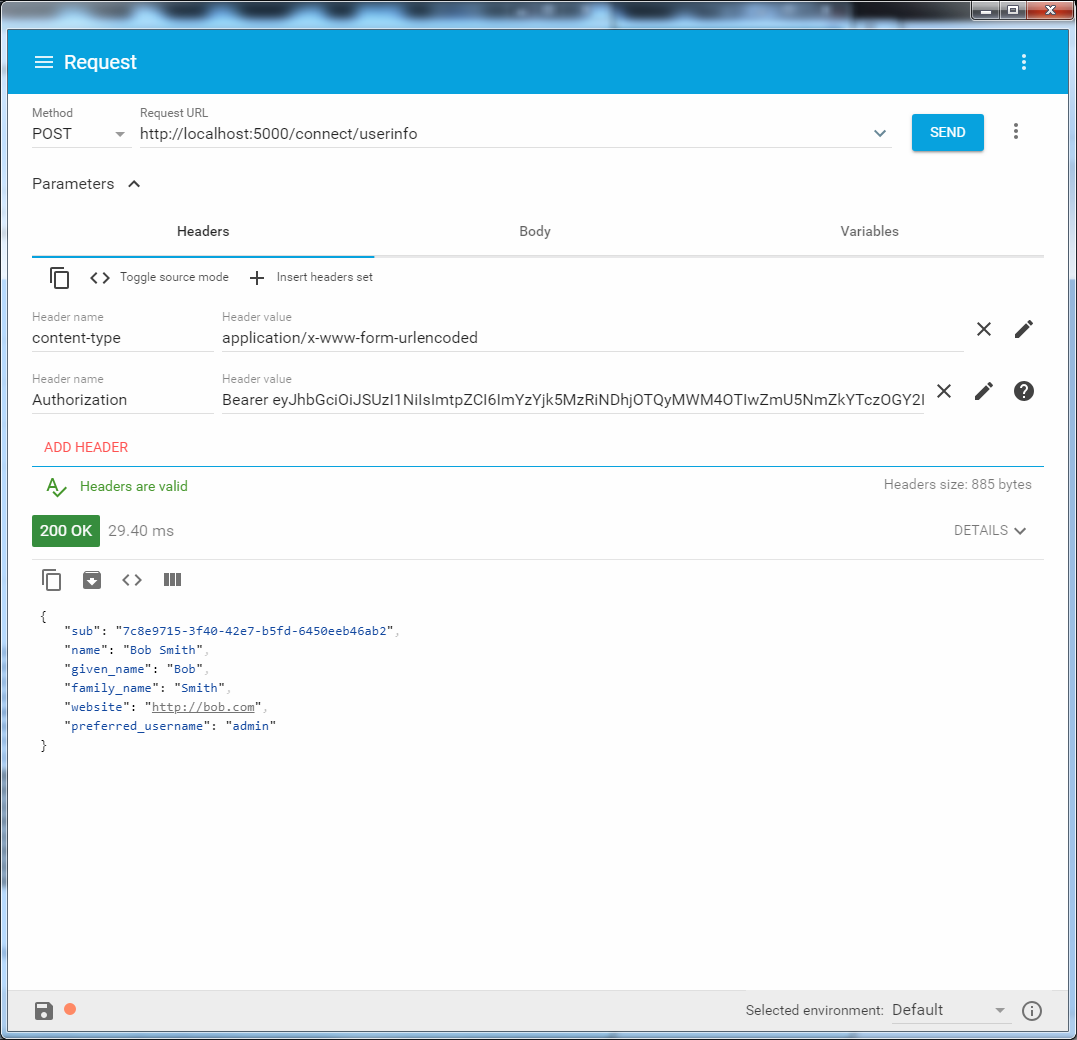
/接続/ userinfo
ここで、IdentityServer4によって承認されるAPIを追加します。 彼との関係は次のようになります。
DataApi.Startup
services.AddAuthentication("Bearer") .AddIdentityServerAuthentication(options => { options.Authority = settings.Authority; // http://localhost:5000 options.RequireHttpsMetadata = false; options.ApiName = settings.ApiName;//api1 });
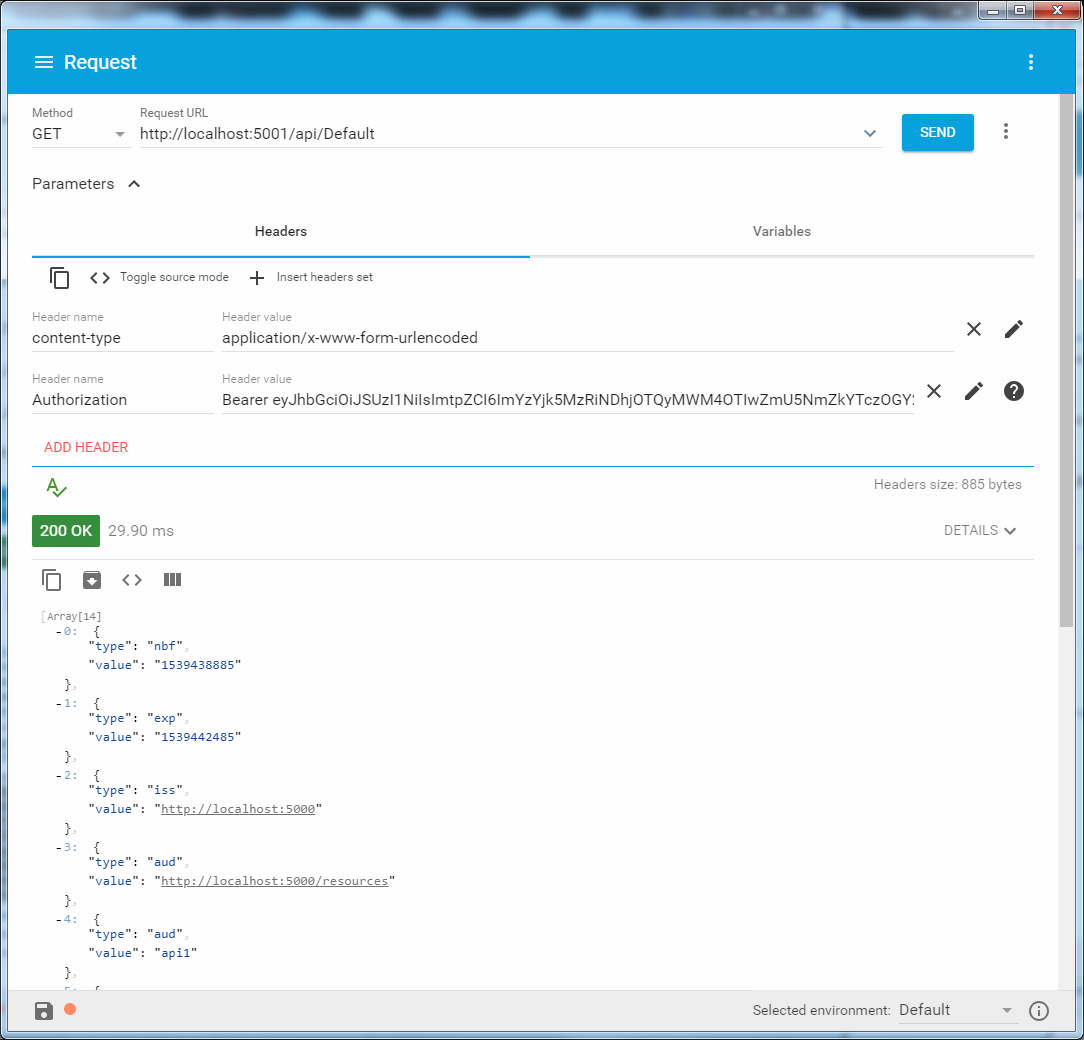
API自体は別のポートにデプロイされます。
「[Authorize]」属性を使用して、通常どおり承認がチェックされます。
/ api /デフォルト
それだけです、誰が何を、または何が欠けていると思うかを書いてください。
コードへのリンク 。
UPD:署名jwtトークン
追加された署名方法:起動時に生成されるRSAおよび* .pfx証明書ファイル。 対応するメソッドは、「appsettings.json」、プロパティ「SigningCredentialConfig」に切り替えることができます。