Centosにpylintをインストールする
pip install pylint
touch pylint.cfg pylint --generate-rcfile > pylint.cfg
ファイルを生成した後、プロジェクトのルートディレクトリに配置する必要があります
ジェンキンスで起動
2.無料の構成でプロジェクト(ジョブ)を作成する
3.ソース管理ポイントで、リポジトリへのリンクを挿入します
4.アセンブリポイントで、「シェルコマンドの実行」または「シェルの実行」を選択します。
find /var/lib/jenkins/workspace/$JOB_NAME/<path/to/check> -iname "*.py" | xargs pylint --disable=all
5.アセンブリ後の操作で、「違反の報告」を選択します
6.プロジェクトを保存して実行します
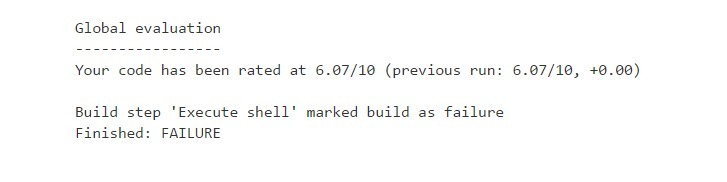
図1 PyLintテスト結果

図2。 PyLintテスト結果-続き1
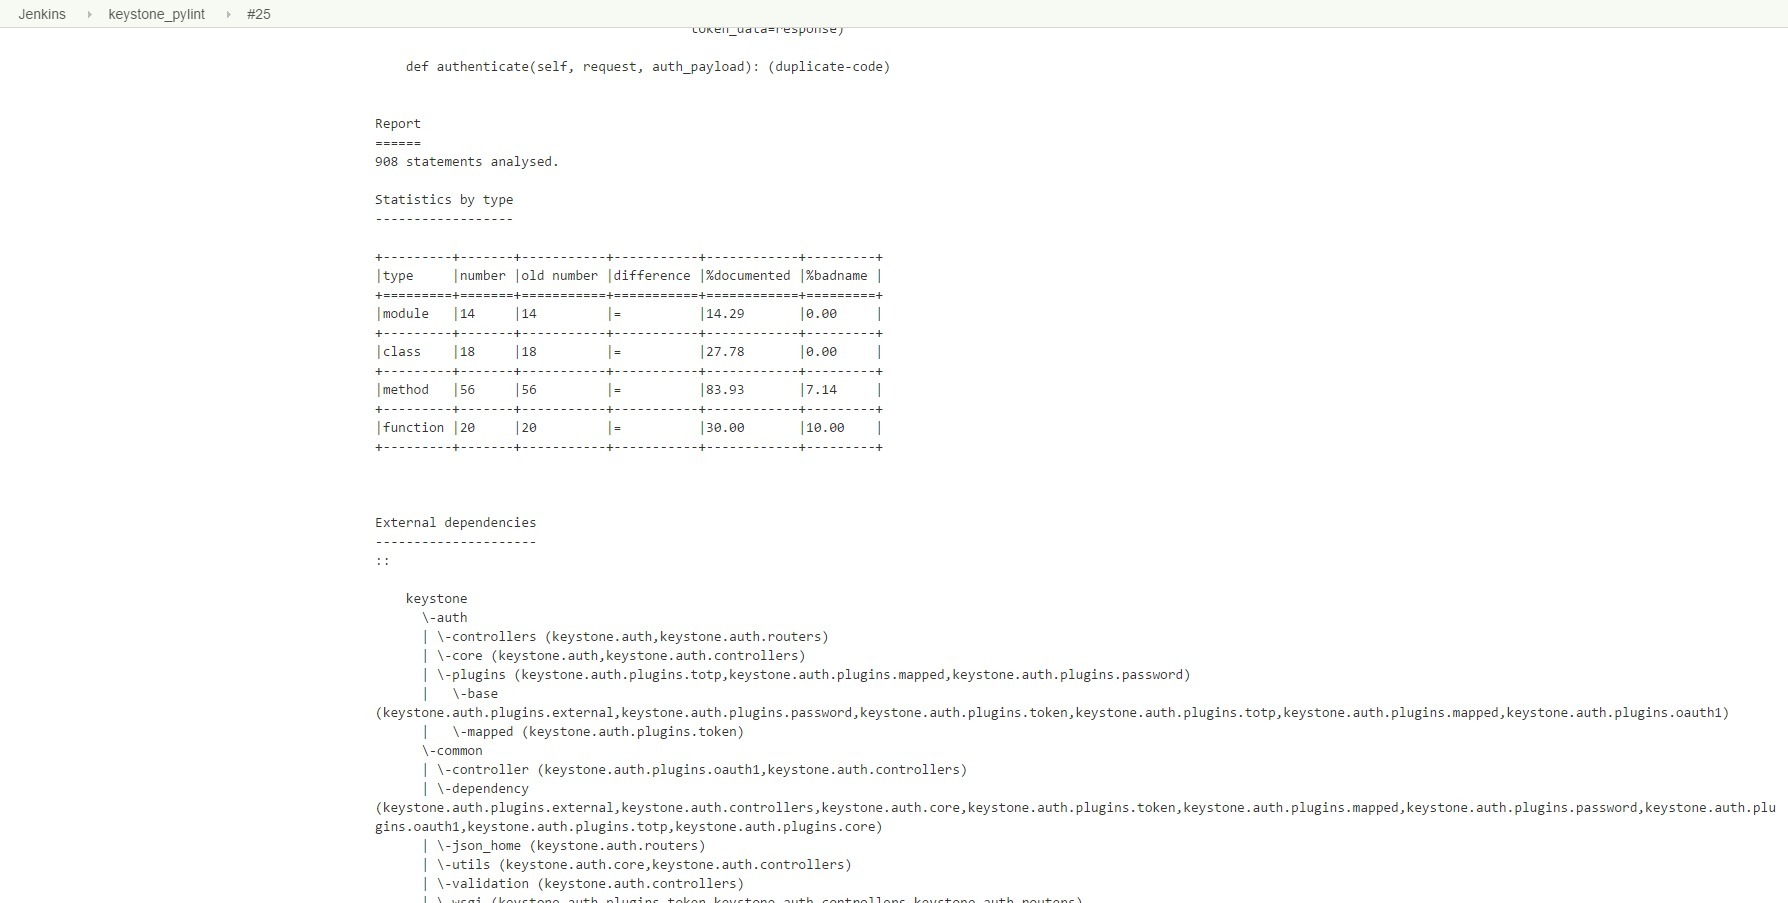
図3 PyLintテスト結果-続き2

図4 PyLintテスト結果-続き3

図5 PyLintテスト結果-続き4
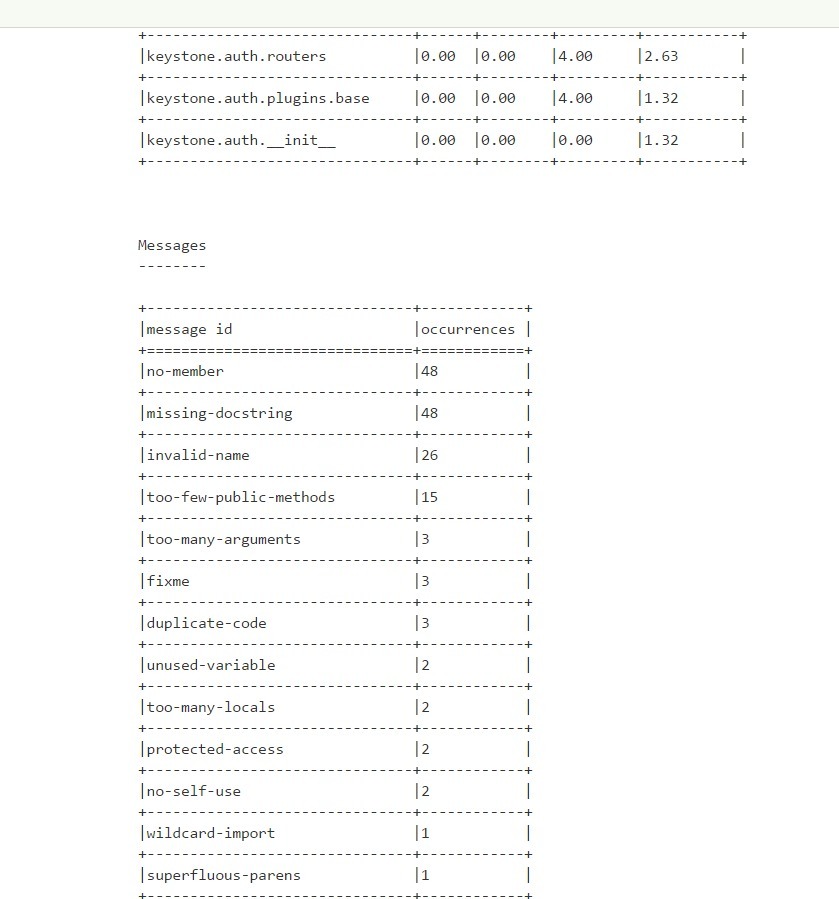
図6 PyLintテスト結果-続き5
SonarQubeとJenkinsの統合
SonarQube用のMySQLのインストールと設定:
wget http://repo.mysql.com/mysql-community-release-el7-5.noarch.rpm sudo rpm -ivh mysql-community-release-el7-5.noarch.rpm sudo yum update -y sudo yum install mysql-server sudo systemctl start mysqld sudo mysql_secure_installation - enter mysql -u root -p CREATE DATABASE sonar CHARACTER SET utf8 COLLATE utf8_general_ci; CREATE USER 'sonar' IDENTIFIED BY 'sonar'; GRANT ALL ON sonar.* TO 'sonar'@'%' IDENTIFIED BY 'sonar'; GRANT ALL ON sonar.* TO 'sonar'@'localhost' IDENTIFIED BY 'sonar';
CentosにSonarQubeをインストールします。
/ optのインストールファイルをダウンロードします
cd /opt sudo wget https://sonarsource.bintray.com/Distribution/sonarqube/sonarqube-6.0.zip
unzipとjavaをインストールします
sudo yum install unzip -y sudo yum install java-1.8.0-openjdk -y
解凍ソナークベ
sudo unzip sonarqube-6.0.zip mv sonarqube-6.0 sonarqube
構成ファイルの構成
vi /opt/sonarqube/conf/sonar.properties sonar.jdbc.username=sonar sonar.jdbc.password=sonar sonar.jdbc.url=jdbc:mysql://localhost:3306/sonar?useUnicode=true&characterEncoding=utf8&rewriteBatchedStatements=true&useConfigs=maxPerformance sonar.web.host=localhost sonar.web.context=/sonar sonar.web.port=9000 http://localhost:9000 sonarqube
SonarQubeを起動します。
cd /opt/sonar/bin/linux-x86-64/ sudo ./sonar.sh start
SonarQubeをサービスとして設定する:
ファイルを作成
/etc/init.d/sonar
ファイルの内容にコピー
#!/bin/sh # # rc file for SonarQube # # chkconfig: 345 96 10 # description: SonarQube system (www.sonarsource.org) # ### BEGIN INIT INFO # Provides: sonar # Required-Start: $network # Required-Stop: $network # Default-Start: 3 4 5 # Default-Stop: 0 1 2 6 # Short-Description: SonarQube system (www.sonarsource.org) # Description: SonarQube system (www.sonarsource.org) ### END INIT INFO /usr/bin/sonar $*
SonarQubeへのリンク
sudo ln -s /opt/sonarqube/bin/linux-x86-64/sonar.sh /usr/bin/sonar
権限の設定とブートへの追加
sudo chmod 755 /etc/init.d/sonar sudo chkconfig --add sonar
ソナーを起動
sudo service sonar start
ソナーランナーをインストールします。
yum install sonar-runner wget http://repo1.maven.org/maven2/org/codehaus/sonar/runner/sonar-runner-dist/2.4/sonar-runner-dist-2.4.zip unzip sonar-runner-dist-2.4.zip mv sonar-runner-2.4 /opt/sonar-runner export SONAR_RUNNER_HOME=/opt/sonar-runner export PATH=$PATH:$SONAR_RUNNER_HOME/bin
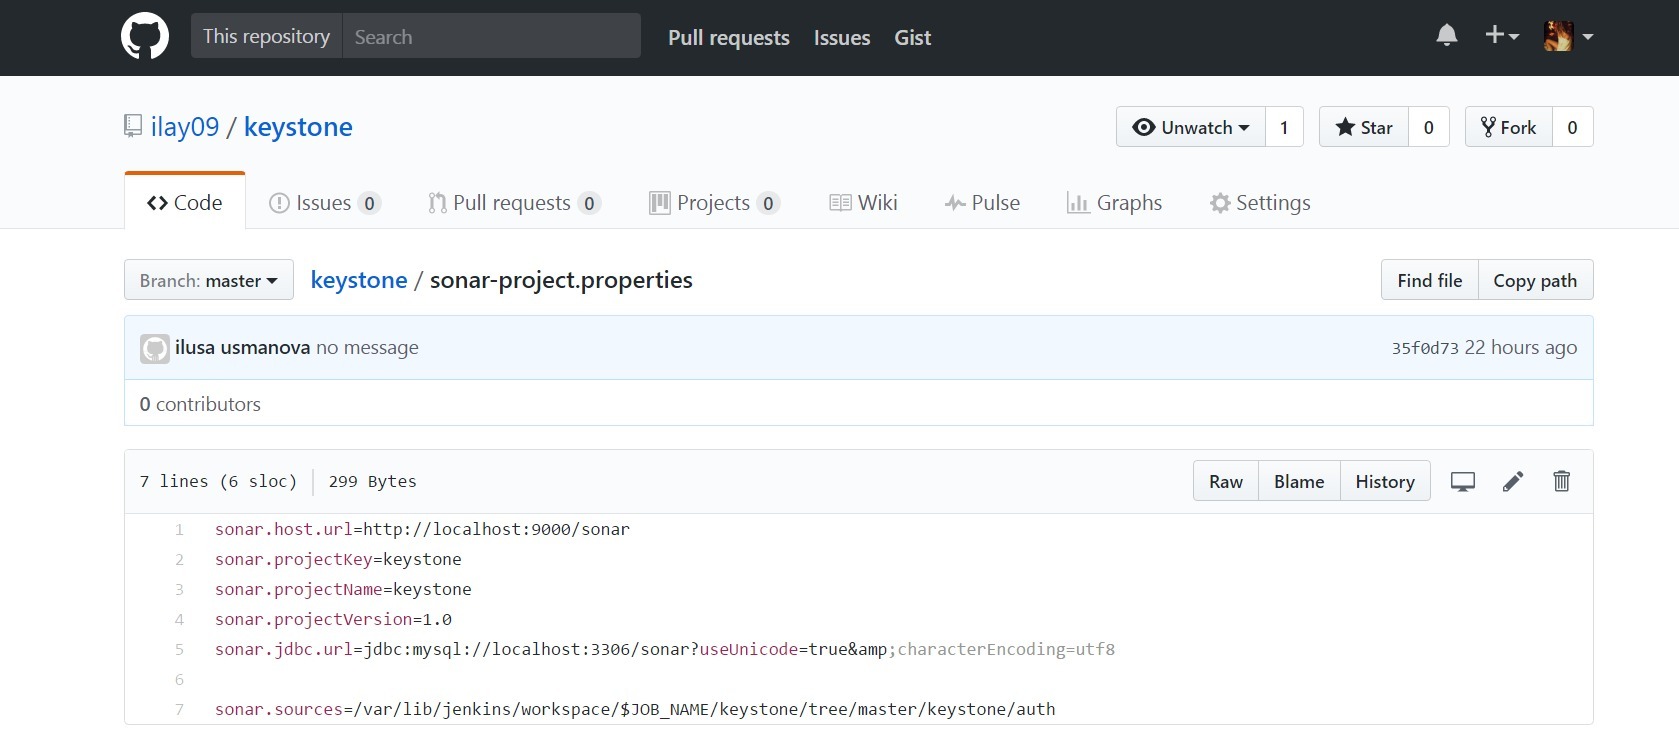
プロジェクトルートにsonar-project.propertiesファイルを作成する必要があります。 ファイルの内容の例:
Jenkinsでの実行:
1. Jenkinsの設定-プラグイン管理で、プラグイン「SonarQube Scanner for Jenkins」をインストールして、視覚的なレポートを生成します
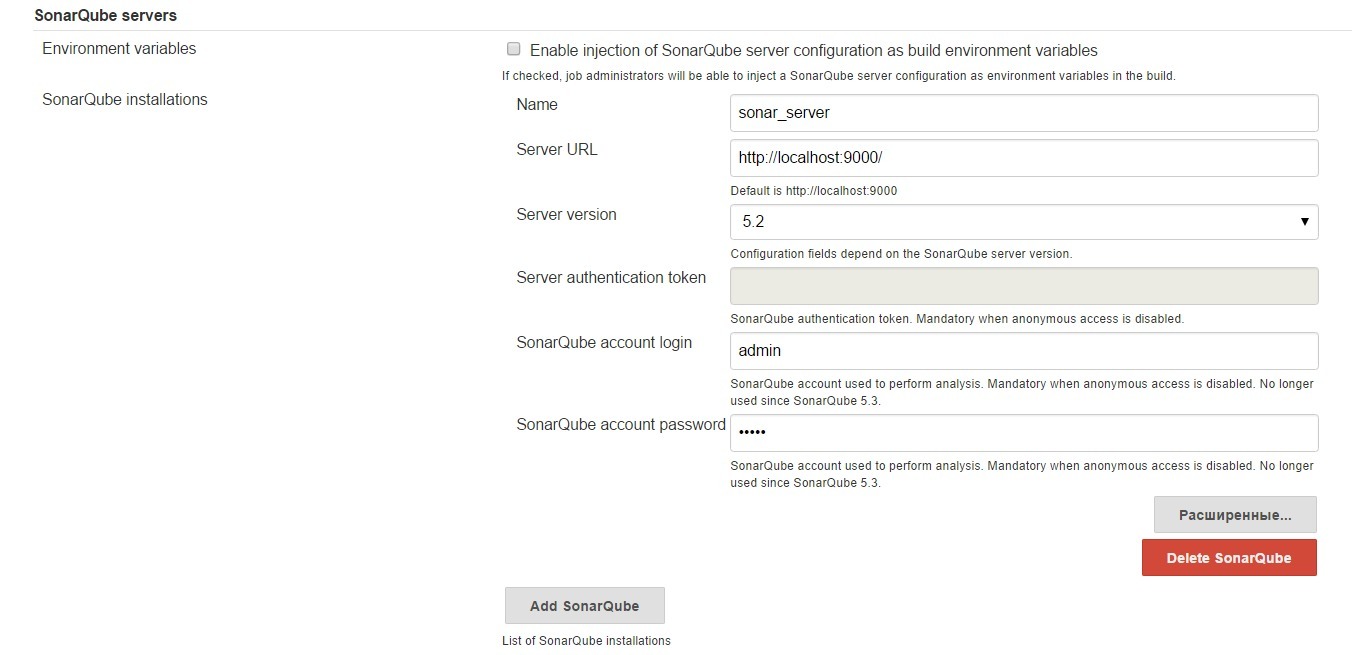
2.「Jenkins設定」-「システム構成」-「SonarQubeサーバー」に移動します(この構成が存在しない場合は、Jenkinsを再起動する必要があります)。 次に、構成フィールドに入力する必要があります。
図8 Jenkins Continuous Integration SystemでのSonarQubeサーバーの構成
3.「Jenkins Settings」-「Global Tool Configuration」-「SonarQube Scanner」に進みます。 構成フィールドに入力します
図9 Jenkins Continuous Integration SystemでSonarQube Scannerを構成する

4.無料の構成でプロジェクト(ジョブ)を作成する
5.ソース管理ポイントで、リポジトリへのリンクを挿入します
6.アセンブリポイントで、「SonarQubeスキャナーの実行」を選択します
[分析プロパティ]フィールドに、sonar-project.propertiesファイルからパラメーターを入力するか、このファイルへのパスを指定します
7.プロジェクトを保存して実行します
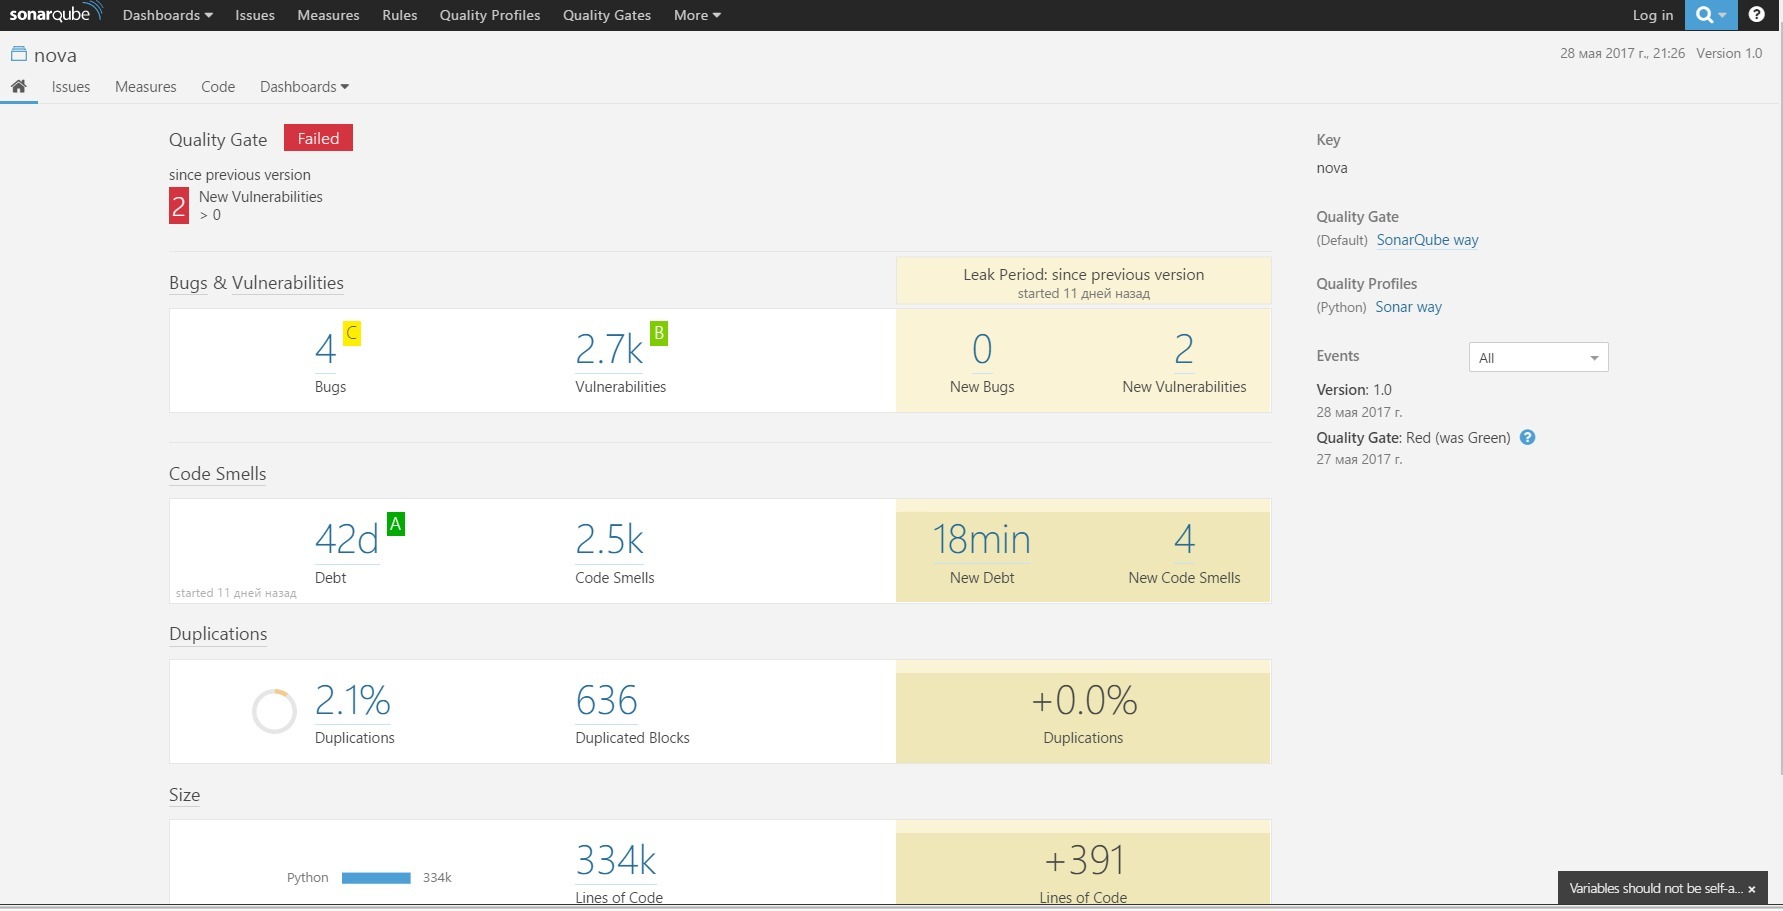
図10 SonarQubeの作業結果
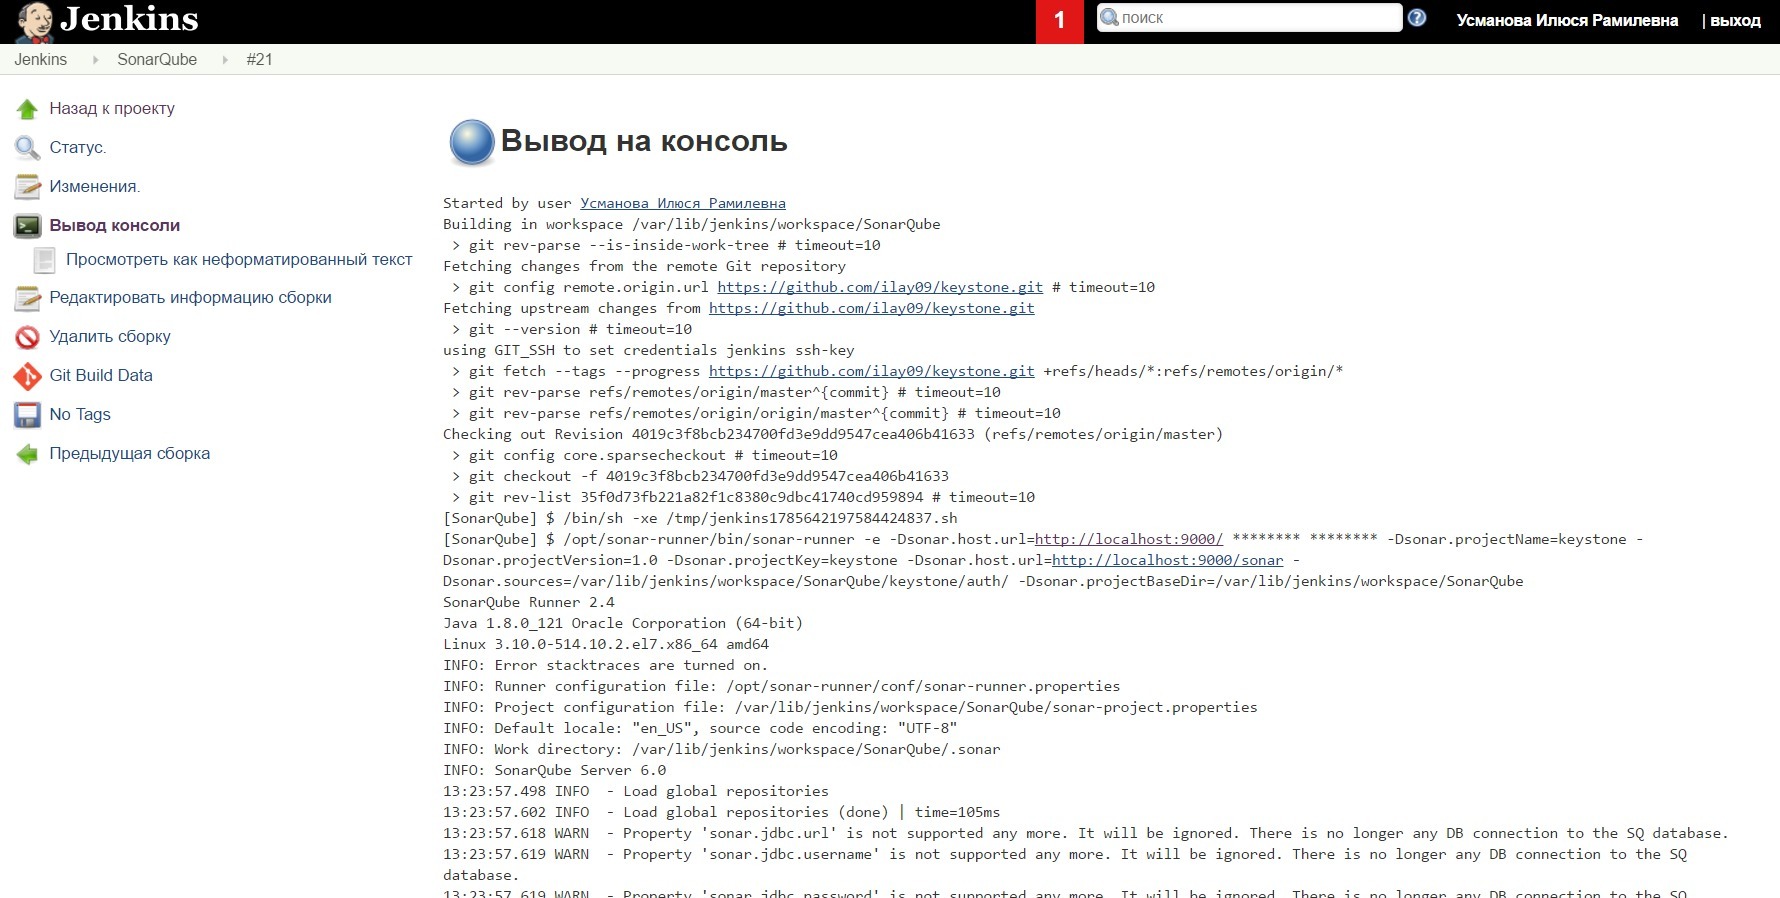
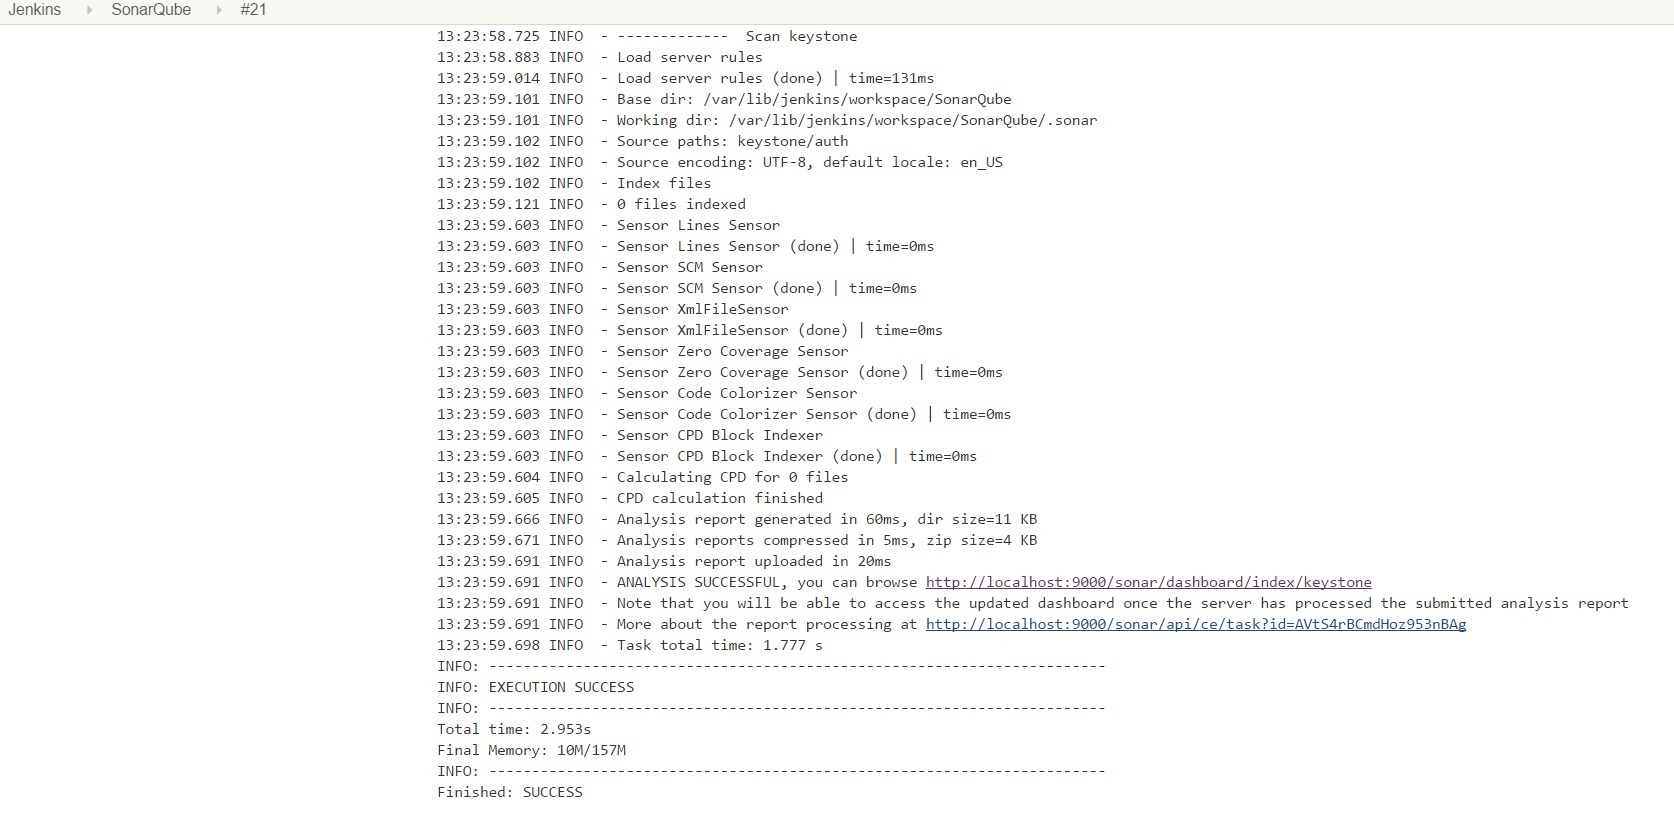
図11 SonarQube作業結果-続き1
localhostプロジェクトの結果からリンクをクリックすると、9000 / sonar / dashboard / index / keystoneで、keystoneコードの品質の確認に関するレポートを詳細に調べることができます
図12 生成されたSonarQubeレポートのサンプル

図13 SonarQubeレポートの生成例-続き1