アーカイブ、クライアント間のメッセージの同期、通知の読み取り、公開チャットなど、すべての新しい機能を備えた独自のジャバーサーバーを簡単に作成する方法を教えたらどうでしょうか。
また、オーディオとビデオの通話をサポートし、優れたインターフェイスを備え、ブラウザーから直接機能する、素晴らしいJabberクライアントを共有します。
サーバーとクライアントの両方が無料ライセンスの下でライセンスされているため、これらの両方を完全に無料で受け取ります。
Metronome IMとJappixについてです 。
両方のプロジェクトが互いに独立して動作し、Metronome IMで動作し、Jabberクライアントに接続でき、BOSHをサポートする他のJabberサーバーにJappixを使用できることを考慮する必要があります。

メトロノームIM
作者:マルコチリーロ
サイト: lightwitch.org/metronome
ライセンス: MIT
で書かれた:ルア
それでは、サーバー側から始めましょう。
Metronome IMは、悪名高いProsody IMのフォークであるJabberサーバーで、Habré について何度も書かれています。 Prosodyとは異なり、Metronomeは主にpubsub 、 ユーザーアクティビティ 、 ムードなどのさまざまなソーシャル機能をサポートするために作成されましたが、これらは私たちにとって主な関心事ではありません。
すぐに使用できるすべてのXEPの完全なリストは、 このページにあります 。 同意して、リストはかなり印象的です!
すべてのXEPには、メッセージアーカイブ(メッセージアーカイブ)、Carbons(クライアント間のメッセージ同期)、およびオフラインメッセージ(オフラインメッセージ)があります。平凡であり、ファイルでファイナライズする必要があります。
Metronome IMでは、すべてのXEPが箱から出してすぐに、ほとんどのJabberクライアントで正しく機能します。
練習から、メッセージがどこかで失われたり、複製されたり、あるクライアントで表示されたりすると、他のクライアントはそれを見ることさえない場合、そのような不快なグリッチはもうほとんどないでしょう。
さらに、サーバーはluaで記述されており、多くのモジュールとかなりわかりやすい構成を備えています。
Prosody IMのほとんどのモジュールも、少しドップした後には適合しますが、ほとんどの場合、これも必要ないでしょう。
設置
デフォルトでは、Metronome IMは既製のパッケージの形では提供されないため、 ソースから収集します。Dockerを使用してインストールすることもできます
まず、依存関係をインストールします。
Ubuntu / Debian:
apt-get update apt-get -y install libssl-dev libidn11-dev build-essentials lua5.1 liblua5.1-dev liblua5.1-bitop-dev liblua5.1-expat-dev liblua5.1-event-dev lua5.1-posix-dev lua5.1-sec-dev lua5.1-socket-dev lua5.1-filesystem-dev
CentOS:
yum -y install epel-release yum -y install gcc lua-devel openssl-devel libidn-devel lua-expat lua-socket lua-filesystem lua-sec lua-dbi lua-event # Install lua-zlib module curl https://codeload.github.com/brimworks/lua-zlib/tar.gz/v0.4 | tar xzv -C /usr/src/ cd /usr/src/lua-zlib-0.4/ make linux make install # Install lua-bitop module curl http://bitop.luajit.org/download/LuaBitOp-1.0.2.tar.gz | tar xzv -C /usr/src/ cd /usr/src/LuaBitOp-1.0.2 make make install
ソースをダウンロードし、収集してインストールします。
useradd -r -s /sbin/nologin -d /var/lib/metronome metronome curl -L https://github.com/maranda/metronome/archive/v3.7.tar.gz | tar xz -C /usr/src/ cd /usr/src/metronome* ./configure --prefix=/usr --sysconfdir=/etc/prosody --datadir=/var/lib/prosody --require-config --ostype=debian # --ostype=linux make && make install mkdir /var/log/metronome /var/run/metronome chown metronome: /var/lib/metronome /var/log/metronome /var/run/metronome
systemdのユニットを作成します:/etc/systemd/system/metronome.service
[Unit] Description=XMPP (Jabber) Server After=network.target [Service] Type=forking PIDFile=/run/metronome/metronome.pid ExecStart=/usr/bin/metronomectl start ExecStop=/usr/bin/metronomectl stop [Install] WantedBy=multi-user.target
インストール完了
カスタマイズ
jappix.comから親切に提供されたmetronome.cfg.lua構成をダウンロードします
少し編集した後、この設定のようなものを得ました:
metronome.cfg.lua
-- Prosody XMPP Server Configuration -- -- Information on configuring Prosody can be found on our -- website at http://metronome.im/doc/configure -- -- Tip: You can check that the syntax of this file is correct -- when you have finished by running: metronomectl check config -- If there are any errors, it will let you know what and where -- they are, otherwise it will keep quiet. -- -- Good luck, and happy Jabbering! ---------- Server-wide settings ---------- -- Settings in this section apply to the whole server and are the default settings -- for any virtual hosts -- This is a (by default, empty) list of accounts that are admins -- for the server. Note that you must create the accounts separately -- (see http://metronome.im/doc/creating_accounts for info) -- Example: admins = { "user1@example.com", "user2@example.net" } admins = { } -- Required for init scripts and metronomectl pidfile = "/var/run/metronome/metronome.pid" -- ulimit metronome_max_files_soft = 200000 metronome_max_files_hard = 200000 -- HTTP server http_ports = { 5280 } http_interfaces = { "0.0.0.0", "::" } https_ports = { 5281 } https_interfaces = { "0.0.0.0", "::" } -- Enable IPv6 use_ipv6 = true -- This is the list of modules Prosody will load on startup. -- It looks for mod_modulename.lua in the plugins folder, so make sure that exists too. -- Documentation on modules can be found at: http://metronome.im/doc/modules modules_enabled = { -- Generally required --"roster"; -- Allow users to have a roster. Recommended ;) "saslauth"; -- Authentication for clients and servers. Recommended if you want to log in. "tls"; -- Add support for secure TLS on c2s/s2s connections "dialback"; -- s2s dialback support "disco"; -- Service discovery "extdisco"; -- External Service Discovery -- Not essential, but recommended --"private"; -- Private XML storage (for room bookmarks, etc.) --"vcard"; -- Allow users to set vCards -- These are commented by default as they have a performance impact "compression"; -- Stream compression (requires the lua-zlib package installed) -- Nice to have "version"; -- Replies to server version requests "uptime"; -- Report how long server has been running "time"; -- Let others know the time here on this server "ping"; -- Replies to XMPP pings with pongs --"pep"; -- Enables users to publish their mood, activity, playing music and more --"register"; -- Allow users to register on this server using a client and change passwords -- Admin interfaces "admin_adhoc"; -- Allows administration via an XMPP client that supports ad-hoc commands --"admin_telnet"; -- Opens telnet console interface on localhost port 5582 -- HTTP modules "bosh"; -- Enable BOSH clients, aka "Jabber over HTTP" "websocket"; -- Enable WebSocket clients --"http_files"; -- Serve static files from a directory over HTTP -- Other specific functionality "posix"; -- POSIX functionality, sends server to background, enables syslog, etc. "bidi"; -- Bidirectional Streams for S2S connections "stream_management"; -- Stream Management support --"groups"; -- Shared roster support --"announce"; -- Send announcement to all online users --"welcome"; -- Welcome users who register accounts --"watchregistrations"; -- Alert admins of registrations --"motd"; -- Send a message to users when they log in "legacyauth"; -- Legacy authentication. Only used by some old clients and bots. "log_auth"; } -- These modules are auto-loaded, but should you want -- to disable them then uncomment them here: modules_disabled = { -- "offline"; -- Store offline messages -- "c2s"; -- Handle client connections -- "s2s"; -- Handle server-to-server connections } -- Discovery items disco_items = { { "muc.example.org" }, { "proxy.example.org" }, { "pubsub.example.org" }, { "vjud.example.org" } }; -- External Service Discovery (mod_extdisco) external_services = { ["stun.example.org"] = { [1] = { port = "3478", transport = "udp", type = "stun" }, [2] = { port = "3478", transport = "tcp", type = "stun" } } }; -- Bidirectional Streams configuration (mod_bidi) bidi_exclusion_list = { "jabber.org" } -- BOSH configuration (mod_bosh) bosh_max_inactivity = 30 consider_bosh_secure = true cross_domain_bosh = true -- WebSocket configuration (mod_websockets) consider_websockets_secure = true cross_domain_websockets = true -- Disable account creation by default, for security allow_registration = false -- Ignore priority settings ignore_presence_priority = true -- These are the SSL/TLS-related settings. If you don't want -- to use SSL/TLS, you may comment or remove this ssl = { key = "/etc/metronome/certs/localhost.key"; certificate = "/etc/metronome/certs/localhost.cert"; options = { "no_sslv2", "no_sslv3", "no_ticket", "no_compression", "cipher_server_preference" }; } -- Force clients to use encrypted connections? This option will -- prevent clients from authenticating unless they are using encryption. c2s_require_encryption = true -- Force servers to use encrypted connections? This option will -- prevent servers from connecting unless they are using encryption. s2s_require_encryption = true -- Allow servers to use an unauthenticated encryption channel s2s_allow_encryption = true -- Don't require encryption for listed servers s2s_encryption_exceptions = { "cisco.com", "gmail.com" } -- Logging configuration -- For advanced logging see http://metronome.im/doc/logging log = { info = "/var/log/metronome/metronome.log"; -- Change 'info' to 'debug' for verbose logging error = "/var/log/metronome/metronome.err"; -- "*syslog"; -- Uncomment this for logging to syslog -- "*console"; -- Log to the console, useful for debugging with daemonize=false } activity_log_dir = "/var/log/metronome/activity_log" -- For the "sql" backend, you can uncomment *one* of the below to configure: sql = { driver = "SQLite3", database = "metronome.sqlite" } -- Default. 'database' is the filename. --sql = { driver = "MySQL", database = "metronome", username = "metronome", password = "password", host = "localhost" } --sql = { driver = "PostgreSQL", database = "metronome", username = "metronome", password = "secret", host = "localhost" } ----------- Virtual hosts ----------- -- You need to add a VirtualHost entry for each domain you wish Prosody to serve. -- Settings under each VirtualHost entry apply *only* to that host. VirtualHost "example.org" enabled = true default_storage = "sql" modules_enabled = { -- Generally required "roster"; -- Allow users to have a roster. Recommended ;) -- Not essential, but recommended "private"; -- Private XML storage (for room bookmarks, etc.) "vcard"; -- Allow users to set vCards -- These are commented by default as they have a performance impact "mam"; -- Message Archive Management "privacy"; -- Support privacy lists -- Nice to have "lastactivity"; -- Logs the user last activity timestamp "pep"; -- Enables users to publish their mood, activity, playing music and more "message_carbons"; -- Allow clients to keep in sync with messages send on other resources --"register"; -- Allow users to register on this server using a client and change passwords --"register_redirect"; -- Redirects users registering to the registration form "public_service"; -- Provides some information about the XMPP server --"log_activity"; -- Activity log, module from https://github.com/jappix/jappix-xmppd-modules "groups"; -- Shared groups -- Admin interfaces --"admin_adhoc"; -- Allows administration via an XMPP client that supports ad-hoc commands } groups_file = "/etc/metronome/groups.txt" resources_limit = 10 no_registration_whitelist = true registration_url = "https://example.org/" registration_text = "Please register your account on Jappix itself (open example.org in your Web browser). Then you'll be able to use it anywhere you want." public_service_vcard = { name = "Jappix XMPP service", url = "https://example.org/", foundation_year = "2010", country = "RU", email = "admin@example.org", admin_jid = "admin@example.org", geo = "48.87,2.33", ca = { name = "StartSSL", url = "https://www.startssl.com/" }, oob_registration_uri = "https://example.org/" } VirtualHost "anonymous.example.org" enabled = true authentication = "anonymous" allow_anonymous_multiresourcing = true allow_anonymous_s2s = true anonymous_jid_gentoken = "Jappix Anonymous User" anonymous_randomize_for_trusted_addresses = { "127.0.0.1", "::1" } ------ Components ------ -- You can specify components to add hosts that provide special services, -- like multi-user conferences, and transports. ---Set up a MUC (multi-user chat) room server on muc.example.org: Component "muc.example.org" "muc" name = "Jappix Chatrooms" modules_enabled = { "muc_limits"; "muc_log"; "muc_log_http"; "pastebin"; } muc_event_rate = 0.5 muc_burst_factor = 10 muc_log_http_config = { url_base = "logs"; theme = "metronome"; } pastebin_url = "https://muc.example.org/paste/" pastebin_path = "/paste/" pastebin_expire_after = 0 pastebin_trigger = "!paste" ---Set up a PubSub server Component "pubsub.example.org" "pubsub" name = "Jappix Publish/Subscribe" --unrestricted_node_creation = true -- Anyone can create a PubSub node (from any server) ---Set up a VJUD service Component "vjud.example.org" "vjud" ud_disco_name = "Jappix User Directory" synchronize_to_host_vcards = "example.org" ---Set up a BOSH service ( https://bind.example.org:5281/http-bind ) Component "bind.example.org" "http" modules_enabled = { "bosh" } ---Set up a WebSocket service Component "websocket.example.org" "http" modules_enabled = { "websocket" } ---Set up a BOSH + WebSocket service Component "me.example.org" "http" modules_enabled = { "bosh", "websocket" } ---Set up a statistics service Component "stats.example.org" "http" modules_enabled = { "server_status" } server_status_basepath = "/xmppd/" server_status_show_hosts = { "example.org", "anonymous.example.org" } server_status_show_comps = { "muc.example.org", "proxy.example.org", "pubsub.example.org", "vjud.example.org" } -- Set up a SOCKS5 bytestream proxy for server-proxied file transfers: Component "proxy.example.org" "proxy65" proxy65_acl = { "example.org", "anonymous.example.org" }
構成は非常によくコメントされており、追加のコメントを自分の側に残しても意味がありません。
jappixまたは他のWebクライアントをインストールする場合は、BOSHコンポーネントが必要だとしか言えません。 これにより、Webクライアントがサーバーと通信します。
サーバーの構成の詳細については、プロジェクトの公式Webサイトで例を参照してください。
DNSサーバーに必要なDNSレコードを登録することを忘れないでください:
xmpp IN A 1.2.3.4 muc IN CNAME xmpp pubsub IN CNAME xmpp vjud IN CNAME xmpp bind IN CNAME xmpp websocket IN CNAME xmpp me IN CNAME xmpp stats IN CNAME xmpp proxy IN CNAME xmpp anonymous IN CNAME xmpp _xmpp-client._tcp.example.org. IN SRV 0 5 5222 xmpp.example.org. _xmpp-server._tcp.example.org. IN SRV 0 5 5269 xmpp.example.org.
サービスを開始します。
systemctl enable metronome systemctl start metronome
ログを確認してください。
すべて問題なければ、ユーザーを作成します。
prosodyctl adduser me@example.com
そして接続してみてください。
サーバーの準備ができました!

Jappix
作成者: ValérianSaliou、Julien Barrier
サイト: jappix.org
ライセンス: AGPL
記述: JavaScript
デモ: jappix.com
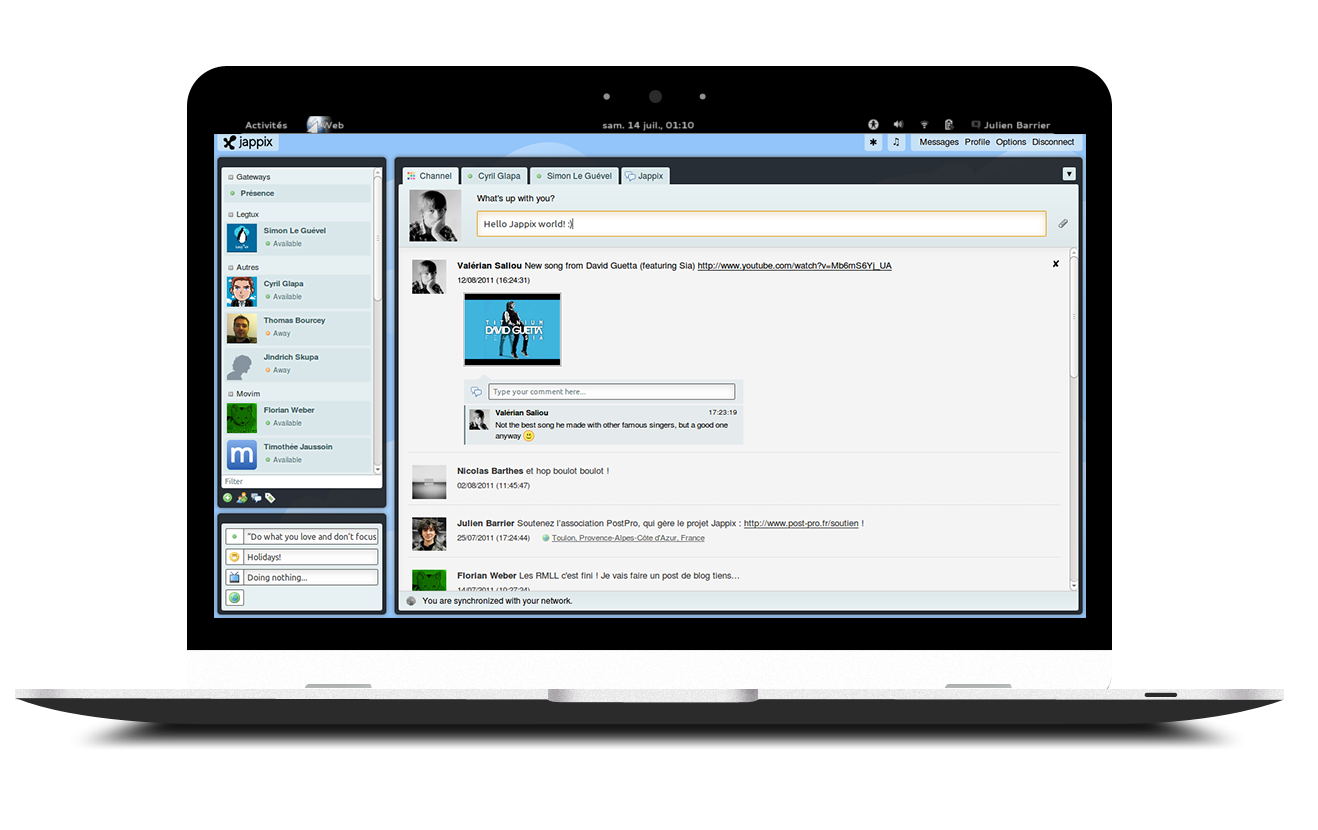
先ほど言ったように、Jappixは非常に優れたインターフェイスを備え、音声通話とビデオ通話をサポートし、ほとんどの一般的なXEPをサポートし、ブラウザーウィンドウから直接動作するJabberクライアントです。
クライアント自体は次のようになります。
非表示のテキスト 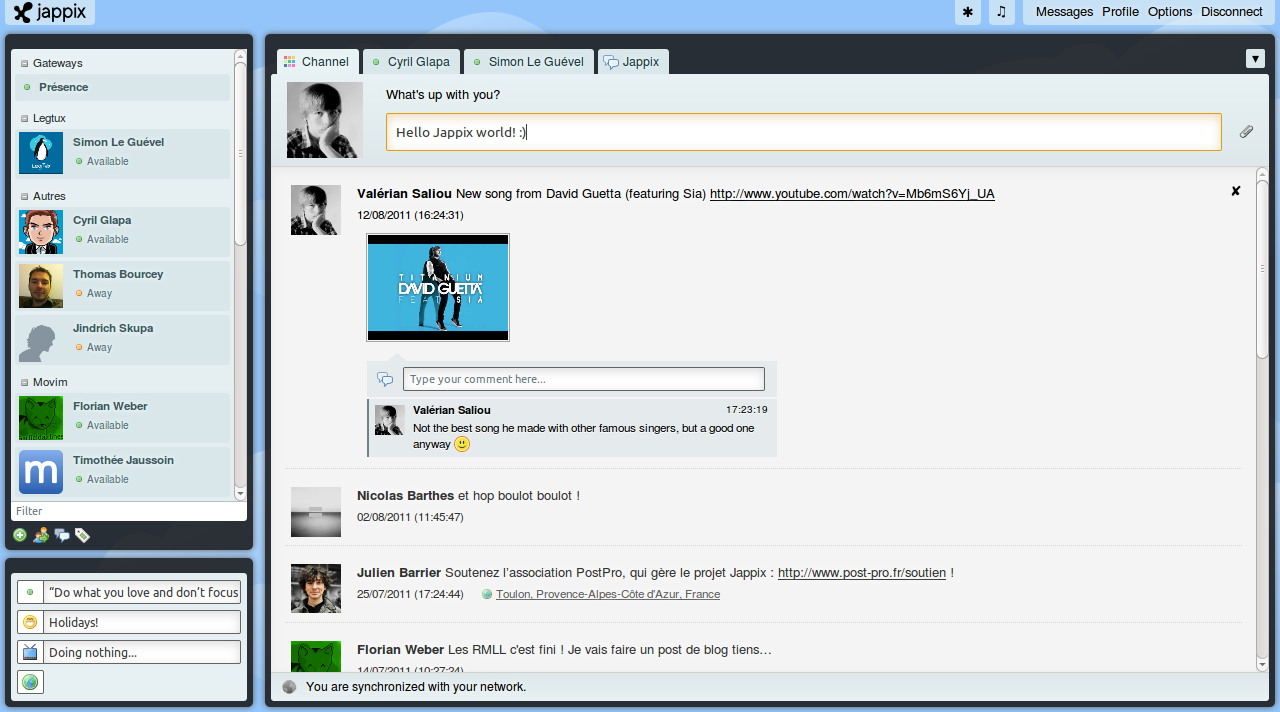
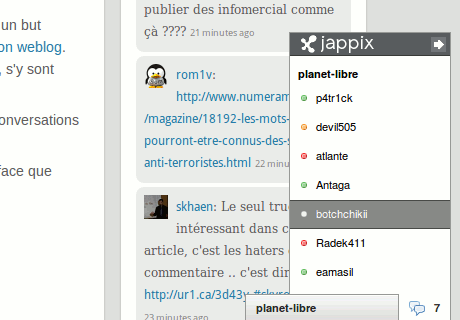
また、サイトに埋め込むための小さなバージョンがあります。
非表示のテキスト 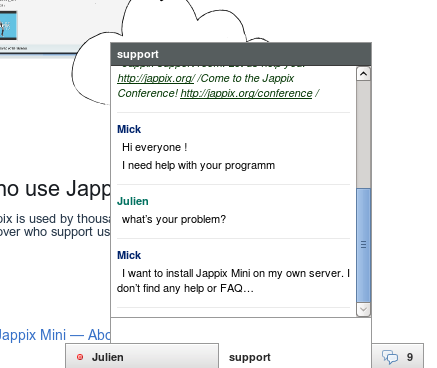
設置
クライアントをインストールします。
インストールは簡単なことではありません。 すべてのアクションは、プロジェクトファイルをWebサーバーのディレクトリにコピーすることです。 ただし、 Dockerを使用してJappixをインストールすることはできます。
それでは、依存関係をインストールしましょう。
Debian / Ubuntu:
apt-get install php5-gd php5-curl
CentOS:
yum install php-mbstring
ここでjappix-1.1.6-primo.tar.bz2をダウンロードし、/ var / wwwに解凍します。
curl -L https://download.jappix.org/1.1.6/jappix-1.1.6-primo.tar.bz2 | tar xvj -C /var/www
Webサーバーの設定を書きましょう。たとえば、nginxの場合、次のようになります。
jappix.conf
server { listen 80; server_name jappix.example.org; return 301 https://jappix.example.org$request_uri; } server { listen 443 ssl; server_name jappix.example.org; root /var/www/jappix; index index.html index.php; access_log /var/log/nginx/jappix-access.log; error_log /var/log/nginx/jappix-error.log; # Configuration SSL # Support du HSTS (HTTP Strict Transport Security) add_header Strict-Transport-Security "max-age=315360000; includeSubdomains"; # Configuration SSL ssl_certificate /etc/nginx/certificates/common-ssl.cert; ssl_certificate_key /etc/nginx/certificates/common-ssl.key; ssl_protocols TLSv1 TLSv1.1 TLSv1.2; ssl_prefer_server_ciphers on; ssl_ciphers "EECDH+ECDSA+AESGCM EECDH+aRSA+AESGCM EECDH+ECDSA+SHA384 EECDH+ECDSA+SHA256 EECDH+aRSA+SHA384 EECDH+aRSA+SHA256 EECDH EDH+aRSA !RC4 !aNULL !eNULL !LOW !3DES !MD5 !EXP !PSK !SRP !DSS"; location / { try_files $uri $uri/ /index.php?$args; } location ~ \.php$ { try_files $uri =404; fastcgi_index index.php; fastcgi_pass php5-fpm-sock; fastcgi_param SCRIPT_FILENAME $document_root$fastcgi_script_name; include /etc/nginx/fastcgi_params; fastcgi_param PHP_VALUE "upload_max_filesize = 25M \n post_max_size = 25M \n max_execution_time = 600"; } location ~ /(app|i18n|log|test|tmp|tools)/ { deny all; } }
Webサーバーを再起動します。
公式プロジェクトwikiでインストールに関するより詳細な情報を見つけることができます 。
カスタマイズ
Jappixにはグラフィカルインストーラーがあります。 リンクをたどります:
https://jappix.example.org/?m=install
管理者を作成し、他の質問に答え、サーバーにアドレスを入力します。
サーバー設定戦略は次のようになります。
非表示のテキスト 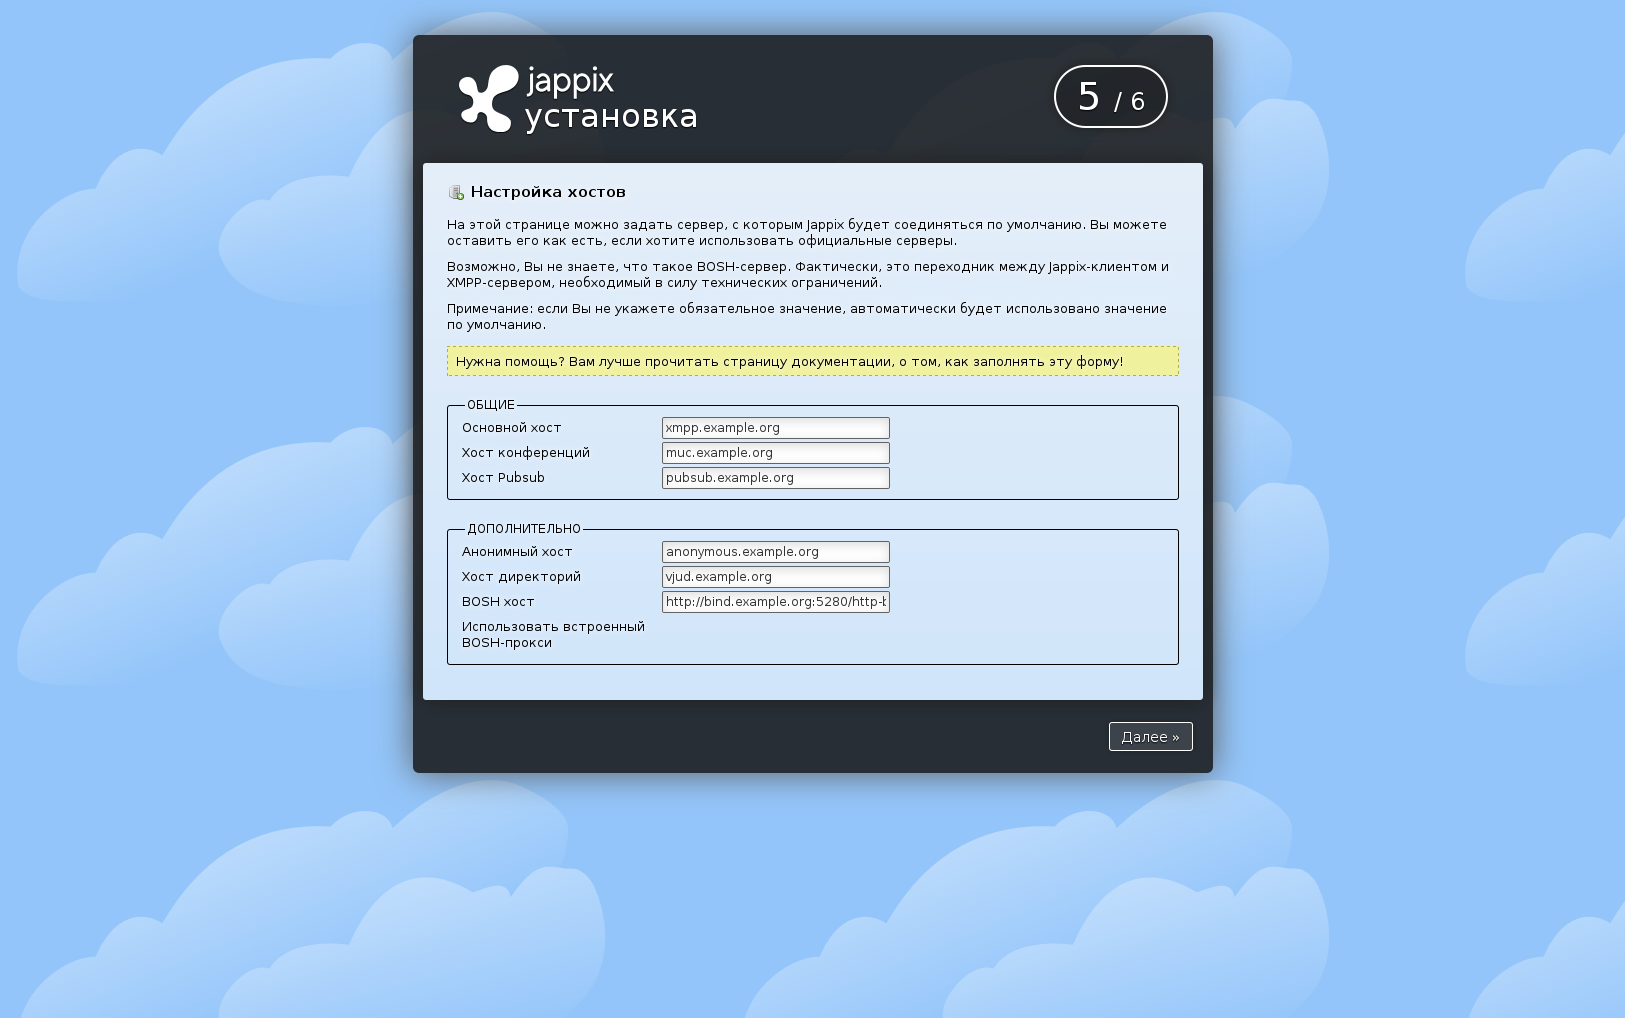
インストールが完了すると、ログインウィンドウに移動します。
非表示のテキスト 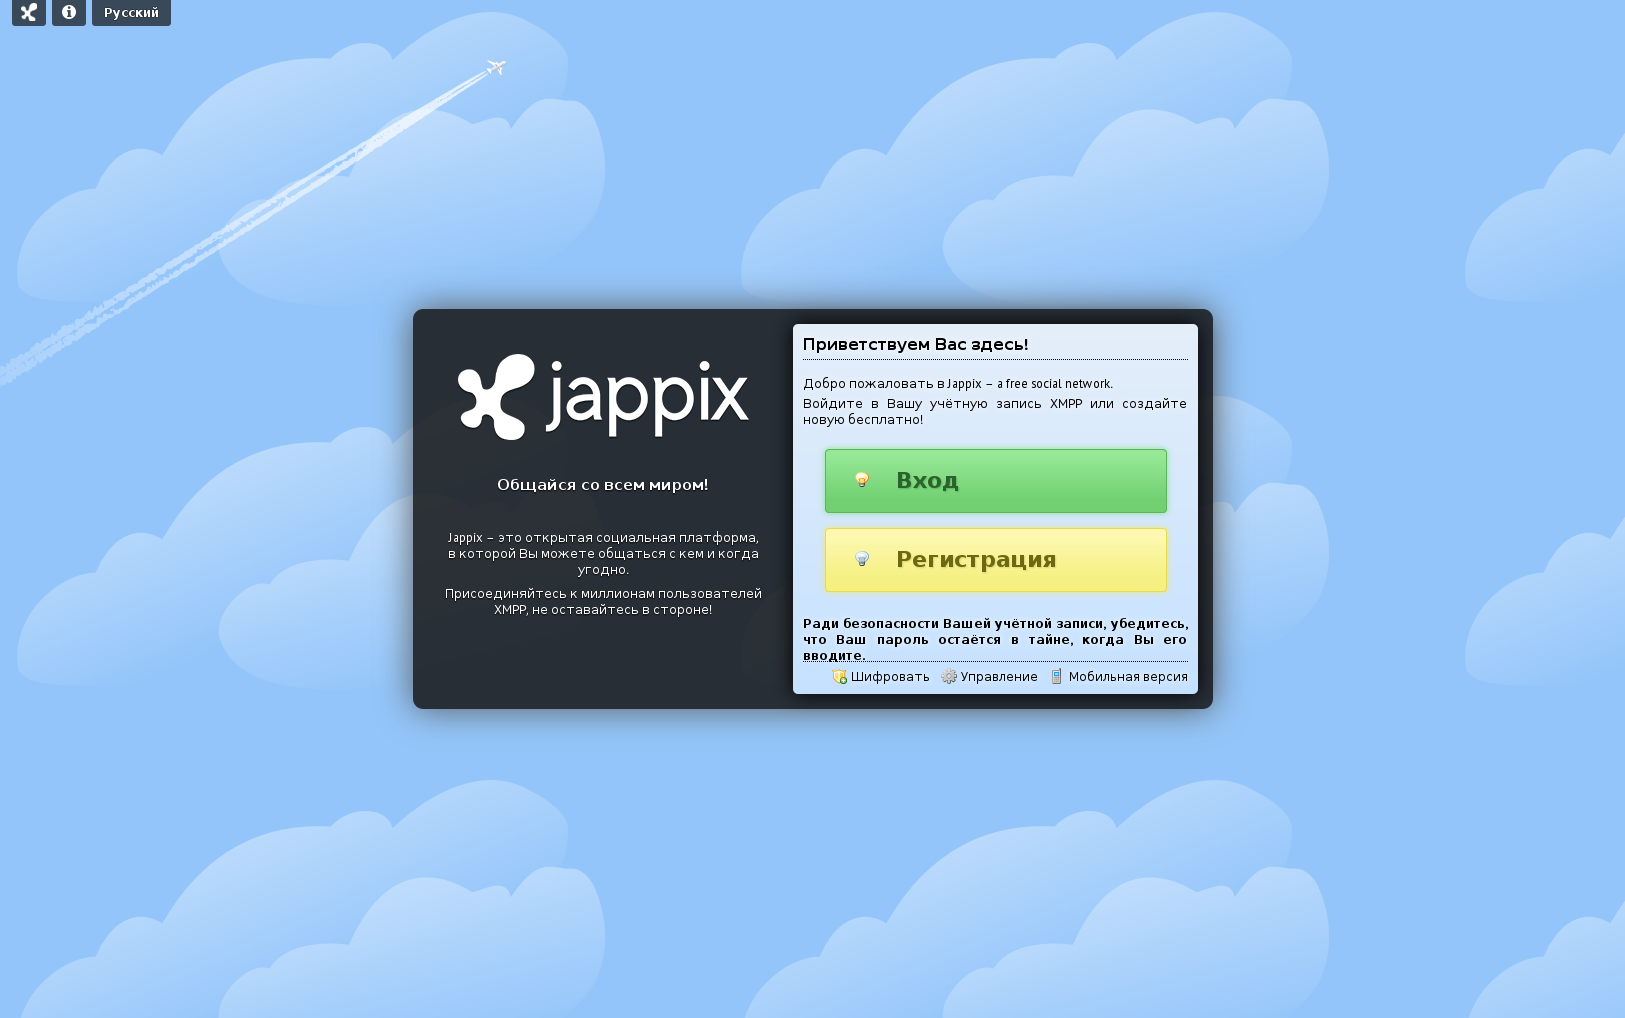
今後、次のリンクから管理パネルにアクセスできます。
https://jappix.example.org/?m=manager
暗号化しましょう
証明書について一言。
サーバーに自己署名証明書を残すのは良くありません。少なくとも無料でインストールする必要があります。
私たちは非常に多くのサブドメインを作成しているので、1つの無料の証明書ではすべての人にとって十分ではありません。 解決策があります-これはLet's Encryptです。
ハブで 、 MalcolmReynoldsは、Let's Encryptから証明書を取得する手順をすでに説明しています 。
DigitalOceanに関するいくつかのクールな記事もあります-nginx、 apache
ただし、Dockerを使用する場合は、私の画像を試してみることをお勧めします: kvaps / letsencrypt-webroot
ご清聴ありがとうございました!