それでもKolabが何であるかわからない場合は、 最初の記事をお読みください。美しいWebフェイスを備えたこのかなり機能的で完全に無料のメールサーバーの詳細なレビューを行いました。
今回はそれをインストールします。
Kolab Groupware(パート1-概要)
Kolab Groupware(パート2-インストール)
この記事で説明されているすべてのことを気にしたくない場合、または単にKolabを試してみたい場合は、既製のdocker imageを使用できます。
パッケージのインストール
パッケージはすべての一般的なディストリビューションに存在します: Red Hat Enterprise Linux 、 CentOS 、 Fedora 、 Debian 、 OpenSUSEおよびUbuntu用の実験的パッケージもあり、 ArchLinux KolabはAURからアセンブルできます。
entos7にインストールしますが、私に集中する必要はありません。他のディストリビューションではインストールに大きな違いはありません。
それでは始めましょう
リポジトリをインストールする
yum -y update yum -y install wget epel-release cd /etc/yum.repos.d wget http://obs.kolabsys.com/repositories/Kolab:/3.4/CentOS_7/Kolab:3.4.repo wget http://obs.kolabsys.com/repositories/Kolab:/3.4:/Updates/CentOS_7/Kolab:3.4:Updates.repo
キーをインストールする
gpg --keyserver pgp.mit.edu --recv-key 0x446D5A45 gpg --export --armor devel@lists.kolab.org > devel.asc rpm --import devel.asc rm devel.asc
今、パッケージ自体
yum -y install kolab
Kolabをインストールする
まず最初に、完全なFQDNをホスト名として設定する必要があります。次に例を示します。
echo "mail.example.org" > /etc/hostname
さらに、dirsrvをインストールするには、マシン名をIPアドレスで解決する必要があるため、DNSおよび/または/ etc / hostsファイルに対応するエントリを追加することを忘れないでください。
Kolabをインストールし、標準の389 Directory Server(以降dirsrv)の代わりにActive Directoryを使用する場合、インストール前に/etc/kolab/kolab.confファイルを編集し、パラメーターをインストールする必要があることを確認するときLDAPを担当します。
この場合、インストールは--with-adパラメーターで開始する必要があります
また、centos-systemsでは、インストールの前に、パッケージをインストールするときにユーザーdirsrvを作成する必要があります。何らかの理由で作成されません。debianではこれで問題ありません。
adduser dirsrv
さて、これですべての準備が整いました。インストールを開始します。
setup-kolab
インストール全体は、対話型スクリプトが尋ねる質問に答えることになります
リスティング
Please supply a password for the LDAP administrator user 'admin', used to login to the graphical console of 389 Directory server. Administrator password [sQnPqqaKInB2ObB]: Please supply a password for the LDAP Directory Manager user, which is the administrator user you will be using to at least initially log in to the Web Admin, and that Kolab uses to perform administrative tasks. Directory Manager password [ohLY9kxxinHGOGE]: Please choose the system user and group the service should use to run under. These should be existing, unprivileged, local system POSIX accounts with no shell. User [dirsrv]: Group [dirsrv]: This setup procedure plans to set up Kolab Groupware for the following domain name space. This domain name is obtained from the reverse DNS entry on your network interface. Please confirm this is the appropriate domain name space. example.org [Y/n]: y The standard root dn we composed for you follows. Please confirm this is the root dn you wish to use. dc=example,dc=org [Y/n]: y Setup is now going to set up the 389 Directory Server. This may take a little while (during which period there is no output and no progress indication). Shutting down dirsrv: mail... [ OK ] Starting dirsrv: mail... [ OK ] Please supply a Cyrus Administrator password. This password is used by Kolab to execute administrative tasks in Cyrus IMAP. You may also need the password yourself to troubleshoot Cyrus IMAP and/or perform other administrative tasks against Cyrus IMAP directly. Cyrus Administrator password [0DIMW-CLUKmsNEU]: Please supply a Kolab Service account password. This account is used by various services such as Postfix, and Roundcube, as anonymous binds to the LDAP server will not be allowed. Kolab Service password [dDGgUZAue2Y-LTW]: Shutting down postfix: [FAILED] Starting postfix: [ OK ] Shutting down amavisd: The amavisd daemon is apparently not running, no PID file /var/run/amavisd/amavisd.pid [FAILED] Starting amavisd: [ OK ] Stopping clamd.amavisd: [FAILED] Starting clamd.amavisd: LibClamAV Warning: ************************************************** LibClamAV Warning: *** The virus database is older than 7 days! *** LibClamAV Warning: *** Please update it as soon as possible. *** LibClamAV Warning: ************************************************** [ OK ] Stopping wallaced: [FAILED] Starting wallaced: [ OK ] Stopping mysqld: [ OK ] Initializing MySQL database: Installing MySQL system tables... OK Filling help tables... OK To start mysqld at boot time you have to copy support-files/mysql.server to the right place for your system PLEASE REMEMBER TO SET A PASSWORD FOR THE MySQL root USER ! To do so, start the server, then issue the following commands: /usr/bin/mysqladmin -u root password 'new-password' /usr/bin/mysqladmin -u root -h mail.example.org password 'new-password' Alternatively you can run: /usr/bin/mysql_secure_installation which will also give you the option of removing the test databases and anonymous user created by default. This is strongly recommended for production servers. See the manual for more instructions. You can start the MySQL daemon with: cd /usr ; /usr/bin/mysqld_safe & You can test the MySQL daemon with mysql-test-run.pl cd /usr/mysql-test ; perl mysql-test-run.pl Please report any problems with the /usr/bin/mysqlbug script! [ OK ] Starting mysqld: [ OK ] What MySQL server are we setting up? - 1: Existing MySQL server (with root password already set). - 2: New MySQL server (needs to be initialized). Choice: 2 Please supply a root password for MySQL. This password will be the administrative user for this MySQL server, and it should be kept a secret. After this setup process has completed, Kolab is going to discard and forget about this password, but you will need it for administrative tasks in MySQL. MySQL root password [lhBkALCvQpocaiT]: Please supply a password for the MySQL user 'kolab'. This password will be used by Kolab services, such as the Web Administration Panel. MySQL kolab password [47rxdTc-vIk3WJ8]: Please supply the timezone PHP should be using. You have to use a Continent or Country / City locality name like 'Europe/Berlin', but not just 'CEST'. Timezone ID [UTC]: Europe/Moscow Please supply a password for the MySQL user 'roundcube'. This password will be used by the Roundcube webmail interface. MySQL roundcube password [o_yUViK4oRy7SX2]: Stopping httpd: [FAILED] Starting httpd: [ OK ] Stopping httpd: [ OK ] Starting httpd: [ OK ] Stopping kolab-saslauthd: [FAILED] Starting kolab-saslauthd: [ OK ] Shutting down cyrus-imapd: [FAILED] Starting cyrus-imapd: [ OK ] Stopping kolabd: [FAILED] Starting kolabd: [ OK ]
インストール後、すでにKolabの動作するインストールがあります。テスト実行にはこれで十分ですが、実稼働環境でのリリースにはファイルをもう少し操作する必要があります:)
構成の編集
構成はこちら/etc/kolab/kolab.conf
ここに、ねじるべきものがあります、いくつかの便利なオプションがあります:
ロケール
ロシア語のデフォルトのロケールはru_RUを指定します
default_locale = en_US
uidとボックス名の生成
メインのメールボックスが生成されるルールは次のとおりです
primary_mail = %(surname)s@%(domain)s
そして、これらは追加のメールボックスが生成されるルールです。あなたが見ることができるように、それらはメインのものよりも柔軟であることができます
secondary_mail = { 0: { "{0}.{1}@{2}": "format('%(givenname)s'[0:1].capitalize(), '%(surname)s', '%(domain)s')" }, 1: { "{0}@{1}": "format('%(uid)s', '%(domain)s')" }, 2: { "{0}@{1}": "format('%(givenname)s.%(surname)s', '%(domain)s')" } }
デフォルトでは、管理インターフェイスのプライマリメールとuidを使用してKolabを変更することは禁止されています。 これらは常にこれらのルールに基づいて自動的に生成される必要があります。
私は個人的にこのスキームが好きではありません。ユーザー名とメールアドレスを手動で、まあ、または少なくとも編集できるように指定することを好みます。 これを行う方法を説明します。
チェックボックス名を無効にする
daemon_rcpt_policy = False
Kolab管理パネルに移動し、 設定に移動し、 uidおよびmail属性のKolabユーザータイプの値を「Generated(read-only)」から「Generated」に変更します。
これで、ユーザーのuidとメールアドレスを手動で編集できます。
メールストレージ
引き続き構成を逆アセンブルします。ここでは、新しいユーザーに対してデフォルトで作成されるフォルダーを示しています
autocreate_folders = { 'Archive': { 'quota': 0, }, 'Calendar': { 'annotations': { '/private/vendor/kolab/folder-type': "event.default", '/shared/vendor/kolab/folder-type': "event", }, ...
必要に応じて、たとえば、すべてのフォルダが高速ストレージにあり、アーカイブフォルダが低速になるように、異なるフォルダを異なるリポジトリに移動できます。
これを行うには、cyrus configでこれらのリポジトリを探す場所を指定します。
echo "partition-default: /var/spool/imap" >> /etc/imapd.conf echo "partition-archive: /var/spool/imap-archive" >> /etc/imapd.conf
そして、以下のようなアーカイブパラメータにパーティションパラメータを追加します。
... 'Archive': { 'quota': 0, 'partition': 'archive' }, ...
マルチドメイン構成
Kolabはそのままでは複数のドメインをサポートしていません。 むしろ、管理パネルにはこれに関するすべてのものがありますが、postfix、cyrus-imap、amavis、roundcubeなどの他のすべてのサービスはすべて、デフォルトで1つのドメインのみをサポートするように構成されています。
それでも複数のドメインを構成する必要がある場合、公式wikiには、この動物園全体を複数のドメインで動作するように構成する方法に関する非常に詳細なガイドがあります。
説明した手順の後、メールのユーザー名が単純なユーザー名からusername@example.orgに変更されることに注意してください
この機能が必要ない場合は、この項目をスキップしてください。
SSLセットアップ
サーバーを保護します。以前にドメインの証明書を受け取っていない場合は、ドメインの証明書を受け取ります。
証明機関からの証明書も必要になります(StartSSLの場合、 sub.class1.server.ca.pem )
Apache用のmod_sslをインストールする
yum -y install mod_ssl
次の方法でキーをコピーします。
/etc/pki/tls/private/mail.example.org.key
/etc/pki/tls/certs/mail.example.org.crt
/etc/pki/tls/certs/sub.class1.server.ca.pem
# C cat /etc/pki/tls/certs/mail.example.org.crt /etc/pki/tls/private/mail.example.org.key /etc/pki/tls/certs/sub.class1.server.ca.pem > /etc/pki/tls/private/mail.example.org.bundle.pem cat /etc/pki/tls/certs/mail.example.org.crt /etc/pki/tls/certs/sub.class1.server.ca.pem > /etc/pki/tls/certs/mail.example.org.bundle.pem cat /etc/pki/tls/certs/sub.class1.server.ca.pem > /etc/pki/tls/certs/mail.example.org.ca-chain.pem # chown -R root:mail /etc/pki/tls/private chmod 600 /etc/pki/tls/private/mail.example.org.key chmod 750 /etc/pki/tls/private chmod 640 /etc/pki/tls/private/* # cat /etc/pki/tls/certs/sub.class1.server.ca.pem >> /etc/pki/tls/certs/ca-bundle.crt # apache sed -i -e '/SSLCertificateFile \/etc\/pki/c\SSLCertificateFile /etc/pki/tls/certs/mail.example.org.crt' /etc/httpd/conf.d/ssl.conf sed -i -e '/SSLCertificateKeyFile \/etc\/pki/c\SSLCertificateKeyFile /etc/pki/tls/private/mail.example.org.key' /etc/httpd/conf.d/ssl.conf sed -i -e '/SSLCertificateChainFile \/etc\/pki/c\SSLCertificateChainFile /etc/pki/tls/certs/mail.example.org.ca-chain.pem' /etc/httpd/conf.d/ssl.conf # HTTPS cat >> /etc/httpd/conf/httpd.conf << EOF <VirtualHost _default_:80> RewriteEngine On RewriteRule ^(.*)$ https://%{HTTP_HOST}\$1 [R=301,L] </VirtualHost> EOF # cyrus-imap sed -r -i \ -e 's|^tls_server_cert:.*|tls_server_cert: /etc/pki/tls/certs/mail.example.org.crt|g' \ -e 's|^tls_server_key:.*|tls_server_key: /etc/pki/tls/private/mail.example.org.key|g' \ -e 's|^tls_server_ca_file:.*|tls_server_ca_file: /etc/pki/tls/certs/mail.example.org.ca-chain.pem|g' \ /etc/imapd.conf # Postfix postconf -e smtpd_tls_key_file=/etc/pki/tls/private/mail.example.org.key postconf -e smtpd_tls_cert_file=/etc/pki/tls/certs/mail.example.org.crt postconf -e smtpd_tls_CAfile=/etc/pki/tls/certs/mail.example.org.ca-chain.pem # kolab-cli api sed -r -i \ -e '/api_url/d' \ -e "s#\[kolab_wap\]#[kolab_wap]\napi_url = https://$(hostname -f)/kolab-webadmin/api#g" \ /etc/kolab/kolab.conf # Roundcube sed -i -e 's/http:/https:/' /etc/roundcubemail/libkolab.inc.php sed -i -e 's/http:/https:/' /etc/roundcubemail/kolab_files.inc.php sed -i -e '/^?>/d' /etc/roundcubemail/config.inc.php # iRony DAV- cat >> /etc/roundcubemail/config.inc.php << EOF # caldav/webdav \$config['calendar_caldav_url'] = "https://%h/iRony/calendars/%u/%i"; \$config['kolab_addressbook_carddav_url'] = 'https://%h/iRony/addressbooks/%u/%i'; EOF # Rouncdcube HTTPS cat >> /etc/roundcubemail/config.inc.php << EOF # Force https redirect for http requests \$config['force_https'] = true; EOF
これで、SSL構成は完了したと見なすことができます。
DKIMおよびSPF
Gmailやその他のメールサーバーが電子メールをスパム送信しないようにするには、サーバーでSPFおよびDKIMレコードを構成することをお勧めします。
DKIMのサーバーパーツとして、OpenDKIMを使用することをお勧めします。
スパム配信を構成する
デフォルトでは、amavisは単にすべてのスパムを削除します。 個人的には、それは完全に正しいわけではなく、スパムはユーザーの個人用スパムフォルダに配信されるべきだと思います
実際、これを行う方法には2つのオプションがあります。
セパレーターオプション
Cyrus-imapを使用すると、郵送先住所の特別な区切り記号を使用して、目的のフォルダーに直接メールを配信できます。
amavisを構成する
# ***spam*** sed -i '/^[^#]*$sa_spam_subject_tag/s/^/#/' /etc/amavisd/amavisd.conf # spam+ sed -i '/^# $recipient_delimiter/s/^# //' /etc/amavisd/amavisd.conf # sed -i 's/^\($final_spam_destiny.*= \).*/\1D_PASS;/' /etc/amavisd/amavisd.conf
メールがすぐにスパムフォルダーに配信される可能性がある別のポイント。このフォルダーでは、だれでも権限pを持っている必要があります(つまり、このフォルダーに文字を入れます)。
ちなみに、これは共有フォルダにも適用されます。共有フォルダで手紙を受け取りたい場合は、共有フォルダに同じアクセス許可を設定する必要があります。
残念なことに、cyrus-imapには、非クラスの権利を誰に対しても定義する標準機能はありませんでした。
しかし、これに対する解決策があります。この行をcrontabに追加すると、kolabは4時間ごとにcyrus-imapをプルし、ドメイン内のすべてのユーザーがスパムフォルダーに対して「anyone p」を持つようにします。
0 4 * * * kolab sam user/%/Spam@example.org anyone p
グローバルSieveスクリプトを使用したオプション
amavisを構成する
# ***spam*** sed -i '/^[^#]*$sa_spam_subject_tag/s/^/#/' /etc/amavisd/amavisd.conf # sed -i 's/^\($final_spam_destiny.*= \).*/\1D_PASS;/' /etc/amavisd/amavisd.conf
cyrusのグローバルスクリプトを作成します。
mkdir -p /var/lib/imap/sieve/global/ cat > /var/lib/imap/sieve/global/default.script << EOF require "fileinto"; if header :contains "X-Spam-Flag" "YES" { fileinto "Spam"; } EOF
コンパイルする:
/usr/lib/cyrus-imapd/sievec /var/lib/imap/sieve/global/default.script /var/lib/imap/sieve/global/default.bc
次に、すべての新しいユーザーに接続するスクリプトを作成しましょう。
/bin/set_spam_sieve.sh
#!/bin/bash imap_stor=/var/spool/imap/ sieve_stor=/var/lib/imap/sieve/ user_sieve_folders=($(find $imap_stor -name Spam -type d -print | sed 's|'$imap_stor'|'$sieve_stor'|' | sed 's|/user||' | sed 's|/Spam|/|')) for folder in ${user_sieve_folders[@]} ; do if [ -f $folder'USER.script' ] ; then cd $folder if [ "$(grep -c 'require.*include' 'USER.script')" -eq 0 ]; then echo 'Inject require "include"; '$folder'USER.script' sed -i '1i require "include";' 'USER.script' /usr/lib/cyrus-imapd/sievec 'USER.script' 'USER.bc' chown -R cyrus:mail $folder fi if [ "$(grep -c "include.*:global.*default" 'USER.script')" -eq 0 ]; then echo 'Inject include :global "default"; '$folder'USER.script' echo 'include :global "default";' >> $folder'USER.script' /usr/lib/cyrus-imapd/sievec 'USER.script' 'USER.bc' chown -R cyrus:mail $folder fi echo -e $folder'USER.script' else echo Creating new $folder'USER.script' mkdir -p $folder cd $folder echo -e 'require ["include"];\ninclude :global "default";' > 'USER.script' /usr/lib/cyrus-imapd/sievec 'USER.script' 'USER.bc' ln -s 'USER.bc' 'defaultbc' chown -R cyrus:mail $folder fi done
実行可能にすることを忘れないでください:
chmod +x /bin/set_spam_sieve.sh
次に、4時間ごとにset_spam_sieve.shスクリプトを実行するタスクをcronに追加します。
0 4 * * * /bin/set_spam_sieve.sh
Fail2banによるブルートフォース保護
Fail2banは、他のサービスのログを監視して、誤ったログイン試行を頻繁に繰り返すサービスです。
たとえば、1つのIPから間違ったパスワードでログインしようとする試みが多すぎる場合、このIPは数分間禁止されます。
公式リポジトリからFail2banをインストールします
yum -y install fail2ban
Fail2banのフィルターを作成する
cat > /etc/fail2ban/filter.d/kolab-cyrus.conf << EOF [Definition] failregex = (imaps|pop3s)\[[0-9]*\]: badlogin: \[<HOST>\] (plain|PLAIN|login|plaintext) .* ignoreregex = EOF cat > /etc/fail2ban/filter.d/kolab-postfix.conf << EOF [Definition] failregex = postfix\/submission\/smtpd\[[0-9]*\]: warning: unknown\[<HOST>\]: SASL (PLAIN|LOGIN) authentication failed: authentication failure ignoreregex = EOF cat > /etc/fail2ban/filter.d/kolab-roundcube.conf << EOF [Definition] failregex = <.*> Failed login for .* from <HOST> in session .* ignoreregex = EOF cat > /etc/fail2ban/filter.d/kolab-irony.conf << EOF [Definition] failregex = <.*> Failed login for .* from <HOST> in session .* ignoreregex = EOF cat > /etc/fail2ban/filter.d/kolab-chwala.conf << EOF [Definition] failregex = <.*> Failed login for .* from <HOST> in session .* ignoreregex = EOF cat > /etc/fail2ban/filter.d/kolab-syncroton.conf << EOF [Definition] failregex = <.*> Failed login for .* from <HOST> in session .* ignoreregex = EOF
次に、それらにFail2banを設定します
cat >> /etc/fail2ban/jail.conf << EOF [kolab-cyrus] enabled = true filter = kolab-cyrus action = iptables-multiport[name=cyrus-imap,port="143,993,110,995,4190"] logpath = /var/log/maillog maxretry = 5 [kolab-postfix] enabled = true filter = kolab-postfix action = iptables-multiport[name=kolab-postfix,port="25,587"] logpath = /var/log/maillog maxretry = 5 [kolab-roundcube] enabled = true filter = kolab-roundcube action = iptables-multiport[name=kolab-roundcube, port="http,https"] logpath = /var/log/roundcubemail/userlogins maxretry = 5 [kolab-irony] enabled = true filter = kolab-irony action = iptables-multiport[name=kolab-irony,port="http,https"] logpath = /var/log/iRony/userlogins maxretry = 5 [kolab-chwala] enabled = true filter = kolab-chwala action = iptables-multiport[name=kolab-chwala,port="http,https"] logpath = /var/log/chwala/userlogins maxretry = 5 [kolab-syncroton] enabled = true filter = kolab-syncroton action = iptables-multiport[name=kolab-syncroton,port="http,https"] logpath = /var/log/kolab-syncroton/userlogins maxretry = 5 EOF
Roundcubeを構成する
デフォルトのテーマ
前の記事で書いたように、デフォルトのカメレオンテーマが気に入らない場合は、簡単にラリーに置き換えることができます
sed -i "s/\$config\['skin'\] = '.*';/\$config\['skin'\] = 'larry';/g" /etc/roundcubemail/config.inc.php
Zipdownloadプラグイン
一部のユーザーは、レターへのすべての添付ファイルをすぐにダウンロードするような機会がないと文句を言います。
したがって、この機能はRoundcubeのzipdownloadプラグインにあります
roundcubeリポジトリをダウンロードし、Roundcubeのpluginsフォルダーにプラグインをコピーします
git clone https://github.com/roundcube/roundcubemail/ --depth 1 /tmp/roundcube mv /tmp/roundcube/plugins/zipdownload/ /usr/share/roundcubemail/plugins/ rm -rf /tmp/roundcube/
あとは、/ etc / roundcubemail / config.inc.phpファイルの$ config ['plugins']配列に追加してアクティブ化するだけです。
sed -i "/'contextmenu',/a \ 'zipdownload'," /etc/roundcubemail/config.inc.php
別のポイント:ディストリビューションに付属するバージョンのphp_zlibモジュールにはバグがあります。その結果、文字にキリル文字の名前のファイルが含まれている場合、zipファイルにパッケージ化すると、それらの名前はkrakozyabraに変わります。
これを解決するには、新しいphp_zlibをビルドします。
yum -y install php-devel zlib-devel pcre-devel gcc pecl install zip
Kolab ActiveSyncサーバー
同期についてもう少し説明します。kolab-synrotonサービス(fork z-push )には、デフォルトで2つの動作モードがあります:フォルダーモードとフラットモード。
フォルダーモードの場合、Roundcubeの同期設定でマークしたすべてのフォルダーがそのまま転送されます。
フラットモードの場合、これらのフォルダーはすべて、メール用、連絡先用、カレンダー用に1つにまとめられます...
AppleおよびWindowsテクノロジーはデフォルトでフォルダーモードで動作しますが、Androidではフォルダーモードのサポートが弱いため(開発者はそう言っています)、フラットモードはデフォルトで有効になっています。
必要に応じて、試してみて、デバイスがまだフォルダーモードをサポートしている場合は、/ usr / share / kolab-syncroton / lib / kolab_sync_data.phpファイルの$ ext_devices配列にその名前を追加できます。
おわりに
これで、インストールは完了したと見なすことができます。もう一度すべてのサービスを再起動し、システムの起動時に自動的に開始されるかどうかを確認します。
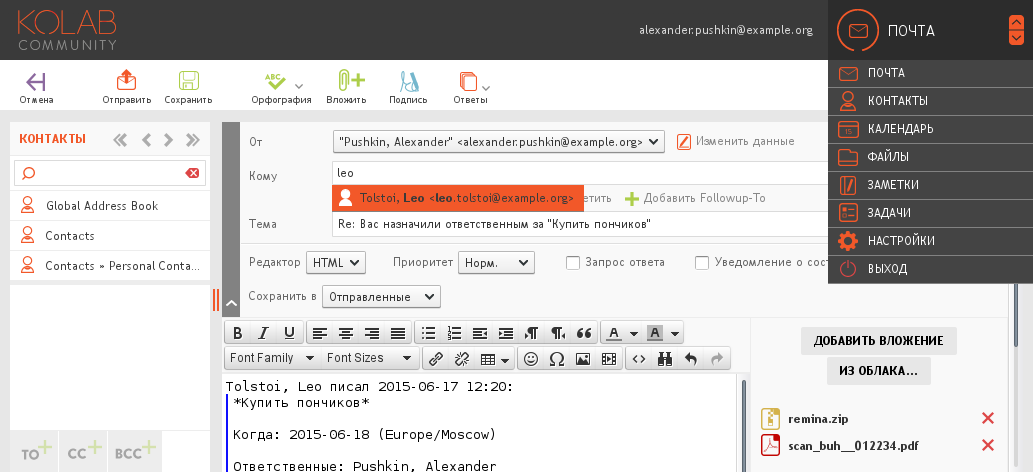
メールクライアントは、 mail.example.org / webmailで入手できます。
管理者: mail.example.org/kolab-webadmin
mail.example.orgからmail.example.org/webmailへの自動リダイレクトを設定することもできます
sed -i -e 's/<Directory \/>/<Directory \/>\n RedirectMatch \^\/$ \/webmail\//g' /etc/httpd/conf/httpd.conf
UPD:最近、 サテライトから、レターを配信するフォルダーにキリル文字の名前がある場合、 Sieveルールが機能しないという問題が発生しました。
ソリューションは非常にシンプルであることが判明しました。
echo 'sieve_utf8fileinto: 1' >> /opt/kolab-crosslab.ru/etc/imapd.conf
ありがとう
Dockerイメージ
ボーナスとして、Koker for Dockerのイメージを記事に添付します。この記事では、上記のすべてとnginxが自動的に構成されます: GitHub 、 DockerHub
プロジェクトの公式サイト: kolab.org