SmtpClientおよびMailNotify
サイトを開発するとき、遅かれ早かれ、ユーザーのアクティブ化、パスワードのリマインドやリセット、ニュースレターの作成など、電子メールとのやり取りに遭遇します。
これに必要なものを決定します。
- メールを送信するクラス
- SMTP設定はIConfigから取得されます
- メール送信エラーがログに記録されます
- メールをオフにするパラメーターの存在。これにより、クライアントの戦闘基地で作業するときに、ごみが送信されなくなります。
静的クラスを作成し、MailSender(/Tools/Mail/MailSender.cs)と呼びます:
public static class MailSender { private static IConfig _config; public static IConfig Config { get { if (_config == null) { _config = (DependencyResolver.Current).GetService<IConfig>(); } return _config; } } private static NLog.Logger logger = NLog.LogManager.GetCurrentClassLogger(); public static void SendMail(string email, string subject, string body, MailAddress mailAddress = null) { try { if (Config.EnableMail) { if (mailAddress == null) { mailAddress = new MailAddress(Config.MailSetting.SmtpReply, Config.MailSetting.SmtpUser); } MailMessage message = new MailMessage( mailAddress, new MailAddress(email)) { Subject = subject, BodyEncoding = Encoding.UTF8, Body = body, IsBodyHtml = true, SubjectEncoding = Encoding.UTF8 }; SmtpClient client = new SmtpClient { Host = Config.MailSetting.SmtpServer, Port = Config.MailSetting.SmtpPort, UseDefaultCredentials = false, EnableSsl = Config.MailSetting.EnableSsl, Credentials = new NetworkCredential(Config.MailSetting.SmtpUserName, Config.MailSetting.SmtpPassword), DeliveryMethod = SmtpDeliveryMethod.Network }; client.Send(message); } else { logger.Debug("Email : {0} {1} \t Subject: {2} {3} Body: {4}", email, Environment.NewLine, subject, Environment.NewLine, body); } } catch (Exception ex) { logger.Error("Mail send exception", ex.Message); } } }
さらに詳しく考えてみましょう。
- 必要に応じて、DependencyResolverからIConfigを静的に初期化します
- EnableMainフラグが設定されている場合、メールの操作を開始します。そうでない場合は、単にログファイルにレターを書き込みます
- MailAddressが指定されていない場合、設定からのデータに従って初期化されます
- SmtpClientは、構成からのデータに従って初期化されます
- 手紙の本文-html
- エンコード-UTF8
- 送信中にエラーが発生した場合、Exception.Messageをログに書き込みます(ここで詳細情報を収集できますが、まだ必要はありません)。
テンプレートでメールを送信することを検討してください。 クラス(静的)NotifyMail(/Tools/Mail/NotifyMail.cs)を作成します。
public static class NotifyMail { private static NLog.Logger logger = NLog.LogManager.GetCurrentClassLogger(); private static IConfig _config; public static IConfig Config { get { if (_config == null) { _config = (DependencyResolver.Current).GetService<IConfig>(); } return _config; } } public static void SendNotify(string templateName, string email, Func<string, string> subject, Func<string, string> body) { var template = Config.MailTemplates.FirstOrDefault(p => string.Compare(p.Name, templateName, true) == 0); if (template == null) { logger.Error("Can't find template (" + templateName + ")"); } else { MailSender.SendMail(email, subject.Invoke(template.Subject), body.Invoke(template.Template)); } } }
同様に、設定を取得します。 送信時に、それを示し、次にFunc <string、string>を使用して、手紙の件名と本文を形成します。
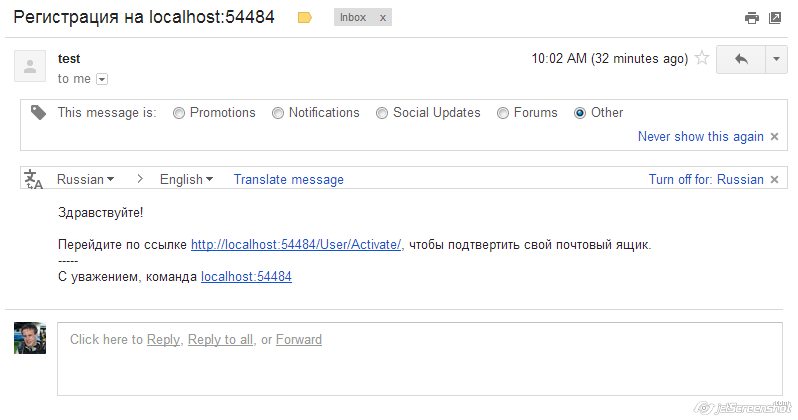
Web.configのRegisterテンプレートを使用して、登録をユーザーに通知します。
<add name="Register" subject=" {0}" template="! <br/><br/> <a href='http://{1}/User/Activate/{0}'>http://{1}/User/Activate/{0}</a>, .<br/>-----<br/> , <a href='http://{1}'>{1}</a>" />
テンプレートを正しく作成するために、htmlタグを保護する必要があることに注目しましょう。 string.Format()のテンプレートとパラメーターの数との関係を考慮する必要があります。 登録中のUserController.csに、(/ Areas / Default / Controllers / UserController.cs:Register)を追加します。
Repository.CreateUser(user); NotifyMail.SendNotify("Register", user.Email, subject => string.Format(subject, HostName), body => string.Format(body, "", HostName)); return RedirectToAction("Index");
BaseControllerの初期化(/Controllers/BaseController.cs)にHostNameを追加しました:
public static string HostName = string.Empty; protected override void Initialize(System.Web.Routing.RequestContext requestContext) { if (requestContext.HttpContext.Request.Url != null) { HostName = requestContext.HttpContext.Request.Url.Authority; } …
登録すると、メールで手紙が届きます。
より複雑なケース
これはすべて良いことですが、多くのプロモーションオファーを含むニュースレターが必要な場合、この形式は機能しません。 第一に、Web.configでそのようなテンプレートを設定することは困難であり、第二に、パラメーターの数が不明です。 通常のhtmlテンプレートと同様に、レターテンプレートはViewで設定すると素晴らしいでしょう。 それでは、ActionMailerライブラリ( http://nuget.org/packages/ActionMailer )を検討してください。
PM> Install-Package ActionMailer Successfully installed 'ActionMailer 0.7.4'. Successfully added 'ActionMailer 0.7.4' to LessonProject.Model.
MailControllerをMailerBaseから継承します。
public class MailController : MailerBase { public EmailResult Subscription(string message, string email) { To.Add(email); Subject = ""; MessageEncoding = Encoding.UTF8; return Email("Subscription", message); } }
Subscription.html.cshtmlビューの追加(/Areas/Default/Views/Mail/Subscription.html.cshtml):
@model string @{ Layout = null; } <!DOCTYPE html PUBLIC "-//W3C//DTD XHTML 1.0 Transitional//EN" "http://www.w3.org/TR/xhtml1/DTD/xhtml1-transitional.dtd"> <html> <head> <meta http-equiv="Content-Type" content="text/html; charset=UTF-8" /> </head> <body> <div> <h1>@Model</h1> </div> </body> </html>
Web.config(Web.config)でメールを操作するための構成を追加します。
<system.net> <mailSettings> <smtp deliveryMethod="Network" from="lxndrpetrov@gmail.com"> <network host="smtp.gmail.com" port="587" userName="lxndrpetrov" password="******" enableSsl="true" /> </smtp> </mailSettings> </system.net>
そして、UserController.cs(/Areas/Default/Controllers/UserController.cs)にテストメソッドを作成します。
[Authorize] public ActionResult SubscriptionTest() { var mailController = new MailController(); var email = mailController.Subscription(", !", CurrentUser.Email); email.Deliver(); return Content("OK"); }
以下を開始します。
localhost / User / SubscriptionTest-電子メールを受け取ります。
文字列内の文字のテキストを取得する例を考えてみましょう。 これを行うには、StreamReader(/Areas/Default/Controllers/UserController.cs)が必要です。
[Authorize] public ActionResult SubscriptionShow() { var mailController = new MailController(); var email = mailController.Subscription(", !", CurrentUser.Email); using (var reader = new StreamReader(email.Mail.AlternateViews[0].ContentStream)) { var content = reader.ReadToEnd(); return Content(content); } return null; }
コンテンツにはすでに生成されたページがあります。 以下を開始します。
ローカルホスト/ユーザー/ SubscriptionShow
SMSNotify
この章では、メールだけでなく、SMSを使用したやり取りを検討します。 ただし、ニュアンスがあります-ニュースレターへのアクセスは個々のサービスによって提供されます。ここでは、unisender.ruを使用した例を使用して、SMSプロバイダーと作業するためのモジュールを作成する基本原則のみを検討します。
タイプMailSetting(/Global/Config/SmsSetting.cs)で設定クラスを作成しましょう:
public class SmsSetting : ConfigurationSection { [ConfigurationProperty("apiKey", IsRequired = true)] public string APIKey { get { return this["apiKey"] as string; } set { this["apiKey"] = value; } } [ConfigurationProperty("sender", IsRequired = true)] public string Sender { get { return this["sender"] as string; } set { this["sender"] = value; } } [ConfigurationProperty("templateUri", IsRequired = true)] public string TemplateUri { get { return this["templateUri"] as string; } set { this["templateUri"] = value; } } }
Web.Configで設定(Web.config):
<configSections> … <section name="smsConfig" type="LessonProject.Global.Config.SmsSetting, LessonProject" /> </configSections> … <smsConfig apiKey="*******" sender="Daddy" templateUri="http://api.unisender.com/ru/api/sendSms" /> </configuration>
SmsSenderクラス(/Tools/Sms/SmsSender.cs)を作成します。
public static class SmsSender { private static IConfig _config; public static IConfig Config { get { if (_config == null) { _config = (DependencyResolver.Current).GetService<IConfig>(); } return _config; } } private static NLog.Logger logger = NLog.LogManager.GetCurrentClassLogger(); public static string SendSms(string phone, string text) { if (!string.IsNullOrWhiteSpace(Config.SmsSetting.APIKey)) { return GetRequest(phone, Config.SmsSetting.Sender, text); } else { logger.Debug("Sms \t Phone: {0} Body: {1}", phone, text); return "Success"; } } private static string GetRequest(string phone, string sender, string text) { try { HttpWebRequest webRequest = (HttpWebRequest)WebRequest.Create(Config.SmsSetting.TemplateUri); /// important, otherwise the service can't desirialse your request properly webRequest.ContentType = "application/x-www-form-urlencoded"; webRequest.Method = "POST"; webRequest.KeepAlive = false; webRequest.PreAuthenticate = false; string postData = "format=json&api_key=" + Config.SmsSetting.APIKey + "&phone=" + phone + "&sender=" + sender + "&text=" + HttpUtility.UrlEncode(text); var ascii = new ASCIIEncoding(); byte[] byteArray = ascii.GetBytes(postData); webRequest.ContentLength = byteArray.Length; Stream dataStream = webRequest.GetRequestStream(); dataStream.Write(byteArray, 0, byteArray.Length); dataStream.Close(); WebResponse webResponse = webRequest.GetResponse(); Stream responceStream = webResponse.GetResponseStream(); Encoding enc = System.Text.Encoding.UTF8; StreamReader loResponseStream = new StreamReader(webResponse.GetResponseStream(), enc); string Response = loResponseStream.ReadToEnd(); return Response; } catch (Exception ex) { logger.ErrorException(" SMS", ex); return " SMS"; } } }
結果は次のようになります。
{"result":{"currency":"RUB","price":"0.49","sms_id":"1316886153.2_79859667475"}}
分解して分析できます。
次のレッスンでは、jsonを使用する方法について説明します。
別のストリーム
多数の人にメールを送信すると、処理に時間がかかる場合があります。 これを行うには、次の原則を使用します。
- 送信メールの送信準備ができているかどうかを確認する別のスレッドを作成します
- メーリングリストを作成すると、レターが作成され、データベースに記録されます
- スレッドはデータベースのステータスを確認して手紙を探します
- 文字はデータベースから順番に抽出されます(文字は削除できますが、文字の内容をリセットできるのは(データベースのサイズを節約するため)だけです。
- 手紙が送られます。
- チェックに戻ります。
Application_Startで別のスレッドが起動されます。 タイマーは1分後に繰り返すように設定されます。
public class MvcApplication : System.Web.HttpApplication { private static NLog.Logger logger = NLog.LogManager.GetCurrentClassLogger(); private Thread mailThread { get; set; } protected void Application_Start() { var adminArea = new AdminAreaRegistration(); var adminAreaContext = new AreaRegistrationContext(adminArea.AreaName, RouteTable.Routes); adminArea.RegisterArea(adminAreaContext); var defaultArea = new DefaultAreaRegistration(); var defaultAreaContext = new AreaRegistrationContext(defaultArea.AreaName, RouteTable.Routes); defaultArea.RegisterArea(defaultAreaContext); FilterConfig.RegisterGlobalFilters(GlobalFilters.Filters); RouteConfig.RegisterRoutes(RouteTable.Routes); BundleConfig.RegisterBundles(BundleTable.Bundles); mailThread = new Thread(new ThreadStart(ThreadFunc)); mailThread.Start(); } private static void ThreadFunc() { while (true) { try { var mailThread = new Thread(new ThreadStart(MailThread)); mailThread.Start(); logger.Info("Wait for end mail thread"); mailThread.Join(); logger.Info("Sleep 60 seconds"); } catch (Exception ex) { logger.ErrorException("Thread period error", ex); } Thread.Sleep(60000); } } private static void MailThread() { var repository = DependencyResolver.Current.GetService<IRepository>(); while (MailProcessor.SendNextMail(repository)) { } } }
MailProcessorクラスを考えます(ただし、作成しません)。
public class MailProcessor { public static bool SendNextMail(IRepository repository) { var mail = repository.PopMailQueue(); if (mail != null) { MailSender.SendMail(mail.Email, mail.Subject, mail.Body); return true; } return false; } }
MailProcessor.SendNextMail(repository)
-文字がない場合、次のメッセージを送信し
MailProcessor.SendNextMail(repository)
返します
MainThreadスレッドは、
MailThread
する
MailThread
待機し、1分間スモークを中断します。 そしてさらに。 データベースに新しい文字がない場合、1分後に喫煙します。
すべてのソースはhttps://bitbucket.org/chernikov/lessonsにあります