この記事では、Blueprintsプラグインの開発プロセスを最初のアイデアから最終結果まで見ていきます。 これを行うために、Atlassian Confluence用の小さなプラグインが開発されます。これにより、ブループリントテクノロジーを使用して、ページビューで古き良きwikiマークアップからページを作成できます。
ステップ1-プロジェクト構造の作成
プロジェクト構造を作成するには、 Atlassian SDKの
atlas-create-confluence-plugin
コマンドを使用して、必要なデータを入力できます。
-
group-id
:com.stiltsoft.confluence.plugins
-
artifact-id
:wiki-markup-blueprint-plugin
-
version
:1.0.0-SNAPSHOT
-
package
:com.stiltsoft.confluence.plugins.blueprint.markup
手順2-POMファイルへのメタデータの追加
これで、お気に入りのIDEでプロジェクトを開き、POMファイルのメタデータを編集できます(Confluenceのプラグインの開発はMavenの参加により行われます)。 この例では、最初のマイルストーンConfluence 5.1を使用します( 5.1-rc3はすでに利用可能です )。
<dependencies> <dependency> <groupId>com.atlassian.confluence</groupId> <artifactId>confluence</artifactId> <version>${confluence.version}</version> <scope>provided</scope> </dependency> <dependency> <groupId>com.atlassian.confluence.plugins</groupId> <artifactId>confluence-create-content-plugin</artifactId> <version>${create-content.version}</version> <scope>provided</scope> </dependency> </dependencies> <properties> <confluence.version>5.1-m1</confluence.version> <create-content.version>1.3.8</create-content.version> <confluence.data.version>5.1-m1</confluence.data.version> <amps.version>4.1.5</amps.version> </properties>
ステップ3-プラグイン記述子へのモジュールの追加
このステップでは、
Blueprints
を操作するためのモジュールをプラグイン記述子
atlassian-plugin.xml
に追加します。
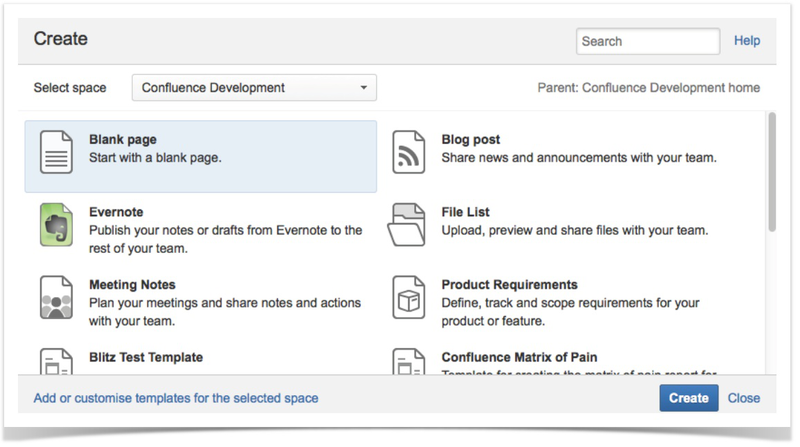
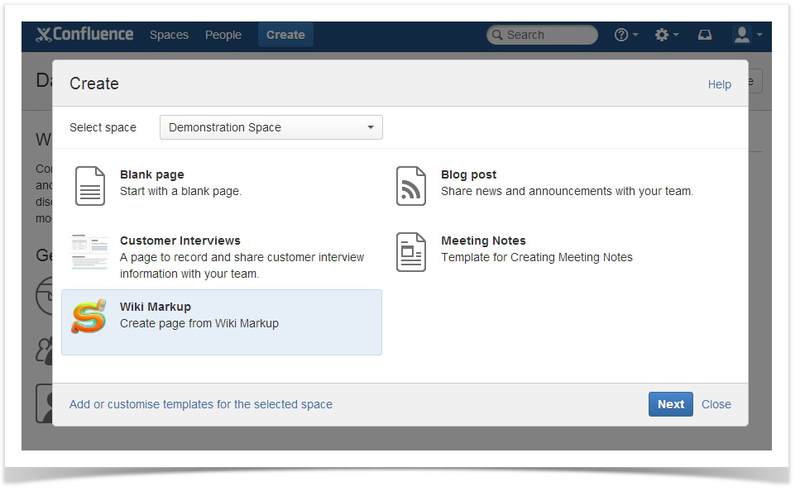
<web-item key="wiki-markup-blueprint-item" i18n-name-key="wiki.markup.blueprint.name" section="system.create.dialog/content"> <description key="wiki.markup.blueprint.description"/> <resource name="icon" type="download" location="images/stiltsoft.png"/> <param name="blueprintKey" value="wiki-markup-blueprint"/> </web-item>
web-item
モジュールは、[
Create Dialog
の
Create Dialog
]ウィンドウに
Wiki Markup
メニュー項目を追加し、次のパラメーターがあります。
- 属性
i18n-name-key
表示されるメニュー項目の名前がリソースファイルにあるキー -
section
属性-メニュー項目が表示される場所を決定します(したがって、Create Dialog
のCreate Dialog
ウィンドウに表示されるように、system.create.dialog/content
値を指定します) -
resource
タグ-表示されたアイコンへのパスを示すために使用 -
param
タグparam
という名前と、後でatlassian-plugin.xml
で宣言されたblueprint
モジュールのキーに等しい値を持つパラメーターを定義します
次に、
blueprint
モジュールを定義します。
<blueprint key="wiki-markup-blueprint" create-result="view" content-template-key="wiki-markup-blueprint-page" index-key="wiki-markup-blueprint-index"> <dialog-wizard key="blueprint-wizard"> <dialog-page id="insertMarkupForm" template-key="WikiMarkup.Blueprint.form" title-key="wiki.markup.blueprint.dialog.title" last="true"/> </dialog-wizard> </blueprint>
blueprint
モジュール
blueprint
、開発者にコアバリューを
blueprint
します。 次のパラメーターで構成されます。
- 属性
key
-記述子内のモジュールキー -
create-result
属性Blueprints
を使用して新しいページを作成するためのすべてのステップを完了した後に予想される動作を定義します。 値のedit
(ページ編集モードに入るすべてのステップを完了した後)およびview
(ページ表示モードに入るすべてのステップを完了した後、ページが自動的に作成されます)を取ることができます。 - 属性
content-template-key
atlassian-plugin.xml
後でatlassian-plugin.xml
で宣言されたcontent-template
モジュールのキーを参照します - 属性
index-key
index'a
作成されたページにindex'a
されるラベルの名前を定義します(index'a
メカニズムindex'a
非常に多面的ですが、この例では考慮していません)
blueprint
モジュールの
dialog-wizard
パラメーターは、
Blueprint
プラグインを使用してコンテンツを作成するときにユーザーに表示されるものの動的な動作を決定します。 このパラメーターには次の属性があります。
-
id
属性html
コンテンツの形成に参加し、ユーザーに表示される現在のコンテンツ作成ウィンドウのcss
クラスの一部として使用されます -
template-key
属性-ウィンドウのコンテンツを動的に生成するためのsoy
テンプレートの名前を定義します -
title-key
属性-リソースファイル内のウィンドウタイトルのキー
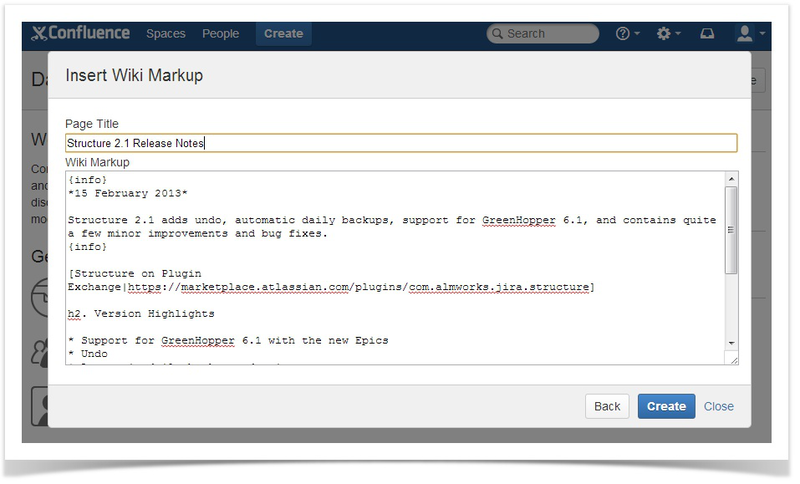
使用する大豆テンプレートは 、後で
web-resource
モジュールで定義されます。 以下は、
templates.soy
ファイルの内容です。
{namespace WikiMarkup.Blueprint} /** * Wiki Markup form */ {template .form} <form id="wiki-markup-form" action="#" method="post" class="aui"> <div> {getText('wiki.markup.blueprint.dialog.form.label.page.title')} </div> <input id="page-title" type="text" name="title"> <div> {getText('wiki.markup.blueprint.dialog.form.label.markup')} </div> <textarea id="wiki-markup" name="wikiMarkup"></textarea> </form> {/template}
この場合、ユーザーには以下が表示されます。
content-template
モジュールは、ページの作成に使用されるページテンプレートを定義します。
<content-template key="wiki-markup-blueprint-page" i18n-name-key="wiki.markup.blueprint.page.name"> <resource name="template" type="download" location="xml/content-template.xml"/> <context-provider class="com.stiltsoft.confluence.plugins.blueprint.markup.WikiMarkupProvider"/> </content-template>
content-template
モジュールには次のパラメーターがあります。
-
key
属性-記述子内のモジュールキー(blueprint
モジュールで使用) -
resource
タグ-新しいページの作成に関与するテンプレートを定義します -
context-provider
タグは、追加の変数を生成するページの作成に参加できるオプションのパラメーターです。
xml
ファイルのページテンプレートには、コンテキストから取得された動的変数が含まれている可能性があることに注意してください。 開発中のプラグインでは、テンプレートは次のとおりです。
<at:var at:name="wikiInXhtml" at:rawXhtml='true'/>
テンプレートで使用できる変数は、ユーザーが入力したフォームから取得することも、
context-provider
直接「寝る」こともでき
context-provider
。 この例では、
context-provider
を使用し
context-provider
。これは、ユーザーが入力フォームに入力したwikiマークアップをConfluenceで使用される
xhtml
マークアップに変換します。
context-provider
のコードを以下に示します。
package com.stiltsoft.confluence.plugins.blueprint.markup; import com.atlassian.confluence.content.render.xhtml.DefaultConversionContext; import com.atlassian.confluence.content.render.xhtml.XhtmlException; import com.atlassian.confluence.renderer.PageContext; import com.atlassian.confluence.xhtml.api.EditorFormatService; import com.atlassian.plugin.PluginParseException; import com.atlassian.plugin.web.ContextProvider; import java.util.Map; public class WikiMarkupProvider implements ContextProvider { private EditorFormatService editorFormatService; public WikiMarkupProvider(EditorFormatService editorFormatService) { this.editorFormatService = editorFormatService; } @Override public void init(Map<String, String> params) throws PluginParseException { } @Override public Map<String, Object> getContextMap(Map<String, Object> ctx) { try { String wikiMarkup = (String) ctx.get("wikiMarkup"); String xhtml = editorFormatService.convertWikiToEdit(wikiMarkup, new DefaultConversionContext(new PageContext())); ctx.put("wikiInXhtml", xhtml); } catch (XhtmlException ignored) { } return ctx; } }
最後に、
atlassian-plugin.xml
で
web-resource
モジュールを定義します。
<web-resource key="blueprint-resources" name="Blueprint Resources"> <transformation extension="js"> <transformer key="jsI18n"/> </transformation> <transformation extension="soy"> <transformer key="soyTransformer"> <functions>com.atlassian.confluence.plugins.soy:soy-core-functions</functions> </transformer> </transformation> <resource type="download" name="wiki-markup.css" location="css/wiki-markup.css"/> <resource type="download" name="templates-soy.js" location="soy/templates.soy"/> <resource type="download" name="wiki-markup.js" location="js/wiki-markup.js"/> <dependency>com.atlassian.confluence.plugins.confluence-create-content-plugin:resources</dependency> <context>atl.general</context> <context>atl.admin</context> </web-resource>
web-resource
モジュールで使用されているパラメーター値をドキュメントでよく理解できます。
com.atlassian.confluence.plugins.confluence-create-content-plugin:resources
依存関係
com.atlassian.confluence.plugins.confluence-create-content-plugin:resources
付加する必要があることに注意してください。 さらに、
wiki-markup.js
、次のように
Blueprint
プラグインを登録する必要があります。
(function ($) { Confluence.Blueprint.setWizard('com.stiltsoft.confluence.plugins.wiki-markup-blueprint-plugin:wiki-markup-blueprint-item', function() { }); })(AJS.$);
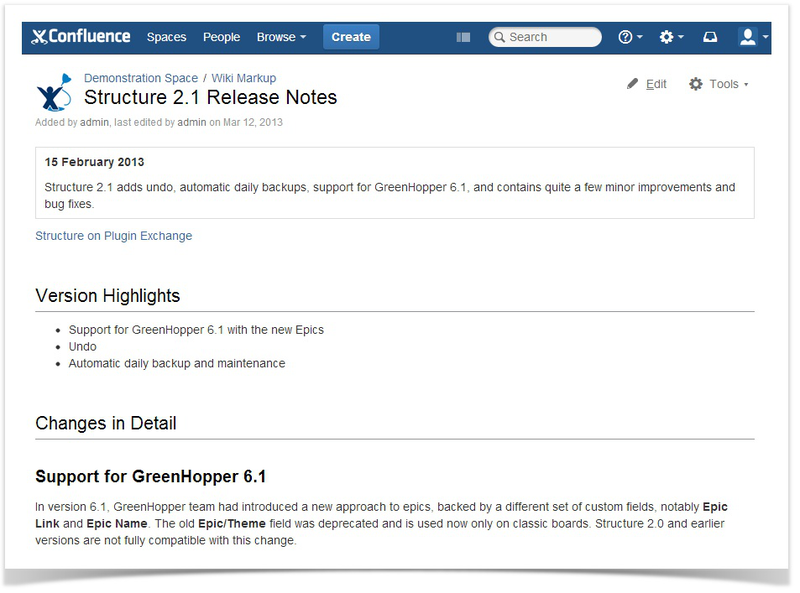
ステップ4-プラグインを使用して、Wikiレイアウトからページを作成します
信じられませんが、wikiマークアップからページを作成するための
Blueprint
プラグインを作成するプロセスは
Blueprint
終了します。 すべてを正しければ、プラグインをインストールして、実際に試してみることができます。
さらに、プラグインのソースコードを確認したり、すべての手順を繰り返して作成したりすることもできます。