My task was to make my beloved a simple, cheap, compact and most importantly galvanically isolated USB-UART converter. The main case for me is debugging via printf using uart, yes yes, I am aware of SWO and other methods, but it’s more convenient for me to work with uart. The presence of insulation is critical for me, because I basically have to design power converters that can easily burn, for example, the usb port of my laptop. However, if you don’t have high voltage in your devices, then you shouldn’t relax either, any 12V can also perfectly damage your PC. Of course, do not forget about the interference, the galvanic isolation partially prevents any muck from getting into the usb port.
As you can see, the decoupled interface converters have some advantages, but here some will object: “Why? Still there is on Aliexpress. " Here the answer is simple - I was not satisfied with the price of the finished device, nor its dimensions, nor quality. As a result, in a couple of hours I “invented a bicycle” that would satisfy all my Wishlist and after manufacturing it turned out like this:

Want to secure your usb ports and find out why so many? Then let's go :))
Concept
Initially, I just wanted to make myself a couple of “whistles” for debugging, and in the future also use them to send to customers, for example, to safely update the firmware via the built-in bootloader or to remove the logs if something went wrong. Hence the task was to make a very cheap piece of iron so that it would not be a pity to distribute to the right and left. True, everything went a little different ...
In my telegram channel, I made an announcement inviting me to join the order, because when the batch increased, the cost of the device decreased. As a result, orders for 50 pieces + 10 pieces were accumulated per day, I did not begin to collect more. Actually, therefore, the KDPV is not 10 pieces, but a few more. Looking ahead, I’ll say that such a small-scale order allowed reducing the cost of one device from ~ 640 rubles to ~ 375 rubles, which is pretty good.
Another feature of the converter is that it does not have a 5V galvanically isolated dc / dc converter installed on it. The block diagram looks like this:
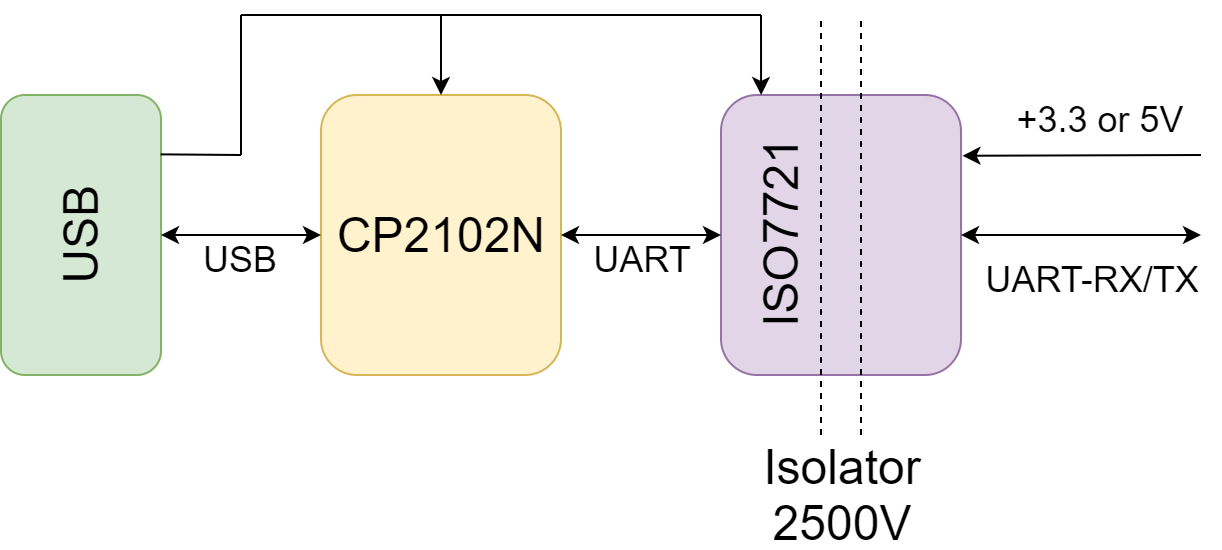
As you can see, the ISO7721 insulator on the left side is powered from 5V of the USB itself, and on the right side you must already supply the voltage of the logical level you need. This isolator works at standard levels of 2.5, 3.3 and 5V, that is, if you work with STM32, then you apply + 3.3V to the VREF pin, and if you use ATmega8, then you already apply + 5V. Quite convenient and this solution has a number of advantages.
Firstly, setting the normal dc / dc leads to a 2-fold increase in the cost of the device, and that's why we need it if there is always power from the usb side, and there will be power from the MK side too, because there is nothing to take from it otherwise.
Secondly, if we install, for example, dc / dc with an input voltage of 5V and an output voltage of 3.3V, then we are unlikely to supply any MK with 5V from it. I don’t really need this, but someone will probably need 5V, because we do not live with atmegs and cortexes alone.
Project
Now to the main thing - to the project. It was executed in Altium Designer, the project source is open, libraries for AD are also open, if someone needs them. For those who do not have Altium, I uploaded all the necessary files, and most importantly, Gerber files for ordering printed circuit boards.
All project sources are located on github
- AltiumProject - source project in AD19
- Documents - schematic diagram in PDF format and specification (BOM)
- Manufacture - a set of files for the production of printed circuit boards (Gerber and NC Drill)
- Mechanical - 3D device model
Paneling
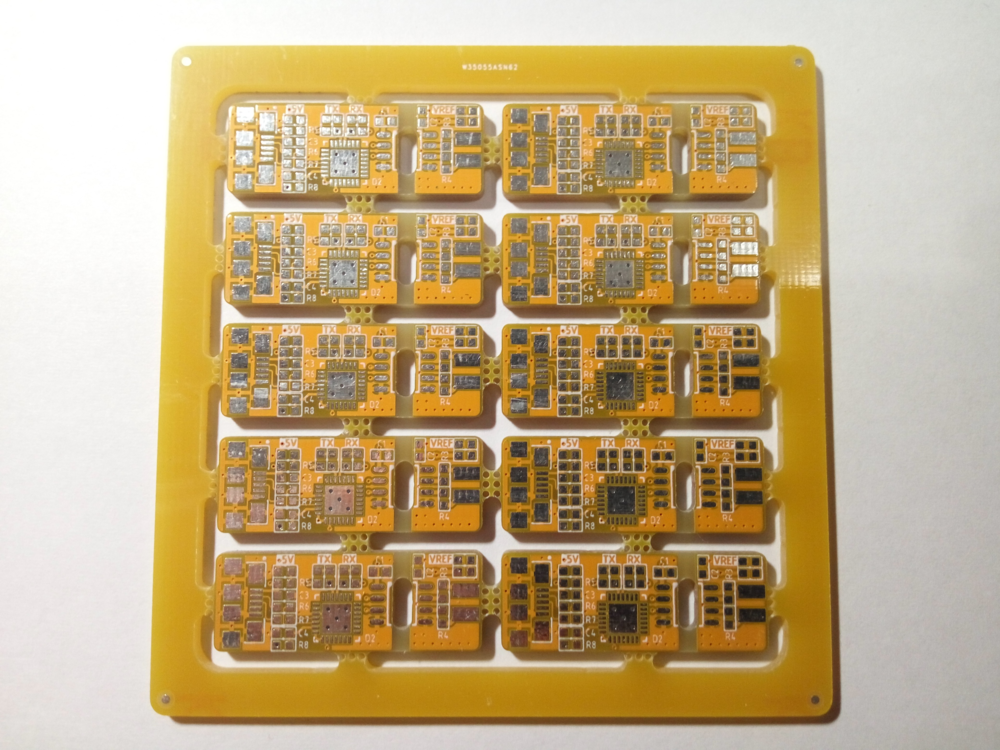
I had to order not 10 boards for myself, but a few more, so it was decided to assemble in a panel. Surely in the future I will also collect at least 10-20 pieces of data from each converter, and installing components on 10 boards at once is much more convenient and faster. I also decided to immediately order 100 boards, because they will come in handy anyway in the future, and for Chinese low-cost airlines (I ordered it on PCBway), the pricing policy is built so that 100 boards cost as much as 60.
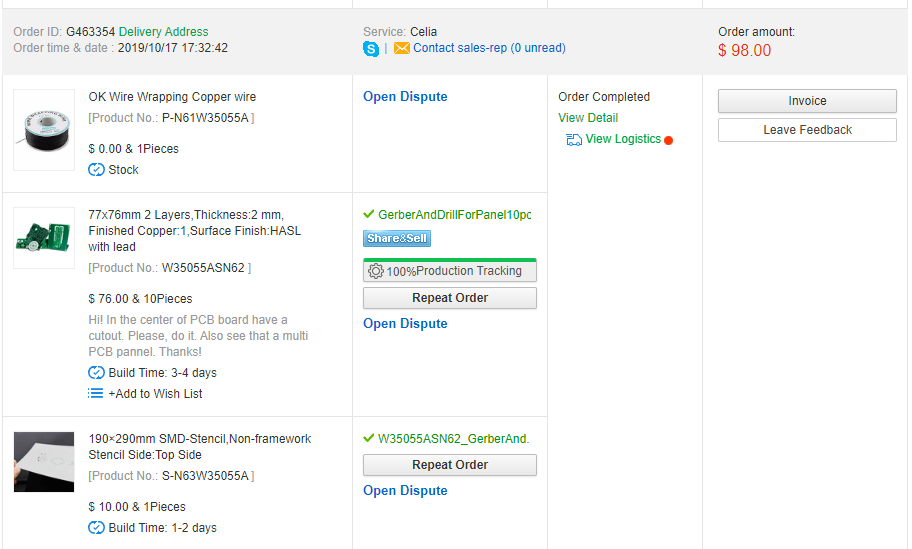
As a result, my order was for 10 panels with 10 boards each, the thickness of the PCB was non-standard 2 mm, which slightly increased the cost. With delivery, the order came out at $ 98 or $ 0.98 / pc. I chose more thickness, because with 2 mm PCB, it fits perfectly between the terminals of the PLS connectors, and this facilitates installation, and additional rigidity and strength of the board as a bonus.
After some time, these panels came to me:
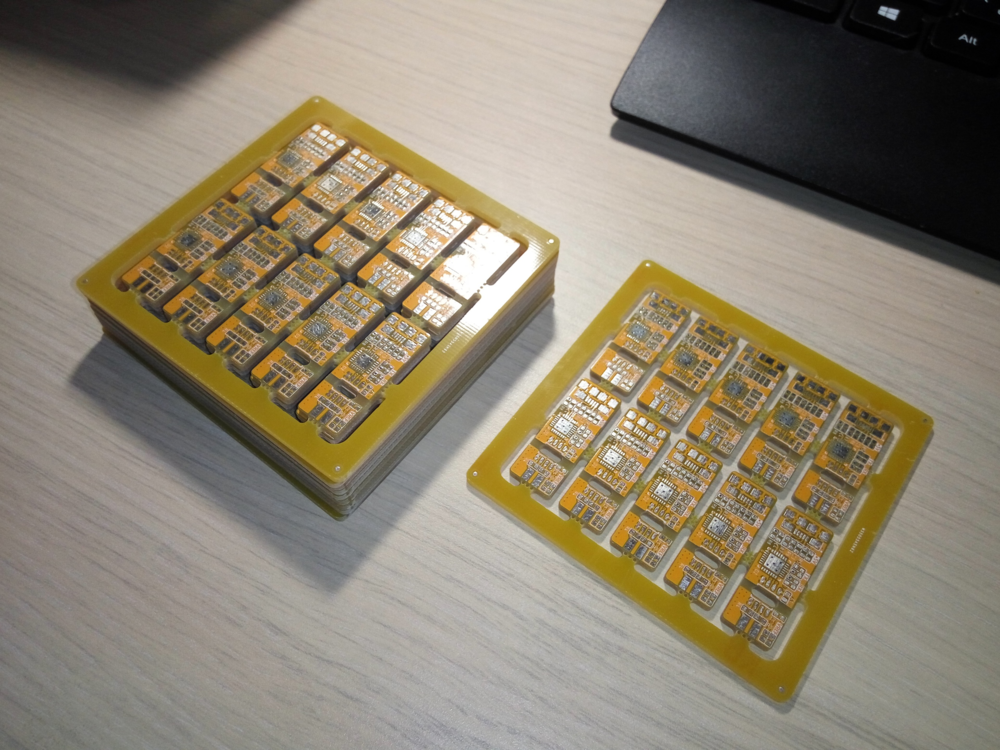
And also a stencil for applying paste on them:
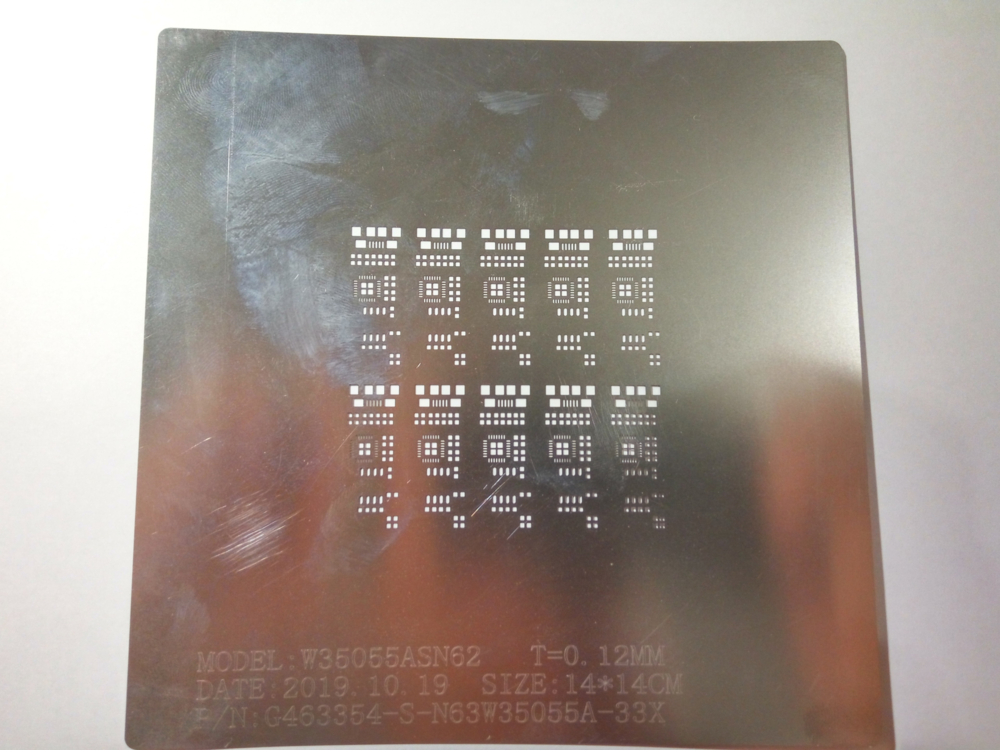
For those who want to assemble this converter on github in the Manufacture folder, there are gerber files for a single board and for a panel of 10 boards, as in the photo.
Assembly and testing
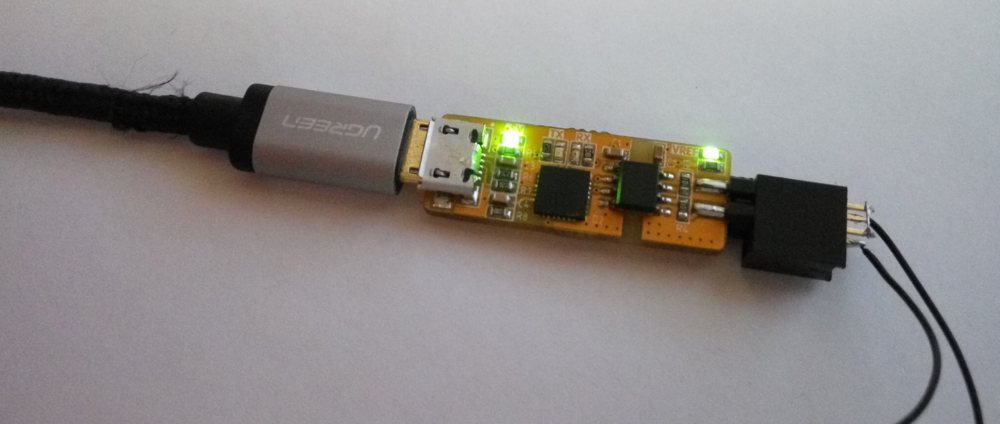
Since the device is simple and consists of only 18 components, there isn’t much to make a mistake here, everything worked right away, the only problems that can come from is installation, usually if something doesn’t work, then look at the soldering of the USB connector and the QFN case, all the rest should not be a problem. All resistors, capacitors and LEDs have a size of 0603, which should also not cause problems when soldering with a hairdryer or in the oven, and even a beginner can also do it with a soldering iron.
After assembling 60 pieces, it was necessary to check before mailing, I did it simply - I took the PBD-4 connector, which is the counterpart for PLD-4, shortened the legs of RX and TX on it to get an “echo”, that is, the data sent from the terminal here but they were accepted by him. And in fact, do not forget to apply 3.3 or 5V to the terminals of the VREF and GND connectors.
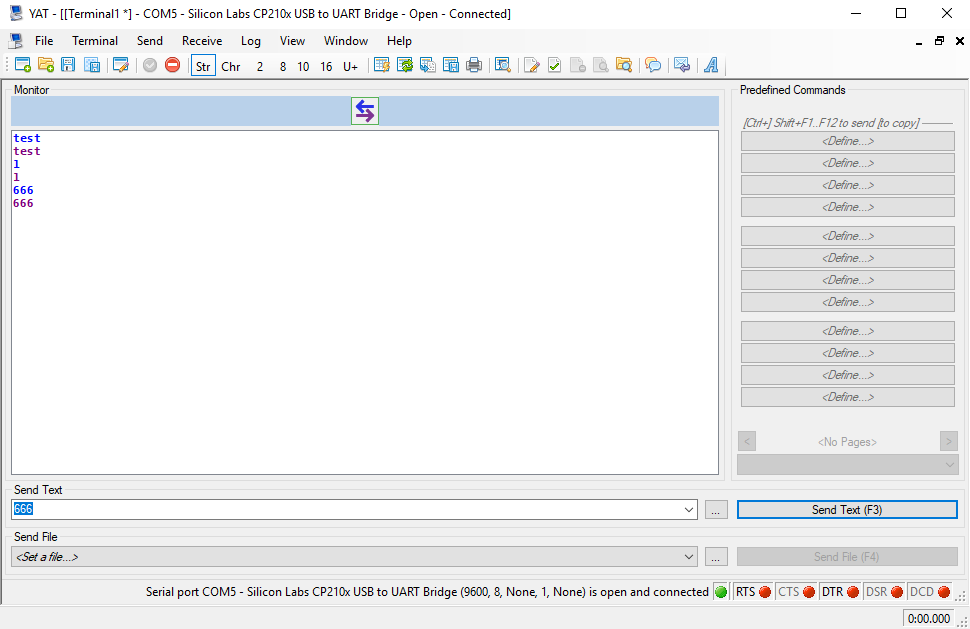
We get a simple and quick way to test devices. I tested with the YAT terminal, just sending a string and if everything is fine, then it immediately flew back:
The final
As a result of this small project, transformers were sent out to a dozen cities; for the final recipient, the cost of the converter came out to 375 rubles / pc + 1 more class 175 airmail forwarding by class. In theory, you could have done even cheaper by ordering components in China rather than digikey, but I’m so calmer when I’m sure that Samsung is still Samsung, and Yageo is still Yageo.
In fact, it turned out cheap for one simple reason - there is no commercial component in the project. If you throw all the time expenses here, as well as profit, then the price would not be so interesting, the benefit of the “earn” task was not worth it.
I hope someone will be interested in this project and you can repeat it without any problems. To reduce the cost on github there is a description of replacements if you can’t buy part-number positions from VOM.