
Not so long ago, we implemented the solution on a Windows terminal server. As usual, they threw shortcuts to the employees on the desktops for employees, and said - work. But users were intimidated in terms of Cyber Security. And when connecting to the server, seeing messages like: “Do you trust this server? Exactly? ”, They were scared and turned to us - is everything okay, can you click OK? Then it was decided to do everything beautifully, so that no questions and panic.
If your users still come to you with similar fears, and you’re tired of ticking the “Do not ask again” checkbox, welcome to cat.
Step zero. Training and Trust Issues
So, our user pokes on the saved file with the extension .rdp and receives such a request:
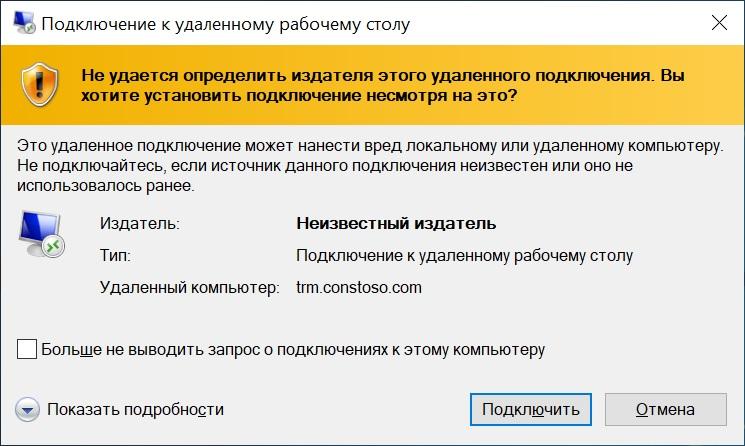
"Malicious" connection .
To get rid of this window, a special utility called RDPSign.exe is used. Full documentation is available, as usual, on the official website , and we will analyze an example of use.
First we need to take a certificate to sign the file. He might be:
- Public
- Issued by internal authority Certificate Authority.
- Absolutely self-signed.
Most importantly, the certificate should be able to sign (yes, you can select
EDS accountants), and client PCs trusted him. Here I will use a self-signed certificate.
Let me remind you that trust in a self-signed certificate can be organized using group policies. A little more details - under the spoiler.
First you need to take an existing certificate without a private key in .cer format (this can be done by exporting a certificate from the Certificates snap-in) and put it in a network folder that is accessible for users to read. After that, you can configure group policy.
Certificate import is configured in the section: Computer Configuration - Policies - Windows Configuration - Security Settings - Public Key Policies - Trusted Root Certification Authorities. Next, right-click to import the certificate.
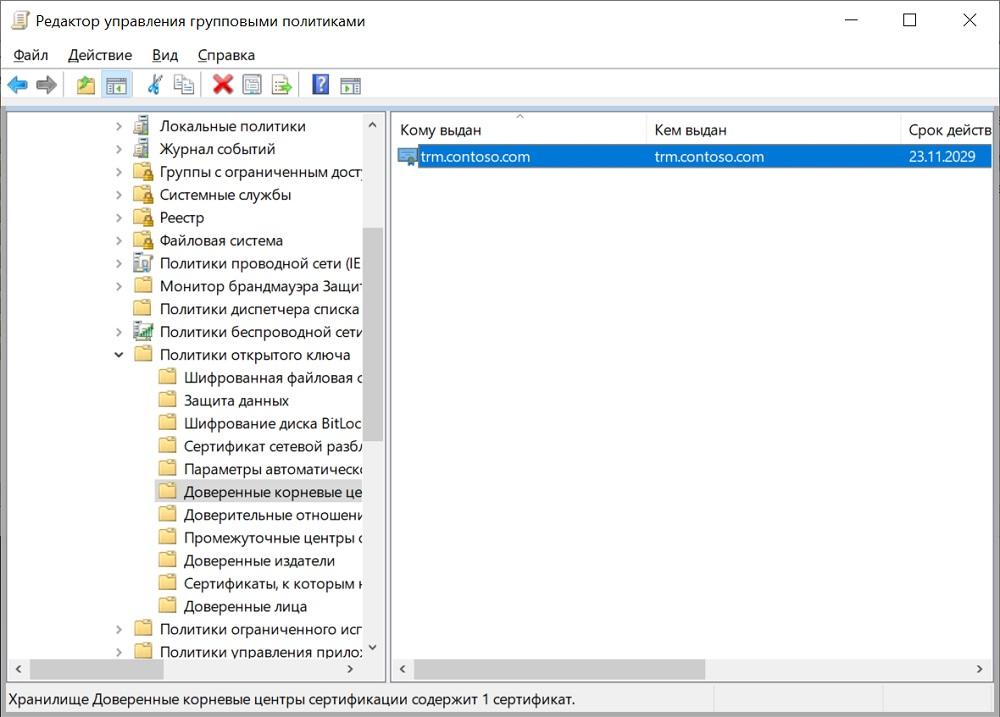
Customized policy.
Client PCs will now trust the self-signed certificate.
If the problems with trust are resolved, we proceed directly to the issue of signature.
Step one. Signedly sign the file
There is a certificate, now you need to know its fingerprint. Just open it in the "Certificates" snap-in and copy it to the "Composition" tab.
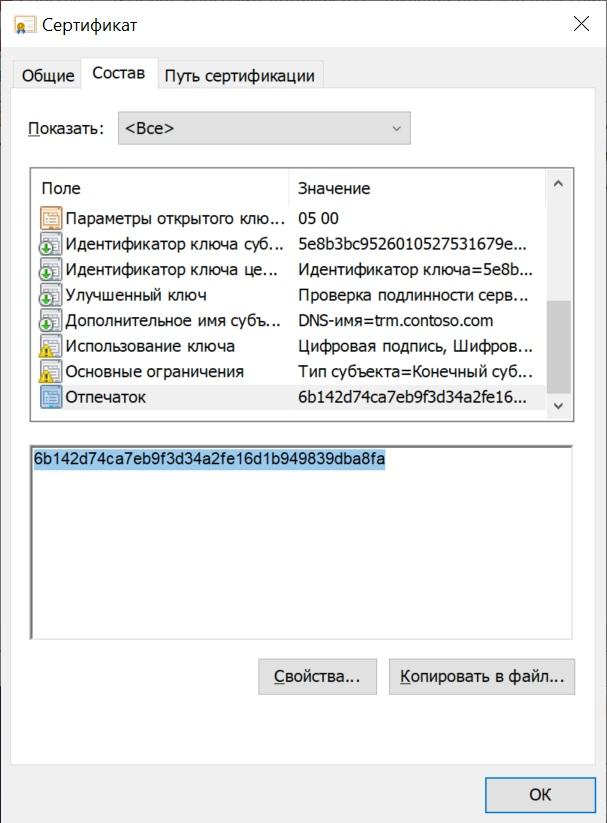
We need the fingerprint.
It is better to immediately bring it to its proper form - only capital letters and without spaces, if any. This can be conveniently done in the PowerShell console with the command:
("6b142d74ca7eb9f3d34a2fe16d1b949839dba8fa").ToUpper().Replace(" ","")
Having received the fingerprint in the desired format, you can safely sign the rdp file:
rdpsign.exe /sha256 6B142D74CA7EB9F3D34A2FE16D1B949839DBA8FA .\contoso.rdp
Where. \ Contoso.rdp is the absolute or relative path to our file.
After the file is signed, it is no longer possible to change some of the parameters through a graphical interface such as the server name (is it really, what is the point of signing?) And if you change the settings with a text editor, the signature “flies”.
Now, when you double-click on the shortcut, the message will be different:
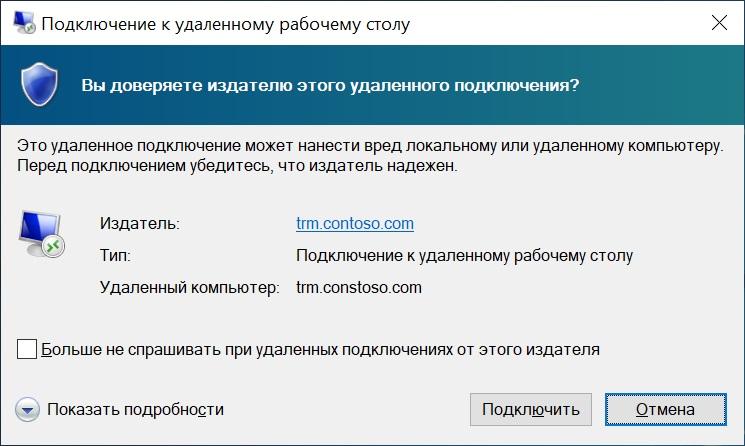
A new message. Color less dangerous, already progress.
Let's get rid of him too.
Step Two And again, trust issues
To get rid of this message, we will again need Group Policy. This time the road lies in Computer Configuration - Policies - Administrative Templates - Windows Components - Remote Desktop Services - Remote Desktop Connection Client - Specify SHA1 fingerprints of certificates representing trusted RDP publishers.
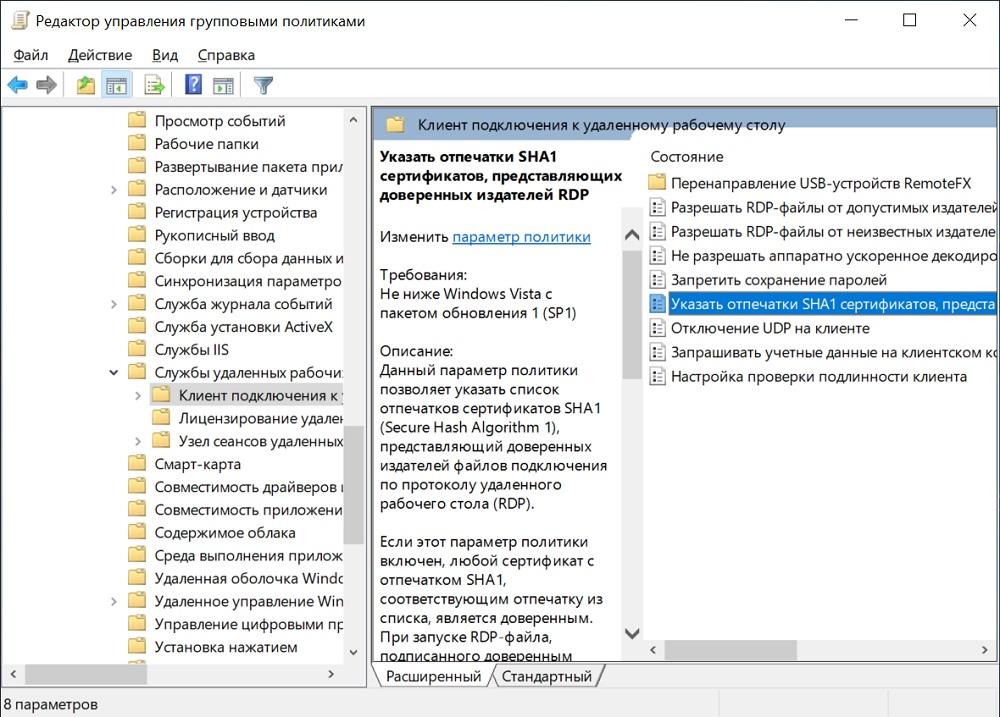
We need a policy.
In politics, it’s enough to add the fingerprint already familiar to us from the previous step.
It is worth noting that this policy overrides the "Allow RDP files from valid publishers and user default RDP settings" policy.

Customized policy.
Voila, now no strange questions - just a login-password request. Hm ...
Step Three Transparent server login
Indeed, if we are already authorized when entering the domain computer, then why do we need to re-enter the same username and password? We will transfer the credentials to the server “transparently”. In the case of a simple RDP (without using the RDS Gateway), we will come to our aid ... That's right, group policy.
We go to the section: Computer Configuration - Policies - Administrative Templates - System - Credential Transfer - Allow the transfer of default credentials.
Here you can add the necessary servers to the list or use wildcard. It will look like TERMSRV / trm.contoso.com or TERMSRV / * .contoso.com.

Customized policy.
Now, if you look at our shortcut, it will look something like this:
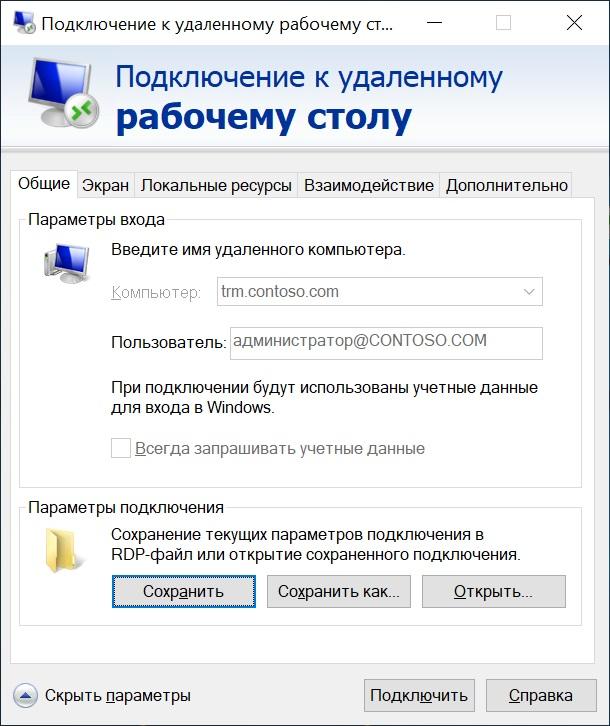
Do not change the username.
If you use RDS Gateway, you will also need to allow data transfer on it. To do this, in IIS Manager, in the "Authentication Methods", disable anonymous authentication and enable Windows authentication.
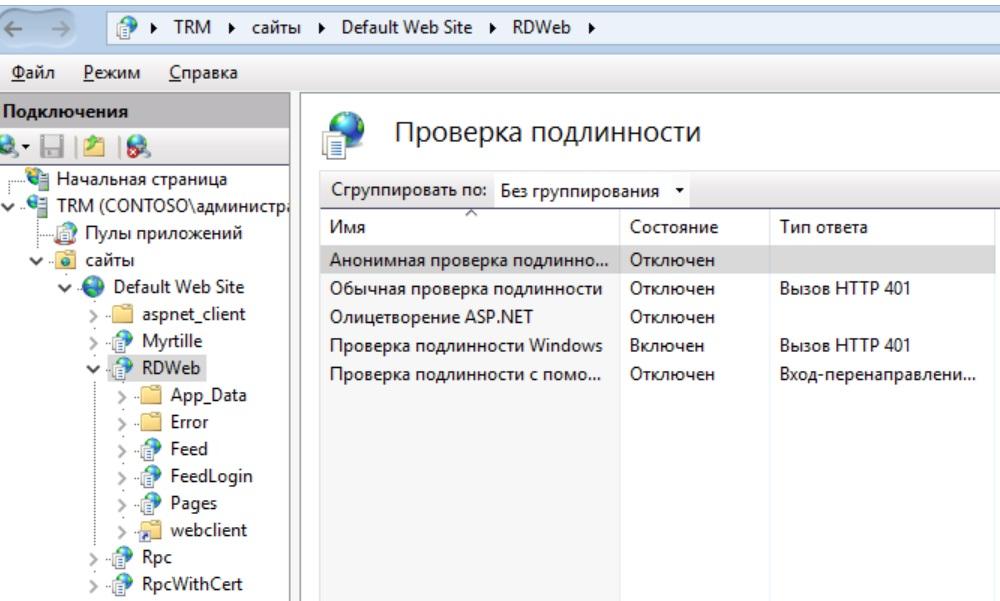
Configured IIS.
Do not forget to restart the web services when finished:
iisreset /noforce
Now everything is fine, no questions and requests.