Well, why is this microbit needed? It is much better to buy an arduino with a set of sensors, and it will all cost less at times.Let's try to understand in an unbiased manner - what are the strengths and weaknesses of each board, and is there any sense in opposing them? And as a bonus for those who read to the end, we’ll talk about a competition where you can get a micro: bit board for free to implement your ideas and projects, even if you are not an 11-year-old student from the UK.
We will compare micro: bit with the most popular among beginners Arduino Uno, not forgetting, however, about the whole wide variety of boards of the Arduino family.
Open the box
Let's start with the look, size and features that the boards provide right out of the box. The BBC micro: bit measures 43 mm × 52 mm, and visually, is almost half the size of the Arduino Uno (69 × 53 mm). It’s immediately noticeable that micro: bit was designed for pockets and backpacks of teenagers :) This is a board with rounded edges, lacking protruding pin connectors. The main components on the board (processor, compass, accelerometer, antenna, etc.) are signed by silk screen printing.

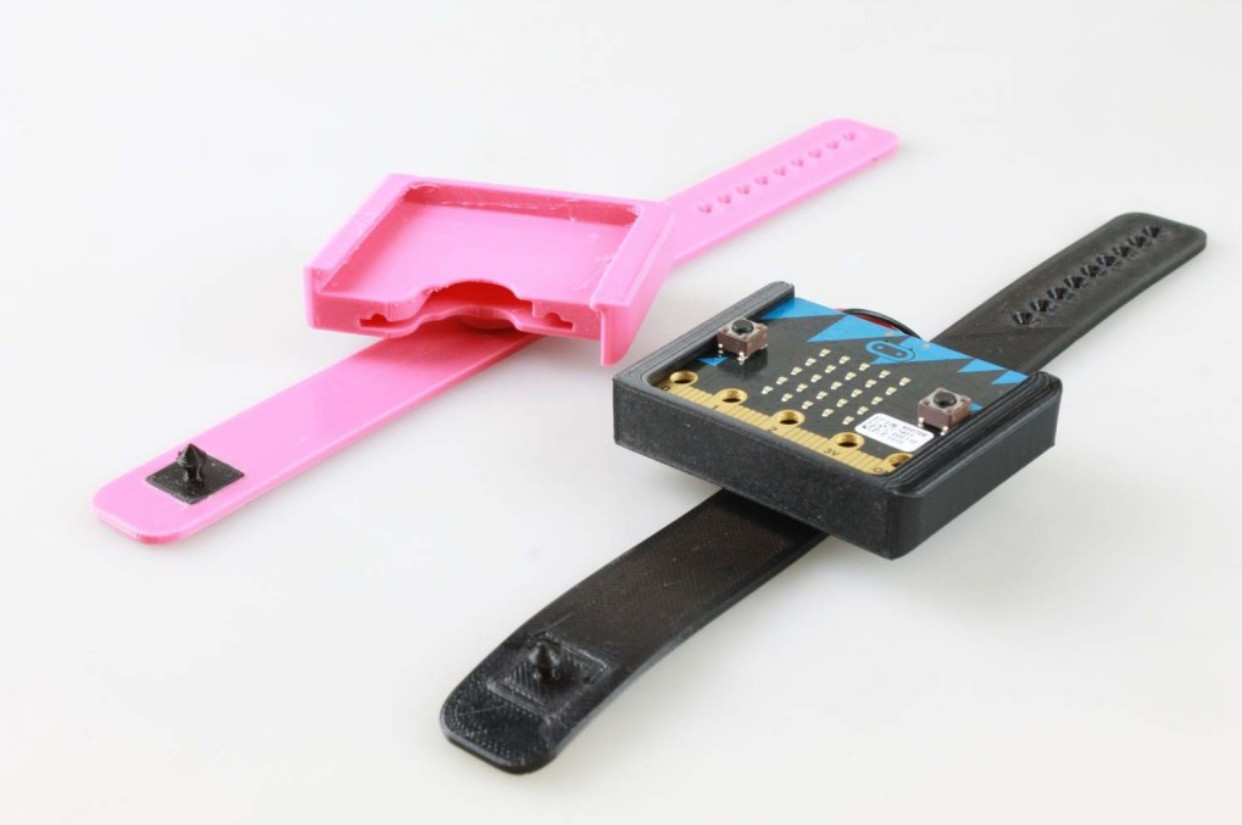
The small sizes of micro: bit are ideal for wearable electronics projects, but do not forget that the Arduino line also has more compact boards than Uno. And here the advantage of a microbit would come to naught if it were not for the built-in sensors and programmable buttons along with an LED matrix already installed on the board. It is this microbit chip that makes it convenient for a quick start.
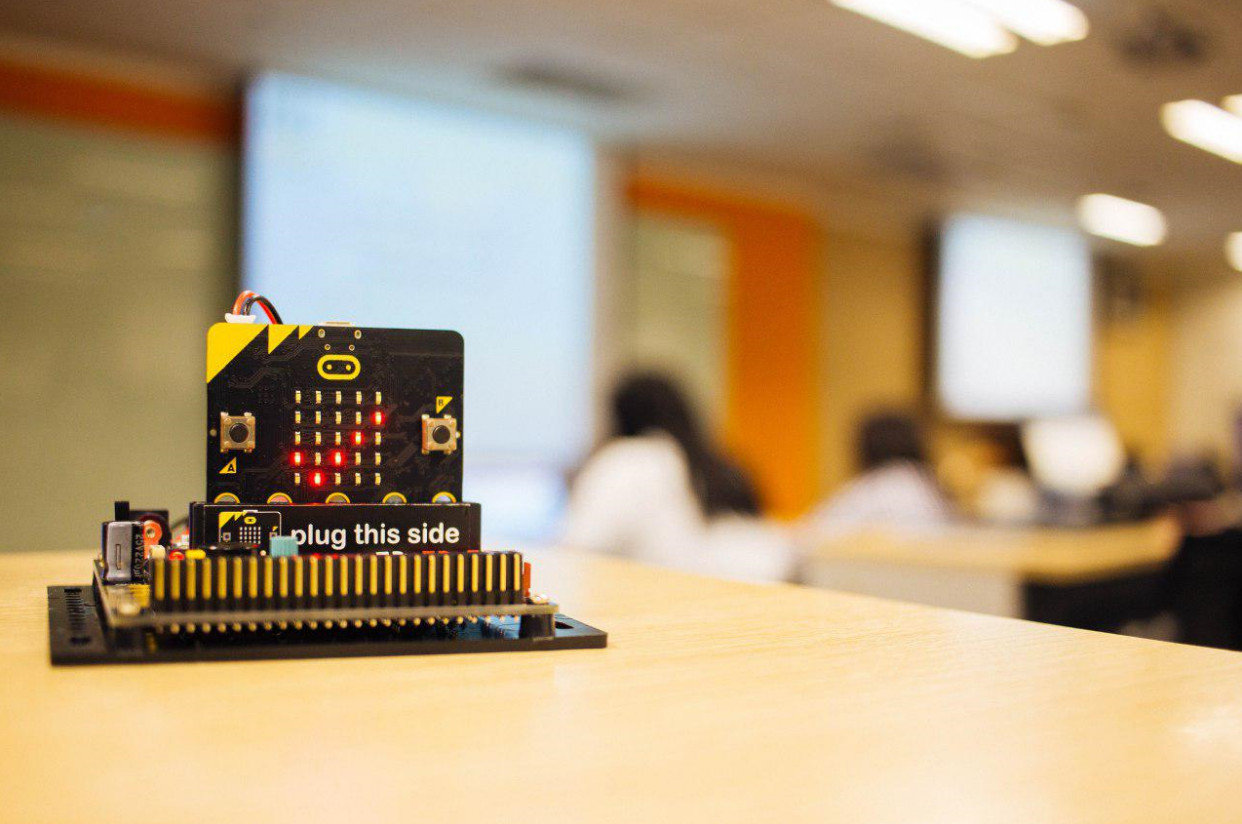
Right out of the box, just by plugging in the power, you can already start playing and experimenting with the board. When you first turn on the microbit will offer you to play the game "Chase The Dot!", In which you want to catch a point. In the game, you don’t need to use the buttons, but you need to tilt the microbit, as if you were rolling a ball on the board itself. This demonstrates the capabilities of the accelerometer built into the board.
It is clear that in comparison with the flashing LED on pin13 by Arduino, a matrix of 25 LEDs in the eyes of the child gives a significant advantage to microbit. You can not only play, but also turn a microbeat into a ticker icon or any animation, or into a smart bracelet, or combine several boards to create a large screen.
Food
When you connect the board to the computer, the microbit receives power through the micro-USB connector. In general, 3 volts is enough for micro: bit, and it is usually powered by two AAA batteries, connecting to the board through the JST connector. You can use the so-called three-volt “tablet” - CR2032 as a power source, but in this case you will need an additional board connected to a microbit, for example, Mi: Power from Kitronik. This is an interesting example of how you can connect additional boards to micro: bit through ring contacts using screws and nuts. The resulting compact and durable “sandwich” is very convenient for simple projects of wearable and portable electronics.


Most Arduino boards, including compact ones, require a stabilized voltage of 5 V or an input voltage in the range of 7-12 V. In school projects, they are often powered by Krona or 6 AA batteries.
Built-in sensors and input devices
They already mentioned their presence directly “on board” the micro: bit board, so we’ll just list them: 3-axis accelerometer, magnetometer, temperature sensor (built into the microcontroller), the ability to measure the level of illumination (part of the matrix LEDs is used for this), two programmable buttons .
Arduino Uno has no built-in sensors.
Wireless communications
Perhaps the main feature of micro: bit, which distinguishes it from dozens of similar boards, including from Arduino, is the presence of an integrated radio module. The radio module is part of the microcontroller, it performs two functions:
- communicates with smartphones and tablets based on Android and iOS using BLE technology (Bluetooth Low Energy);
- communicates with other micro: bit boards
Of course, this is a very correct decision: to enable students to connect the microbeat with their favorite toys - smartphones. Mobile applications can exchange data with the board. You can control the robot, monitor the state of soil moisture in the pot of your favorite indoor flower or the sensors of your room’s security, protecting it from the encroachments of your younger brother. Also, using a smartphone or tablet, you can program the board in the absence of a PC.
The easiest way to use the radio module is to communicate with other microbit boards. It is very simple to send a message to one or several boards, which will immediately appear on the display in the form of a running line. At the same time, it is possible to create so-called radio groups (up to 256 radio networks) so as not to interfere with communication with other owners of boards located nearby. That is, you can only exchange messages with members of your radio group, although there may be other cards nearby in the radio reception area. It is very convenient during class, when children united in groups will not interfere with each other when sending radio signals. With this in mind, the scope for implementing the ideas of collaborative games or wireless monitoring systems for anything in school projects is huge.
Alas, the Arduino Uno provides the capabilities for such wireless communications only by connecting external devices.
Connecting additional modules and expansion cards
Not tired of laudatory odes to the British "piece of iron"? Well, we got to the fly in the ointment. Everything is wonderfully thought out at micro: bit, except for the ability to connect additional modules.
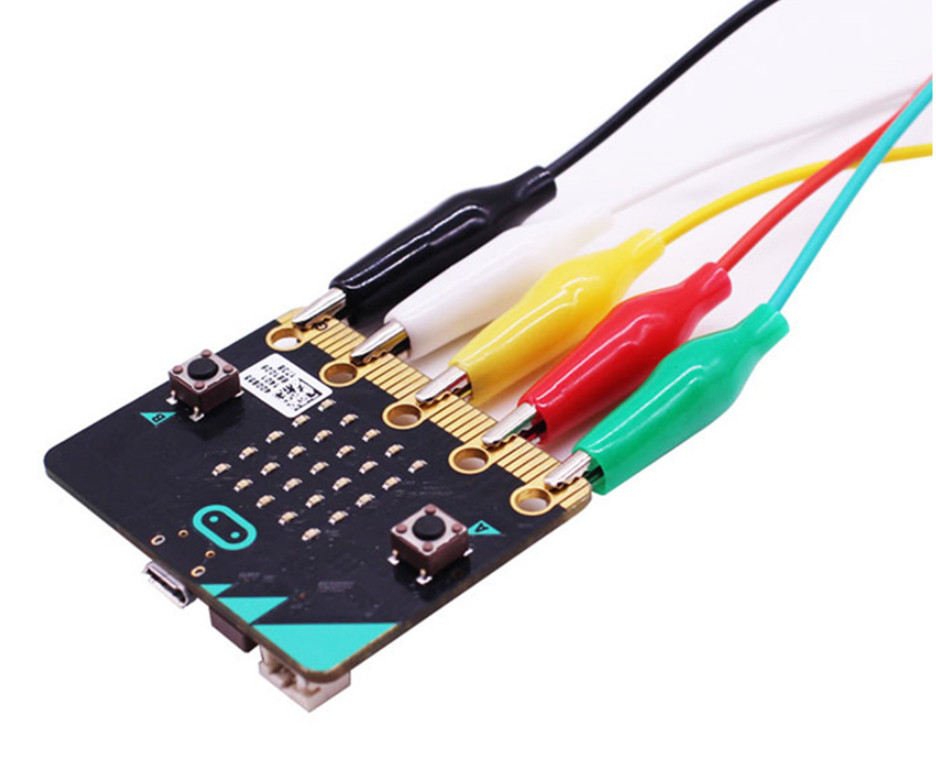
More precisely, for most school curriculum projects, those board options that are available out of the box will suffice. In addition, there is a simple opportunity to quickly connect to the three pins of the microcontroller due to the presence of ring pads on the printed circuit board using crocodiles or banana connectors (and two more similar rings are used to connect power).
But as soon as you want to get access to more pins (and this moment can come quickly, for example, you decide to assemble a robot trolley for driving along a line with two sensors and two motors) - here you will find a problem called edge connector (edge connector )
Connecting to other micro: bit pads (except for the five ring ones), on which the remaining pins of the microcontroller are output, is nontrivial - these pads are located on the edge of the board with a pitch of 1.27 mm and require a special, very specific connector.

Chinese manufacturers, of course, have already established the production of such connectors and expansion cards with them, but for the time being, it is problematic to purchase them from Russian suppliers. There is a life hack from the developers of the board - as “sticks and ropes”, in the absence of the original connector, they recommend using the old PCI connector from the PC motherboard, since it has the same contact pitch.
Against this background, connecting to all Arduino Uno connectors with at least a pair of stripped wires of a suitable diameter looks like accessibility and simplicity itself :)
Programming
To program micro: bit, several options are officially offered:
- Microsoft MakeCode graphical programming environment along with a debugging simulator,
- Javascript
- MicroPython
It also unofficially supports many other programming methods, including C ++, Rust, Espruino, ARM mbed, and RTOS Zephyr.
Features of programming micro: bit are well described in the article already mentioned on Habré . You can only once again focus on the fact that you do not need to install any software to program the board, you only need Internet access, and when you connect the board via MicroUSB, it is simply visible as a removable disk. Filling the firmware is done by simply copying the hex file.
For programming Arduino boards, the Arduino IDE is most often used, and as an alternative, Eclipse, Atmel Studio, and many others. Among graphical programming languages, Scratch for Arduino, Ardublock, FLProg, XOD, etc. are well known.
Hardware platform
A few dry numbers on the technical characteristics of the compared "glands"
Main technical specifications micro: bit
Microcontroller: 32-bit ARM Cortex-M0 Nordic nRF51822
Frequency: 16 MHz
Flash: 256 KB
RAM: 16 KB
Input voltage: 1.8–3.6 V
Logic Unit Voltage: 3.3 V
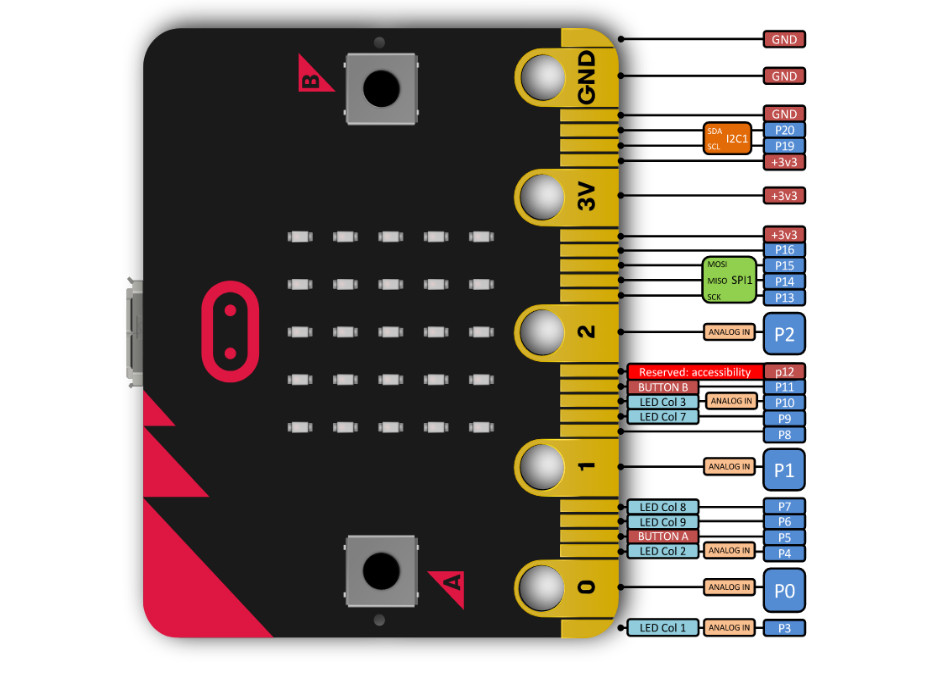
General Purpose I / O Ports: 19
Ports with PWM support: 19 (at the same time - on 3 pins)
Ports with ADC: 6
ADC resolution: 10 bits
Communication Buses: I²C and SPI
Specifications Arduino Uno
Microcontroller: 8-bit AVR, ATmega328
Frequency: 16 MHz
Flash memory 32 Kbytes, 0.5 Kbytes of them used for bootloader
2K SRAM
1 KB EEPROM
Supply voltage 5 V
Input voltage (recommended) 7-12 V
Logic Unit Voltage: 5 V
Digital I / O: 14 (6 of them support PWM)
ADC Inputs: 6
ADC resolution: 10 bits
Communication Buses: I²C, SPI
So what is the bottom line?
But to summarize our small comparison, you need to consider a few more important things. Any “piece of iron”, especially if it claims to have at least some role in the educational process, needs methodological and didactic materials, a community of enthusiastic teachers who support the whole “movement” and help newcomers, patiently responding to their endless “how- why-why-doesn’t work. ” A beginner should be able to buy a piece of hardware, inexpensively, including here and now, until his enthusiasm has cooled. And the educational organization should be able to purchase several dozen boards from a Russian supplier, observing all the necessary procurement procedures.
Given all these factors, the large family of Arduino boards is currently out of competition. Arduino boards (of course, first of all, thanks to cheap Chinese clones and analogues) are available both in price and in retail and in educational distributors. A Russian-speaking community of users and enthusiasts is developed, ready to share experiences and recommendations, answer questions from beginners. There is a huge variety of expansion cards and all kinds of modules, dozens of kits and designers, a large number of libraries for software that facilitate the process of connecting various hardware.
British micro: bit in Russia so far cannot boast of either a developed Russian-speaking community of enthusiasts, or technical support for users in Russian. Few sellers import modest inventory. There are practically no methodological and educational materials in Russian, although the situation has been improving recently, for example, a book in Russian “BBC micro bit. Official User Guide. ”
One must think that it is temporary difficulties with teaching materials, because a large number of English-language teaching materials and projects have already been accumulated that have been adapted for schoolchildren of primary and secondary classes, taking into account their age interests and capabilities. It remains to adapt them and translate them into Russian, or vice versa - you can immediately use English in the learning process, increasing your knowledge of the language during experiments with the board.
As for expansion cards, modules for micro-bits, and designers based on it, Chinese companies over the past couple of years have developed and released a very decent amount of micro: bit compatible hardware. European companies are not lagging behind them, the same Kitronik mentioned above (or rather, vice versa - are the Chinese not lagging behind the Europeans?)
I want to believe that all the advantages of micro: bit will ultimately outweigh the existing shortcomings, and it will appear in our schools and circles. By and large, according to the plan of the project initiators, micro: bit at school teaches not even programming, and especially not electronics. It gives students the opportunity to learn how to independently use technology to solve their practical problems, and not just be consumers of ready-made solutions. Although, I would like to hope that some of the teenagers, thanks to acquaintance with micro: bit, will still choose the path of developers, for example, embedded systems.
Convinced, I want to try micro: bit in business
Of course, it’s better to try it yourself once than read a hundred times. Readers of Habr, regardless of their age, have the opportunity to get micro: bit boards and accessories for them for free. To do this, take part in the competition for the creation of smart devices running micro: bit.
The competition is called "YOUR: BIT". Until December 8 of this year, manage to submit an application describing the idea of a device based on a micro: bit board. And when the best projects are determined, the contest organizers will send micro: bit boards (and switching boards to them in order to be able to use all the pins of the microcontroller) to these lucky winners to implement projects in hardware. In total, the prize pool includes 50 micro: bit boards and the same number of switching boards. Details and details are on the contest website .
And finally, a small recommendation from the organizers of the contest - try to maximize the use of all the "bits" of microbit in your projects, first of all - the possibility of boards for wireless communication. Do not limit your ideas to using only one board.
Acknowledgments
For help in preparing the material, thanks to Ruslan Tikhonov and Andrei Rozhkov.