Namely, the development of design, production and assembly of stands for guitars.
Objective of the project
The project had several goals:
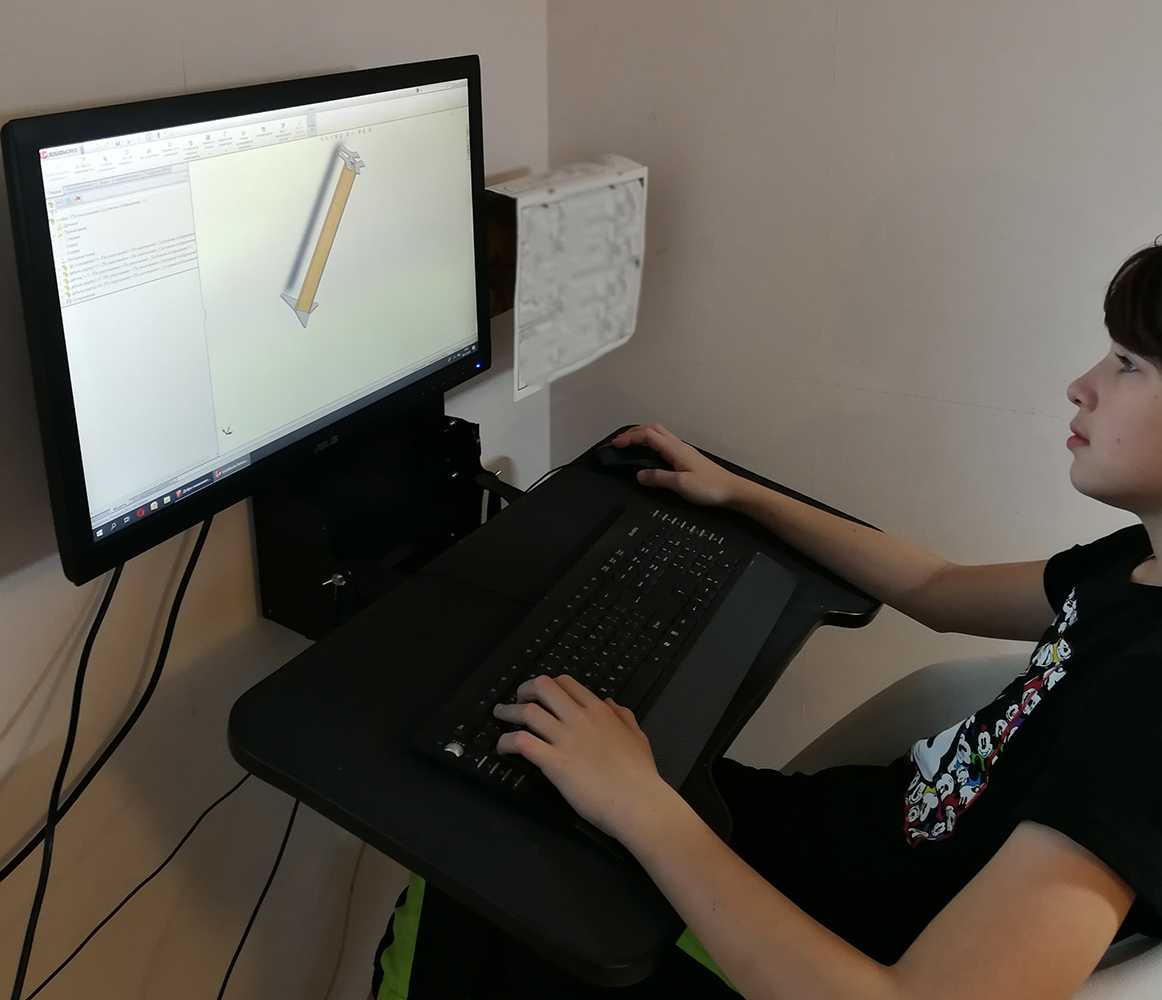
- Give your son basic skills at SolidWorks.
- Make a convenient place to store guitars (because the idea of hanging on a wall bracket did not find understanding).
Design
Initial data
- It is necessary to securely place 3 guitars (dreadnought, electric guitar and ukulele), while not making extra holes in the walls.
- Make mounting as cheap as possible, simple, fast and technologically advanced.
Design
Having considered the options (of which there were not very many in general in view of paragraph 2 of the initial data), we decided to make a stand for placing guitars.
The first solution was to take 6 plastic water pipes: make two bends in each, cut out special fasteners from the steel - screeds and put it together.
The option is quite working, but manufacturability (as I imagined that it would be necessary to bend 6 pipes with high precision with your hands and a construction gun - the mood immediately noticeably dropped) and the aesthetics of the solution leaves much to be desired.
The second option was to use a threaded rod (for example, M10x1000, the price is about 70-100 rub.), A plastic pipe of large radius, the upper and lower supporting parts of the structure made of 3mm-4mm steel and cut the thread in the central part under the stud or weld a nut. Manufacturability grows significantly, aesthetically looks easy. But doubts arose about the rigidity of the structure: the fulcrum (even if you add a large washer and an additional nut under the upper part) is small and distortions are quite possible and the weight also began to embarrass: according to calculations, 3-4 kg. it worked out and it’s still without guitars.
Therefore, we decided to develop another option

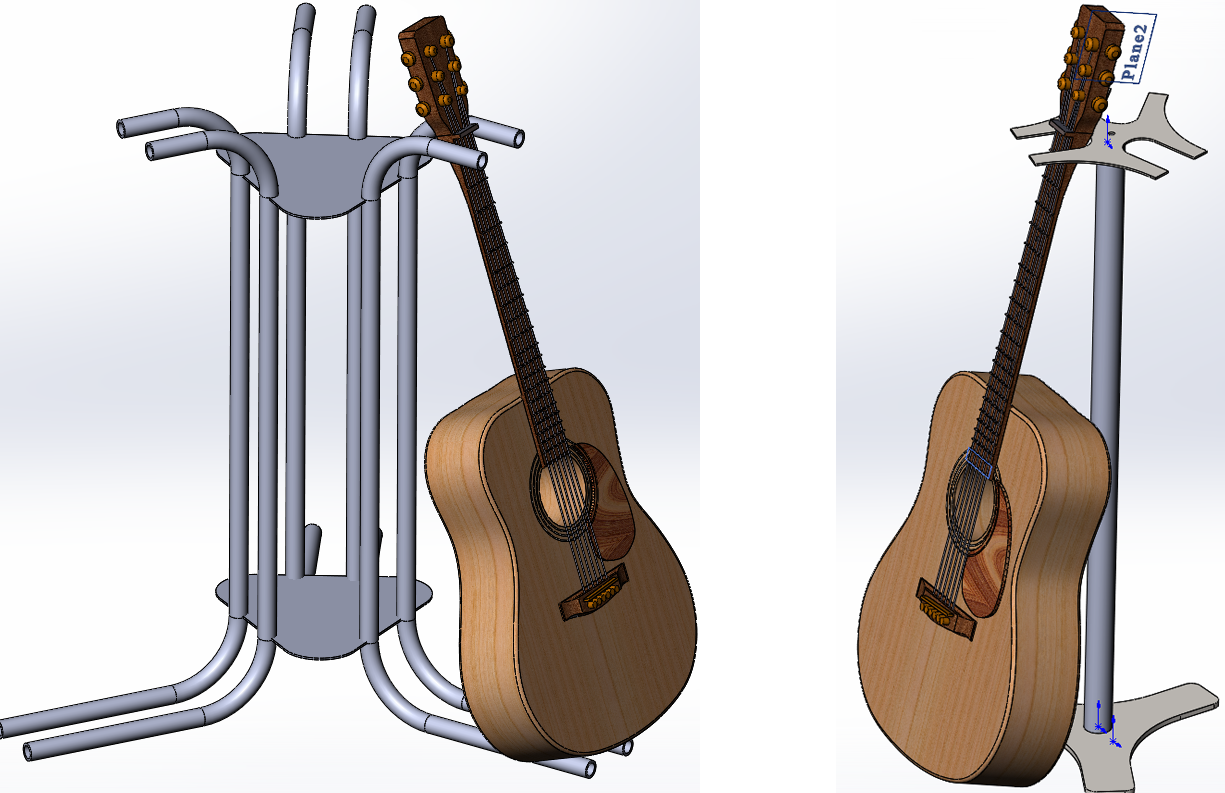
This time they abandoned the metal parts and chose 6mm plywood (empirically) as the main material. Plywood is well and precisely cut with a laser and the price is not high. The same meter hairpin is inserted into the middle of the structure.
They decided to stay on this option:
Manufacturability (ease of assembly) - high
Aesthetics - the whole family approved
Weight is not large (1.5 kg approximately)
The contact spot of the vertical panels and the bases has increased significantly compared to the second design option. In addition, a spike-groove connection is additionally made, which gives rigidity and there is the possibility (looking ahead to say that it was not useful) to further glue the joints.
Training
The company cut the plywood - (800 rubles. Together with the material)
Were purchased (found on the farm):
- Threaded stud 1000mm - 1pc. (I found M14 in my household and squandered holes for it).
- large washers - 3 pcs.
- ordinary nuts (you can buy self-locking, if you want to combine the assembly with a lesson in fintes. Why? see below) - 2 pcs.
- cap nut - 1 pc.
- LED strip - 5 meters.
Assembly
Unfortunately, the assembly process was not photographed, so I will describe it in words.
Training
- As you can see, the bottom base plate is made of two 6mm panels - they need to be glued together. To make everything exactly match - I recommend inserting vertical panels and then gluing one panel to another.
- The most non- technological part of this project is connected with this: you need to weld a large washer on the stud, flush with the edge of the stud. In this case, the pin is remarkably attached to the bottom of the base. I did it myself. If you want to do the same thing - I think in any company / garage / cottage where there are welders - they will weld the puck easily and simply.
The assembly itself
We insert the hairpin into the lower base, then the washer and tighten the nut along the entire hairpin . We twist another nut to a depth of about 10-15 mm from the top edge and put another washer on top. We insert the panels (if necessary, we attach an LED strip to them from the inside), we fix the upper base and tighten the cap nut.
Build result

It turned out to be quite a beautiful and neat design (thanks to the embedded clearances of 0.1-0.2 mm in the spike-groove joints).
Strong and reliable - as the lower base is quite wide. The stand is equally stable with one guitar and with three.
The groove for the neck in the upper panel is made with a small negative angle, for additional fixation.
The LED strip inside looks beautiful.
Coloring
And now a fly in the ointment ...
- The choice of paint color (orange) was very unsuccessful for the rack. It would be better to take a light varnish or stain.
- It was not necessary to disassemble the structure before painting. then nothing was inserted into the grooves anymore; I had to clean it with a knife.

Conclusion
In conclusion, I want to give a link to the project in SolidWorks 2018 and to the zip archive with ready-made drawings in dxf format that you can give to any company engaged in cutting plywood, if you yourself want to assemble such a device.
IMHO, the stand will be a wonderful hand-made gift for a guitarist, for example, for the upcoming New Year.
Thank you for your time!