Hello, Habr!
My name is Artyom Dobrovinsky, I work as an Android developer at FINCH .
Once, after a couple of pints with a colleague from a company that is placing ads for selling MIGs and mosquitoes named Igor, we started discussing static code analyzers in CI (and what else to discuss). The idea was voiced that they were cool to use - but only after there was confidence in the logical reliability of the code. In other words, you can think about code style only after all the tests are written.
I decided to listen to my colleague and thought about how to calculate the scale of the disaster for improvised applications. The view fell on Sonarqube and Jacoco. The process of connecting them for hello-world projects is elementary. Connecting them into an Android project, broken into modules, is already more difficult. In order to help those interested, this article was written.
Habré already has a very good translation of the tutorial on using Sonarqube - but it is from 2016, something is outdated there, there is no kotlin and just I find reporting generation for all buildType's redundant.
A bit about libraries, for those who are not familiar with them.
Sonarqube is an open source platform for continuous inspection and measurement of code quality. It allows you to track the fight against technical debt over time (it’s cool to see that technical debt is winning, and you can’t do anything about it). Sonar also keeps track of duplicate code, potential vulnerabilities, and excessive complexity of functions.
Jacoco is a free library for calculating test coverage of a project in Java. But with Kotlin we will make her friends.
How to connect Sonarqube and Jacoco
In the build.gradle of the root module, add the following code:
apply plugin: 'android.application' apply plugin: 'org.sonarqube' sonarqube { properties { property "sonar.host.url", "%url sonarqube%" property "sonar.login", "%%" property "sonar.projectName", "% %" property "sonar.projectKey", "% %" property "sonar.reportPath", "${project.buildDir}/sonarqube/test.exec" property "sonar.projectBaseDir", "$rootDir" property "sonar.sources", "." property "sonar.tests", "" property "sonar.coverage.exclusions", "**/src/androidTest/**, **/src/test/**" property "sonar.coverage.jacoco.xmlReportPaths", fileTree(include: ['*/*/jacoco*.xml'], dir: "$rootDir/app/build/reports/jacoco").collect() } }
sonar.reportPath
- indicate where Sonar should put the report for further analysis.
sonar.projectBaseDir
specify the folder in which the analysis will be started initially; in our case, this is $ rootDir - the root folder of the project.
sonar.coverage.exclusions
list of exceptions for counting coverage, where ** is any folder, a * is any file name or resolution.
sonar.sources
- source folder.
sonar.tests
- an empty line here so that the tests can also be analyzed by Sonarqube.
sonar.coverage.exclusions
- we exclude tests from the analysis of test coverage.
sonar.coverage.jacoco.xmlReportPaths
- using collect()
collect Jacoco reports to calculate test coverage.
To activate Jacoco, it is better to create a jacoco.gradle
file and write all the necessary logic there. This will help to avoid cluttering the rest of build.gradle.
In order not to register Jacoco in the build.gradle of each subproject, we prescribe its initialization in the subprojects closure. In reportsDirPath
for submodules, specify the root folder. From there, Sonar will take all Jacoco reports.
subprojects { apply plugin: 'jacoco' jacoco { toolVersion = '0.8.5' def reportsDirPath = "${project.rootDir}/app/build/reports/jacoco/${project.name}" reportsDir = file(reportsDirPath) } }
In the same file, we write a function to configure Jacoco.
This function is large, so first I will bring it - and then I will explain what is happening in it.
def configureJacoco = { project -> def variantName = project.name project.tasks.create(name: "getJacocoReports", type: JacocoReport) { group = "Reporting" description = "Generate Jacoco coverage reports for the $variantName build." reports { html.enabled = true xml.enabled = true } def excludes = [ '**/R.class', '**/R$*.class', '**/BuildConfig.*', '**/Manifest*.*', '**/AndroidManifest.xml', '**/*Test*.*', 'android/**/*.*', 'androidx/**/*.*', '**/*Fragment.*', '**/*Activity.*', '**/*Api.*', '**/injection/**/*.class', '**/ui/**/*.class', % build- % ] def javaClasses = fileTree(dir: "${project.buildDir}/intermediates/javac", excludes: excludes) def kotlinClasses = fileTree(dir: "${project.buildDir}/tmp/kotlin-classes", excludes: excludes) classDirectories = files([javaClasses, kotlinClasses]) sourceDirectories = files([ "${project.projectDir}/src/main/java", "${project.projectDir}/src/main/kotlin", ]) executionData = files(fileTree(include: ['*.exec'], dir: "${project.buildDir}/jacoco").files) } }
We created the getJacocoReports
task, the “Reporting” group. Reports will be provided in html and xml formats. All files except those included in the excludes array will be analyzed. In addition to the generated Androyd files, I decided to exclude from the analysis all fragments and activities, Retrofit interfaces, package with DI, custom views and library code.
Perhaps this list will change over time.
classDirectories
- an indication of where to look for code for analysis. We include both java and kotlin files here.
sourceDirectories
- specify where Jacoco look for files with source code.
executionData
- as in the case of Sonar, an indication of where the report will be generated to calculate coverage.
Also in jacoco.gradle you need to add its configuration for all modules using the above function:
allprojects { project -> configureJacoco(project) project.tasks.withType(Test) { enabled = true jacoco.includeNoLocationClasses = true } }
And a task for collecting the generated reports:
task getJacocoReports() { group = "Reporting" subprojects.forEach { subproject -> subproject.tasks.withType(JacocoReport).forEach { task -> dependsOn task } } }
Starting Sonarqube through the command line
It ./gradlew % % && ./gradlew jacocoAggregateReports && ./gradlew sonarqube
simply: ./gradlew % % && ./gradlew jacocoAggregateReports && ./gradlew sonarqube
. Commands are run through &&
, because the execution should be interrupted if the previous step did not succeed.
What happens on command above:
- First, run the tests (at the same time we generate all the necessary files in the build folder).
- Generate a Jacoco report.
- Launch Sonarqube.
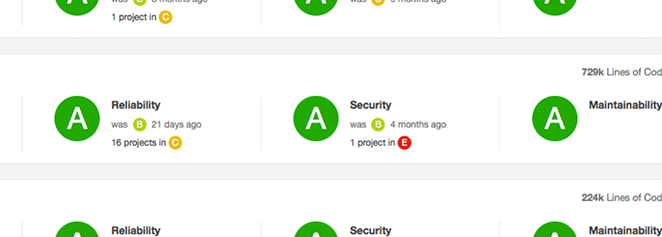
Next, you need to go to the site, fail in the project and look at the scale of the disaster. The project page shows the result of the last check.
With Sonarqube, the idea of the state of the project is becoming much more complete. It’s easier to adjust the technical debt backlog, than to take on novice developers (in each quibble Sonarqube gives an argument why it isn’t accepted to write like that - reading these explanations can be very useful), and simply - knowledge is power .
That's all, folks!
Question to readers - what do you use to analyze code and measure test coverage? Do you see the point at all?