Part 2: Creating a REST API: Database Basics
In the first article, you created a web server, here you will create a module that is responsible for starting and shutting down the database connection pool using node-oracledb . And add a feature that simplifies the execution of simple statements by automatically getting and releasing connections from the pool.
Running connection pool
Because node-oracledb is built on top of OCI client libraries, it has built-in support for creating OCI pools that are client-side and have excellent performance characteristics. To create a connection pool, start by creating a new configuration file called database.js in the config directory. Copy and paste the following code into the file and save the changes.
module.exports = { hrPool: { user: process.env.HR_USER, password: process.env.HR_PASSWORD, connectString: process.env.HR_CONNECTIONSTRING, poolMin: 10, poolMax: 10, poolIncrement: 0 } };
As with the config / webserver.js file, this file allows you to set some properties using environment variables. Using environment variables provides flexibility when deploying the application in different environments and helps keep passwords and other sensitive information out of source code. Run the following commands from the terminal to set the necessary environment variables and verify that they are available in future terminal sessions.
echo "export HR_USER=hr" >> ~/.bashrc echo "export HR_PASSWORD=oracle" >> ~/.bashrc echo "export HR_CONNECTIONSTRING=0.0.0.0/orcl" >> ~/.bashrc source ~/.bashrc
You might notice that poolMin and poolMax were the same and that poolIncrement was set to 0. This will create a fixed size pool that requires less management resources - a good idea for pools that get consistent usage.
Although Node.js is often described as “single-threaded”, it has a thread pool available for certain operations that would otherwise block the main thread that runs JavaScript code. This thread pool is used by node-oracledb to perform all of its asynchronous operations, such as receiving connections and executing SQL and PL / SQL code. However, the default thread pool size is 4. If you want all 10 connections in the pool to work simultaneously, you need to increase the number of threads accordingly.
The UV_THREADPOOL_SIZE environment variable can be used to adjust the thread pool size. UV_THREADPOOL_SIZE can be set before running the Node.js application or from within, but it must be set before the first call is made using the thread pool. This is due to the fact that the thread pool is created upon its first use and after its creation, its size is fixed. Open the index.js file in the root of the application and add the following lines after the first line (which contains the web server module).
// *** line that requires services/web-server.js is here *** const dbConfig = require('./config/database.js'); const defaultThreadPoolSize = 4; // Increase thread pool size by poolMax process.env.UV_THREADPOOL_SIZE = dbConfig.hrPool.poolMax + defaultThreadPoolSize;
Now that the thread pool has the appropriate size, you can go to the database module. Create a new file in the services directory named database.js . Copy and paste the following code into it and save the changes.
const oracledb = require('oracledb'); const dbConfig = require('../config/database.js'); async function initialize() { const pool = await oracledb.createPool(dbConfig.hrPool); } module.exports.initialize = initialize;
This module first introduces node-oracledb and the configuration file. Then an asynchronous function is defined with the name initialize, which is then provided through the module.exports object. The initialize function creates a connection pool, which is stored in the internal connection pool cache as the default pool.
Now you need to connect everything so that the connection pool starts before the web server opens. Go back to index.js and add the following line below line 1.
// *** line that requires services/web-server.js is here *** const database = require('./services/database.js');
Then add the following try block to the stratup function, immediately before the existing try block that starts the web server.
try { console.log('Initializing database module'); await database.initialize(); } catch (err) { console.error(err); process.exit(1); // Non-zero failure code } // *** existing try block in startup here ***
At this point, you can install node-oracledb and test the code. Run the following commands in a terminal from the hr_app directory.
npm install oracledb -s node .
If you see messages that the database module and the web server are running, then, congratulations - your connection pool is now working!
Shutdown connection pool
If you close the application now (using ctrl + c, as before), the Node.js process will be destroyed before the connection pool is closed. Although all related database processes should be cleaned up automatically, it is best to explicitly close the connection pool before exiting the Node.js. process.
Return to the services / database.js file, add the following lines of code to the end, and save the updates.
// *** previous code above this line *** async function close() { await oracledb.getPool().close(); } module.exports.close = close;
The close function uses the oracledb.getPool () method to get the default pool synchronously, and then calls the close method on the pool to close it.
To call the close function at the right time, add the following lines of code to the index.js file inside the shutdown function immediately after the existing try block that stops the web server.
// *** existing try-catch block in shutdown here *** try { console.log('Closing database module'); await database.close(); } catch (err) { console.log('Encountered error', e); err = err || e; }
If you start and close the application again, you will see that the database module is closed after closing the web server, but before the process is complete.
Simplify simple CRUD operations
Executing SQL or PL / SQL code using node-oracledb is usually a three-step process: get the connection, execute the code, and then release the connection. If all you want to do is make one call to execute (no multi-step transaction is required), then receiving and releasing the connection may look like standard code. I like to create a function that performs all three operations in one call. Return to the services / database.js file, add the following code below and save the changes.
// *** previous code above this line *** function simpleExecute(statement, binds = [], opts = {}) { return new Promise(async (resolve, reject) => { let conn; opts.outFormat = oracledb.OBJECT; opts.autoCommit = true; try { conn = await oracledb.getConnection(); const result = await conn.execute(statement, binds, opts); resolve(result); } catch (err) { reject(err); } finally { if (conn) { // conn assignment worked, need to close try { await conn.close(); } catch (err) { console.log(err); } } } }); } module.exports.simpleExecute = simpleExecute;
Typically, you will not use the database module in the web server module, but add it now to verify that it is working correctly. Open the services / web-server.js file and add the following line under the existing constant declarations at the top.
// line that requires ../config/web-server.js here const database = require('./database.js');
Then use the following code to replace the entire app.get handler that responds with “Hello World!” (All 3 lines).
// *** line that adds morgan to app here *** app.get('/', async (req, res) => { const result = await database.simpleExecute('select user, systimestamp from dual'); const user = result.rows[0].USER; const date = result.rows[0].SYSTIMESTAMP; res.end(`DB user: ${user}\nDate: ${date}`); });
The new handler uses the simpleExecute function of the database module to retrieve the values of the current user and systimestamp from the database. The values are then used in the template literal to respond to the client with a dynamic message.
Launch the application again and go to localhost: 3000. You should see something like the following image.
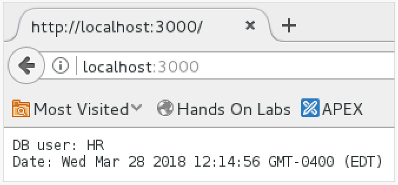
If you see this message, then everything works as it should. In the next article, you will continue to create the API by adding the routing, controller, and database logic for the GET request.