
Once, it occurred to me that it was a crazy idea to bring 500 laser pointers in one place . I spent a lot of time and did it. It turned out spectacular and useless, but I liked it. Six months ago, another crazy idea came to me. This time not at all spectacular, but much more useful. I also spent a lot of time on it. And in this article I present a beta version of my second crazy idea.
I called the project Nanonyam (Nanonyam) and even came up with a logo for it (I painted for 5 minutes).
For those who think in terms of Arduino, we can say that Nanonyam is a virtual arduino shield for managing Windows.
In other words, Nanonyam is a virtual machine that uses firmware for the AVR microcontroller as the bytecode (ATMEGA2560 recommended). Inside this virtual machine is the AVR kernel simulator, but instead of peripheral devices that are located at SRAM addresses from 0x0060 to 0x01FF, there is a special interface to virtual functions (including the Windows API functions). And here it is very important to immediately understand: the code for Nanonyam should not have any access to the specified memory range, so as not to accidentally call, for example, the function of deleting files or formatting the disk. The rest of the SRAM memory range from 0x0200 to 0xFFFF (this is more than in a real microcontroller) is available to the user for any purpose. I note right away that there is special protection against accidentally starting the firmware of a real microcontroller (or firmware from a different architecture): before activating the "dangerous" functions, you need to call a special tricky virtual function. There are some other security features.
To create programs for Nanonyam you need to use special libraries that implement all the currently available virtual functions. You can download the Nanonyam virtual machine and its libraries here . And here is the page for describing virtual functions . And yes, my site is very primitive and not adapted for mobile devices.
Nanonyam is free for home and commercial use. Nanonyam is on an “as is” basis. Source code not provided.
At the moment, the program is in the testing phase. About 200 virtual functions have been implemented that allow you to create simple programs for Windows.
Obviously, creating something complicated in such a virtual machine will not work, since the memory for the code is only 256 kB. Data can be stored in separate files, a buffer for the graphic part is implemented externally. All functions are simplified and adapted for the 8-bit architecture.
What can be done at Nanonyam? I came up with several tasks.
Development of program blocks
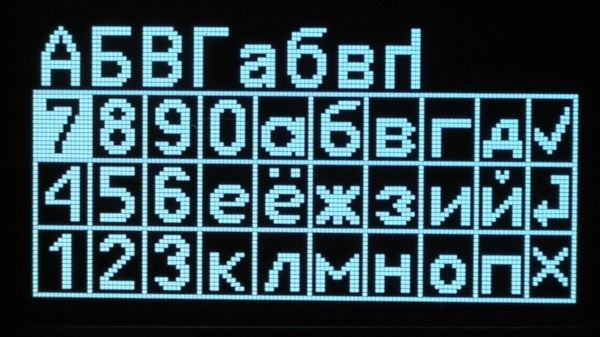
Once I needed to develop a complex menu for a 128x64 dot graphic display. I really didn’t want to constantly download the firmware into a real microcontroller to see how the pixels look. So the idea of Nanonyam was born. In the figure below, the image from the real OLED display of one of the items on the same menu. Now I can work it out without a real device.
Nanonyam (in its final idea) is a good tool for working out software blocks for microcontrollers, as there are functions for working with graphics (you can simulate displays and indicators), with files (you can make logs, read test data), with a keyboard (you can read up to 10 buttons at the same time), with COM ports (here is a separate item).
Create fast programs
For example, you need to quickly process 100,500 text files. Everyone needs to be opened, slightly changed according to some simple algorithm, saved and closed. If you are a Python master, then I congratulate you, you have everything. But if you are an inveterate arduino worker (and there are many of them), then Nanonyam will help you in solving this problem. This is exactly my second goal at Nanonyam: to add many useful functions such as word processing, creating screenshots or simulating keystrokes in the system (this, by the way, is already there), as well as many other functions for solving routine tasks.
Testing glands through COM-port
Nanonyam can act as a terminal working according to your algorithm. You can draw a small menu to control the device and display the data received from the port. You can save and read data from files for analysis. A convenient tool for simple debugging and calibration of glands, as well as for creating simple virtual instrument control panels. For students and young scientists, this project can be very useful.
Programming training
However, as with the entire Arduino project, the main utility of Nanonyam is the simplification of its functions, interface, and bootloader. Therefore, this project should be of interest to novice programmers and those who are satisfied with the level of arduino. By the way, I myself have not yet studied arduino in detail, since I always used WinAVR or AVR Studio, but started with assembler. Therefore, the sample program below will be a little wrong, but quite working.
Hello, Habr!
It's time to get to know some of the features of Nanonyam and write a simple program. We will write in Arduino, but not in the way it is customary, but in the way I can now (I have already said that I have not dealt with this environment very well). First, create a new sketch and select the Mega2560 board.

Save the sketch to a file and copy the Nanonyam library nearby . It would be correct to include the library headers, but I don’t know how to write compilation of individual files in Arduino, so for now just turn on the libraries directly (and all at once):
#include <stdio.h> #include "Nanonyam\nN_System_lib.c" #include "Nanonyam\nN_Keyboard_lib.c" #include "Nanonyam\nN_File_lib.c" #include "Nanonyam\nN_Math_lib.c" #include "Nanonyam\nN_Text_lib.c" #include "Nanonyam\nN_Graphics_lib.c" #include "Nanonyam\nN_RS232_lib.c"
It would be even more correct to make a special module “Nanonyam for Arduino”, which can be installed directly from Arduino. As soon as I deal with this, I’ll do it, but for now I’ll just show the essence of working with a virtual machine. We write the following code:
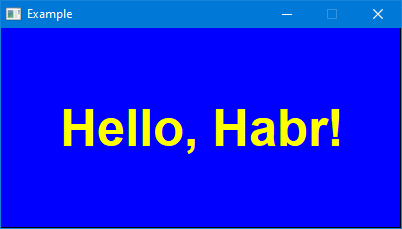
// void setup() { sys_Nanonyam();// g_SetScreenSize(400,200);// 400200 sys_WindowSetText("Example");// g_ConfigExternalFont(0,60,1,0,0,0,"Arial");// Windows 0 g_SetExternalFont(0);// 0 g_SetBackRGB(0,0,255);// g_SetTextRGB(255,255,0);// g_ClearAll();// ( ) g_DrawTextCenterX(0,400,70,"Hello, Habr!");// g_Update();// } // void loop() { sys_Delay(100);// }
A sketch with this program can be downloaded here . Look for a detailed description of the functions on the site . I hope the comments in this code are enough to understand the point. Here, the sys_Nanonyam () function plays the role of a “password” for the virtual machine, which removes restrictions on virtual functions. Without this function, the program will close after 3 seconds of operation.
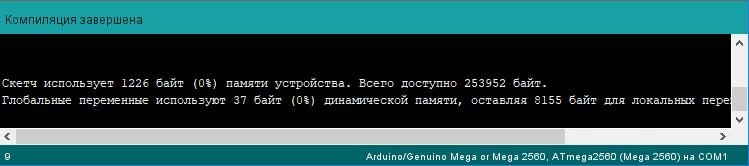
Click the "Check" button and there should be no errors.
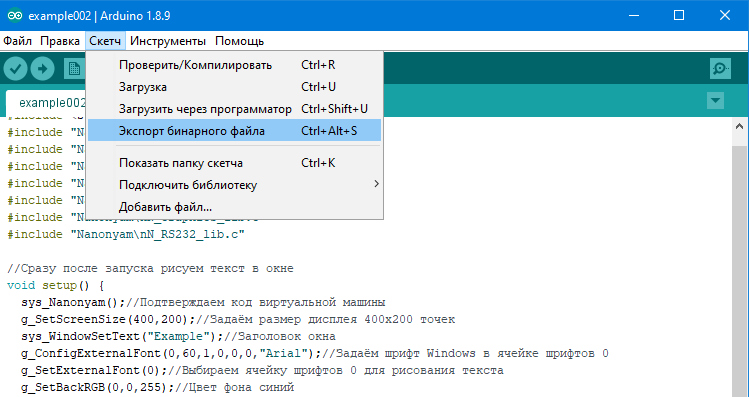
Now you need to get the binary file (firmware). Select the menu " Sketch >> Export binary file (CTRL + ALT + S) ".
In this case, two HEX files will be copied to the folder with the sketch. We take only the file without the prefix "with_bootloader.mega".
There are several ways to specify a HEX file for a Nanonyam virtual machine, all of which are described on this page . I suggest creating a Nanonyam.path file next to the Nanonyam.exe file, in which to write the full path to our HEX file. Then you can run Nanonyam.exe . We get a window with our inscription.
Similarly, you can create programs in other environments, for example, in AVR Studio or WinAVR.
This is where we finish the acquaintance with Nanonyam. The basic idea should be clear. More examples are on the site . If there are enough people who want to use this project, then I will make more examples and continue to “fill in” the libraries of virtual functions. Concrete ideas for the development of the project and reports on malfunctions, bugs and mistakes are accepted. It is advisable to send them to the contacts listed on the site . A discussion is welcome in the comments.
Thank you all for your attention and good programming!