Environment Variables for Python Projects
When developing a web application or bot, we often deal with some secret information, various tokens and passwords (API keys, secrets of web forms). Hardcoding this information, let alone storing it in a publicly available version control system, is a very bad idea.
# . . API_KEY = 'very_secret_password'
Configuration files
The easiest way to solve this problem is to create a separate configuration file with all the sensitive information and add it to .gitignore
. The disadvantage of this approach is that in git you also need to keep the configuration file template and do not forget to update it periodically.
# . from config import API_KEY app = Flask(__name__) app.config['API_KEY'] = API_KEY
Environment variables
A more advanced approach is to use environment variables. Environment variables are named variables that contain textual information that run programs can use. For example, to start a flask application, first you need to specify the name of our application in the environment variable FLASK_APP
:
$ export FLASK_APP=hello.py $ flask run * Running on http://127.0.0.1:5000/
Using environment variables, you can get various application parameters and secret keys:
import os app.config['API_KEY'] = os.environ.get('API_KEY')
Python-dotenv library
In order not to manually set environment variables each time the terminal is restarted, you can use the python-dotenv package . It allows you to load environment variables from the .env
file in the root directory of the application.
Install the package:
pip install python-dotenv
Now you can create an .env file with all the environment variables that your application needs. Important, add the .env
file to .gitignore
, do not store it in version control system.
import os from dotenv import load_dotenv dotenv_path = os.path.join(os.path.dirname(__file__), '.env') if os.path.exists(dotenv_path): load_dotenv(dotenv_path)
This .env file can be used for all configuration variables, but it cannot be used for the FLASK_APP
and FLASK_DEBUG
environment variables, since they are already needed during the initial loading of the application.
Direnv utility
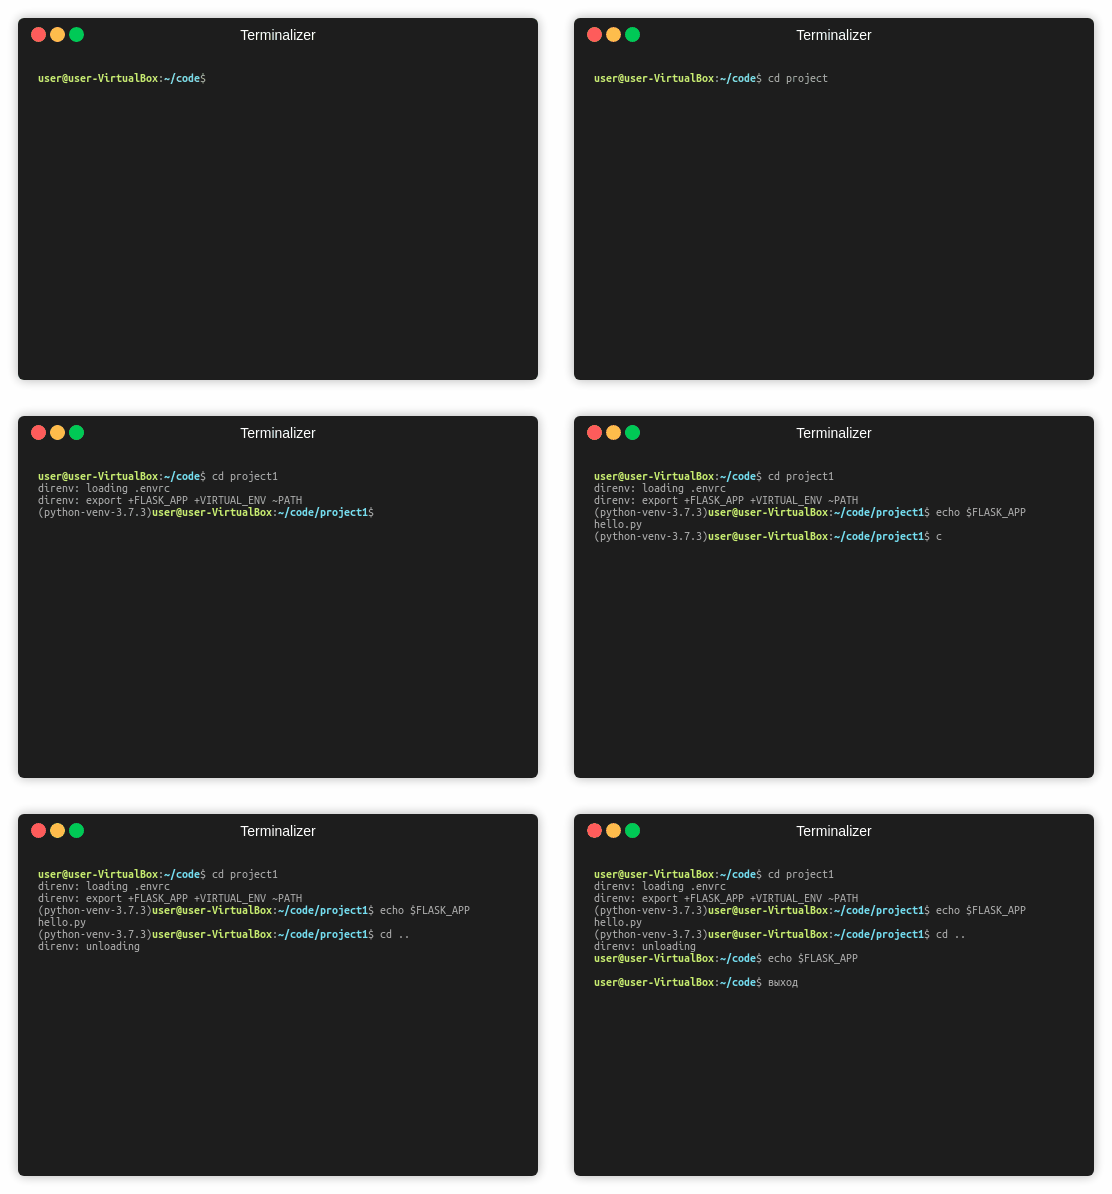
Environment variables can be automatically loaded when entering the project folder, this is especially convenient when working with several projects at the same time. The direnv utility allows you to do this. Direnv is a terminal environment variable manager that supports bash, zsh, tcsh and other shells. Allows you to automatically load and unload environment variables depending on your current directory. This allows you to have environment variables specific to each project. Before each invitation, the presence of the .envrc
file in the current and parent directories is checked. If the file exists, it is loaded into the bash subpattern, and all exported variables are then captured by direnv and then made available to the shell.
Install direnv
sudo apt-get install direnv
Next, you need to make changes to configure our shell; for bash, add the following to the end of the ~/.bashrc
and restart the console:
eval "$(direnv hook bash)"
Create a new folder for the project:
$ mkdir ~/my-project $ cd ~/my-project
We show that the environment variable FLASK_APP is not loaded:
$ echo $FLASK_APP nope
Write the environment variables to the .envrc
file:
$ echo export FLASK_APP=hello.py > .envrc .envrc is not allowed
To ensure security, after creating or modifying the .envrc
file, you need to confirm with the direnv allow command:
$ direnv allow . direnv: reloading direnv: loading .envrc direnv export: +FLASK_APP
We show that the environment variable is loaded:
$ echo $FLASK_APP hello.py
When you exit the project folder, environment variables are unloaded
$ cd .. direnv: unloading
and become unset again
$ echo $FLASK_APP nope
Working with virtual environments in direnv
In addition to loading environment variables, direnv also allows you to work with a virtual environment for Python.
The virtual environment allows you to use different versions of the python interpreter and library packages for individual projects. There are several ways to create a virtual environment for python, here we look at the venv module, for other options are described in the direnv documentation .
To use venv to automatically create and activate a virtual environment, you need to add the following code to the ~/.config/direnv/direnvrc
(see the documentation) .
Creating a virtual environment
If you add a line to the .envrc
file
layout python-venv
then when navigating to the folder direnv will create a virtual environment in the direnv folder, for example .direnv/python-venv-3.7.3
.
To create a virtual environment with a different path, for example, in the more familiar venv folder, you must set the VIRTUAL_ENV
variable:
export VIRTUAL_ENV=.venv
In the same way, you can connect an already created virtual environment.
Work with different versions of Python
To install other than the system version of python, you need to use the command:
layout python-venv python3.6
Create a bash prompt string (PS1)
Unlike manual activation of the virtual environment, in our case the bash prompt (PS1) will not be changed (usually it looks like (venv) user@comp:~$
). To return to showing the activation of the virtual environment in the console, add the following code to the ~/.bashrc
:
show_virtual_env() { if [[ -n "$VIRTUAL_ENV" && -n "$DIRENV_DIR" ]]; then echo "($(basename $VIRTUAL_ENV))" fi } export -f show_virtual_env PS1='$(show_virtual_env)'$PS1
Sample .envrc
file configuration file
This is what the .envrc
file configured for developing a flask application might look like:
export VIRTUAL_ENV=venv layout python-venv export FLASK_APP=app.py export FLASK_DEBUG=1
This allows you to automatically activate the virtual environment and load environment variables when entering the project folder.
