Hello, Habr!
Today I will touch upon a very widespread and, generally speaking, rather well-known topic of burnout of OLED screens. Despite the fact that this topic has been relevant for a long time , some smartphone manufacturers continue to make unsuccessful design decisions , and users continue to take incorrect, rather destructive measures . I would like to tell briefly about what OLED screens are, why they burn out and how, in fact, the quickest and most painless way to smooth this problem (of course, without root rights). Go!
OLED - what is it and why
OLED stands for Organic Light-Emitting Diode, and basically uses the luminescent properties of certain organic compounds that emit light when an electric current is passed through them. In fact, each pixel is a miniature electrode filled with a substance that emits either red, green, or blue light when voltage is applied.
Well, why is this needed?
This technology has a specific list of rather significant advantages over its main competitor - LCD. They can be briefly listed like this:
- Less energy consumption: black means that no voltage is applied to the pixel at all;
- Smaller design, which allows you to put more chips into the gadget;
- Very good light scattering, which allows to significantly expand the angle of visibility;
- The cost of production is less: the luminescent substances used are inexpensive to purchase;
- Greater color saturation;
- And others.
Burning the screen - how does this happen?
Of course, our world is not perfect, and everything has its advantages and disadvantages - including our friend OLED . In addition to many small problems, such as the strong reflection of external light on the street or the large (compared to LCD, sometimes up to 3 times) energy costs for displaying white, there is a very pronounced defect that has already been noticed by all and sundry. This is a screen burn .

And this is due to the fact that those same substances in pixels cannot shine forever , and the life cycles of each individual pixel are not synchronized in any way. For example, blue pixels burn out faster at the same voltage, and if you look at similar pictures on the screen for a long time, then whole portions of the screen will fade out differently.
How to deal with this?
The main task of combating OLED screens is to use all parts of the screen as evenly as possible. Some manufacturers slightly tune their features so that they do not spoil the device. But, as practice shows, it is better not to rely on manufacturers, but to monitor the state of their gadget themselves.
In many cases, it just comes down to the fact that it’s sometimes useful to change the background on the desktop, move application icons from time to time, monitor the brightness of the smartphone and in general how often the displayed image changes. However, on a noticeable number of devices there is a very unpleasant catch.
If you, like mine, have some fixed display elements fixed, such as navbar (navigation bar) or status bar, but there is no salvation in the settings, you will have to work out a little. Using ADB ( Android Debug Bridge ), we will make the navigation bar and / or statusbar appear only in those applications in which we always need them. And where we rarely need them, they will be hidden and appear only when swipe in the corresponding part of the screen.
You need to use the ADB utility through the console. Everything will work under Windows, only you need to reset adb.exe and all the necessary dlls in the right folder. Further, all the commands and actions shown by me will be performed under Linux (Ubuntu), but this is purely for convenience, since under the Windows (or any other linux distribution) this utility will work in exactly the same way.
Installation
Linux: open the terminal and write:
sudo apt install adb
Pretty self-explanatory.
Windows:
- Download the desired archive
- Unpack it wherever convenient.
- We open the folder and go into it through the command line.
Done.
Some initial work
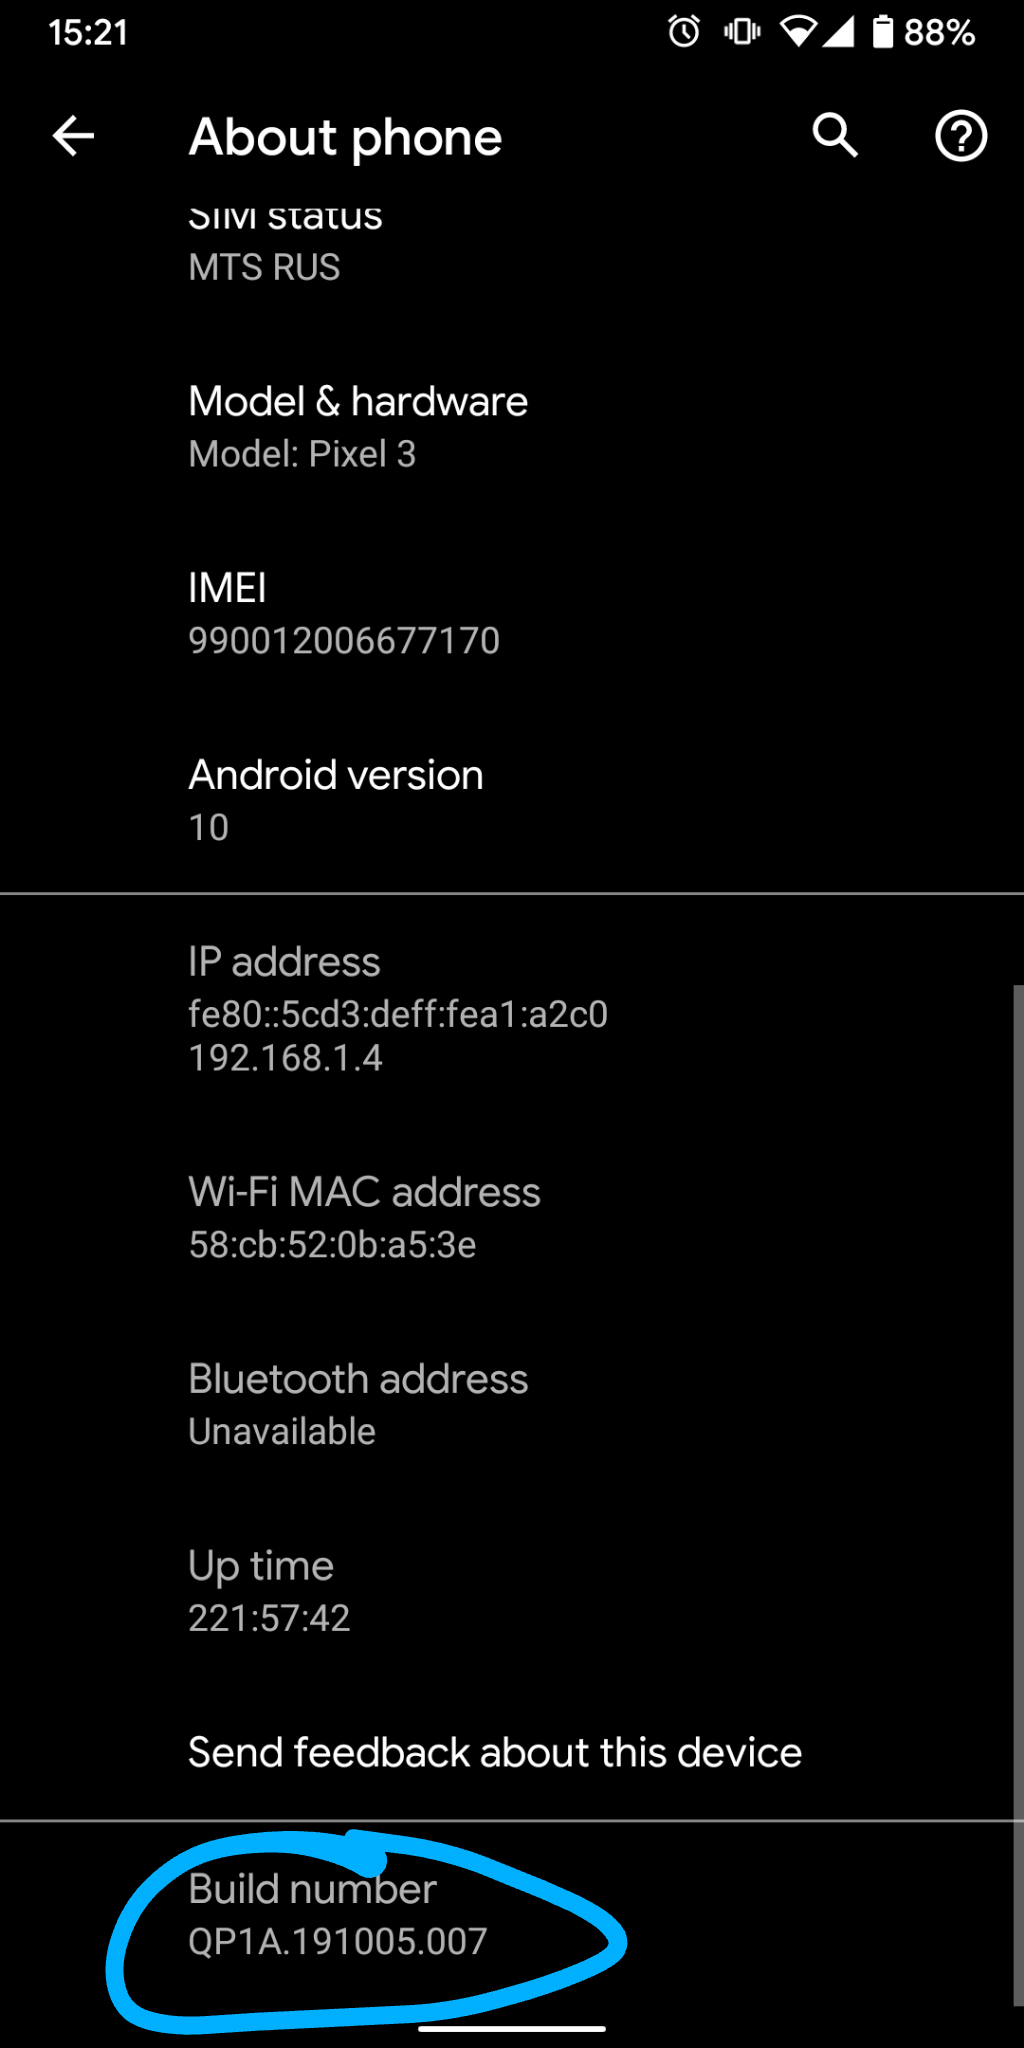
We go into the settings of our smartphone and find the build version (build number).
We click on it several times and get access to the developer options.
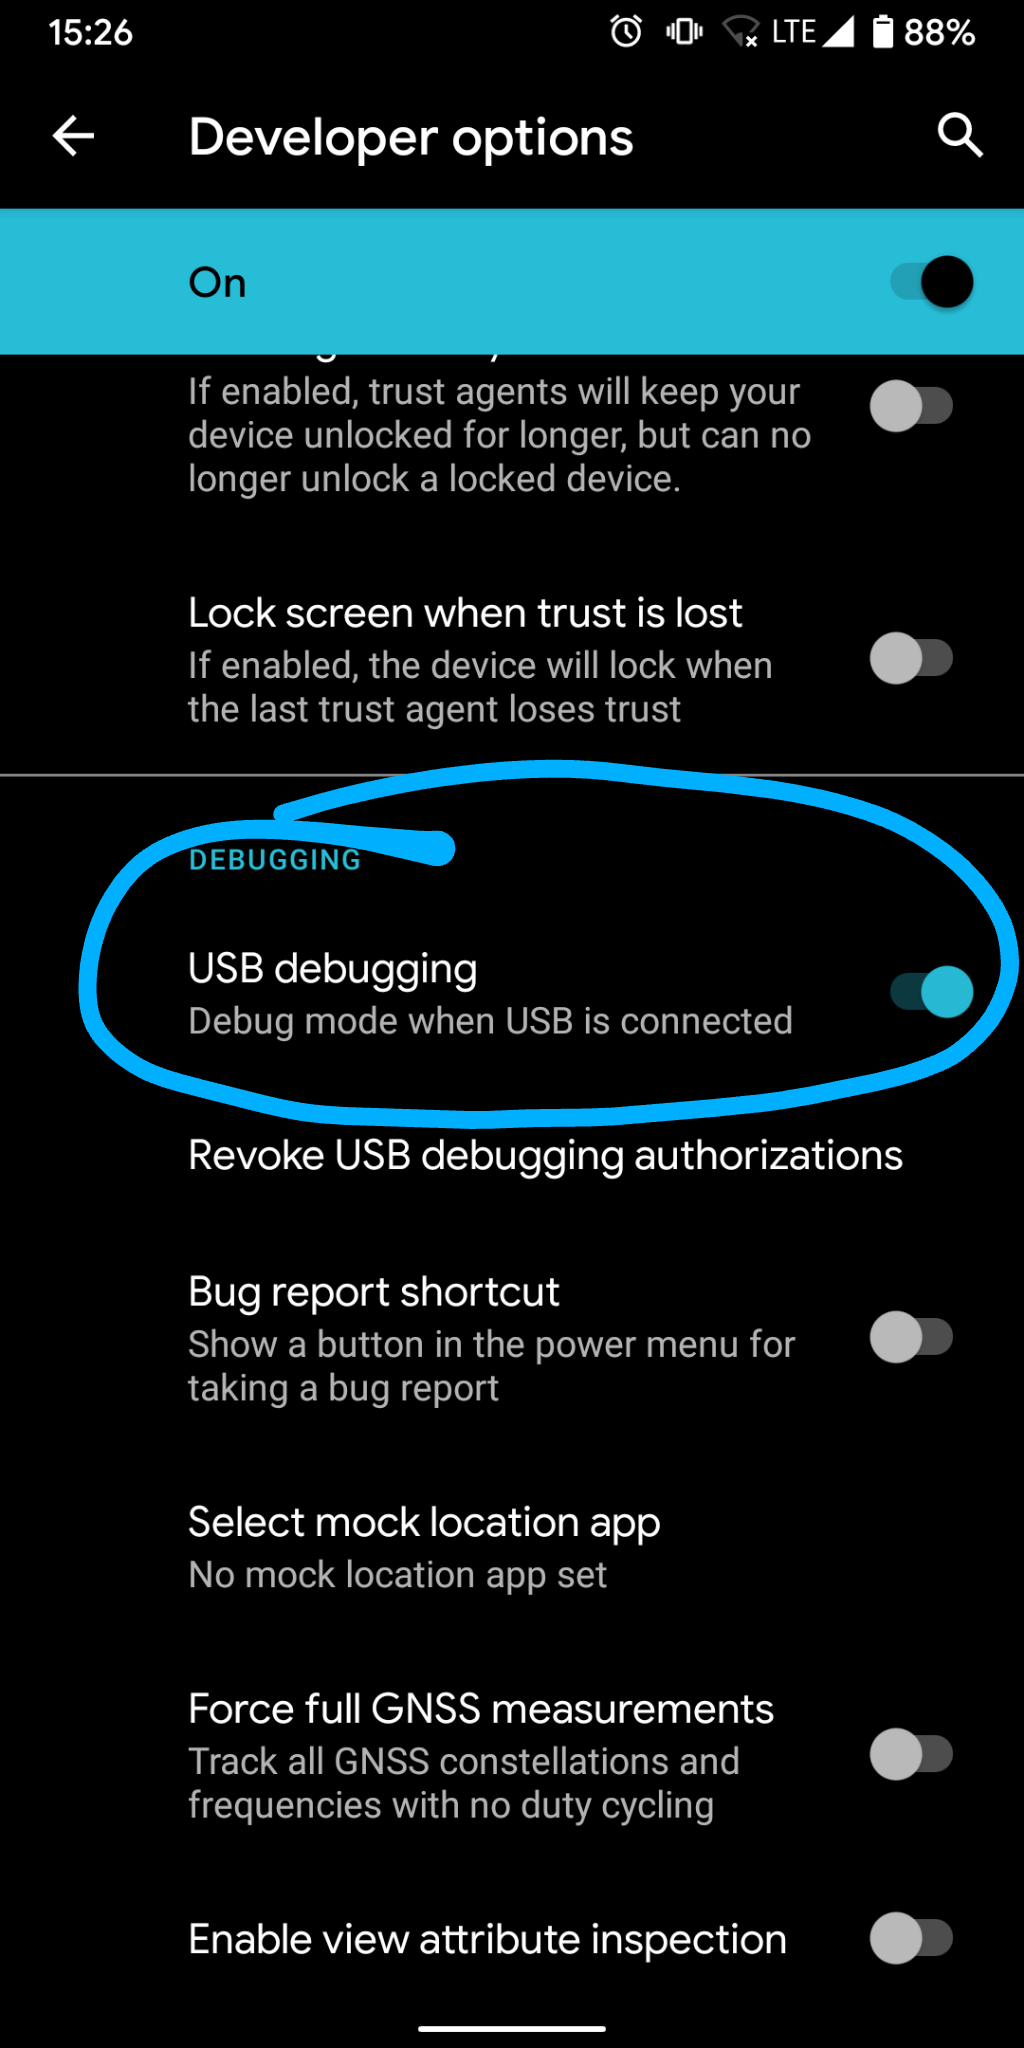
Next, we need to enable USB debugging:
Now we connect the smartphone to the computer in the MTP (file transfer) mode, and write in the terminal:
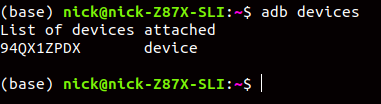
adb devices
Now you should see the following message on your smartphone:

Put a tick and click "OK."
Again, we write adb devices
and get something like this:
Hooray! We are ready for action! Of course, there is no need to do all this work more than once for one computer. You can turn on adb at any time, connect your smartphone and give it commands (just be careful, please!).
And now the most important thing
As it is written here , we will push some global settings. But first, determine the names of the application packages in which you would like to leave the settings the same. You can do this, for example, like this:
adb shell pm list packages | grep vk
or so:
adb shell pm list packages vk
We get the answer:
package:com.vkontakte.android
The name of the package is what follows after 'package', that is, in our case it is 'com.vkontakte.android'.
Next, let's say that we want to hide the navigation bar everywhere except vk. You can do it this way:
adb shell settings put global policy_control immersive.navigation=apps,-com.vkontakte.android
Done! Changes must take effect immediately.
Let’s hide the status bar everywhere except VK and YouTube.
adb shell settings put global policy_control immersive.status=apps,-com.vkontakte.android,-com.google.android.youtube
Hooray! And now in the habrahabr application we will remove both the statusbar and navbar in order to fit even more cool articles on the screen.
adb shell settings put global policy_control immersive.full=ru.habrahabr
That's all! At any time, changes can be returned to default by writing:
adb shell settings put global policy_control immersive.full=default
Conclusion
With the release of the 10 bucket and the advent of new gestures, the special need for specifically these troubles weakened, since the navbar is practically absent. However, if you are annoyed by some elements of the UI and you cannot remove them in the settings, you can do as I showed through the console.
All this information was accumulated by me when I myself tried to solve the problem of screen burn on my smartphone, and I hope that for some people this article was interesting and useful. Good luck to all!
PS
I will be glad to any reasonable criticism in the form and content of the article.