Original translation in my blog
Gaining full access to the Wolfram Language from Python
The Wolfram language ( Wolfram Language ) gives programmers a unique language with a huge number of complex algorithms, as well as built-in knowledge about the world. Over the years, people have been asking us how to access all the features of our technology from other software environments and programming languages. Years passed and we created many such solutions as Wolfram CloudConnector for Excel , WSTP (Wolfram symbol transfer protocol) for C / C ++ programs and, of course, J / Link , which provides access to Wolfram Language directly from Java.
Therefore, today we are pleased to officially introduce you the new long-awaited solution for combining languages, which will allow you to directly and efficiently call Wolfram Language from Python : Wolfram Client Library for Python . And most importantly, this client library has fully open source code hosted on WolframClientForPython git storage under the MIT license, so you can copy it as much as you like and use it as you like.
It is easy and simple.
The Wolfram client library makes it easy to integrate a large collection of Wolfram Language algorithms , as well as the Wolfram knowledge base directly into any existing Python code, which greatly saves your time and effort when developing new code. In this article, we first show you how to set up a connection between Python and the Wolfram Language, look at a few methods and examples that can be used to compute the Wolfram Language, and then call it for use from Python. For more complete reference information, follow this link: documentation home page for the Wolfram client library for Python .
Appreciate on the spot ...
Let's start with a simple example that calculates the average and standard deviation of a million numbers taken from a normal distribution. This example shows how to call a Wolfram function from Python and compare the results from Python with the same Wolfram Language calculation to show that they have high convergence.
Statistical Data Analysis
First, to connect to the Wolfram Language, you need to create a new session with the Wolfram Engine (free Wolfram language engine):
from wolframclient.evaluation import WolframLanguageSession session=WolframLanguageSession()
To call Wolfram Language functions you need to import the `wl` engine:
from wolframclient.language import wl
Now you can execute any Wolfram language code. Assign the sample variable from Python to a list value of one million random numbers taken from the normal distribution, with a mean of 0 and a standard deviation of 1:
sample = session.evaluate(wl.RandomVariate(wl.NormalDistribution(0,1), 1e6))
Consider the first five of them:
sample[:5] [0.44767075774581, 0.9662810005828261, -1.327910570542906, -0.2383857558557122, 1.1826399551062043]
You can calculate the average of this sample using Wolfram Language. As expected, it will be close to zero:
session.evaluate(wl.Mean(sample)) 0.0013371607703851515
You can also directly calculate the same in Python to make sure you get a similar result:
from statistics import mean mean(sample) 0.0013371607703851474
Similarly, you can calculate the standard deviation of a sample using the Wolfram Language:
session.evaluate(wl.StandardDeviation(sample)) 1.0014296230797068
Then run the following code in Python to make sure you get a similar result:
stdev(sample) 1.0014296230797068
It can not but rejoice that the results converge. Now you know how to call simple Wolfram Language functions from Python. Let's continue with a more interesting example.
Using the Wolfram Knowledge Base
Let's look at the Wolfram Language built-in function, which is not available in Python, WolframAlpha :
moons = session.evaluate(wl.WolframAlpha('moons of Saturn', 'Result'))
The WolframAlpha function is one of the high-level functions in the Wolfram Language that communicates with Wolfram | Alpha servers through the web API . You can use this API directly from Python, which makes calling the WolframAlpha function much more powerful and more convenient, since you get access to all the data processing functions directly from the Wolfram Language. Let's look at what the moon variable in Python contains:
moons EntityClass['PlanetaryMoon', 'SaturnMoon']
The output here is a representation in Python of an expression from the Wolfram Language, which can be used in any subsequent calculation. For example, if you want to get a list of the first four satellites of Saturn (by their degree of proximity to Saturn), for this you need to execute the following code:
session.evaluate(wl.EntityList(moons))[:4] [Entity['PlanetaryMoon', 'S2009S1'], Entity['PlanetaryMoon', 'Pan'], Entity['PlanetaryMoon', 'Daphnis'], Entity['PlanetaryMoon', 'Atlas']]
Or you can derive the four largest mass satellites of Saturn using this code:
bigmoons = session.evaluate(wl.EntityList(wl.SortedEntityClass(moons, wl.Rule("Mass","Descending"),4))) bigmoons [Entity['PlanetaryMoon', 'Titan'], Entity['PlanetaryMoon', 'Rhea'], Entity['PlanetaryMoon', 'Iapetus'], Entity['PlanetaryMoon', 'Dione']]
Or you can get an array of strings with the names of these satellites, for example:
session.evaluate(wl.Map(wl.Function( wl.Slot()("Name")), bigmoons)) ['Titan', 'Rhea', 'Iapetus', 'Dione']
All this is very impressive. Let's look at another example using the image processing and machine learning functions built into the Wolfram Language.
Image Processing and Machine Learning
First, let's switch to another mode to perform evaluations directly in the Wolfram Language. So far, you used the `wl` engine to create Wolfram Language expressions in Python, but you can also execute lines of code written in Python that contain Wolfram Language code, and sometimes it is even easier to read:
from wolframclient.language import wlexpr
For example, we calculate 1 + 1 in the Wolfram Language, sending it as a string:
session.evaluate('1+1') 2
Using this method, you can write a small code in the Wolfram Language, which receives the image at the input and uses the built-in face detection algorithm to find the location of the face in the image. Here, the image we use is the famous painting “ Girl with a Pearl Earring ” by the Dutch artist Johannes Vermeer (it should be noted, naturally, this algorithm will work also on almost any image with objects in which you can recognize faces). Since the Python terminal interface does not support image output, we need to use the Jupyter Notebook along with the Python Image Library (PIL) package in order to be able to output the result:
from PIL import Image import io
session.evaluate(wlexpr(''' image = ImageResize[ Import["Girl_with_a_Pearl_Earring.jpg"], 300]; boxes = FindFaces[image]; face = ImageAssemble[{{image,HighlightImage[image, boxes, "Blur"]}}]; ''') )
data = session.evaluate( wlexpr('ExportByteArray[ face, "PNG" ]') )
Image.open(io.BytesIO)

As a result, everything turned out pretty easy and powerful at the same time. But what to do if you do not have the Wolfram Engine installed locally on your computer, and you want to use the Wolfram client library for Python? In this case, you can always use the Wolfram Language directly by calling it from the Wolfram Cloud (cloud).
So go to the cloud
Wolfram Cloud provides easy access to the Wolfram Language without preinstalling locally. Wolfram Cloud provides a variety of services, including the Wolfram Language web programming interface, as well as the ability to deploy custom Wolfram Language web APIs.
In the following example, we will do this by deploying the Wolfram Language web-API. For example, the API takes the names of two countries (country1 and country2) at the input, finds the capital for each country and then calculates the distance between them (in kilometers):
CloudDeploy[ APIFunction[{"country1"->"String","country2"->"String"}, QuantityMagnitude[ GeoDistance[ EntityValue[Entity["Country", #country1], "CapitalCity"], EntityValue[Entity["Country", #country2], "CapitalCity"] ], "Kilometers" ]&, "WXF" ], CloudObject["api/public/capital_distance"], Permissions->"Public"]

After deploying this API, you can start a new Wolfram Language session, but this time you are connecting to the Wolfram Cloud instead of the local engine:
from wolframclient.evaluation WolframCloudSession cloud = WolframCloudSession()
To call the API, you must specify the username (user1) and the API endpoint (api / public / capital_distance). Using this data you can connect to the cloud ...
api = ('user1', 'api/public/capital_distance') result = cloud.call(api, {'country1': 'Netherlands', 'country2': 'Spain'})
... and then get the desired result:
result.get() 1481.4538329484521
Evaluate once again how easy and simple it is.
If you want to save the deployed Wolfram Language API so that only you can use it, you can deploy the API using the Permissions → “Private” command. To do this, in the private API, you can generate (in Wolfram Language) an authentication security key:
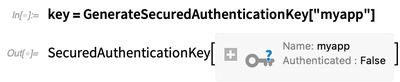
key = GenerateSecuredAuthenticationKey["myapp"]
Copy the answers from these two lines of input:
key["ConsumerKey"] key["ConsumerSecret"]
Then paste them into your Python session:
SecuredAuthenticationKey('<<paste-consumer-key-here>>', '<<paste-consumer-secret-here>>')
And then start a new cloud session with authentication:
cloud = WolframCloudSession(credentials=sak) cloud.start() cloud.authorized() True
Now you (and only you) can use any Wolfram Language API that you have deployed for private use.
Let's talk a bit about the basic concepts of serialization
In order to do everything quickly and efficiently, the Wolfram client library for Python uses the open WXF format for exchanging expressions between Python and Wolfram. WXF is a binary format for accurately serializing Wolfram Language expressions in a form suitable for sharing with external programs. The library function Export can serialize Python objects to a string input form and WXF, and also supports a set of Python built-in classes such as dict, list, and strings:
from wolframclient.serializers import export export({ 'list': [1,2,3], 'string': u'abc', 'etc': [0, None, -1.2] }) b'<|"list" -> {1, 2, 3}, "string" -> "abc", "etc" -> {0, None, -1.2}|>'
WXF is a numerical array with packed data, which allows you to effectively support NumPy arrays.
For example, create an array of 255 8-bit positive integers:
import numpy array=numpy.arange(255, dtype='uint8')
Serialize it to WXF bytes and calculate the number of bytes:
wxf=export(array, target_format='wxf') len(wxf) 262
NumPy allows you to access many Python libraries. Consequently, this efficient and compact serialization helps connect the Python system to the Wolfram Language, a direct consequence of which is support in NumPy that serializing PIL images in general is very efficient. Most pixel data modes are displayed as one of the types of numeric arrays specified as NumericArrayType .
It is also worth noting that pandas Series and DataFrame are supported here initially. The library also provides an extensible mechanism for serializing arbitrary classes.
What is available now?
Install the latest Wolfram client library for Python using the pip command:
$ pip install wolframclient
To do this, you need Python 3.5.3 (or a newer version) and Wolfram Language 11.3 (or a newer version). Check out the Wolfram client library documentation for Python . All source code is hosted on the WolframClientForPython repository on Wolfram Research GitHub .
If you have suggestions for improving it and you can and want to help us do this, you can do this by sending us a request to update the data in this repository.
We are very pleased that this release has finally taken place and we hope that it will be useful to you. Please tell us your opinion in the comments section or in the Wolfram community , and we will do our best to contact you personally.
About translation
Translation of the post by Dorian Birraux (Engine Connectivity Engineering) and Arnoud Buzing (Director of Quality and Release Management) " Announcing the Wolfram Client Library for Python ".
I express my deep gratitude to Peter Tenishev and Galina Nikitina for their help in translating and preparing the publication.
I express my deep gratitude to Peter Tenishev and Galina Nikitina for their help in translating and preparing the publication.
Want to learn how to program in Wolfram Language?
Watch weekly webinars .
Registration for new courses . Ready online course .
Order solution at Wolfram Language.