Do-it-yourself Segmented Control, as in iOS 13.0 and later
IOS 13 has updated Segmented Control, but for those who can't upgrade Xcode, it's just not available. So I decided to write how you can quickly make the same Segmented Control yourself.
Go!
First of all, go to the Storyboard. We place the View element on our ViewController.
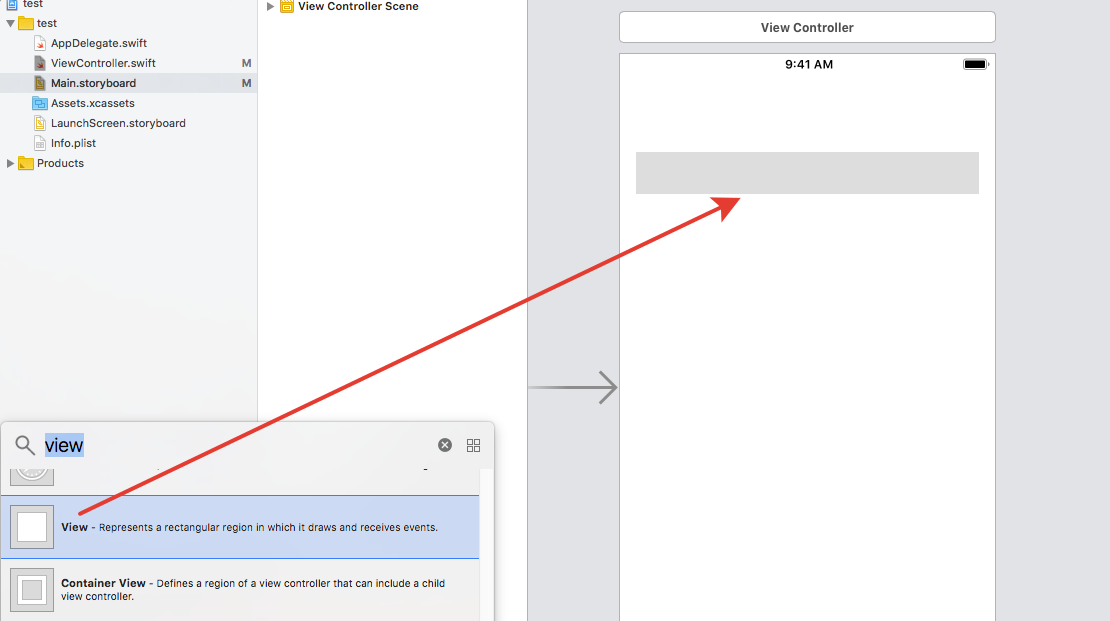
We fix it with constraints as you like and in what place you need it.
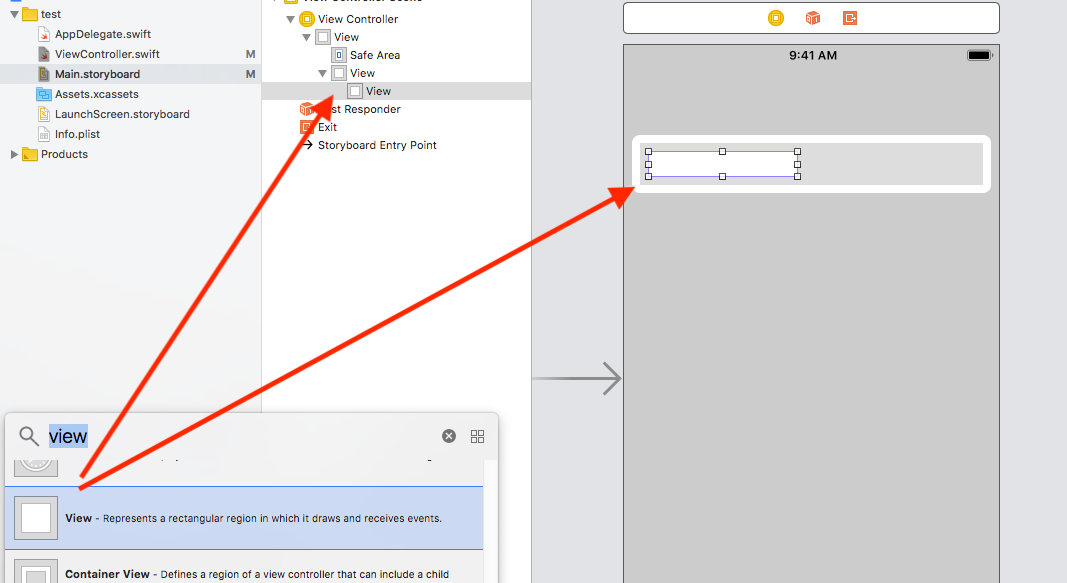
Paint the background and check the clip to Bounds checkbox.

Take another View and place it inside our first View. Just be sure to see that it was inside your first View. It must be placed in a ladder.
Next, we fix it with constants with an indent of 2 pix from all sides.
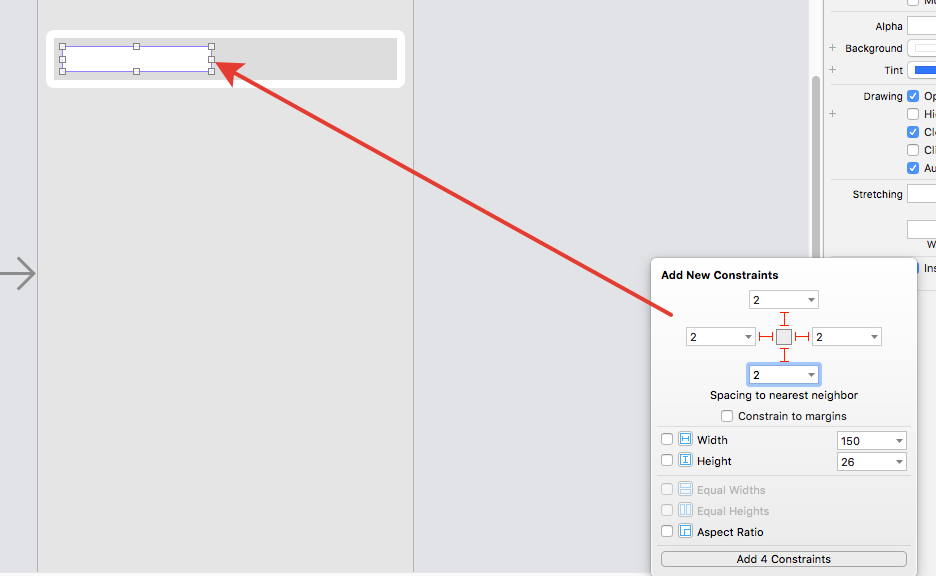
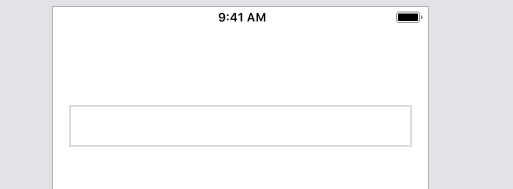
And it will be placed inside your first view as in the photo below.
Next, select our white View which is internal. We select leading and traling constant, and change their Priority to 750.

Now we create for this View two more constants from left and right with indent 0 pix

We also go into editing the data of the constants that we just created and change their Priority = 900 and fix them not from the edges of our gray View, but set them relative to the center and if you do everything correctly your white View will be assembled by a line in the center.

Now select two Buttons and place them inside the gray view, but they should be hierarchically at the very bottom so that their text does not overlap with our white view when we move it. We fix our buttons in the center relative to their half.

All. Now connect our elements to the storyboard with the ViewController.
The gray View I called - fonView.
White View called - blockView.
Also, two buttons buttonOne and buttonTwo created an action for them.

We are also pulling into our code two constants that we made with priority 750. Let's name them:
In viewDidLoad, we prescribe only the rounding of our View and make one constant equal to priority 950 so that the white view is not in the middle like a line, but looks like a selected segment.
The finish line. In the action button, we write such a code. the bottom line is that we are changing our priorities and the view is increasing by the required size and we are updating our constants animatedly.
It's all! Check!

Go!
First of all, go to the Storyboard. We place the View element on our ViewController.
We fix it with constraints as you like and in what place you need it.
Paint the background and check the clip to Bounds checkbox.
Take another View and place it inside our first View. Just be sure to see that it was inside your first View. It must be placed in a ladder.
Next, we fix it with constants with an indent of 2 pix from all sides.
And it will be placed inside your first view as in the photo below.
Next, select our white View which is internal. We select leading and traling constant, and change their Priority to 750.
Now we create for this View two more constants from left and right with indent 0 pix
We also go into editing the data of the constants that we just created and change their Priority = 900 and fix them not from the edges of our gray View, but set them relative to the center and if you do everything correctly your white View will be assembled by a line in the center.
Now select two Buttons and place them inside the gray view, but they should be hierarchically at the very bottom so that their text does not overlap with our white view when we move it. We fix our buttons in the center relative to their half.
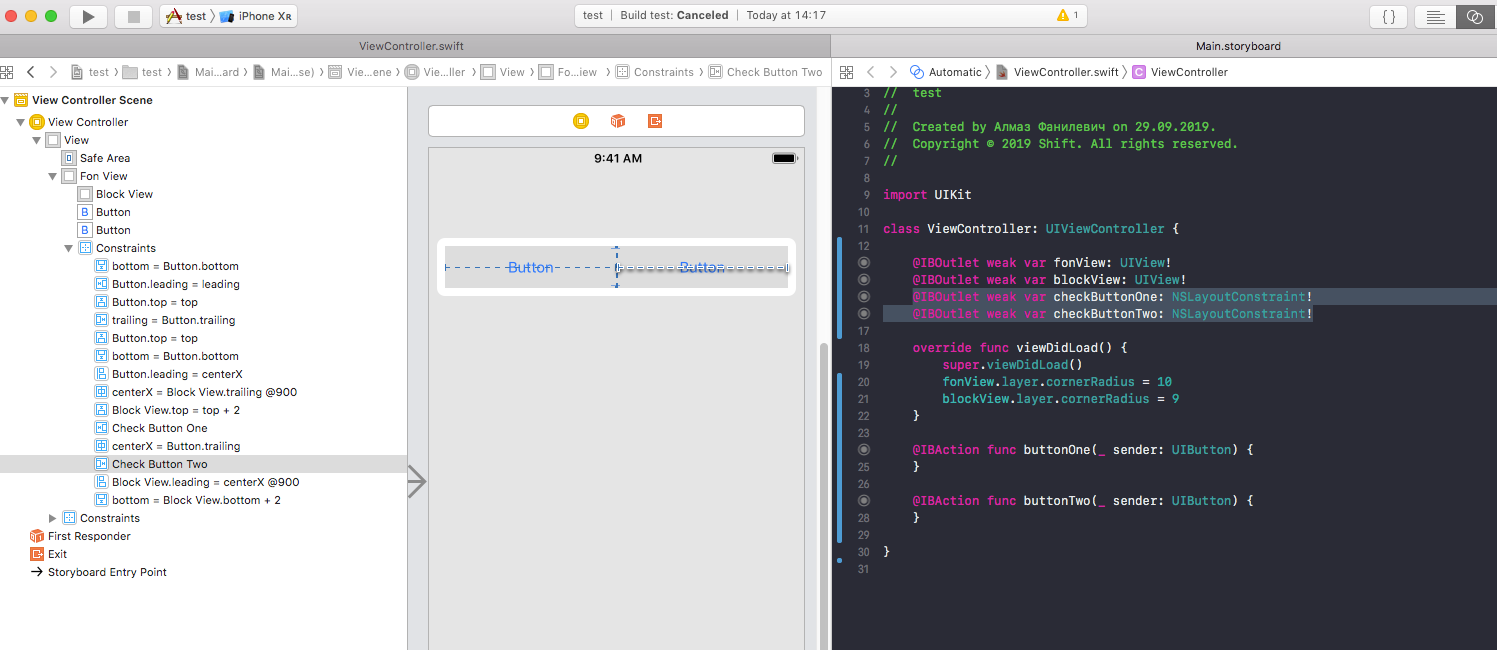
All. Now connect our elements to the storyboard with the ViewController.
The gray View I called - fonView.
White View called - blockView.
Also, two buttons buttonOne and buttonTwo created an action for them.
We are also pulling into our code two constants that we made with priority 750. Let's name them:
@IBOutlet weak var checkButtonOne: NSLayoutConstraint! @IBOutlet weak var checkButtonTwo: NSLayoutConstraint!
In viewDidLoad, we prescribe only the rounding of our View and make one constant equal to priority 950 so that the white view is not in the middle like a line, but looks like a selected segment.
override func viewDidLoad() { super.viewDidLoad() fonView.layer.cornerRadius = 10 blockView.layer.cornerRadius = 9 checkButtonOne.priority = UILayoutPriority(rawValue: 950) }
The finish line. In the action button, we write such a code. the bottom line is that we are changing our priorities and the view is increasing by the required size and we are updating our constants animatedly.
@IBAction func buttonOne(_ sender: UIButton) { checkButtonOne.priority = UILayoutPriority(rawValue: 950) checkButtonTwo.priority = UILayoutPriority(rawValue: 750) UIView.animate(withDuration: 0.5) { self.view.layoutIfNeeded() } } @IBAction func buttonTwo(_ sender: UIButton) { checkButtonOne.priority = UILayoutPriority(rawValue: 750) checkButtonTwo.priority = UILayoutPriority(rawValue: 950) UIView.animate(withDuration: 0.5) { self.view.layoutIfNeeded() } }
It's all! Check!
All Articles