Disk forensics, memory forensics and log forensics. Volatility framework and Autopsy. Problem solving with r0ot-mi. Part 1
This article contains solutions to tasks aimed at the forensics of memory, RAM, and web server logs. As well as examples of using the Volatility Framework and Autopsy programs.
Organizational Information
Especially for those who want to learn something new and develop in any of the areas of information and computer security, I will write and talk about the following categories:
In addition to this, I will share my experience in computer forensics, analysis of malware and firmware, attacks on wireless networks and local area networks, conducting pentests and writing exploits.
So that you can find out about new articles, software and other information, I created a channel in Telegram and a group to discuss any issues in the field of ICD. Also, I will personally consider your personal requests, questions, suggestions and recommendations personally and will answer everyone .
All information is provided for educational purposes only. The author of this document does not bear any responsibility for any damage caused to anyone as a result of using knowledge and methods obtained as a result of studying this document.
- PWN;
- cryptography (Crypto);
- network technologies (Network);
- reverse (Reverse Engineering);
- steganography (Stegano);
- search and exploitation of WEB vulnerabilities.
In addition to this, I will share my experience in computer forensics, analysis of malware and firmware, attacks on wireless networks and local area networks, conducting pentests and writing exploits.
So that you can find out about new articles, software and other information, I created a channel in Telegram and a group to discuss any issues in the field of ICD. Also, I will personally consider your personal requests, questions, suggestions and recommendations personally and will answer everyone .
All information is provided for educational purposes only. The author of this document does not bear any responsibility for any damage caused to anyone as a result of using knowledge and methods obtained as a result of studying this document.
Memory forensics - level 2
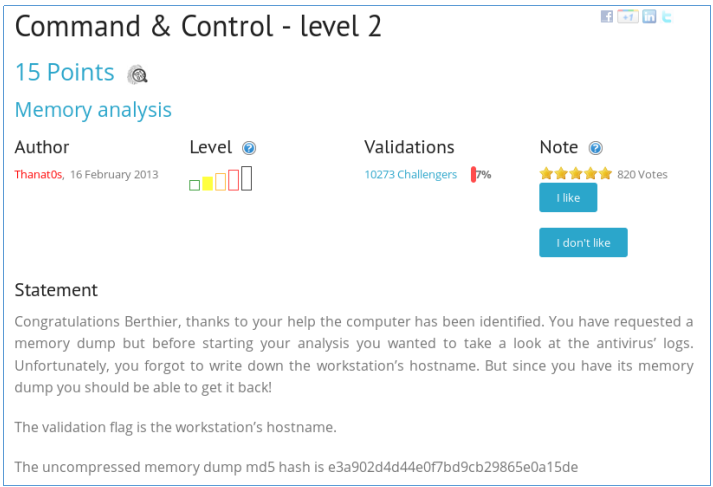
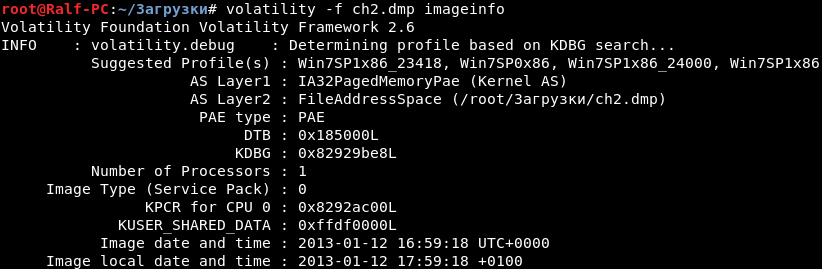
In this task, we are given an image of RAM and asked to find the name of the machine. To solve this type of tasks we will use the Volatility Framework. We load the image with the following command, specifying the path to the image as a parameter. First we find out information about the image.
volatility -f ch2.dmp imageinfo
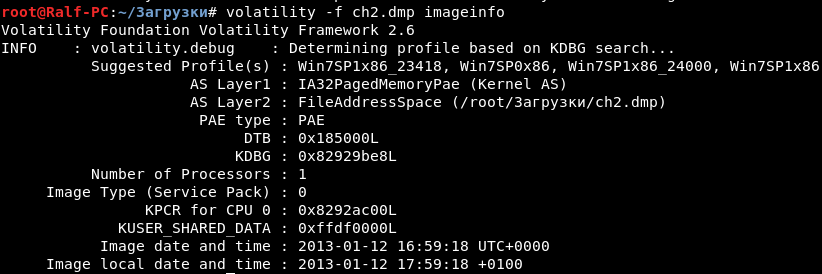
This way we learn that it is a memory image of the Windows operating system. That is, we can find out the name of the machine from the registry. Now we must specify the profile as a parameter. The key value in the registry can be displayed in the following way.
volatility -f ch2.dmp --profile=Win7SP1x86_23418 printkey -K "ControlSet001\Control\ComputerName"

And now we find out the name of the computer.
volatility -f ch2.dmp --profile=Win7SP1x86_23418 printkey -K "ControlSet001\Control\ComputerName\ActiveComputerName"

We see the name of the computer. We hand over, we get points.
Logs forensics - web attack

In this task, they give us a Web server log and say that an attack was made on it, we need to understand what data the attacker learned. Let's open the log.
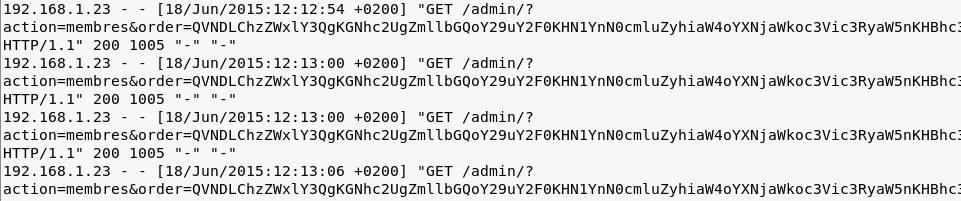
We see that base64 encoded data as an order parameter. We will write a code to decode them.
from re import * from base64 import * f = open('ch13.txt') log = f.read() f.close() k = findall("action=membres&order=(.*?) HTTP", log) [print(str(b64decode(i.replace("%3D", "=")), "utf-8")) for i in k]
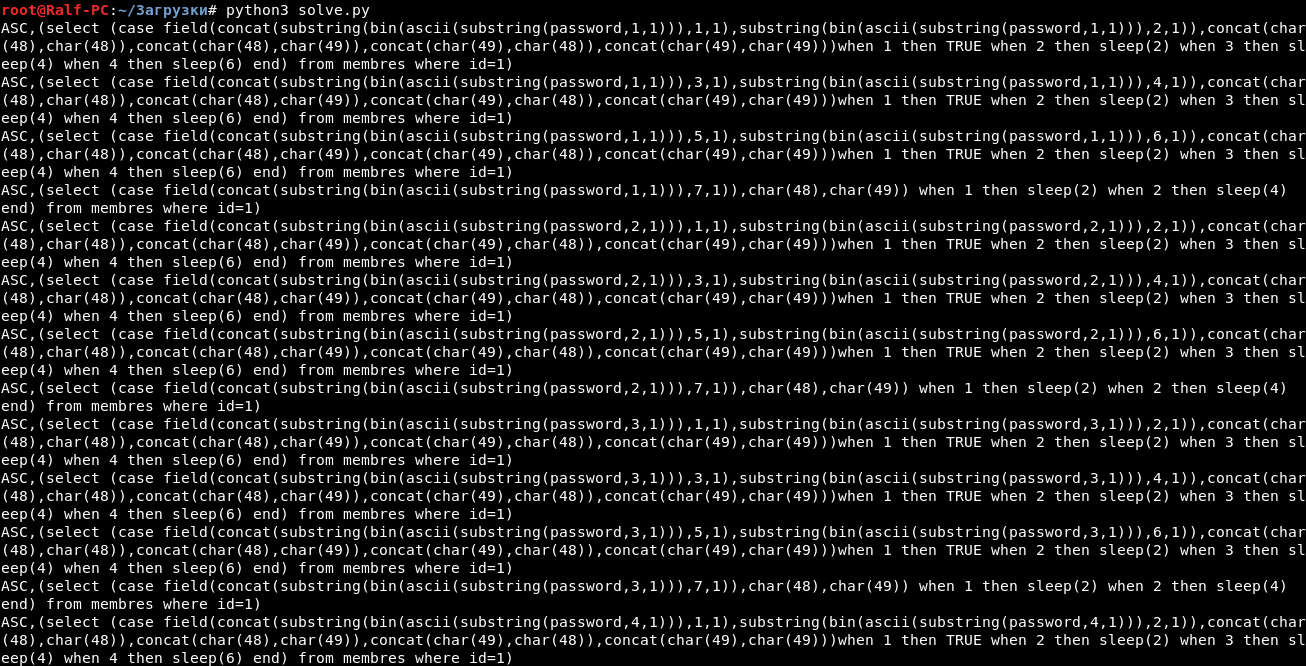
Convert a little to understandable.
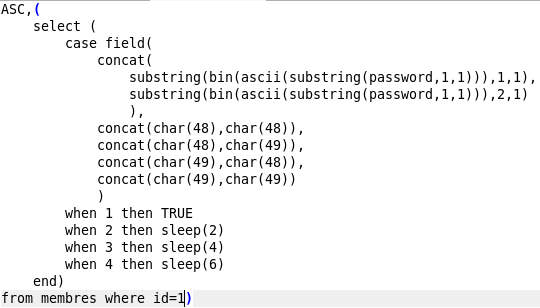
Thus, we compare the first two bits of the first letter of the password with 00, 01, 10, 11 and make a corresponding pause - 0, 2, 4 and 6 seconds. Also happens with the second and third two bits. After that, the seventh bit is checked and, depending on the equality of 0 or 1, a pause of 2 and 4 seconds is made.
Thus, by the delay we can determine which bits the server returns.

For example: the time difference between the first requests is 6 seconds, that is, these are bits 11, etc. Automate this process.
from re import * from base64 import * import binascii f = open('ch13.txt') log = f.read() f.close() k = findall("action=membres&order=(.*?) HTTP", log) dec_k = [str(b64decode(i.replace("%3D", "=")), "utf-8") for i in k] t = findall("2015:12:1(.*?) \+0200]", log) tim = [int(i.split(':')[0])*60 + int(i.split(':')[1]) for i in t] tim = [tim[i+1] - tim[i] for i in range(len(tim)-1)] + [0] password = "" for i in range(0, len(tim), 4): c = '' for sec in tim[i:i+3]: if sec == 0: c += '00' elif sec == 2: c += '01' elif sec == 4: c += '10' elif sec == 6: c += '11' if tim[i+3] == 2: c += '0' elif tim[i+3] == 4: c += '1' password += chr(int(c,2)) print(password)
We give the password.
Memory forensics - level 5
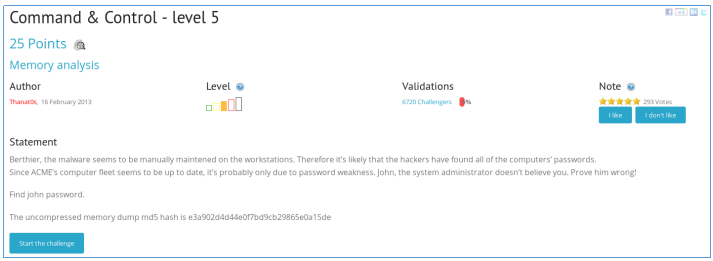
We are asked to find the password for John and provide a core dump. Like last time, we find out which operating system is used.
This is Windows. Volatility has a hashdump option.

Now find the user password.

We send the password and get points.

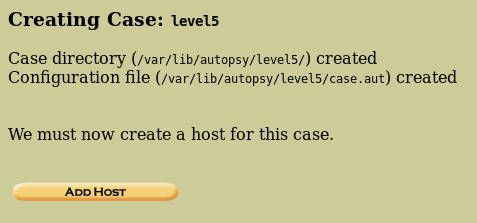
Disk forensics - find the cat

We are given a disk image and asked to find the place where the cat is. For such tasks, you can use FTK Imager. I will solve it using AutoPsy . Run the program.
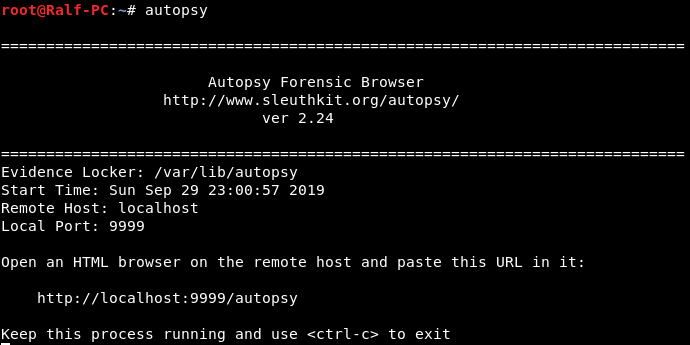
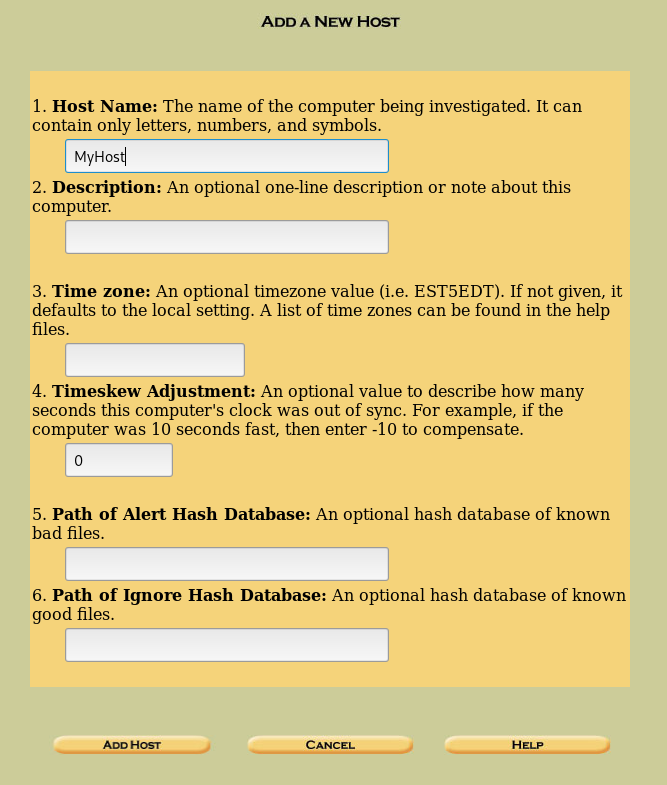
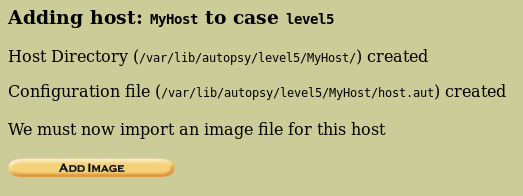
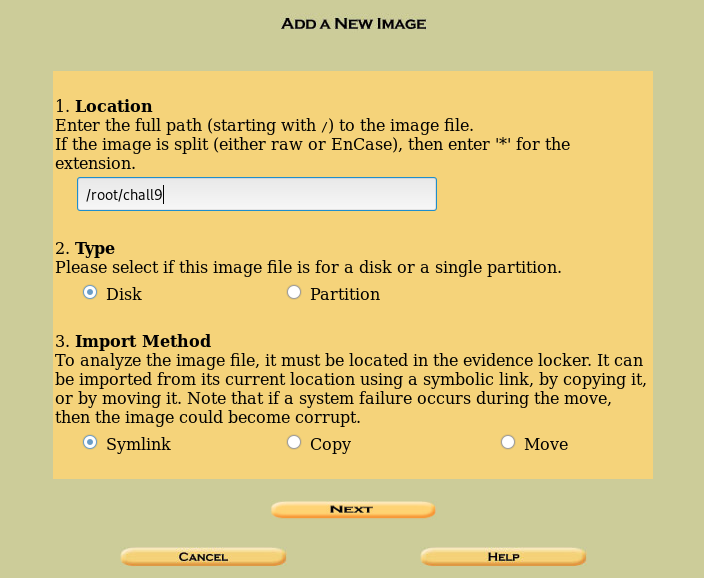
We are told to open the page in a browser. We open. Now create a new case and add a host. Next, you need to add an image.
Images 
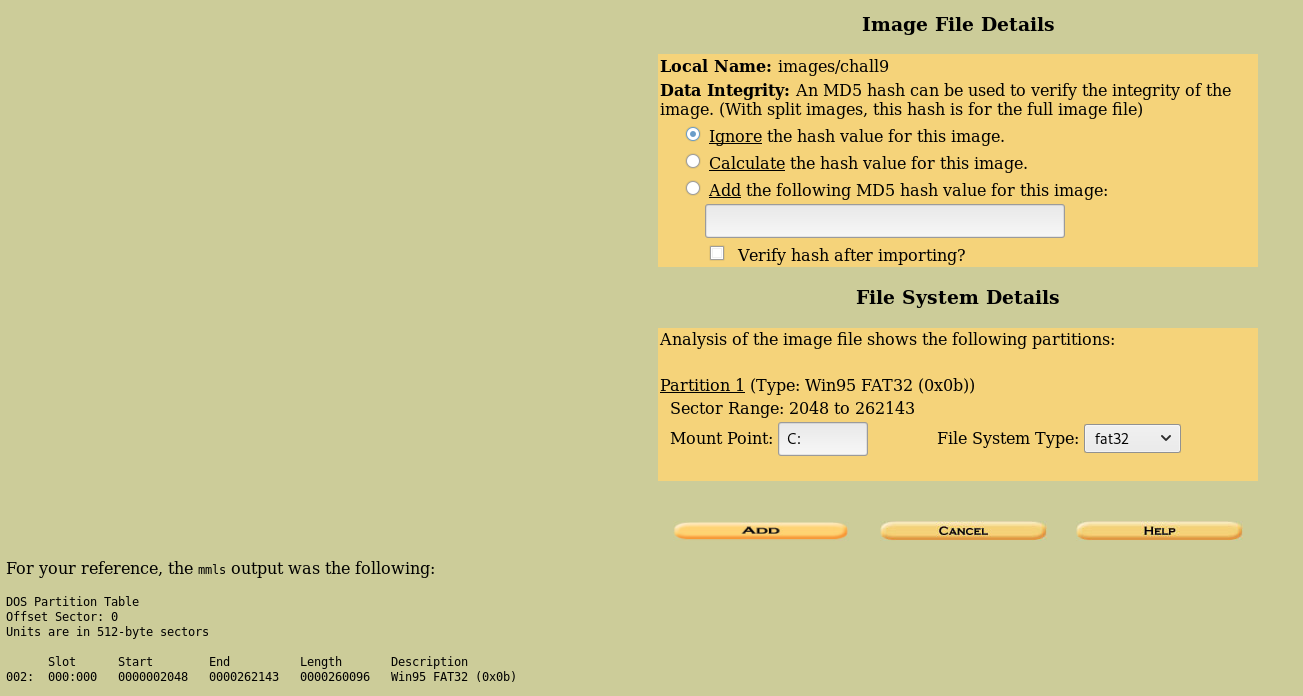

After creating the environment, we have the following.
 "
"
Select the analysis option.

We display the following section structure. There is nothing interesting in the Documentations folder. Let's go to Files.
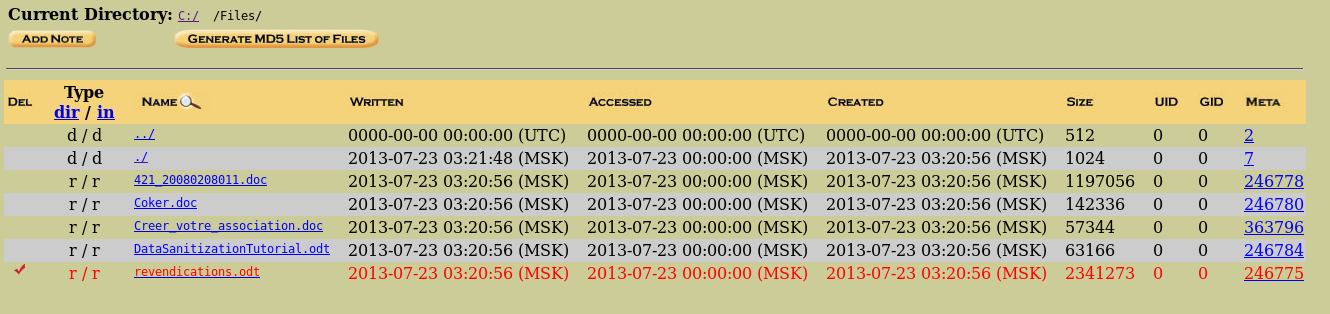
There is an interesting odt file. We select it.
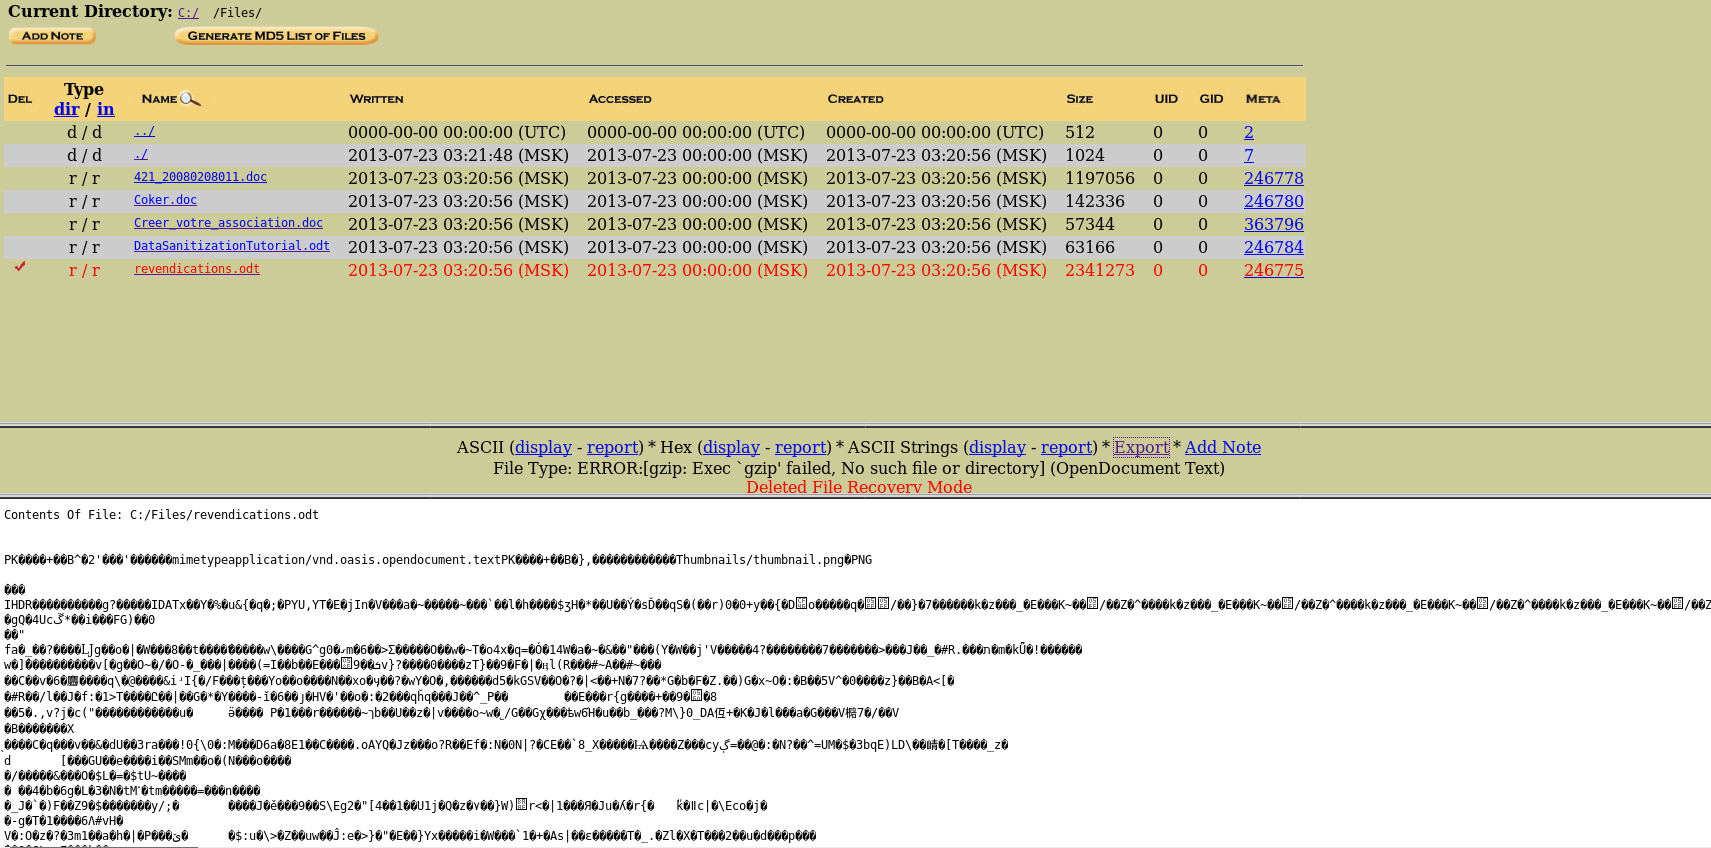
The contents are displayed below - there is some kind of image. Select extract to extract the file. From the downloaded file we extract the image.
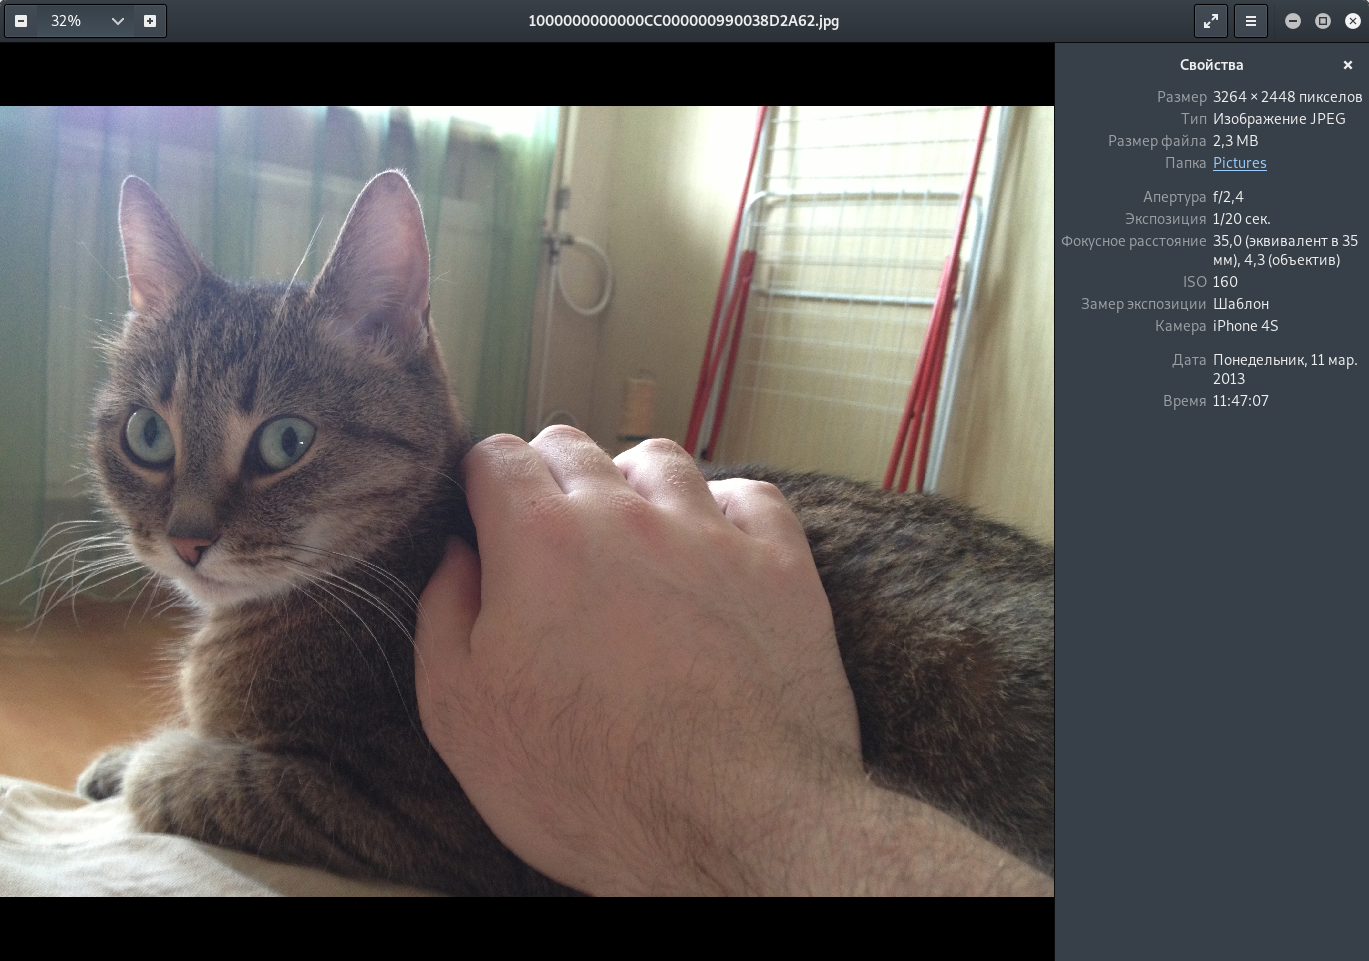
Most likely this is the cat we need to find. Let's see exif information.

Great, there are location coordinates. We find it in the cards.
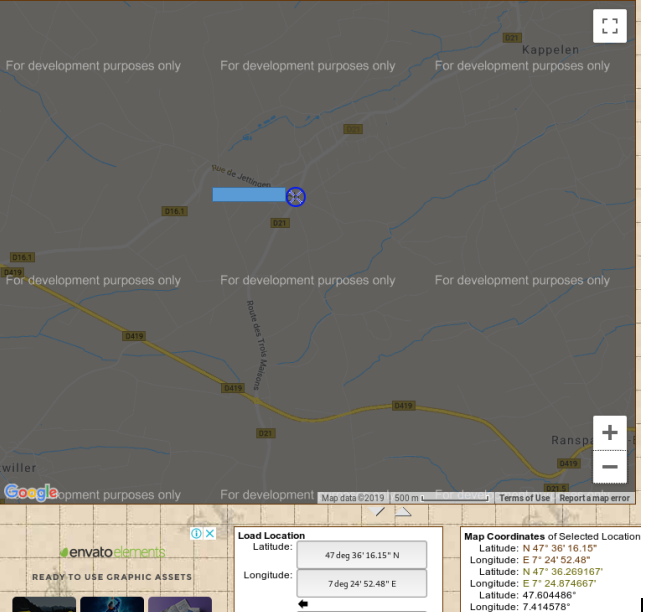
We send the answer and get points.

Further more and more complicated ... You can join us on Telegram . There you can propose your own topics and vote on the choice of topics for the following articles.
All Articles