Yandex: an adult smart home
Recently, Yandex launched its smart home system. We are offered to buy inexpensive Wi-Fi devices: an adapter in an outlet, a light bulb and an IR remote control. It is interesting that the developers of “smart” devices have the opportunity to create their own “smart home” skills, this will allow you to connect devices to the Yandex system and manage their voice through Alice. More and more new brands are appearing on skill lists. Alice perfectly understands Russian speech, which makes her the undisputed leader among voice assistants in the Russian market.
However, not everything is so smooth ...
The first minus: basically, all the proposed systems are “cloudy”. Their reliability is sometimes in doubt, since their performance directly depends on the quality of the connection with the manufacturer’s servers. And when you turn off the Internet, the devices completely turn into a “pumpkin”.
Second minus: scripting system. An important part of a smart home is the scripts. And here they are very primitive: If “the phrase is such and such,” then enable “the device is such and such.” For my smart home, this was too little.
Cons do not end there, but the rest is more likely connected with the immaturity of the system. The Yandex development team continues to actively add various features, and bugs to edit, for which many thanks to them!
After studying the documentation, I decided to create the Yandex UD skill and connect the smart home controller to it. This will allow you not to depend on cloud servers, implement any scripts locally on the controller and at the same time control the system by voice through Alice. For this, I wrote the plugin “yandex2mqtt” on Node.js.
Bit of theory
- Alice, turn on the light.
After this phrase, magic happens and the light turns on. But what is behind the scenes? Let's figure out how it all works.
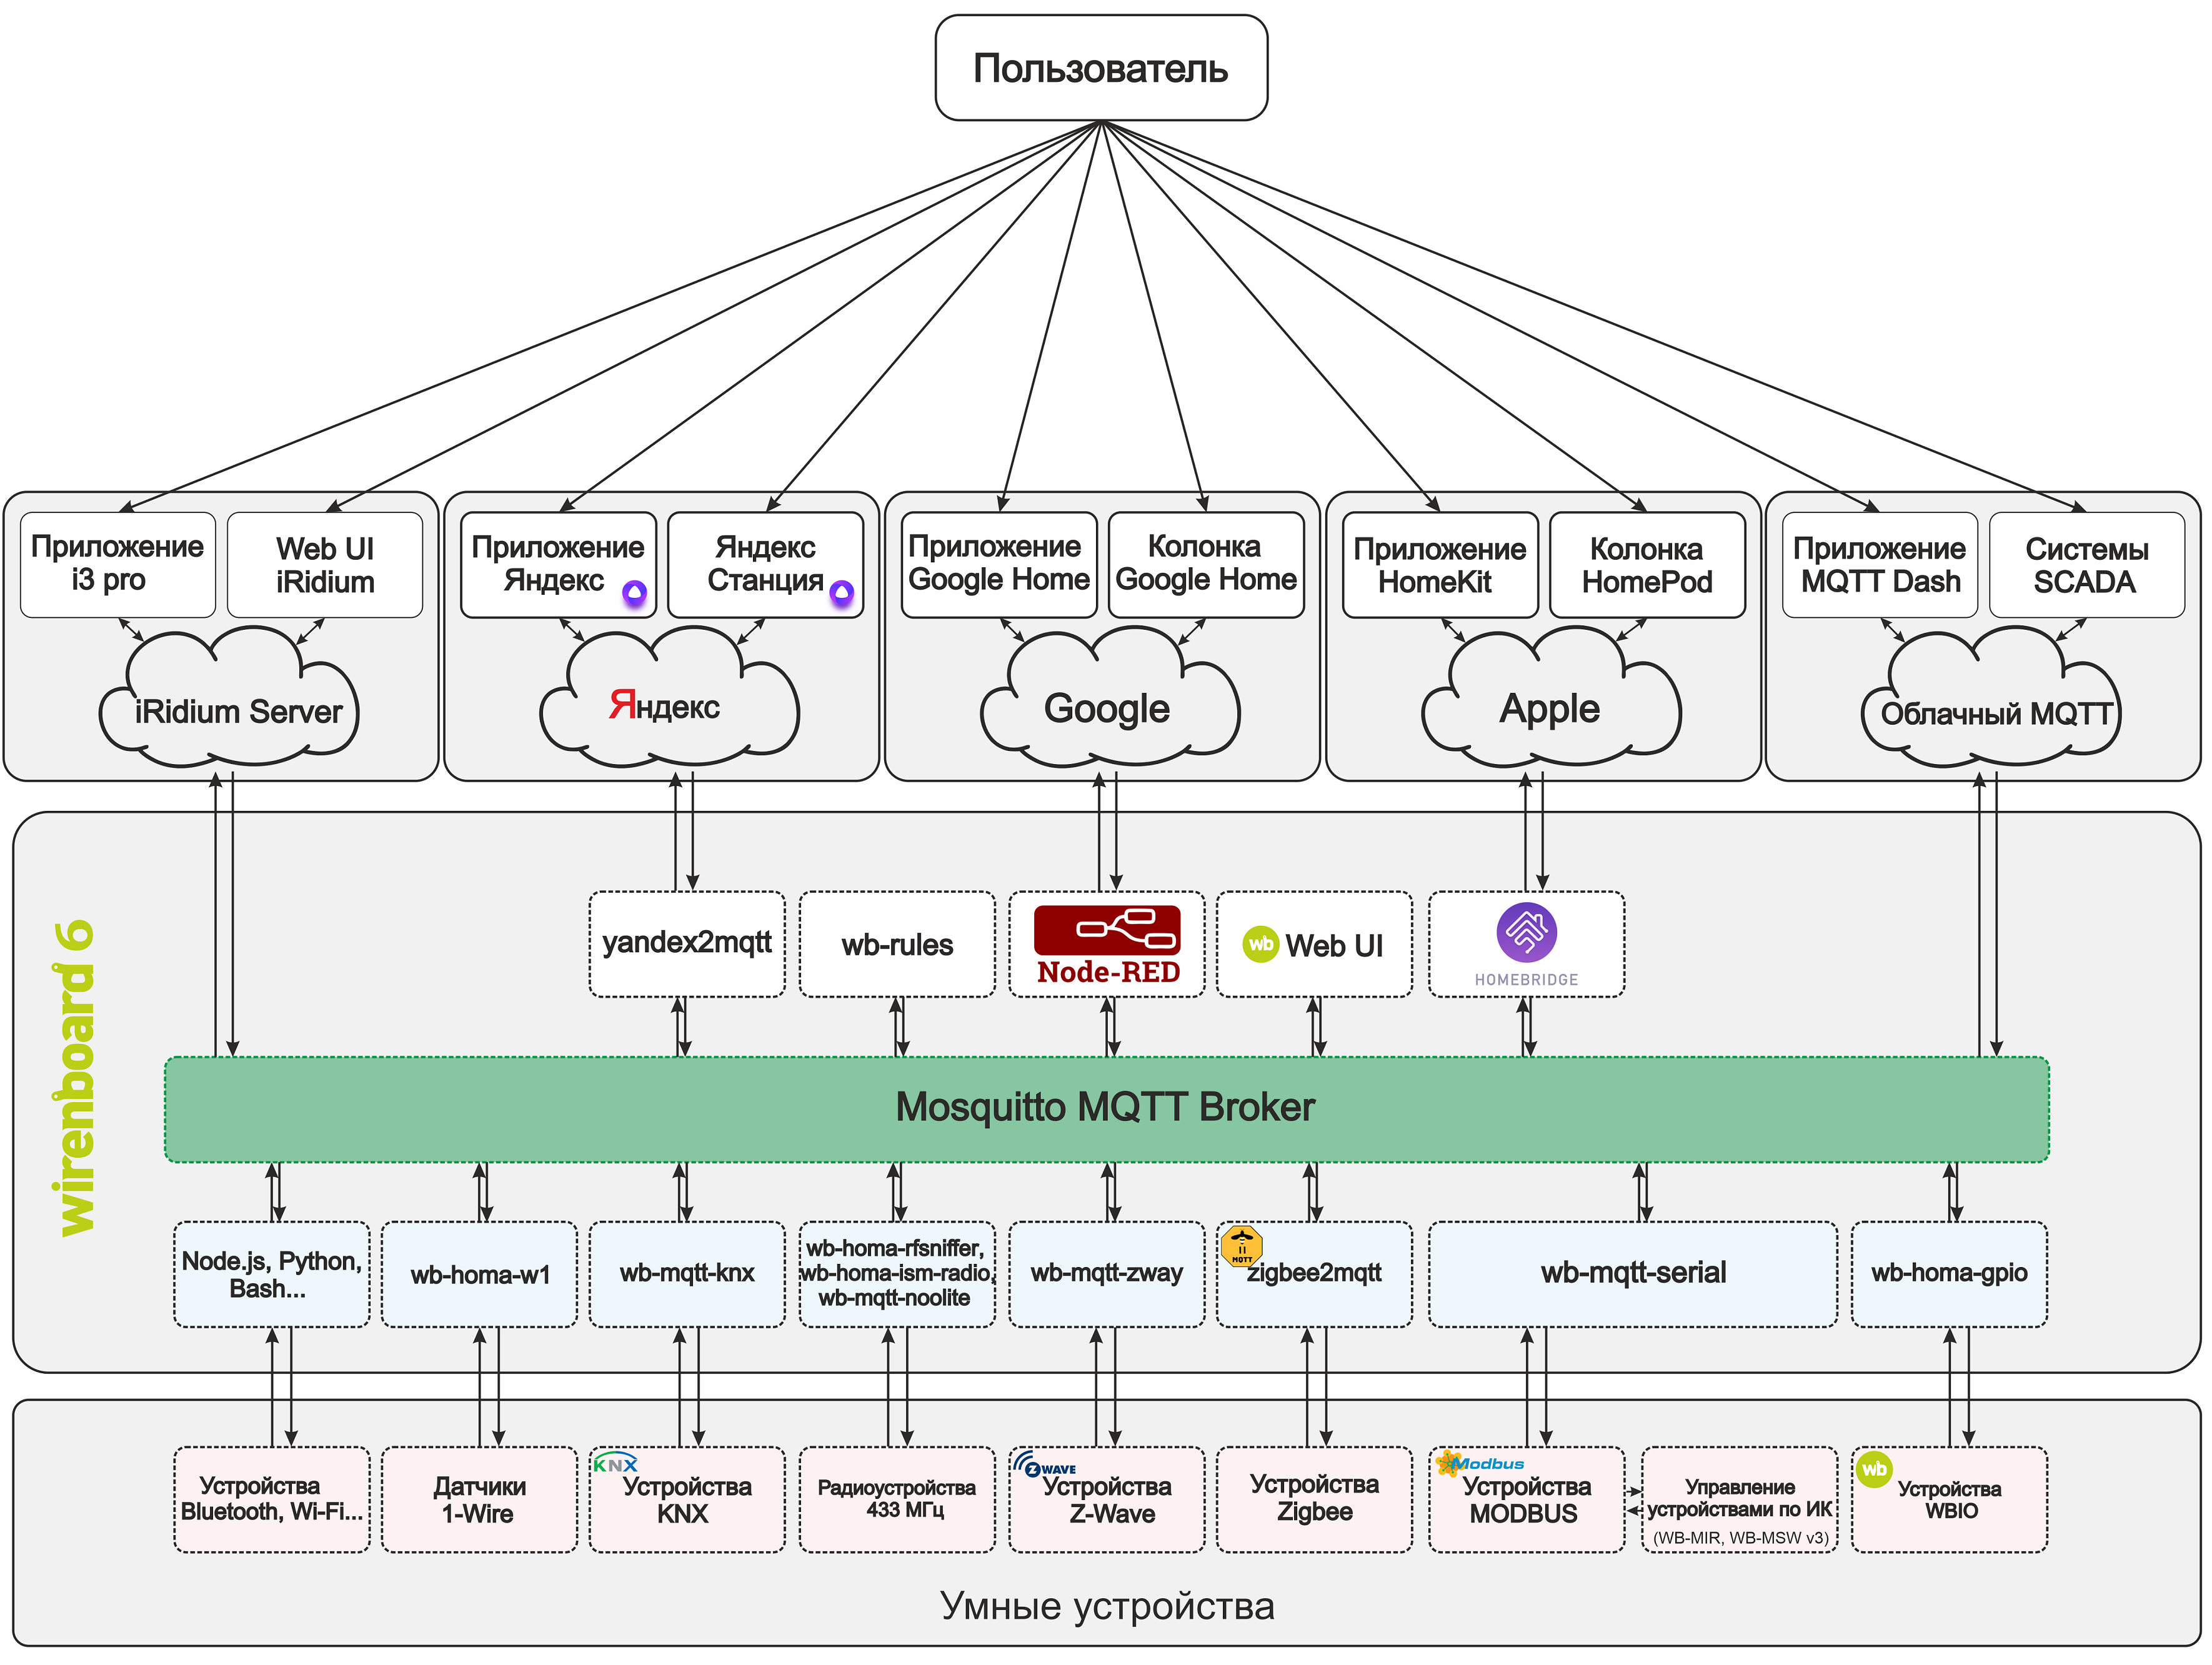
Yandex station, having heard a familiar command, sends data to the Yandex server, to which we specified the address of our controller in advance. The server processes the information and redirects it to the controller in the form of a Post request. On the controller, an intermediate API (in our case, this is the yandex2mqtt plugin) processes the request and redirects it to the MQTT topic. Next, the script is processed in the Node-Red program.
Node-Red decides what to do next. If it is provided by the script, he sends a command to turn on the light in the corresponding topic MQTT. The wb-mqtt-serial driver responds by sending a Modbus command to the relay module, which switches the relay. And finally, the light turns on! Yes, the path is not close, but a few fractions of a second pass for the user.
Let's take a closer look at the yandex2mqtt plugin. The first thing that Yandex requires for the skill to work is an oAuth service for bundling accounts in the Yandex application. After Yandex receives the authorization token from the oAuth service, it requests a list of devices. The yandex2mqtt plugin responds with a list of devices with all properties in json format. Then they appear in the list of devices available for control (in the so-called quasar). Now, if you tell Alice to turn on some device from the list, Yandex will send a Post request with the data of the device that he wants to turn on to the controller. In response, the plugin confirms the inclusion and writes the new state to the mqtt topic specified in the settings of the same plugin. If the device changed its status without the participation of Yandex, then the plug-in, seeing new data in the mqtt topic, will send it to Yandex when requesting the status, which is now happening only if you go into the device itself in quasar. In other cases, Yandex does not poll statuses.
Now I’ll talk about some of the properties of Yandex UD devices.
Device type
For a correct display in the “quasar” and a more precise definition of commands by Alice, Yandex suggests assigning different types of devices to devices. Total types 10:
- devices.types.light - Any lamp, chandelier, light bulb, etc.
- devices.types.socket - Outlet
- devices.types.switch - Switch
- devices.types.thermostat - Thermostat
- devices.types.thermostat.ac - Air conditioning
- devices.types.media_device - Media device
- devices.types.media_device.tv - TV
- devices.types.cooking - Kitchen appliances
- devices.types.cooking.kettle - Maker
- devices.types.other - Everything else that did not fit the previous paragraphs.
Ability
Each device must also have at least one capability .
In total, Yandex UD has 5 types of skills. Each skill has a different function (instance) , and some skills have several such functions, which adds flexibility when configuring devices.
Capabilities:
1. devices.capabilities.on_off - Turn on and off.
instance:
- on
2. devices.capabilities.color_setting - Color management.
instance:
- rgb
- hsv
- temperature_k
3. devices.capabilities.mode - Switch modes.
instance:
- thermostat
- fan_speed
4. devices.capabilities.range - Range control.
instance:
- brightness
- temperature
- volume
- channel
5. devices.capabilities.toggle - Mute.
instance:
- mute
With the right combination of all the properties of the device, Alice understands without any problems all the commands for managing the Smart Home given to her. Here, of course, there are some difficulties with combining skills. The documentation clearly does not indicate which skills can be combined and which cannot. But the “scientific poking method” will help us with this.
So, for example, I found out that air conditioning contains four skills:
Device type:
devices.types.thermostat.ac
Skill Type:
devices.capabilities.on_off
instance:
- on
devices.capabilities.range
instance:
- temperature
devices.capabilities.mode
instance:
- thermostat
devices.capabilities.mode
instance:
- fan_speed
I will not describe the remaining properties, everything is pretty simple there.
To make it work, you need:
- Controller
- Any domain
- SSL certificate
- Node.js
- Yandex2mqtt plugin
- MQTT broker
- Node-red
Controller
My “smart” apartment is controlled by the Wiren Board 6. But you can use any other Linux controller that will pull Node.js and Node-Red. For example, Raspberry pi or PC.
Domain
Of course, it is desirable to have a white IP address and buy a domain, but this is not necessary. You can use DDNS - for example, www.noip.com .
Everything is simple here: register, create a free hostname, enter your IP address. Some routers have a special DDNS setting where you can enter noip.com data. The router will automatically send an IP address when it is changed. If there is no such setting in the router, you can install the noip program on the controller and add it to autorun. The program will do exactly the same thing as a router with special DDNS settings - update your ip address in the noip.com database
Thus, we have a static address that redirects all requests to our controller.
Ports 443 and 80
Now almost every person has a router at home. In addition to its obvious functions, it is also a barrier to the local network from unwanted guests from outside. But in certain cases, we need access to the internal network from the outside. Router manufacturers provided this and added the NAT (Network Address Translation) feature.
I will not paint the moment of setting up the router, since it is different for each manufacturer. How to do this, read the instructions for your router. Google keywords: Port Forwarding, Port Mapping, NAT.
It is necessary to forward the port for access to yandex2mqtt (it can be any, I chose 443) and port 80 (only needed to get an SSL certificate. After receiving the certificate, port 80 can be closed).
SSL certificate
Immediately put all the dots on the “and”: self-signed certificates will not work.
Most domain registrars (for example, reg.ru) give their customers free SSL certificates for the main domain (www.yourdomain.ru). If you bought a domain specifically for Alice, then you can use the provided SSL certificate.
If you do not have your own domain, or you have another subdomain allocated for Alice (for example, alice.yourdomain.ru), then you need to get a certificate for this subdomain, or for the address provided by the DDNS service.
To do this, I suggest using the free service for obtaining an SSL certificate from letsencrypt.org.
To obtain a certificate, you need to install the certbot program, run and specify all the data that it requests. At the same time, port 80 should be free and accessible from the outside. I advise you to carefully study the instructions from letsencrypt.
Install and configure certbot
Stop the watchdog and nginx services.
We forward the 80th port in the router.
Run the certbot program:
After starting, the program will ask some simple questions.
1. Your e-mail. Just enter the address and press enter

2. You are prompted to read the user agreements. If you agree with everything, just enter “A”, which means Agree, that is, I agree.

3. The program asks for permission to send your email address to the developers. Enter N.

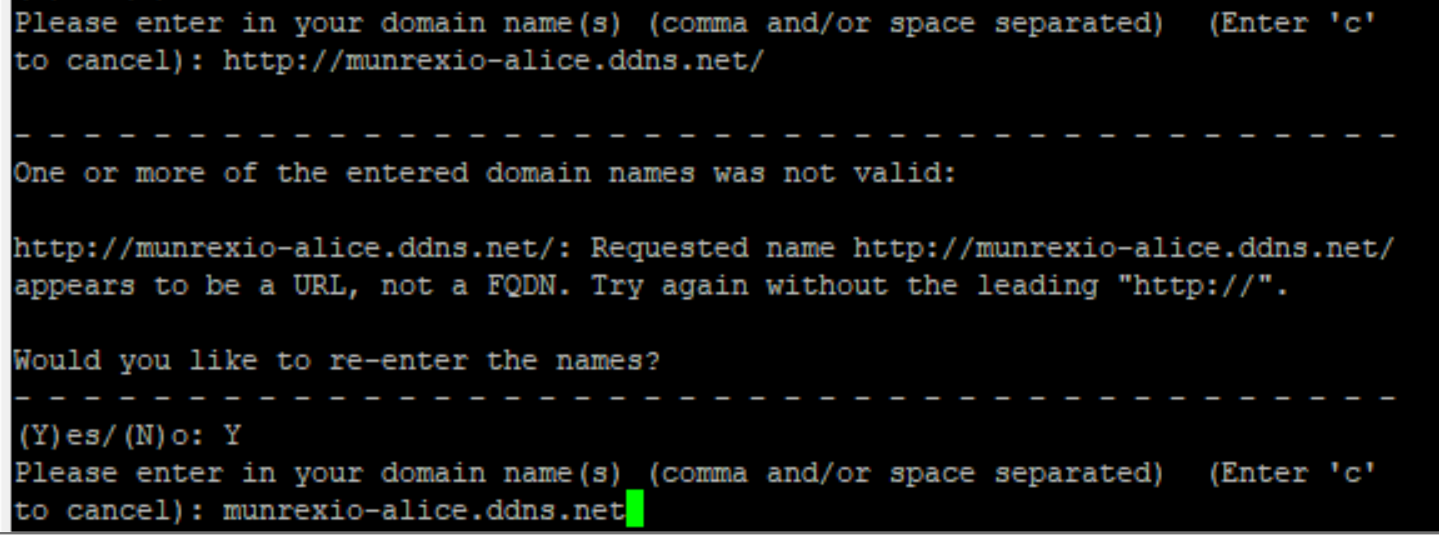
4. Enter your domain for which you want to receive a certificate (you can enter the one that we received in noip earlier). Here I give an example of erroneous input. The http: // prefix is not required.
If you did everything correctly, you will see the following:
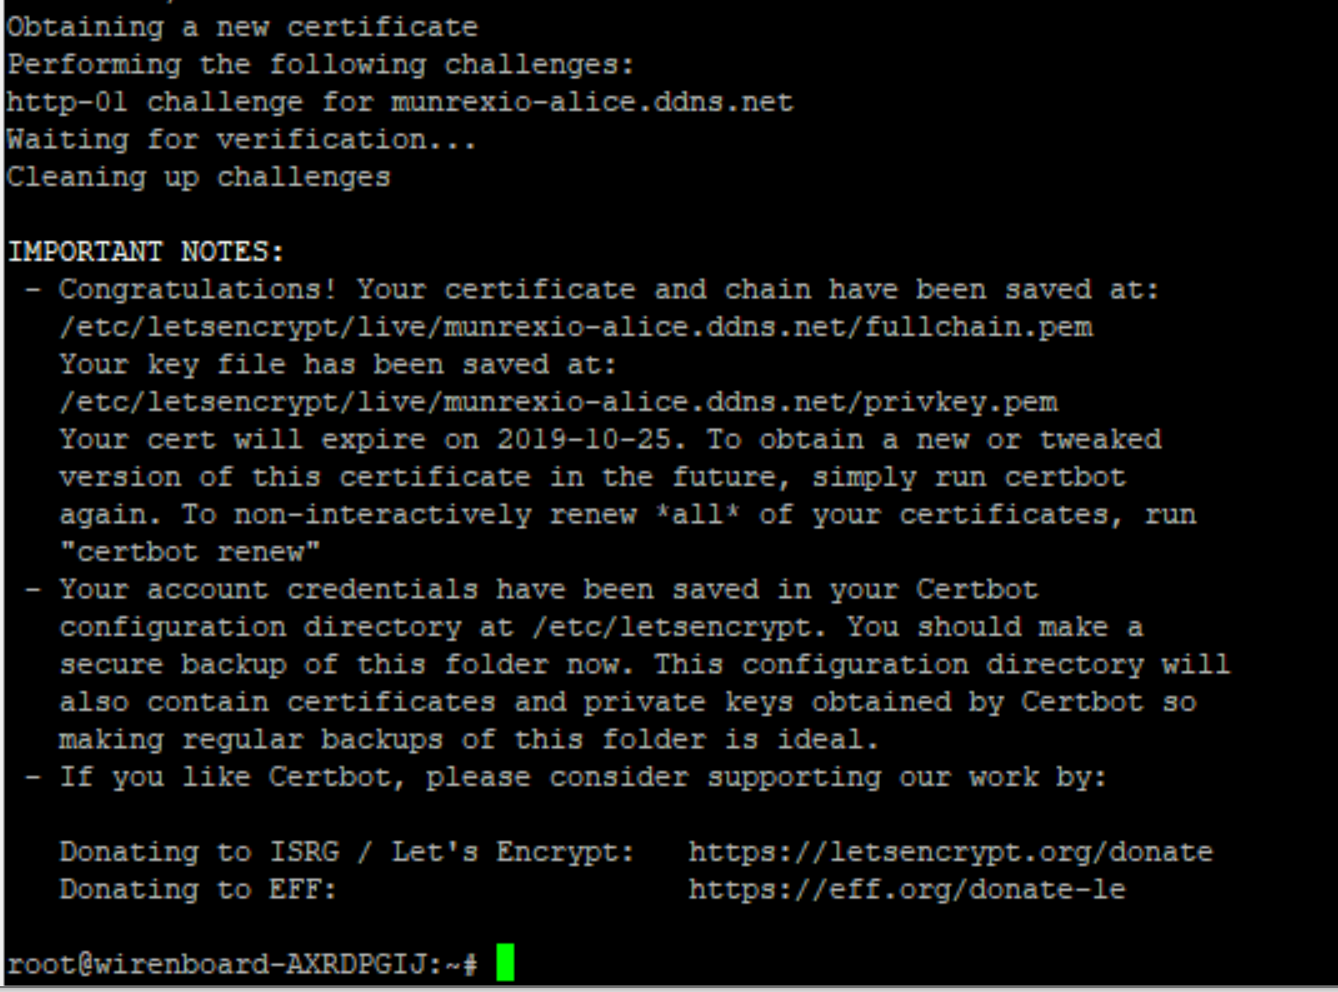
This means that the certificate was successfully received. Remember the path to the certificate and key, it will be required when configuring the yandex2mqtt plugin. For security, close port 80 in the settings of the router, it will no longer be useful.
We include services watchdog and nginx.
The certificate from letsencrypt is issued for 3 months. Do not forget to update.
apt-get update apt-get install certbot
Stop the watchdog and nginx services.
service watchdog stop service nginx stop
We forward the 80th port in the router.
Run the certbot program:
certbot certonly --standalone
After starting, the program will ask some simple questions.
1. Your e-mail. Just enter the address and press enter
2. You are prompted to read the user agreements. If you agree with everything, just enter “A”, which means Agree, that is, I agree.
3. The program asks for permission to send your email address to the developers. Enter N.
4. Enter your domain for which you want to receive a certificate (you can enter the one that we received in noip earlier). Here I give an example of erroneous input. The http: // prefix is not required.
If you did everything correctly, you will see the following:
This means that the certificate was successfully received. Remember the path to the certificate and key, it will be required when configuring the yandex2mqtt plugin. For security, close port 80 in the settings of the router, it will no longer be useful.
We include services watchdog and nginx.
service nginx start service watchdog start
The certificate from letsencrypt is issued for 3 months. Do not forget to update.
Node.js and the yandex2mqtt plugin
Installation
Configuring the node.js repository
Next, install or update all the necessary components
After successful installation, copy the yandex2mqtt repository to the controller.
We set the rights.
We go into the folder.
We start the installation.
Installation completed.
curl -sL https://deb.nodesource.com/setup_10.x | bash -
Next, install or update all the necessary components
apt-get install -y nodejs git make g++ gcc build-essential
After successful installation, copy the yandex2mqtt repository to the controller.
git clone https://github.com/munrexio/yandex2mqtt.git /mnt/data/root/yandex2mqtt
We set the rights.
chown -R root:root /mnt/data/root/yandex2mqtt
We go into the folder.
cd /mnt/data/root/yandex2mqtt
We start the installation.
npm install
Installation completed.
Autostart
Create a systemd unit:
Go to the / etc / systemd / system / folder on the controller and create a file called yandex2mqtt.service . Copy the following into it:
After that save the changes and close the file.
To enable the unit, enter the command in the console:
Now you can start and stop the plugin with commands
Go to the / etc / systemd / system / folder on the controller and create a file called yandex2mqtt.service . Copy the following into it:
[Unit] Description=yandex2mqtt After=network.target [Service] ExecStart=/usr/bin/npm start WorkingDirectory=/mnt/data/root/yandex2mqtt StandardOutput=inherit StandardError=inherit Restart=always User=root [Install] WantedBy=multi-user.target
After that save the changes and close the file.
To enable the unit, enter the command in the console:
systemctl enable yandex2mqtt.service
Now you can start and stop the plugin with commands
service yandex2mqtt start service yandex2mqtt stop service yandex2mqtt restart
Setup:
All necessary plug-in settings are in the file /mnt/data/root/yandex2mqtt/config.js
Edit this file according to your parameters.
The SSL certificate must be fullchain .
After configuration, run yandex2mqtt with the command:
service yandex2mqtt start
After setting up and starting the bridge, I advise you to check the certificate on this site .
Just enter your domain that you are going to use to access Alice. For proper operation, the certificate must pass all the checks. Otherwise, nothing will work.
Skill Yandex UD
Skill creation
1. Go to the page dialogs.yandex.ru/developer
2. Log in with your account.
3. Click “create dialogue”
4. Select “Smart Home”
5. Enter the required parameters:


6. Account bundle:

Click “add new”
1. The application identifier is clientId
2. Application secret - clientSecret

7. Save the skill
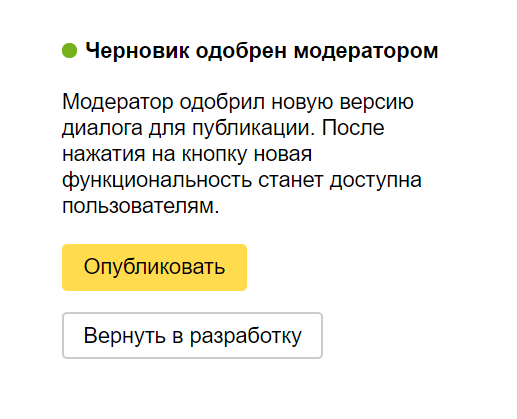
8. Click on “Moderation”

9. Click “Publish”
2. Log in with your account.
3. Click “create dialogue”
4. Select “Smart Home”
5. Enter the required parameters:
- Name - Any name.
- Endpoint URL - an address of the type yourdomain / provider , where instead of “yourdomain ” is the address from noip or your domain for which an ssl certificate is received.
- Privacy - select “Do not show in the catalog” (Required! Otherwise, the skill will not pass instant moderation)
- Name and Email of the developer - indicate your details.
- Description - any text
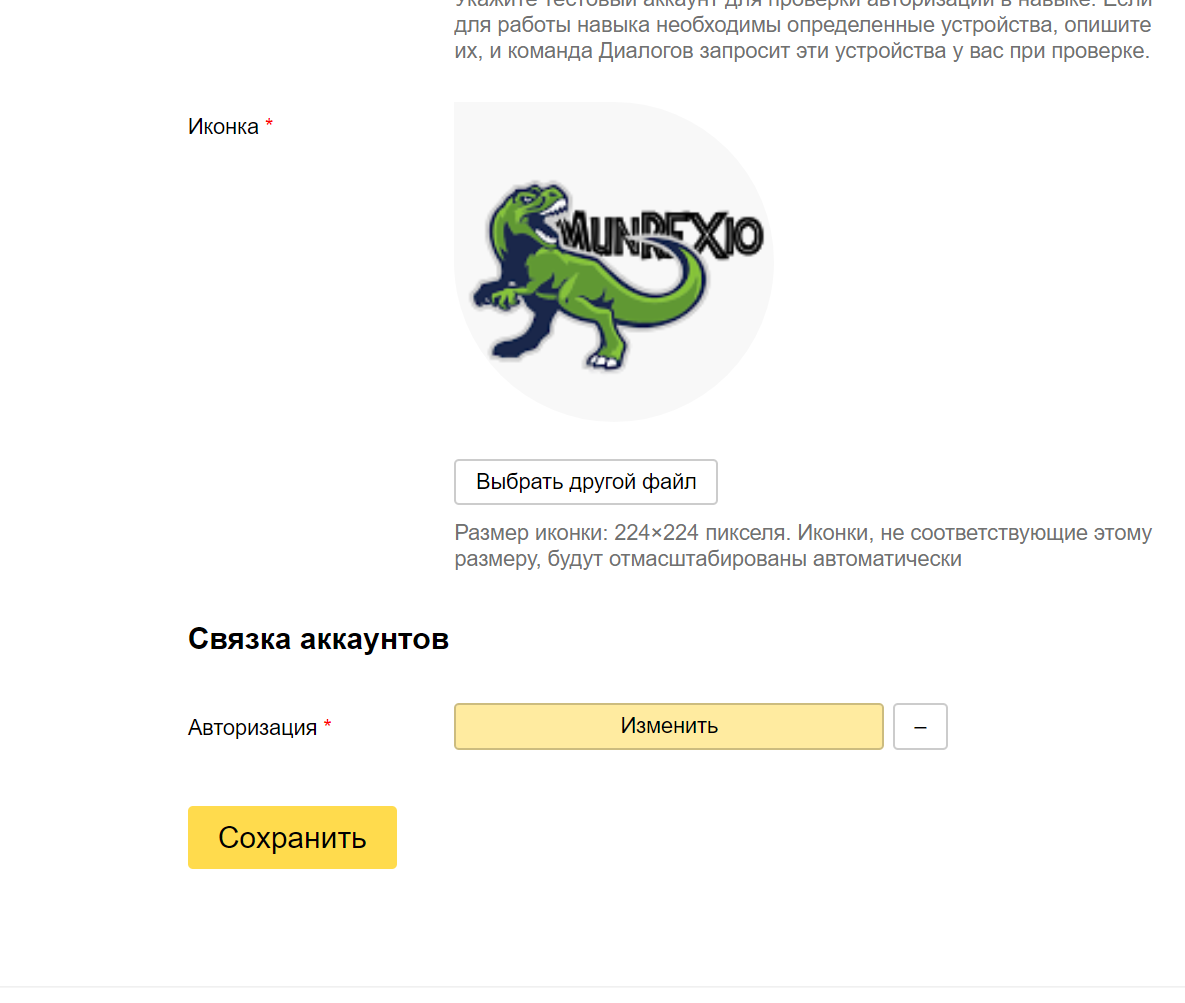
- Icon - any icon.
6. Account bundle:
Click “add new”
- The first two points - specify the data from config.js / clients :
1. The application identifier is clientId
2. Application secret - clientSecret
- Authorization URL - your domain / dialog / authorize
- Token URL - your domain / oauth / token
- Token Update URL - Yourdomain / oauth / token
7. Save the skill
8. Click on “Moderation”
9. Click “Publish”
Adding devices to Yandex UD.
1. Go to the Yandex application on the phone
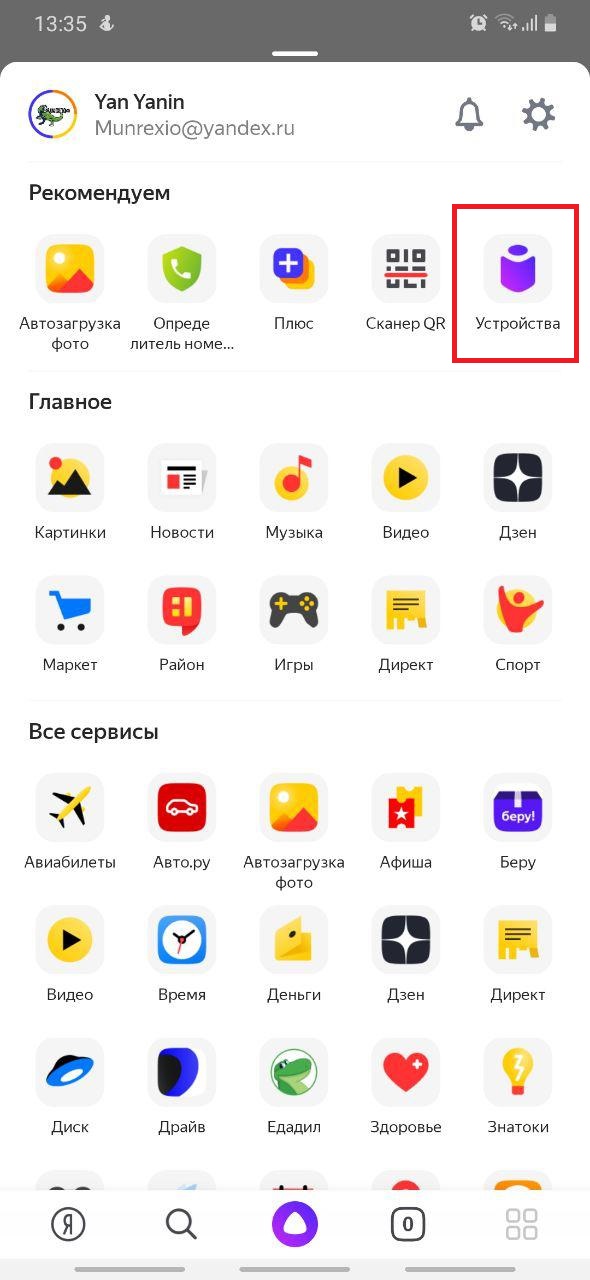
2. In the menu, select Devices / Smart Home

3. Click “Add device”

4. Choose your skill

5. Click “Merge Accounts”

6. The authorization page will open
Enter login and password (set in the config.js file in the users block)

7. Click “Allow”.

8. Click “Update device list”

2. In the menu, select Devices / Smart Home
3. Click “Add device”
4. Choose your skill
5. Click “Merge Accounts”
6. The authorization page will open
Enter login and password (set in the config.js file in the users block)
7. Click “Allow”.
8. Click “Update device list”
Now Alice can be given commands to manage the added devices. Corresponding teams will come to the topics indicated by mqtt.
It remains to bind some actions to these topics.
Node-red
Node-Red was chosen for the automation system. This is a great visual programming tool. The installation and configuration procedure can be seen here .
The process of setting up and automating a smart home will drag on an entire article, or even two. And there are already many such articles. Instead - a small example of using the plugin, how to turn on the light bulb voice.
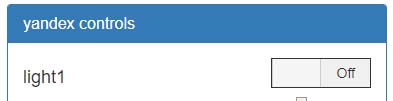
For convenience, we create a virtual device on the Wiren Board 6 controller in the web interface.
The wb-rules rule engine needs to be entered
defineVirtualDevice("yandex", { title: "yandex controls", cells: { light1: { type: "switch", value: false }, } });
We’ll write the MQTT topics of this virtual device in config.js for the type of “on” skill of the “Light” device:
devices: [ //_______________ ______________// { name: '', room: '', type: 'devices.types.light', mqtt: [ { type: 'on', set: '/devices/yandex/controls/light1/on', // stat: '/devices/yandex/controls/light1' // }, ], capabilities: [ { type: 'devices.capabilities.on_off', retrievable: true, state: { instance: 'on', value: true } }, ] }, //_______________ _______________// ]
Now, with the phrase “Alice, turn on / turn off the Light”, the virtual device switches.
Let's move to Node-Red, which was installed according to the instructions.
For convenient work with Wiren Board 6, you can also use the additional “node” node-red-contrib-wirenboard .
The WBE2R-R-ZIGBEE expansion module is installed in the controller, which made it possible to connect to the IKeevskaya smart lamp of the TRODFRY series using the ZigBee protocol.
Now it's up to the small. Throw several blocks into the Node-Red workspace, connect them with “strings” and click Deploy.
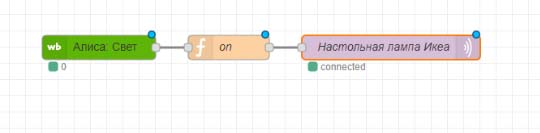
The ikeevsky light bulb is connected through the zigbee2mqtt plugin, therefore, in mqtt the bulb topic must be sent json for control. To do this, we will insert a simple function between the WB virtual device and the mqtt bulb topic.
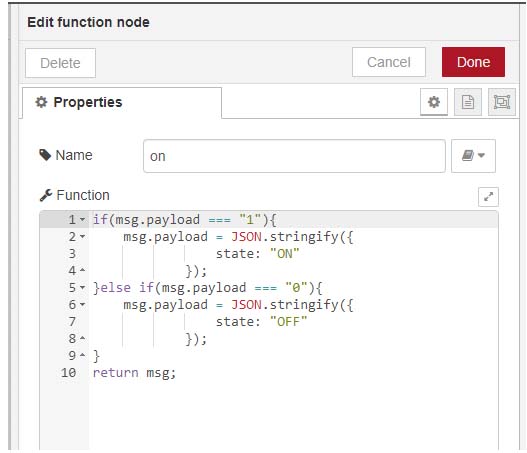
Click Deploy. We check.
Alice, turn on the Light!
So, today we learned how to connect Alice to an automation system. Perhaps in some cases it's too complicated, it's easier to buy a regular wi-fi light bulb, and that's enough. But if you are planning to build a truly smart home for yourself, then simple ways can not do here. But is it worth it or not, everyone will decide for himself. Thanks for your attention!
All Articles